VulcansHowl (talk | contribs) |
|||
| (4 intermediate revisions by 2 users not shown) | |||
| Line 7: | Line 7: | ||
|caption= |
|caption= |
||
|series=9-10 |
|series=9-10 |
||
| − | |team=Team Conker |
+ | |team=[[Team Conker]] |
|team_members=Alex Botwright<br>Ian Botwright<br>David Weston<br>Keith Brown<br><small>(Series 9)</small><br>Mike Sweeney<br><small>(Series 10)</small> |
|team_members=Alex Botwright<br>Ian Botwright<br>David Weston<br>Keith Brown<br><small>(Series 9)</small><br>Mike Sweeney<br><small>(Series 10)</small> |
||
|from=Ripon, North Yorkshire |
|from=Ripon, North Yorkshire |
||
| Line 61: | Line 61: | ||
==The Team== |
==The Team== |
||
| + | {{main|Team Conker}} |
||
| − | {{quote|Team Captain Alex has aspired to winning Robot Wars since he was six years old. He has always loved to build things and once designed a go-kart/bathtub hybrid.|The ''Robot Wars'' website on Team Conker in Series 9}} |
||
| − | Crackers 'n' Smash was entered by '''Team Conker''', named in homage to the Conker series of featherweight robots built by the team. On the live circuit, the team have also used the name '''Team Eventorizon''', particularly when Ian and Alex Botwright compete separately. |
||
| − | |||
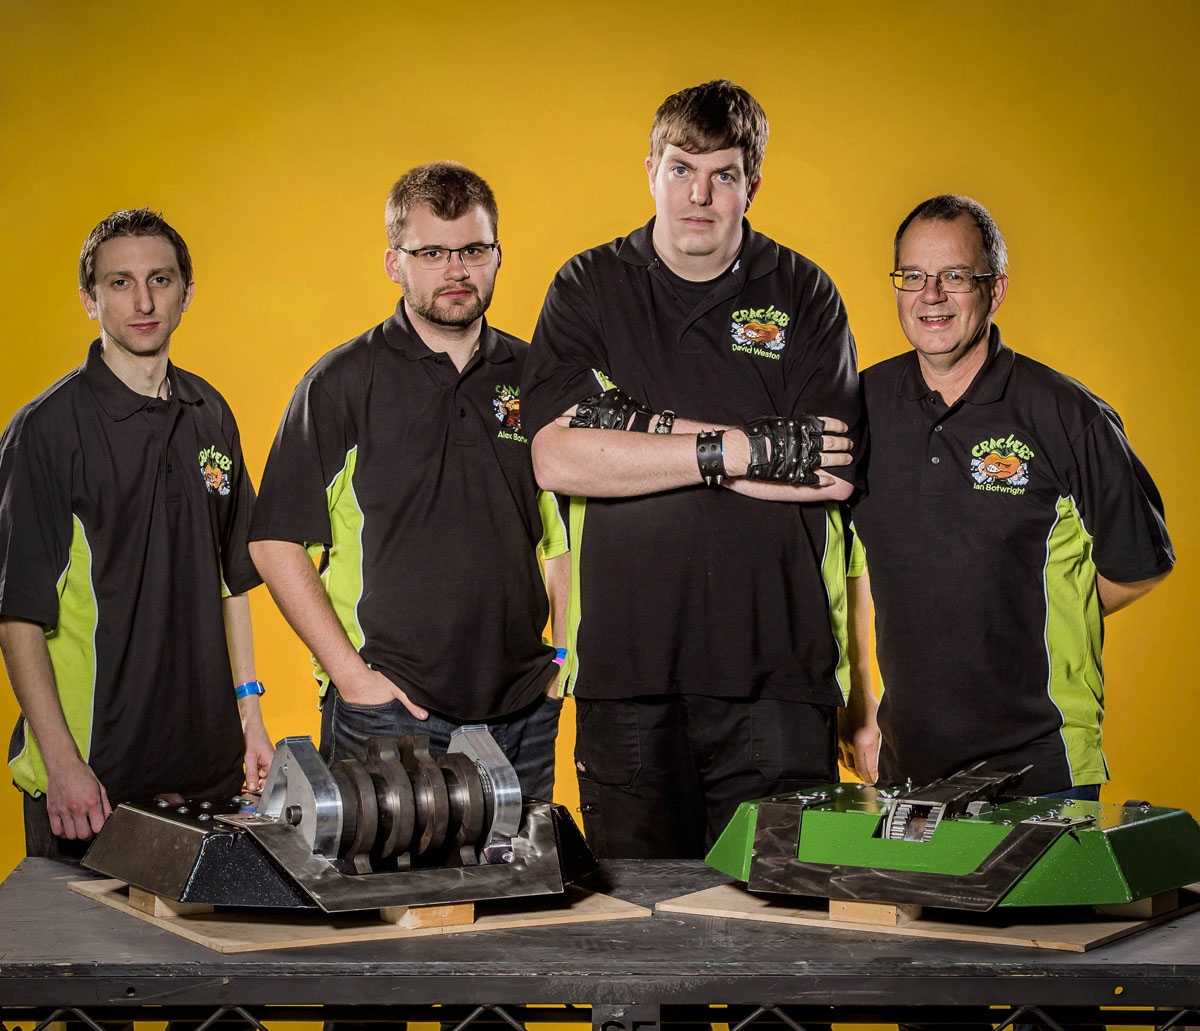
[[File:Crackersnsmash-team.jpg|thumb|left|Crackers 'n' Smash with Team Conker in Series 9]] |
[[File:Crackersnsmash-team.jpg|thumb|left|Crackers 'n' Smash with Team Conker in Series 9]] |
||
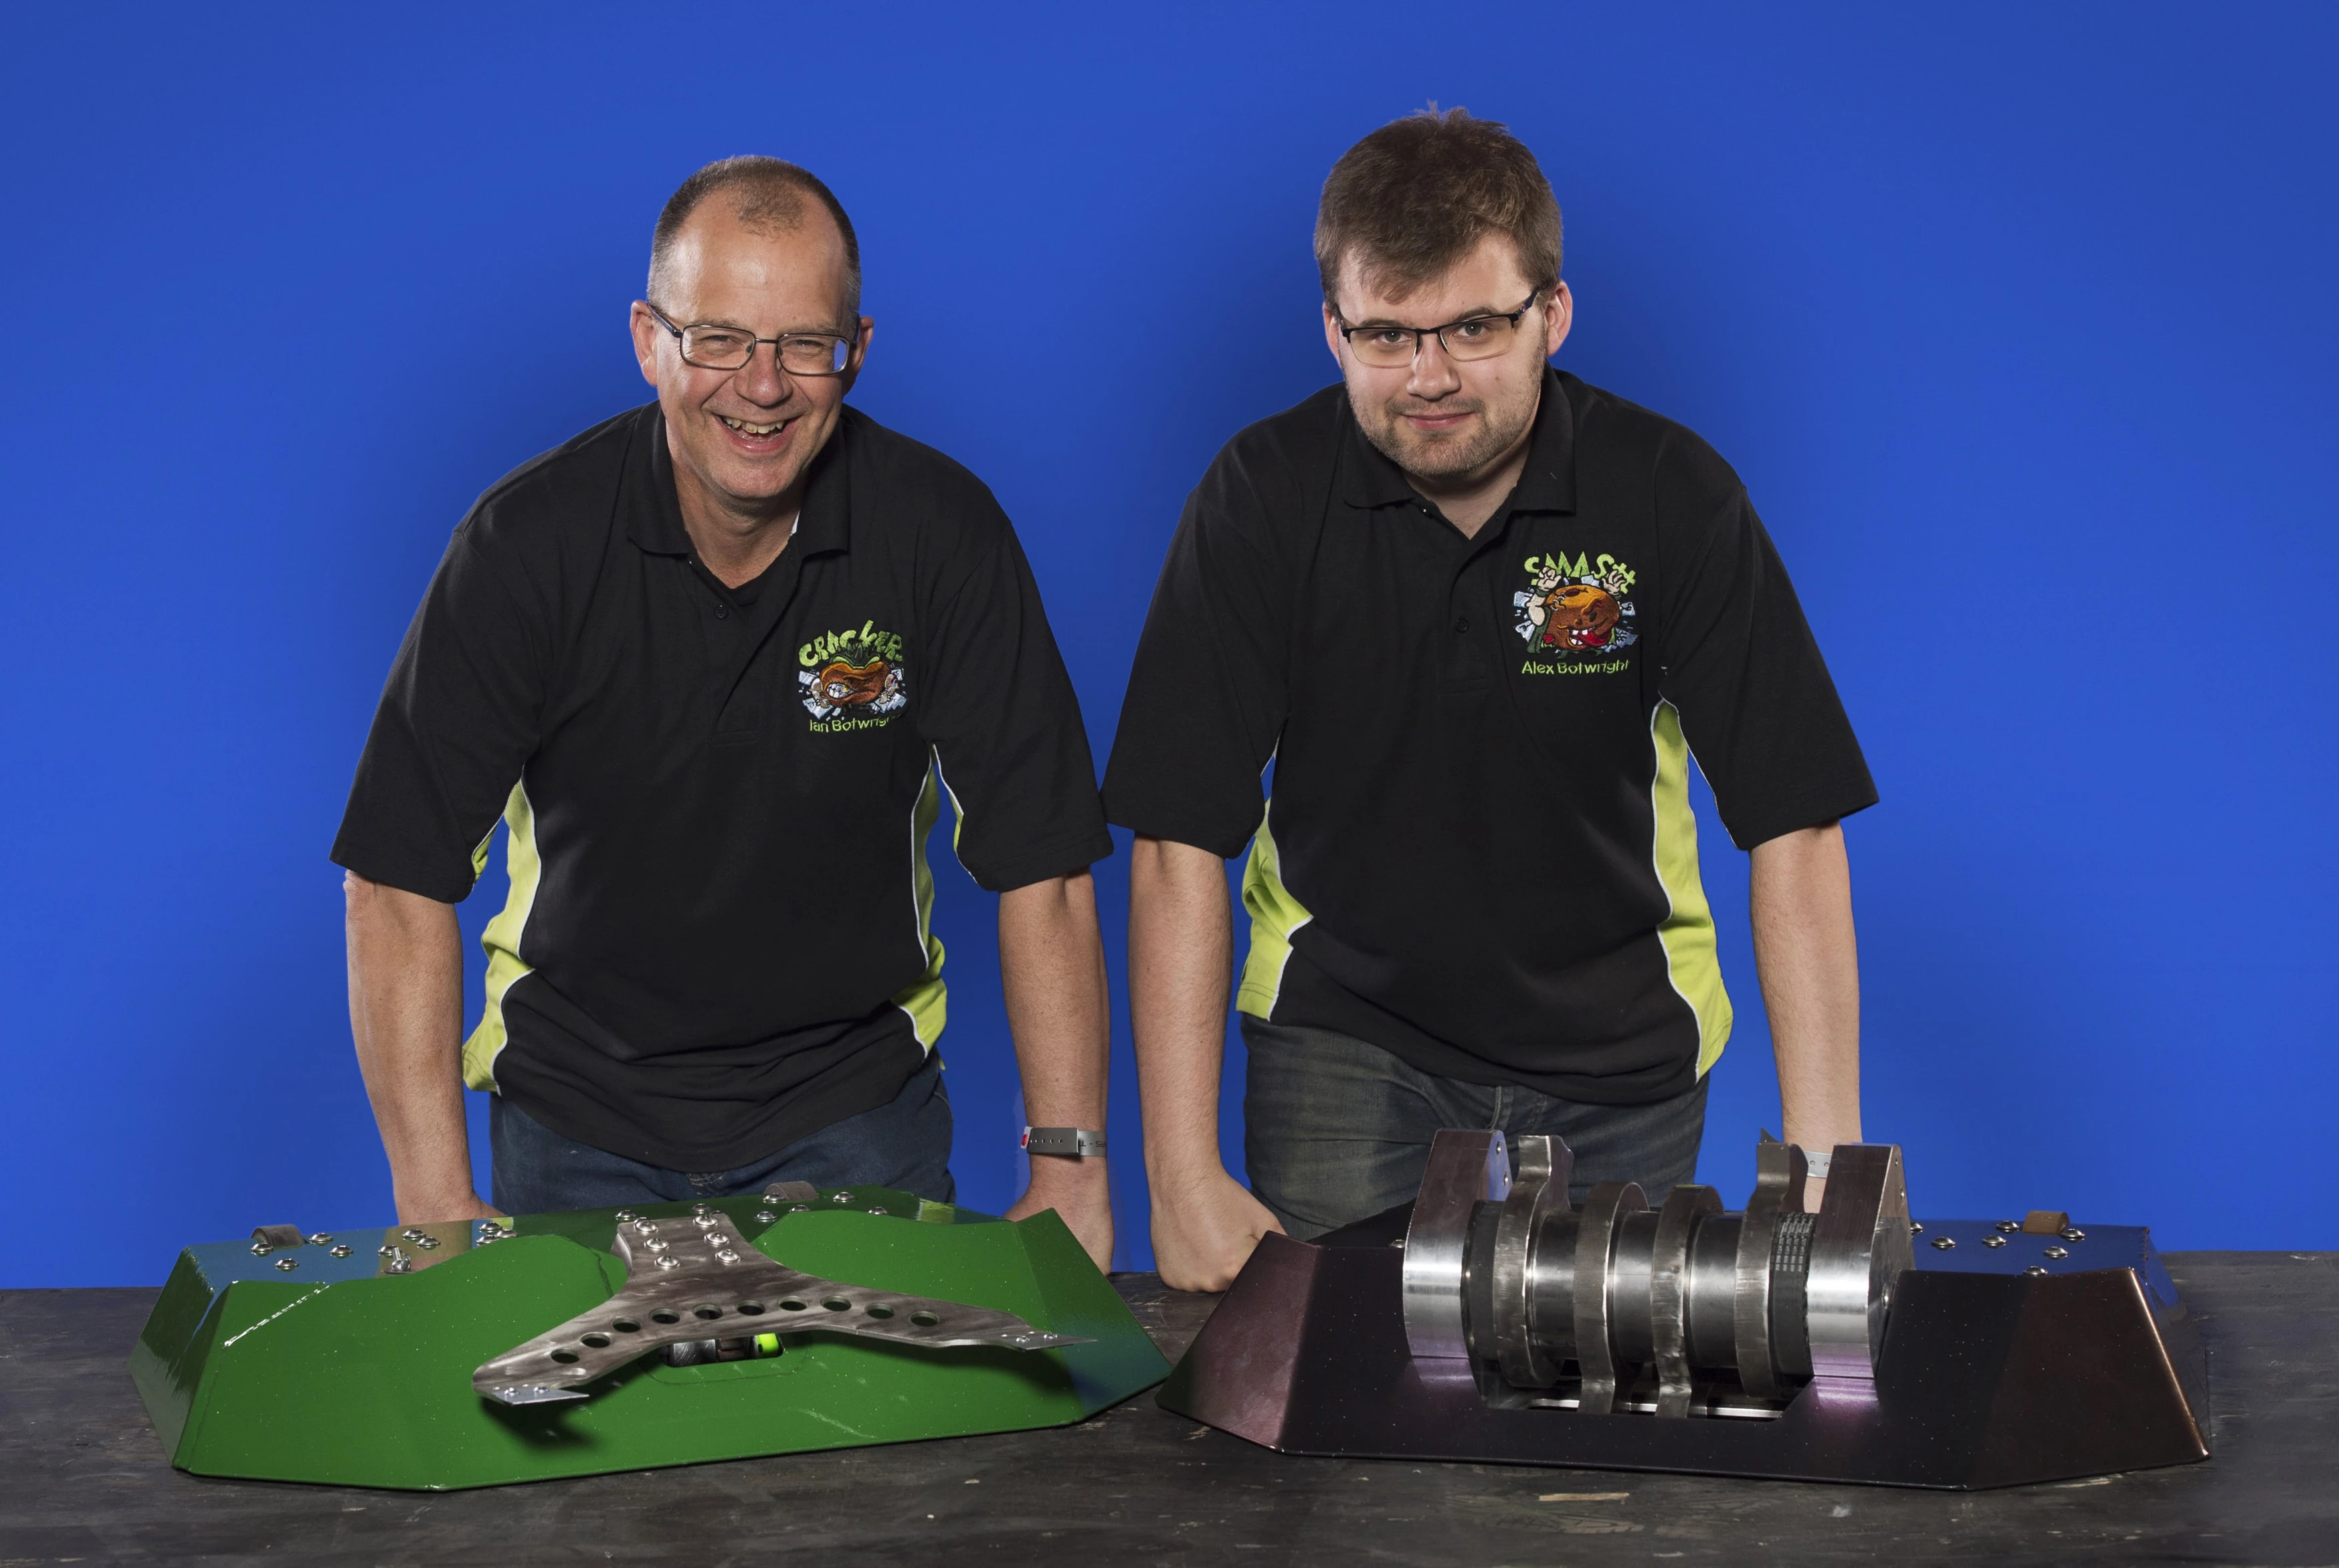
[[File:Team_Conker_s10.jpg|thumb|Crackers 'n' Smash with the Botwrights in Series 10]] |
[[File:Team_Conker_s10.jpg|thumb|Crackers 'n' Smash with the Botwrights in Series 10]] |
||
| + | Crackers 'n' Smash was entered by the Yorkshire-based '''Team Conker''', named after the team's signature featherweight robots. The team was comprised of father-and-son duo Ian and Alex Botwright, alongside consistent teammate David Weston. The three were joined by Keith Brown in Series 9, and Mike Sweeney in Series 10. For Series 9, Alex Botwright captained the team, while Ian captained the team in Series 10. Smash was consistently driven by Alex, whilst Crackers was driven by David Weston. |
||
| − | Team Conker is led by the North Yorkshire-based father-and-son duo, Ian and Alex Botwright. In Series 9, 25-year old son Alex Botwright captained the team, having been the lead designer of Crackers 'n' Smash, who also drove Smash in battle. 55-year old father Ian Botwright took on the mantle of captain in Series 10, and gained the lead speaking role for the series, also co-designing the robot and being integral with repairs. By trade, Ian Botwright is a maths and science consultant, allowing him to incorporate STEM and robotics into education, whilst Alex Botwright has been described by the ''Robot Wars'' website as an 'interactives designer' and an 'interactives engineer'. |
||
| − | |||
| ⚫ | |||
| ⚫ | |||
| − | Team Conker were also joined by Dave Weston for all of their appearances on ''Robot Wars'', including their withdrawal from Series 8, where all members of Team Conker still remained on-site to assist other roboteers. 30-year old electronics engineer Dave Weston drove Crackers in battle, and was also highly involved with repairing the robots. Away from Team Conker |
||
| − | |||
| − | In Series 9, the fourth member of the team was 28-year old CNC fabrication business owner Keith Brown, who assisted with the process of designing the robots via CAD. In Series 10, printing engineer Mike Sweeney took his place, assisting with the electronics and 3D aspects of Crackers 'n' Smash. |
||
==Robot History== |
==Robot History== |
||
| Line 122: | Line 114: | ||
{{quote|Double the robots, double the destruction!|Ian Botwright}} |
{{quote|Double the robots, double the destruction!|Ian Botwright}} |
||
Crackers 'n' Smash competed in [[Robot Wars: Series 10/Heat 2|Heat 2]], where their first battle proved to be a daunting draw against the reigning runner-up [[Eruption]], and fourth place finisher from the previous series, [[Aftershock]]. In preparation for their encounter with the vertical spinner of Aftershock, an [[Entanglement devices|entanglement device]] was suspended above Crackers in the form of hanging chains. |
Crackers 'n' Smash competed in [[Robot Wars: Series 10/Heat 2|Heat 2]], where their first battle proved to be a daunting draw against the reigning runner-up [[Eruption]], and fourth place finisher from the previous series, [[Aftershock]]. In preparation for their encounter with the vertical spinner of Aftershock, an [[Entanglement devices|entanglement device]] was suspended above Crackers in the form of hanging chains. |
||
| − | {{dialogue a-b-a-b|Dara Ó Briain|Division here, between a lifter and a spinner. Almost like, in your other part of your life, where you're both a classical musician and a rock musician!|Ian Botwright|Yes, I played with Harrogate Symphony Orchestra, and I play with a band in Ripon as well, on guitar!|Are you both a tea man, and a coffee man?|You've gotta have variety, so we like to do both!|Dara Ó Briain draws similarities between Ian Botwright's hobbies and his robots}} |
||
[[File:Aftershock vs Crackers.jpg|thumb|left|Crackers loses its entanglement device to Aftershock]] |
[[File:Aftershock vs Crackers.jpg|thumb|left|Crackers loses its entanglement device to Aftershock]] |
||
| Line 144: | Line 135: | ||
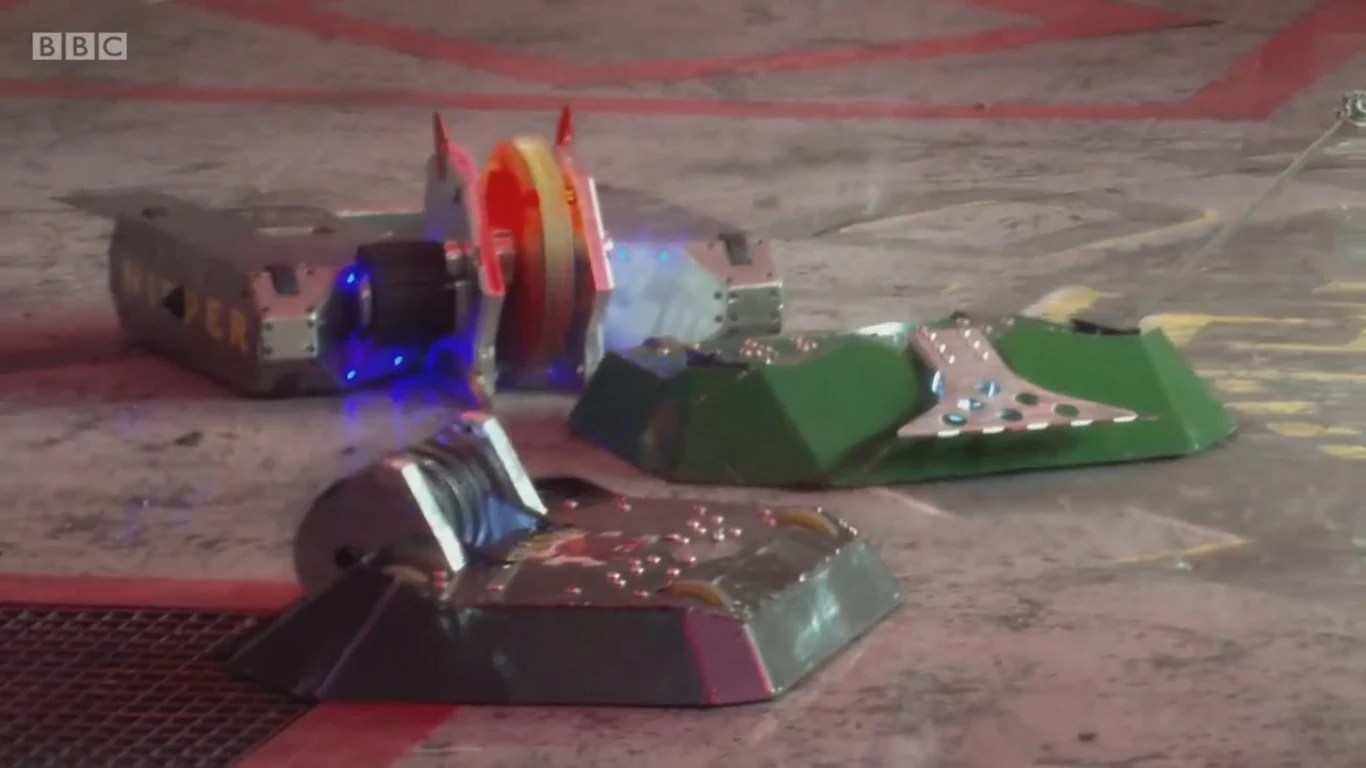
[[File:Big Nipper Crackers 'n' Smash 1.jpg|thumb|left|Crackers loses one of its entanglement chains to Big Nipper]] |
[[File:Big Nipper Crackers 'n' Smash 1.jpg|thumb|left|Crackers loses one of its entanglement chains to Big Nipper]] |
||
| − | [[File: |
+ | [[File:Big Nipper Crackers 'n' Smash 2.jpg|thumb|right|Big Nipper whacks Smash away]] |
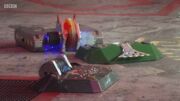
[[File:Sir Killalot vs Crackers.jpg|thumb|left|Crackers is 'sat on' by Sir Killalot]] |
[[File:Sir Killalot vs Crackers.jpg|thumb|left|Crackers is 'sat on' by Sir Killalot]] |
||
| − | [[File: |
+ | [[File:Big Nipper hits Smash.jpg|thumb|Sparks fly as Smash takes another hit from Big Nipper]] |
Crackers 'n' Smash started promisingly, with Smash slamming into Big Nipper while avoiding the spinning disc, and Crackers pushing Big Nipper backwards. However, Smash became stuck on the flame pit, and Big Nipper charged Crackers across the arena, ripping away one of its entanglement devices, again without jamming the opposing spinner. While Crackers was stuck on the surface of the pit, Smash charged head-first into Big Nipper's disc, but was lifted from the floor in recoil, and Smash's mobility was permanently impaired, despite unintentionally freeing its team-mate. The remaining chains atop Crackers were ripped away, and Crackers was buffeted into [[Sir Killalot]] by Big Nipper. Unable to drive away, Crackers was helpless as Sir Killalot drove on top of it, trapping the lightweight machine. |
Crackers 'n' Smash started promisingly, with Smash slamming into Big Nipper while avoiding the spinning disc, and Crackers pushing Big Nipper backwards. However, Smash became stuck on the flame pit, and Big Nipper charged Crackers across the arena, ripping away one of its entanglement devices, again without jamming the opposing spinner. While Crackers was stuck on the surface of the pit, Smash charged head-first into Big Nipper's disc, but was lifted from the floor in recoil, and Smash's mobility was permanently impaired, despite unintentionally freeing its team-mate. The remaining chains atop Crackers were ripped away, and Crackers was buffeted into [[Sir Killalot]] by Big Nipper. Unable to drive away, Crackers was helpless as Sir Killalot drove on top of it, trapping the lightweight machine. |
||
{{dialogue a-b|David Weston|He's sat on me!|Jonathan Pearce|You really don't want to be there!|Reactions to Crackers being flattened by Sir Killalot}} |
{{dialogue a-b|David Weston|He's sat on me!|Jonathan Pearce|You really don't want to be there!|Reactions to Crackers being flattened by Sir Killalot}} |
||
| Line 179: | Line 170: | ||
==Series Record== |
==Series Record== |
||
<gallery type="slideshow"> |
<gallery type="slideshow"> |
||
| + | Crackers VT.jpg|Crackers in its Series 9 VT |
||
| + | Smash VT.jpg|Smash in its Series 9 VT |
||
| ⚫ | |||
| ⚫ | |||
Crackers alt lifter.jpg|Crackers' alternative lifter design for Series 10 |
Crackers alt lifter.jpg|Crackers' alternative lifter design for Series 10 |
||
Crackers shells.jpg|Crackers' interchangeable shells for Series 10 |
Crackers shells.jpg|Crackers' interchangeable shells for Series 10 |
||
| Line 186: | Line 181: | ||
==Outside ''Robot Wars''== |
==Outside ''Robot Wars''== |
||
| − | Following the BBC's decision not to renew the ''Robot Wars'' reboot in March 2018, Team Conker began entering Crackers 'n' Smash into live events, starting with the ''Extreme Robots'' event in Manchester that April. With both halves now sporting a metallic silver paint scheme and drum spinners, the clusterbot attained considerable success, defeating [[Eric]] and [[Team |
+ | Following the BBC's decision not to renew the ''Robot Wars'' reboot in March 2018, Team Conker began entering Crackers 'n' Smash into live events, starting with the ''Extreme Robots'' event in Manchester that April. With both halves now sporting a metallic silver paint scheme and drum spinners, the clusterbot attained considerable success, defeating [[Eric]] and [[Team Tilly#Outside Robot Wars|F7]] in a melee and [[Iron Heart 88]] in a head-to-head battle at various stages. Crackers 'n' Smash found their biggest success at a live event in Guildford, at the ''Extreme Robots'' event in June 2018. There, Crackers 'n' Smash defeated F7 to reach the Grand Final against [[Ripper]], where Smash fought alone and was thrown out of the arena, for a second-place finish. |
[[File:Smashing.jpg|thumb|left|The identical Crackers 'n' Smash in September 2018]] |
[[File:Smashing.jpg|thumb|left|The identical Crackers 'n' Smash in September 2018]] |
||
[[File:Smash and Crackers.jpg|thumb|Smash and Crackers earn first and second place in the FRA Middleweight Championship]] |
[[File:Smash and Crackers.jpg|thumb|Smash and Crackers earn first and second place in the FRA Middleweight Championship]] |
||
| − | Both Crackers, and Smash, regularly |
+ | Both Crackers, and Smash, regularly competed at the ''Extreme Robots'' middleweight competitions in the second half of 2018 and early 2019. Crackers was updated to use a drum spinner, identical to that of Smash, and after the team ran out of purple paint, Smash was also painted the same shade of green as Crackers. As a result, both robots appeared to be nearly identical, borrowing aspects from the other machine. At the FRA Middleweight Championship held in Chatham, both Crackers and Smash individually fought their way to the Grand Final, where Smash won the battle against teammate Crackers, and became the UK Middleweight champion. In the 2019 Middleweight Championship, Smash finished third, behind [[Team Saint|Raphael]] and champion F7. |
| − | |||
| − | ===Team Eventorizon=== |
||
| − | <gallery type="slideshow"> |
||
| − | Conker.jpg|Conker |
||
| − | Conker 2.jpg|Conker 2 |
||
| − | Conker_3_closeup.jpg|Conker 3 |
||
| − | </gallery> |
||
| − | Since ''Robot Wars<nowiki>'</nowiki>'' original twelve-year hiatus, Alex Botwright and Ian Botwright have also competed with featherweights on the live events circuit under the name '''Team Eventorizon''', alternatively '''Team Conker'''. They have competed with three versions of '''Conker''', all four-wheel drive robots with vertical spinning weapons; '''Conker''' and '''Conker 2''' are armed with flywheels, while '''Conker 3''' features an egg beater spinner. In 2016, Conker 3 won the Insomnia 58 featherweight event, beating [[Coyote|Drumroll]] in the final after throwing it out of the arena. After not being fully constructed on time, it found less success at the 2018 event, which was hosted by ''King of Bots'', driving into the pit intentionally against [[Team Danby|Get Shrekt]]. However, Conker 3 would eventually score one knockout victory against [[Team Legion#Outside Robot Wars|Legion]] and [http://king-of-bots.wikia.com/wiki/Barghest Barghest], throwing the former out of the arena in the process. Conker 3 scored a total of six points by the end of the qualification rounds, although this was not enough for it to secure a place in the knockout round. Conker 3 competed at the ''Robodojo'' Autumn Featherweight Championship, hosted by Team Eventorizon, but sustained significant damage from the vertical spinner of [https://king-of-bots.wikia.com/wiki/Aegis Aegis Mk II]. |
||
| − | <gallery type="slideshow" position="left"> |
||
| − | BinkyFW.jpg|Binky |
||
| − | Binky 18.jpg|Binky in 2018, with an asymmetrical bar |
||
| − | Binky May 2019.jpg|Binky in May 2019 |
||
| − | Hatchet.jpg|Hatchet |
||
| − | </gallery> |
||
| − | Team Eventorizon also compete with '''Binky''' (not to be confused with the [[Binky|Series 3 competitor of the same name]]) which is armed with a vertical flywheel. Binky also competed at the event in 2018 with success, including a melee win by knockout over [http://king-of-bots.wikia.com/wiki/Microswitch Microswitch] and Broadax 2 in less than a minute, and a melee victory over [https://king-of-bots.wikia.com/wiki/Neon Neon] and [[HIGH-5|Mini ACE]]. Binky scored enough points to qualify for the knockout round, winning over [[Team Legion#Outside Robot Wars|Sabre20]] after causing substantial damage to the latter's armour before the latter pitted itself. In a battle of vertical spinners, Binky prevailed over [[Team Danby#Outside Robot Wars|Get Shrekt]] to reach the Quarter-Finals, but was defeated there by [https://king-of-bots.wikia.com/wiki/Amnesia Amnesia] after its weapon malfunctioned, preventing it from self-righting after a crucial flip from [[Team Immersion|Adam Hamilton's]] machine. However, Binky did finish third within the 18-way Gladiator battle held just before the final. |
||
| − | |||
| − | At the team's own event in November 2018, the ''Robodojo'' Autumn Featherweight Championship, Binky emerged as the champion of the full combat event. At the January 2019 ''Robodojo'' event, Binky only fought in whiteboard battles, causing significant damage to [http://king-of-bots.wikia.com/wiki/Barróg Barróg], while Binky entered the main competition in March 2019, but lost its three battles. Binky entered the sportsman division of the May 2019 ''Robodojo'' event, without the use of its spinning disc, replacing the withdrawal Scrapster. It entered the full combat division in July 2019, throwing both Plastic Fantastic and Graffiti out of the arena to collect two wins, but was also thrown out of the arena by X-303 and [[Reaper|Disturbance]]. Binky returned for the FRA UK Featherweight Championship 2019, but without any great success, losing to Satanix, Pressure Point Mk II and Toothless. |
||
| − | |||
| − | Team Eventorizon also created a featherweight crusher named '''Mitternacht''', with its gripping weapon being powered by a linear actuator. It competed at the ''Robodojo'' January 2019 event in the Sportsman division, filling in for another robot which was overweight, and finished in fifth place. Mitternacht also competed at the March 2019 ''Robodojo'' event under the controls of [[Eric|Alasdair Sutherland]], and went undefeated in its four head-to-head Sportsman fights, but was the first to fall in the four-way Grand Final. Mitternacht finished with an even record at ''Robodojo'' in July 2019, defeating [[Team Death|Danger UXB]] and Ensign Wedgeley Crusher, but losing to Gengar and BOB 3 in the sportsman class. Mitternacht found its greatest success at the FRA UK Featherweight Championship in August 2019, where it achieved second place in its Heat out of six, defeating [https://king-of-bots.fandom.com/wiki/Nigel_Barrage Nigel Barrage], [https://king-of-bots.fandom.com/wiki/Forge_Master Forge Master 2] and [https://king-of-bots.fandom.com/wiki/Crabsolutely_Clawful Crabsolutely Clawful], only suffering a loss by split decision to [https://king-of-bots.fandom.com/wiki/Luna-Tic Luna-Tic] and a loss to [https://king-of-bots.fandom.com/wiki/Barróg Barróg Doom]. Despite qualifying for the Top 16, Mitternacht withdrew from its battle against [https://king-of-bots.fandom.com/wiki/Amnesia Amnesia] after burning out its speed controller in testing before the battle. |
||
| − | |||
| − | In the past, Team Eventorizon have competed with [[Team Danby|Sam Price's]] featherweight '''Hatchet''', armed with an axe, which later became Red Hot Tilly Pecker. |
||
| − | |||
| − | Team member Ian Botwright was a judge in the beetleweight combat web-series ''Bugglebots'' in 2018, alongside [[Team Make Robotics|Kane Aston]] and [[Tomahawk|Annita van der Meer]]. |
||
| − | |||
| − | ===Team Hell=== |
||
| − | <gallery type="slideshow"> |
||
| − | Hells_Angel.jpg|Hell's Angel |
||
| − | Hell's Angel 2018.jpg|Hell's Angel in 2018 at ''King of Bots'' UK |
||
| − | Satanix.png|Satanix |
||
| − | Satanix 2019.jpg|Satanix in July 2019 |
||
| − | BabyHell.jpg|Baby Hell |
||
| − | FIN.jpg|F.I.N. (Four Inch Nails) |
||
| − | Stewie.jpg|Stewie |
||
| − | Stewie later.jpg|Stewie, following upgrades |
||
| − | Stewie 2019.jpg|Stewie in 2019 |
||
| − | Headbanger.png|Headbanger |
||
| − | Cabrakan.jpg|Cabrakan |
||
| − | Cabrakan 2.jpg|Cabrakan 2 |
||
| − | </gallery> |
||
| − | Team member David Weston also fights in live events, primarily with featherweights and antweights, under the name '''Team Hell'''. His featherweights are '''[https://king-of-bots.wikia.com/wiki/Hell's_Angel Hell's Angel]''' (built in 2007), which is a black box-shaped featherweight armed with an axe and '''[https://king-of-bots.wikia.com/wiki/Satanix Satanix]''', a two-wheel driven ramming robot with two front wedge prongs and rear-mounted ramming spikes, later upgraded to become '''Satanix 1.666'''. |
||
| − | |||
| − | Hell's Angel competed at the 2018 ''King of Bots'' UK featherweight championship, winning all three of its qualifying melees, defeating [https://king-of-bots.fandom.com/wiki/Hedgebot Hedgebot] twice, as well as [https://king-of-bots.fandom.com/wiki/Aegis Aegis Mk II], [https://king-of-bots.fandom.com/wiki/Wipeout Wipeout] and [http://king-of-bots.wikia.com/wiki/Microswitch Microswitch]. Within the Top 20, Hell's Angel fought [https://king-of-bots.fandom.com/wiki/Shrapnel Shrapnel], but lost its entire front end, and feigned immobility in order to escape the battle without further damage. Hell's Angel then withdrew prior to its losers' melee, which was ultimately won by [https://king-of-bots.fandom.com/wiki/DB12 DB12]. Despite lacking an active weapon - required for it to fight in the main competition - Satanix 1.666 also attended the ''King of Bots'' UK event under its original name, fighting in two whiteboard battles and the 18-way 'Gladiator' battle. Satanix would later perform well at the ''Robodojo'' Autumn Featherweight Championship, collecting two dominant victories in its first two Full Combat fights. Satanix also competed at ''Robodojo'' in July 2019 in the sportsman division, gathering three wins over Crota, Parasite and Stabby McUnicornface, but drove out of the arena against Midas, and in the subsequent third place rumble. |
||
| − | |||
| − | Satanix competed in the main bracket at the FRA UK Featherweight Championship in August 2019, with success. It escaped its Heat in second place, most notably defeating Binky. In the Top 16, Satanix won its next fight against [https://king-of-bots.fandom.com/wiki/Get_Shrekt Get Shrekt] and then earned a victory over [[Team Outlaw#Team Tilly|Push-Abili-Tilly]] in the quarter-finals. However, Satanix was not able to be repaired in time for its semi-final match, and forfeited its place in the competition back to Push-Abili-Tilly. |
||
| − | |||
| − | Team Hell also fight with the following antweights: |
||
| − | *'''Baby Hell''', an antweight version of Hell's Angel armed with an axe. |
||
| − | *'''F.I.N.''' (standing for '''Four Inch Nails'''), a full-body antweight thwackbot which gets its name from the four-inch nails used as attachments. |
||
| − | *'''Stewie''', an antweight armed with a flipper and named after [https://en.wikipedia.org/wiki/Stewie_Griffin Stewie Griffin], a main character from the American animated television series ''Family Guy''. |
||
| − | *'''Headbanger''', a beetleweight armed with an electric axe. |
||
| + | For more information on the team's excursions aside from Crackers 'n' Smash, see the [[Team Conker]] article. |
||
| − | In 2009, David Weston was also involved in the build of a joint team project of Team Hell, [[Jellyfish|Team Die Gracefully Robotics]] and Team Godzilla where they built '''Cabrakan''', a two-wheel driven robot armed with a stabbing chisel which won the Best Promising Newcomer Award at the end of the year. At the start of 2010, Weston managed to acquire Cabrakan and built a new version of it for the UK Championships, known as '''Cabrakan 2'''. This version had a front-mounted lifter, similar to that of the original [[The Morgue|Morgue]], but this version suffered from build issues and did not enjoy much success. |
||
==References== |
==References== |
||
| Line 252: | Line 197: | ||
*Crackers 'n' Smash is the only clusterbot to have been thrown out of the arena entirely, with Eruption flipping both halves of the machine into the trench. |
*Crackers 'n' Smash is the only clusterbot to have been thrown out of the arena entirely, with Eruption flipping both halves of the machine into the trench. |
||
*Across both of its series, Crackers 'n' Smash collected losses against all three reboot champions, with Big Nipper being the only robot to defeat Crackers 'n' Smash without winning a series. |
*Across both of its series, Crackers 'n' Smash collected losses against all three reboot champions, with Big Nipper being the only robot to defeat Crackers 'n' Smash without winning a series. |
||
| − | *Despite team members David Weston and Will Sweeney being present at the filming of Series 10, they were not included in Crackers 'n' Smash's official team photograph. |
||
==External Links== |
==External Links== |
||
Revision as of 21:30, 5 February 2020
- "Double the trouble, double the pain!"
- — Robot Wars: The Official Handbook
Crackers 'n' Smash, alternatively Crackers n' Smash or abbreviated to CnS, was a two-part clusterbot which entered Series 9 and 10 of Robot Wars, having also qualified for Series 8 before withdrawing.
In its series debut, it reached the Head-to-Head round and achieved a win over Coyote, but was eliminated there in third place after suffering losses to the reigning and future champions Apollo and Carbide. In Series 10, Crackers 'n' Smash was drawn against heavily established opponents in all of its battles, and collected losses to Eruption and Big Nipper, despite managing to survive longer than Aftershock in their Group Battle.
Design

Crackers 'n' Smash in Series 10
- "A clusterbot is a machine that's made of two or more parts, which gives our opponent not just one problem to deal with, but multiple issues about how you fight something that's in two places at once."
- — Alex Botwright explains the reasoning behind Crackers 'n' Smash

Crackers 'n' Smash are loaded into the arena for Series 9
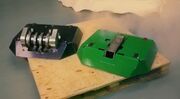
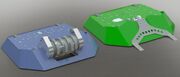
Crackers 'n' Smash consisted of a pair of four-wheel drive box-shaped robots with front wedges and two different weapons. Both were built over the course of three months, at a total cost of £8,000. Due to rule changes implemented for Series 9-10, each half of Crackers 'n' Smash could still fight individually if the other was immobilised during battles. As a result, both halves have to be immobilised in order for the whole robot to be eliminated.
- "This cluster bot is made up of 60kg 'Smash' and 50kg 'Crackers'. While the concept of using cluster bots makes the team vulnerable to flippers, Crackers benefits from a compact lifting weapon and Smash has a high mass spinner."
- — Robot Wars: Build Your Own Robot on Crackers 'n' Smash in Series 9

Crackers in Series 10, with its forked lifter
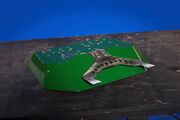
Crackers (Kawasaki green) weighed 50kg and originally featured a compact front-hinged 10kW lifting arm in Series 9. For Series 10, the lifting mechanism was altered into a rear-hinged one, with interchangeable forked or scoop-type lifters[1]. The forked lifter was used in Crackers 'n' Smash's opening melee, while the scoop lifter was used in the Redemption Round.
- "This insectoid like set of prongs is designed to go either side of a flippers front wedge and slide under them before they get under us."
- — Team Conker explain the purpose of Crackers' forked lifter[2]
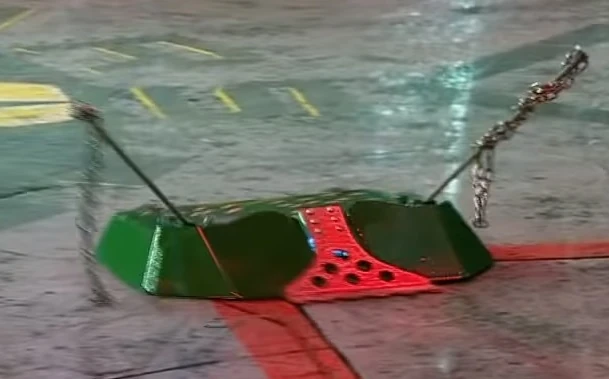
Crackers with its entanglement devices and scoop lifter
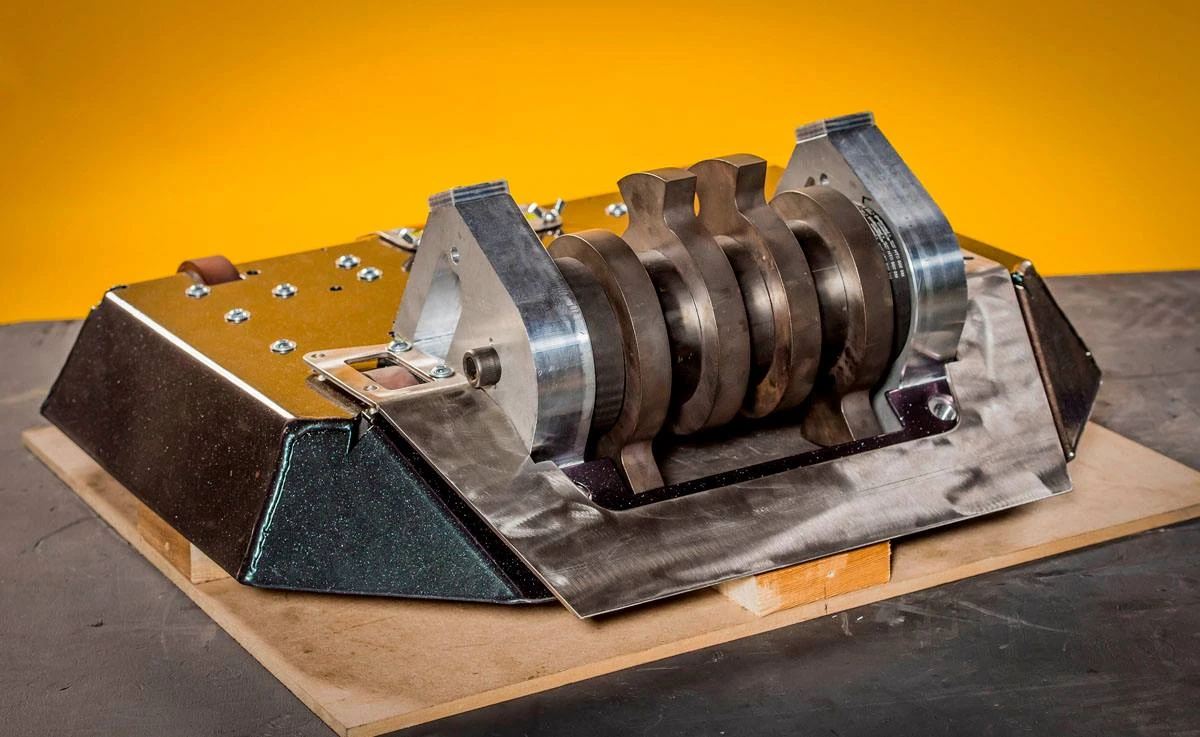
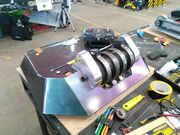
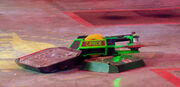
Crackers was armoured in 5mm HARDOX, and the lifter was powered by two 3.7Kw motors. It originally had a HARDOX base in Series 9, but this was swapped for aluminium in Series 10 to save weight, where it also gained a steeper wedge made of 10mm ARMOX. In the event of the new shell being damaged beyond repair during Series 10, Crackers could have been equipped with its original bodyshell from Series 9. Additionally, the team incorporated an entanglement device onto Crackers, suspending loose chains above Crackers when battling vertical spinners.
- "For Series 10 Crackers 'n' Smash added an entanglement weapon consisting of single 1m lengths of steel cable connected in two places on a glass fibre rod"
- — Robot Wars: Build Your Own Robot on Crackers' entanglement device

Smash in Series 9
Smash (pearlescent purple) weighed 60kg, and featured a custom-designed 13kg drum-like spinner with four interconnected steel discs, spinning at 8000rpm in Series 9, and a record high of 11,000rpm in Series 10, providing a tip speed of 250mph. Its armour consisted of 3.6mm hardened steel with a 5mm stainless steel front wedge, and this armour was improved for Series 10. The robot was four-wheel driven, with all four wheels being exposed on top, despite those at the front being unable to reach the floor when the robot is inverted. The front two wheels were more protected in Series 10 by Smash's steeper wedge.

Crackers 'n' Smash in its Series 9 VT


Crackers 'n' Smash on the turntable in Series 9
Both Crackers and Smash used custom VESC brushless speed controllers co-developed with Rory Mangles of Team Nuts. These are high-amperage versions of the VESC controllers designed by Benjamin Vedder, modified for use in robot combat. Modifications over Vedder's original design include changes to the current shunts, wider higher power tracks and improved mounting points for higher amperage and improved current handling over the standard VESCs.[4]
- "Given that CnS was effectively a Season 1 robot, when we managed to make it into Season 2, we were a Season behind everyone else in terms of experience and knowledge; nothing teaches you more about your robot than when it breaks! When we were accepted for Season 3, we knew we couldn't stand still. Despite being in running condition and, given new armour & weapon bulkheads for smash, we could have gone in again with very few changes... but that would put us two seasons behind everyone else in terms of design."
- — Team Conker[5]


The Series 10 version of Crackers

The Series 10 version of Smash
For Series 10, Crackers 'n' Smash underwent several modifications which reduced its combined weight by 16kg; Team Conker removed excess material from each robot's bulkheads, as well as trimming the gears and pulleys in their drive systems. The team also brought more spare components and installed secondary removable links into both robots; the latter to comply with new rules concerning duplicate links for invertible robots.[6]
- "Built to be different, innovative and exciting, Crackers ‘N’ Smash have fought some of the best robots ever to compete, including all three Robot Wars champions!"
- — CnS - Team Conker Facebook page[7]
Qualification

CAD of Crackers 'n' Smash used to apply for Series 10
Crackers 'n' Smash first entered the build phase ahead of Series 8, and applied for the series via online applications. The clusterbot was accepted to compete in the series, and the team arrived at the studio, but could not complete the build in time, and withdrew. After being completed long before the filming of Series 9, Crackers 'n' Smash applied for the series in the same manner, and was once again accepted to compete, making its televised debut.
For its Series 10 application, computer-aided designs of an upgraded Crackers 'n' Smash were submitted in its online application form to demonstrate upgrades, and although David Weston notes that it was only selected very near to the filming of the series[8], Crackers 'n' Smash were accepted for the third time, and entered the final series of the show.
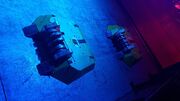
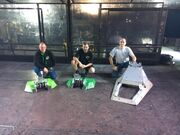
The Team
- Main article: Team Conker

Crackers 'n' Smash with Team Conker in Series 9

Crackers 'n' Smash with the Botwrights in Series 10
Crackers 'n' Smash was entered by the Yorkshire-based Team Conker, named after the team's signature featherweight robots. The team was comprised of father-and-son duo Ian and Alex Botwright, alongside consistent teammate David Weston. The three were joined by Keith Brown in Series 9, and Mike Sweeney in Series 10. For Series 9, Alex Botwright captained the team, while Ian captained the team in Series 10. Smash was consistently driven by Alex, whilst Crackers was driven by David Weston.
Robot History
Series 8


Conker 3 destroys a monitor in the team's VT
Before its televised debut, Crackers 'n' Smash initially qualified for Series 8. However, the robot was not completed in time for its first battle, and would not be finished for a further twelve hours. As such, Crackers 'n' Smash withdrew, but footage from the team's VT was still used in the opening sequence of the show, where the team's featherweight Conker 3 destroyed a monitor. David Weston also remained on-set to assist with the repairs of Chompalot.
Series 9
- "Entering Robot Wars was a childhood dream... and now I'm about to become your worst nightmare."
- — Alex Botwright
Crackers 'n' Smash made its combat debut in Heat 5, where it faced Series 8 runner-up Carbide alongside fellow newcomers Meggamouse and Trolley Rage in its Group Battle. Originally, it was intended to face Apollo, Coyote and Ms Nightshade[9], but the withdrawal of Point Blank caused Crackers 'n' Smash to be moved into its new group battle.
- "...and fascinating to see how the clusterbot Crackers 'n' Smash do here..."
- — Jonathan Pearce during Crackers 'n' Smash's first battle
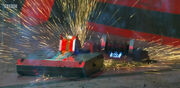
Sparks fly as Crackers sustains an attack from Carbide
At the start, Crackers immediately drove across the arena, where a bump from Meggamouse sent it careering onto the Flame Pit. Crackers remained stuck there as Smash darted over the closed pit and was hit from the front by Carbide's bar spinner. The impact warped Smash's front wedge, leaving it trailing as Smash reversed into Carbide again and pushed Meggamouse onto the arena spikes. Meanwhile, Crackers raised its lifter as Trolley Rage pushed it off the Flame Pit, and dodged Carbide as it hit Smash a few more times. Smash sped over the Flame Pit as it drove out of the empty CPZ, its wedge finally breaking off as it caught the edge of the hazard. Crackers sat in the middle of the arena close to the immobilised Trolley Rage and Meggamouse's minibot, Charles, where it and Meggamouse attempted to push Trolley Rage back.
- "Ahh, running away! Running away! Ahh!"
- — David Weston as Smash dodges Carbide
Crackers escapes as Carbide destroys Meggamouse's wheel
Smash continued driving around the arena and dodging Carbide in the background, before Crackers was attacked by Carbide. Sustained blows from Carbide caused sparks to fly and Crackers' lifter to be ripped off, but Crackers survived, and attempted to push Meggamouse while the pit descended. Smash withstood a few more blows from Carbide's spinner before being spun away, but escaped as Crackers lingered over the Floor Flipper and drove into Meggamouse again. At the same time, Carbide destroyed Meggamouse's wheel, before Smash was again chased by Carbide across the arena and pushed Charles into the pit just as 'cease' was called. As a result, Crackers 'n' Smash progressed to the Head-to-Head round along with Carbide, despite both robots requiring extensive repairs to their weapons; in addition to the warped wedge, Smash had also sustained several gashes to its weapon mount.
- David Weston: "This is fixable."
- Alex Botwright: "This is fixable."
- David Weston: "Right, let's get cracking!"
- — Team Conker assess the damage inflicted to Crackers 'n' Smash
In its first Head-to-Head, Crackers 'n' Smash faced fellow newcomer Coyote.

Smash is pushed by Coyote


Smash sustains damage from Dead Metal
Smash immediately darted towards Coyote as Crackers turned towards the Flame Pit, but was grabbed by Coyote and pushed into the wall. Coyote dragged, spun and pushed Smash into Dead Metal, whose saw grazed Smash's weapon mount as Crackers attempted to free its other half. Both parts escaped as Dead Metal let go of Smash, before Smash slammed into Coyote and in turn pushed it into Dead Metal. However, it briefly got caught by the House Robot in doing so, but Crackers and Smash soon retreated to the middle of the arena, and gathered around Coyote after it pressed the Arena Tyre and activated 'Rogue House Robot' mode. Dead Metal charged into Smash once again, and pushed it onto the Flame Pit despite Crackers' attempt to push him away.
- "Very low machines, you can see the way they're slipping away at times, but [Dead Metal's] got [Smash] here now."
- — Jonathan Pearce observes Crackers 'n' Smash's low height as Dead Metal grabs Smash again

Crackers 'n' Smash attack Coyote


Crackers survives as Coyote lays immobile
Smash quickly drove away as Dead Metal released his grip, before accidentally driving over Crackers as the latter rammed into and under Coyote. Both Crackers and Coyote became stuck together as a result, so Smash pressed the Arena Tyre, and in spite of 'Rogue House Robot' having already once been enabled, Matilda came out of her CPZ to hit Coyote twice. The attack briefly rendered Coyote immobile on one side, but Crackers 'n' Smash persevered, with both halves ramming, bumping and pushing Coyote around. Smash eventually reversed Coyote into an empty CPZ, where it was left immobile, but drove itself onto the Flame Pit again seconds later, and remained stuck there as the countdown timer began. Since Crackers was still moving around the arena, half of Crackers 'n' Smash was still mobile, securing the clusterbot victory and three points as a result.
- Ian Botwright: "Hitting the tyre, not getting the pit – twice - getting a House Robot, get the House Robot coming out at you. It's... I'm sorry..."
- Alex Botwright: "It's terrifying."
- — Team Conker's verdict on 'Rogue House Robot'
This enabled Crackers 'n' Smash to share joint-first on the leaderboard with its next opponent, Carbide. Before the battle, Team Conker removed both Crackers and Smash's weapons to prevent them being damaged by Carbide's spinner, as well as to make them low enough to prevent the latter from causing significant damage elsewhere.
- "We're going in without the weapons. We know they're going to get torn off, so it's a pure three-minute survival match."
- — David Weston explains Team Conker's decision to remove Crackers 'n' Smash's weapons
However, this action contravened the active weapons rule, and not realising this until both robots were in the arena, Team Conker informed the production crew of their decision, and asked to withdraw Crackers 'n' Smash from the battle. Nevertheless, when asked by the production crew, Team Carbide requested that the battle should go ahead anyway.

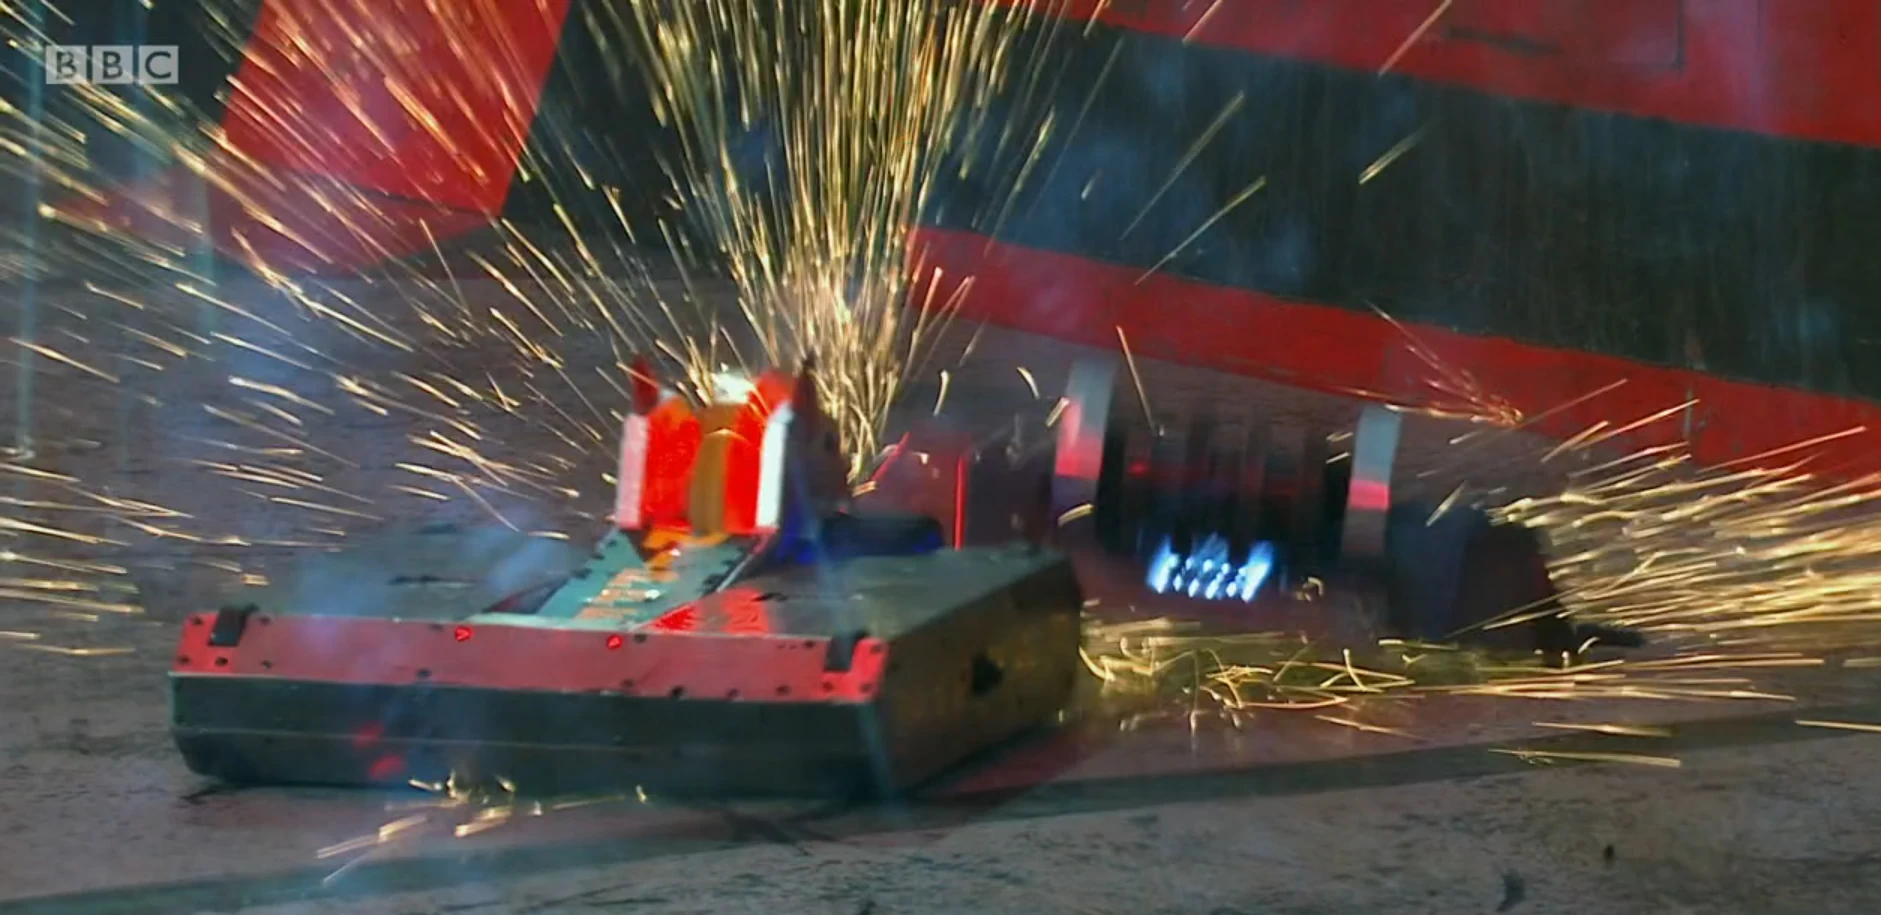
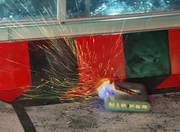
Sparks fly as Carbide's spinner hits Smash's wedge

Smash pushes Carbide off Crackers


Carbide sends Smash hurtling into the wall
As the battle began, Smash immediately drove into Carbide, with both robots sustaining hits from Carbide's spinner as they attempted to surround it. In doing so, Crackers momentarily got underneath Carbide, but Carbide repeatedly hit Smash's replacement wedge, sending sparks and shrapnel flying as Smash turned Carbide around and drove itself onto the Floor Flipper. Smash was flipped over as a result, and used its inverted wedge to push Carbide off Crackers. Both halves survived more blows from Carbide's spinner as David Weston reported control problems, with Smash hitting the Arena Tyre and activating the pit as he did so. Crackers ‘n’ Smash withstood several more attacks from Carbide, before Smash was sent spinning violently into the wall by Carbide. Upon impact, Smash broke off a wall panel and flew up against the bulletproof panels, landing on Shunt's scoop just before Carbide hit Crackers again. Immediately, 'cease' was called, and the battle was stopped for safety reasons while repairs to the arena were carried out.
- "Stay out of trouble, Crackers 'n' Smash; you didn't manage it. And again – whoa! Wow, away goes Smash!"
- — Jonathan Pearce summarises Crackers 'n' Smash's performance as replays of Carbide's battle-stopping attack are shown

Smash after breaking the arena wall
While the repairs were completed, Team Conker declared that they would formally forfeit the battle to Carbide, in an effort to make sure that both halves of Crackers 'n' Smash did not sustain too much damage ahead of their next battle. In spite of Carbide's attacks on their bodyshells, however, both Crackers and Smash's chassis and drivetrains remained intact throughout the battle.
- "One brick of a robot! The drive system’s fine. Mechanically, the entire robot’s fine, which also means... we can fight Apollo, and we can fight Apollo properly."
- — Alex Botwright assesses the integrity of Crackers 'n' Smash's chassis and internals
This was crucial in enabling Crackers 'n' Smash to be ready in time to fight defending champion Apollo in its third – and last – Head-to-Head. For this battle, Team Conker finally succeeded in getting both halves' weapons working since the Group Battles, and were cautiously optimistic about their chances of reaching the Heat Final.
- "So we're either in for the high jump or we could potentially bring about the biggest upset by knocking out the current champions."
- — David Weston before the Head-to-Head against Apollo

Crackers gets underneath Apollo...

...before Apollo throws it towards Dead Metal
This time, Crackers approached Apollo first, dodging Apollo's initial charge and momentarily getting underneath it. It pushed Apollo around the arena as the latter fired its flipper to free itself, before Smash drove up Apollo's wedge and was pushed back close to the wall. In response, Smash was pushed by Apollo towards Dead Metal, with Apollo reversing over Crackers while Smash pressed the Arena Tyre. The pit descended, with Crackers again attempting to push Apollo while Smash darted behind and was caught by Dead Metal. Crackers was eventually thrown into Dead Metal's saw by Apollo, and it was left unable to self-right as Dead Metal charged into it, sending more sparks flying as his saw made contact with Crackers' underside.
- "And Crackers, I think, is over and out."
- — Jonathan Pearce after Crackers is flipped by Apollo

Apollo sends Smash into orbit
Apollo proceeded to throw Smash around the arena several times, with Smash struggling to drive away on its back as Dead Metal grabbed and pushed it again. Crackers was briefly nudged by Apollo as it backed into the Arena Tyre and activated 'Rogue House Robot' mode, while Dead Metal sliced into the inverted Smash's side, sending sparks flying everywhere as he did so. However, Smash escaped, and survived to a judges' decision as Apollo pushed and threw it against the wall twice more. The Judges declared Apollo as the winner, leaving Crackers 'n' Smash with no points as a result. This ensured that Crackers 'n' Smash finished third on the Head-to-Head leaderboard with three points, which was not enough to prevent it from being eliminated from Series 9.
- Ian Botwright: "Had a great fight there. Fantastic fun."
- Alex Botwright: "That was... surviving three minutes with Apollo was... frankly surprising. I'm quite glad in some ways 'cause I don’t have to fight Carbide again."
- — Ian and Alex Botwright of Team Conker on Crackers 'n' Smash's last battle of Series 9
Series 10
- "Double the robots, double the destruction!"
- — Ian Botwright
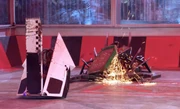
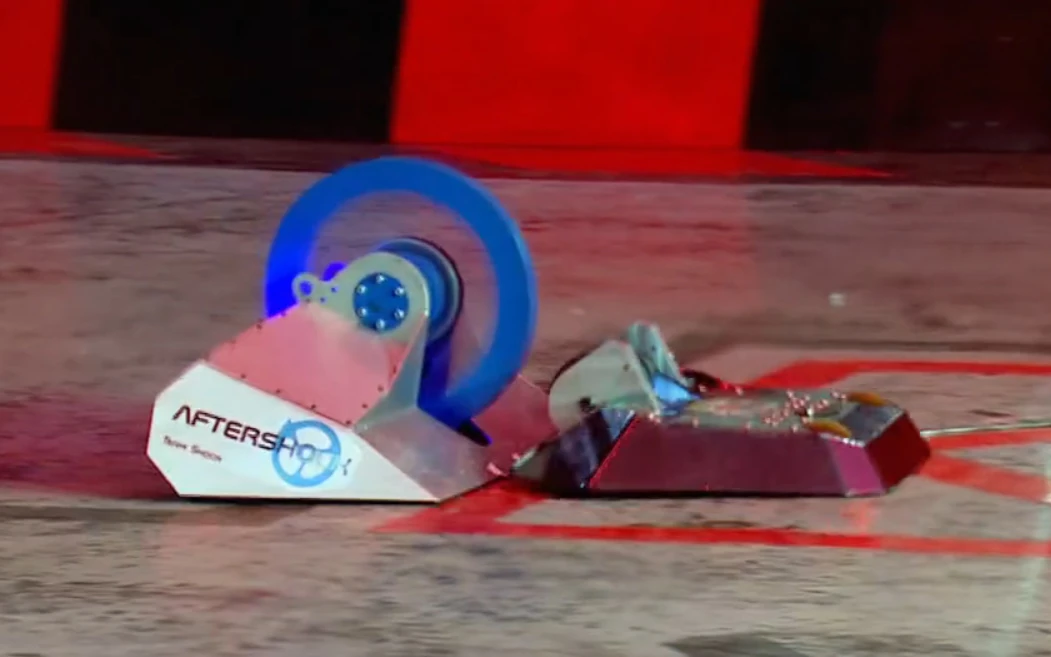
Crackers 'n' Smash competed in Heat 2, where their first battle proved to be a daunting draw against the reigning runner-up Eruption, and fourth place finisher from the previous series, Aftershock. In preparation for their encounter with the vertical spinner of Aftershock, an entanglement device was suspended above Crackers in the form of hanging chains.

Crackers loses its entanglement device to Aftershock

Smash and Aftershock put spinner to spinner
At the start of the battle, the two clusterbots separated, with Smash reversing while Crackers assaulted Aftershock, hoping to employ its entanglement device. However, Aftershock easily ripped the chains from Crackers, at little consequence to itself, and pushed Crackers into an empty CPZ, grinding at its side armour. Fleeing from Eruption, Smash bumped into its teammate, but found its way underneath Aftershock, holding it in place to test the two spinners against each other in a relatively even contest, until the floor flipper launched Smash into the air, and at this stage Aftershock damaged the underside of the flipper, raising concerns with health and safety.
- "You can't drive, the arena flipper's buggered!"
- — Ian Botwright

Smash is tossed by the arena flipper, which was broken soon afterwards
Ian Botwright sensed the danger of the broken arena hazard, and encouraged his robots to cease movement so the battle could be halted. Crackers 'n' Smash fled for safe areas of the arena to confirm whether or not the battle would be suspended, but it became apparent that the battle needed to continue, and both robots were hit hard by Aftershock, with the lifter of Crackers being bent out of shape. Crackers 'n' Smash continued to behave passively in the centre of the arena, when Eruption increased the momentum of the match by launching Aftershock out of the arena.
- "Fine then, keep fighting!"
- — Alex Botwright

Crackers is flipped out of the arena by Eruption
Smash is thrown out shortly after Crackers
Smash was still inverted, unable to assert itself while Crackers was thrown into the air twice by Eruption in an empty CPZ. Crackers bravely charged into Eruption, engaging it in the centre of the arena, but was manoeuvred over the flame pit, and eventually to the arena wall, where Eruption threw it out of the arena. Crackers 'n' Smash were not defeated yet, as Smash remained mobile, albeit only for a short period until Eruption drove under the exposed ground clearance of Smash, and blasted it into the trench at full power, causing Smash to hit the plexiglass entrance door.
- "That was a good one, and we're in the trench. Well done!"
- — Alex Botwright to Team Eruption
The battle had ended in loss for Crackers 'n' Smash, and was followed by a small argument in the control booths, with Team Shock blaming Ian Botwright for leading the teams to believe that the battle would be halted for safety reasons, although this was forgiven.
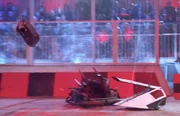
Despite Crackers 'n' Smash being sent into the Robot Redemption Knockouts, the liberty of it remaining active in its Group Battle for longer than Aftershock allowed it to face the robot which had finished third in the heat's other Group Battle, Big Nipper. Crackers was applied with its alternative scoop-shaped lifter and entanglement devices, while Big Nipper had applied its vertical spinner to challenge Crackers 'n' Smash.
- "This to stay in the heat. The team of Crackers 'n' Smash, not fanatics who want to win, for them, Robot Wars is more about the enjoyment of designing and creating something - the charity of human spirit!"
- — Jonathan Pearce
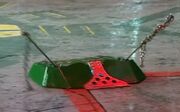
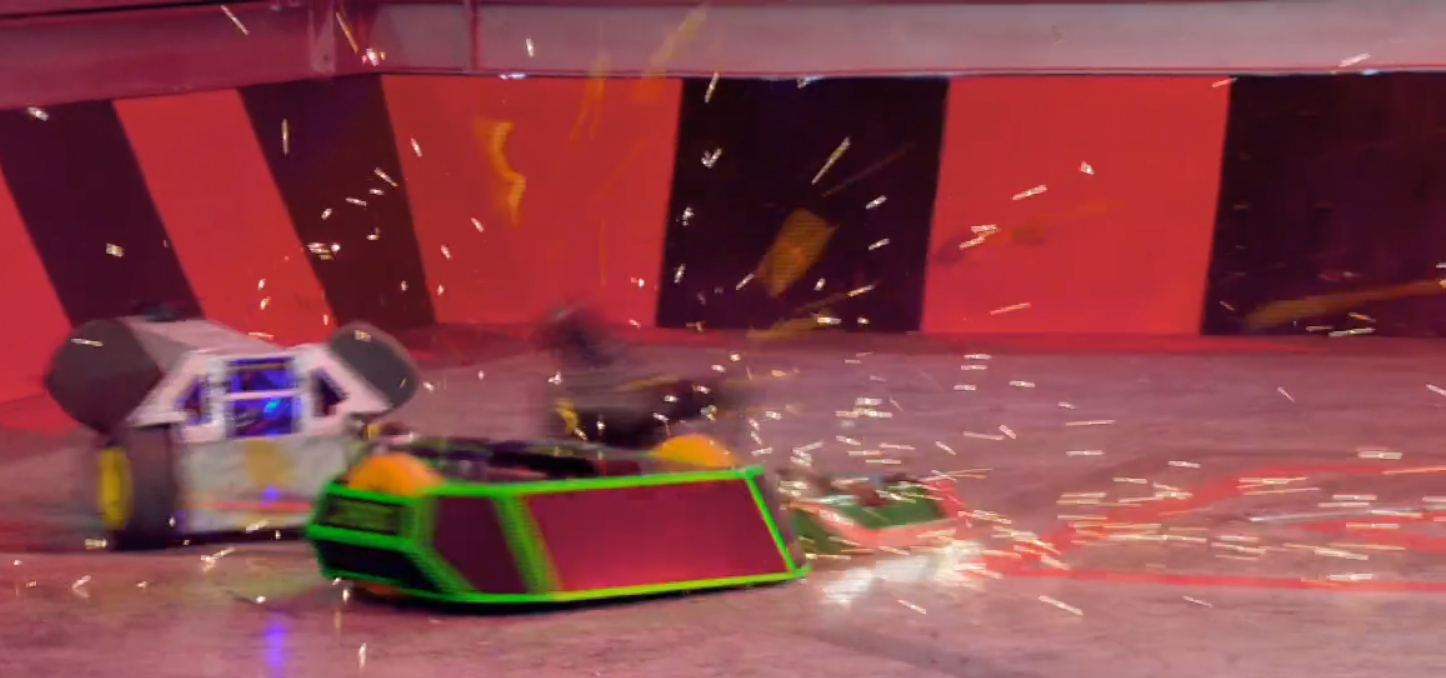
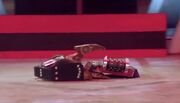
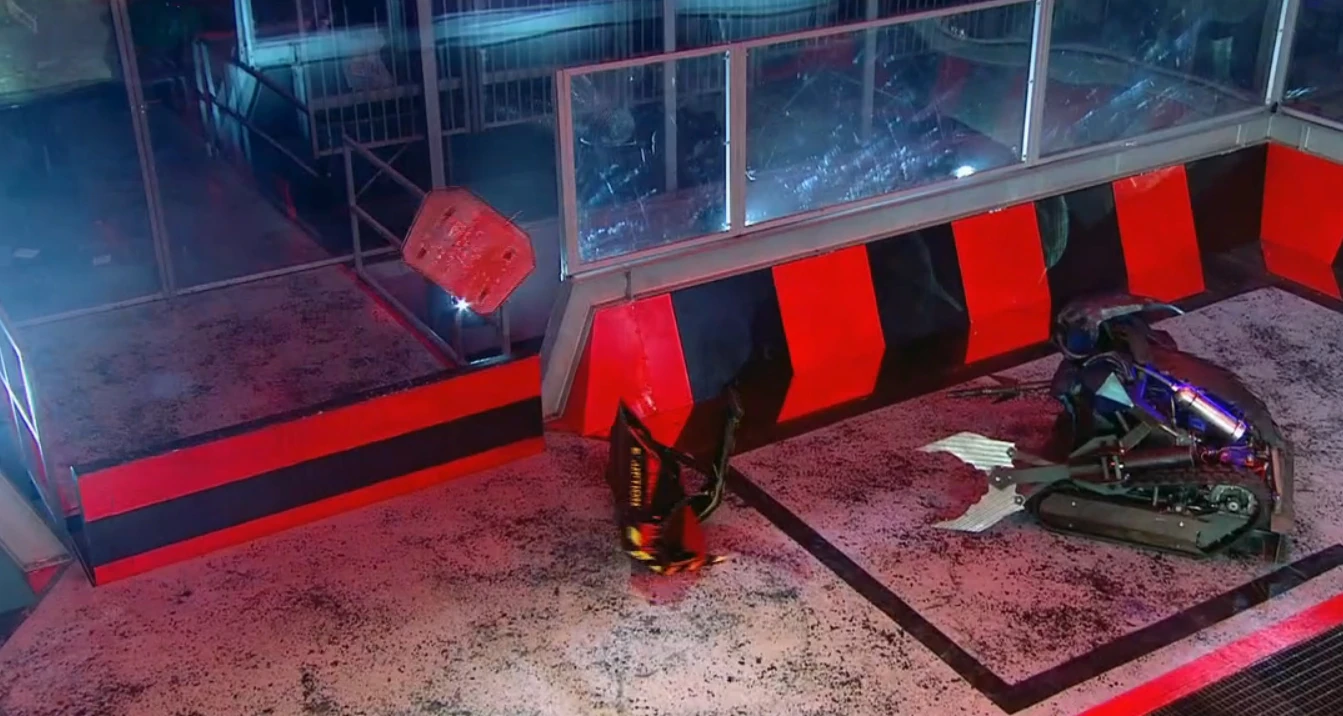
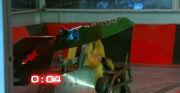
Crackers loses one of its entanglement chains to Big Nipper


Big Nipper whacks Smash away

Crackers is 'sat on' by Sir Killalot
Sparks fly as Smash takes another hit from Big Nipper
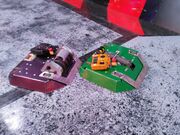
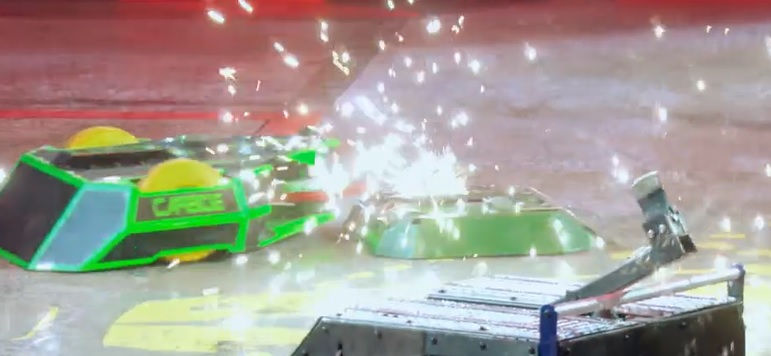
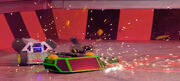
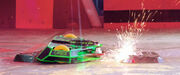
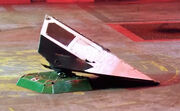
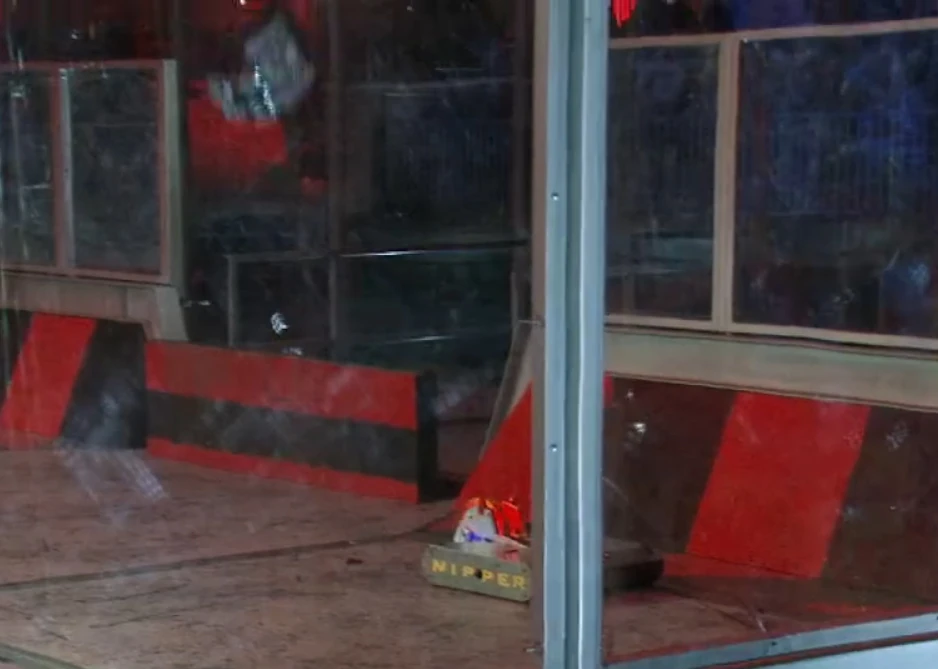
Crackers 'n' Smash started promisingly, with Smash slamming into Big Nipper while avoiding the spinning disc, and Crackers pushing Big Nipper backwards. However, Smash became stuck on the flame pit, and Big Nipper charged Crackers across the arena, ripping away one of its entanglement devices, again without jamming the opposing spinner. While Crackers was stuck on the surface of the pit, Smash charged head-first into Big Nipper's disc, but was lifted from the floor in recoil, and Smash's mobility was permanently impaired, despite unintentionally freeing its team-mate. The remaining chains atop Crackers were ripped away, and Crackers was buffeted into Sir Killalot by Big Nipper. Unable to drive away, Crackers was helpless as Sir Killalot drove on top of it, trapping the lightweight machine.
- David Weston: "He's sat on me!"
- Jonathan Pearce: "You really don't want to be there!"
- — Reactions to Crackers being flattened by Sir Killalot

Smash is launched up by Big Nipper

Smash lands outside the arena
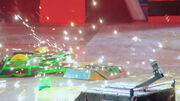
Smash, which had lost the use of its drum spinner, was buffeted in sequence by the disc of Big Nipper, throwing it against the arena wall, with Smash largely unable to leave its circumference, while Crackers experienced similar issues. In its killer blow, Big Nipper struck the side of Smash, firing it straight into the lighting above the arena, high into the air, and then into the trench below, having broken three arena lights in the process. With Smash out of the arena, Crackers was left to fight alone, but after two blows from the disc of Big Nipper and a period on top of the flame pit, the Judges commenced their countdown clock on Crackers 'n' Smash. Sir Killalot plucked Crackers into the air, and held it aloft until the robot was counted out, putting an end to Team Conker's campaign without any victories in the series.

Crackers is held over the flame pit by Sir Killalot
- "Well it was a good display, but the Botwright family didn't get their bots right in the end, and their clusterbots are mere playthings of Sir Killalot!"
- — Jonathan Pearce
The eliminated Ian Botwright stepped into the trench with Angela Scanlon to inspect their robot and the damaged lights, and vowed to return with a new design in a future series, which would ultimately not happen.
Results
| CRACKERS 'N' SMASH - RESULTS | ||
| Series 9 | ||
| Series 9 - UK Championship Heat Round 2, Third Place | ||
| Heat 5, Group Battle | vs. Carbide, Meggamouse, Trolley Rage | Qualified |
| Heat 5, Head-to-Heads | vs. Coyote | Won via KO (3 points) |
| Heat 5, Head-to-Heads | vs. Carbide | Forfeited (0 points) |
| Heat 5, Head-to-Heads | vs. Apollo | Lost (0 points) |
| Series 10 | ||
| Series 10 - UK Championship Robot Redemption Knockouts | ||
| Heat 2, Group Battle | vs. Eruption, Aftershock | Lost |
| Heat 2, Robot Redemption | vs. Big Nipper | Lost |
Wins/Losses
- Wins: 2
- Losses: 4
Series Record


| Series | Crackers 'n' Smash Series Record |
|---|---|
| Series 1-7 | Did not enter |
| Series 8 | Withdrew |
| Series 9 | Heat Round 2, Third Place |
| Series 10 | Heat, Round 1 |
Outside Robot Wars
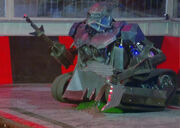
Following the BBC's decision not to renew the Robot Wars reboot in March 2018, Team Conker began entering Crackers 'n' Smash into live events, starting with the Extreme Robots event in Manchester that April. With both halves now sporting a metallic silver paint scheme and drum spinners, the clusterbot attained considerable success, defeating Eric and F7 in a melee and Iron Heart 88 in a head-to-head battle at various stages. Crackers 'n' Smash found their biggest success at a live event in Guildford, at the Extreme Robots event in June 2018. There, Crackers 'n' Smash defeated F7 to reach the Grand Final against Ripper, where Smash fought alone and was thrown out of the arena, for a second-place finish.

The identical Crackers 'n' Smash in September 2018

Smash and Crackers earn first and second place in the FRA Middleweight Championship
Both Crackers, and Smash, regularly competed at the Extreme Robots middleweight competitions in the second half of 2018 and early 2019. Crackers was updated to use a drum spinner, identical to that of Smash, and after the team ran out of purple paint, Smash was also painted the same shade of green as Crackers. As a result, both robots appeared to be nearly identical, borrowing aspects from the other machine. At the FRA Middleweight Championship held in Chatham, both Crackers and Smash individually fought their way to the Grand Final, where Smash won the battle against teammate Crackers, and became the UK Middleweight champion. In the 2019 Middleweight Championship, Smash finished third, behind Raphael and champion F7.
For more information on the team's excursions aside from Crackers 'n' Smash, see the Team Conker article.
References
- ↑ https://www.facebook.com/586161301592950/photos/ms.c.eJw9zNkNwEAMAtGOImPw1X9jUfbI5xMjcuBFRJVatCe3E9ao5LFLQlj3NVfv~;u~_rjzimLWu2Z1SlqsC2yG9P5bVL0LT9~;v4JXvfu8QI5oiOM.bps.a.691273114415101.1073741831.586161301592950/691273161081763/?type=3&theatre
- ↑ https://www.facebook.com/586161301592950/photos/ms.c.eJw9zNkNwEAMAtGOImPw1X9jUfbI5xMjcuBFRJVatCe3E9ao5LFLQlj3NVfv~;u~_rjzimLWu2Z1SlqsC2yG9P5bVL0LT9~;v4JXvfu8QI5oiOM.bps.a.691273114415101.1073741831.586161301592950/691273161081763/?type=3&theater
- ↑ https://www.facebook.com/586161301592950/videos/vb.586161301592950/600238343518579/?type=3&theater Crackers n Smash - First Drive Test
- ↑ http://www.fightingrobots.co.uk/threads/13034-heavyweight-brushless-speed-controllers-vescs-for-sale-hi-amperage-version?highlight=VESC
- ↑ https://www.facebook.com/permalink.php?story_fbid=686632204879192&id=586161301592950
- ↑ https://www.facebook.com/586161301592950/photos/pcb.686632204879192/686631098212636/?type=3&theater
- ↑ https://www.facebook.com/CnS-Team-Conker-586161301592950/
- ↑ Private correspondence with User:ToastUltimatum
- ↑ https://www.reddit.com/r/robotwars/comments/68aw0w/so_it_looks_like_tr2_were_only_a_reserve_in/
Photo credits: CnS - Team Conker Facebook page
Trivia
- At 11,000rpm, Smash's drum has the fastest top speed of any spinning weapon in the history of the show, breaking the 9,200rpm record set by Pulsar.
- Crackers 'n' Smash is the only clusterbot to have been thrown out of the arena entirely, with Eruption flipping both halves of the machine into the trench.
- Across both of its series, Crackers 'n' Smash collected losses against all three reboot champions, with Big Nipper being the only robot to defeat Crackers 'n' Smash without winning a series.
External Links
- CnS - Team Conker Facebook page
- Crackers 'n' Smash (Series 9) on the Robot Wars website
- Crackers 'n' Smash (Series 10) on the Robot Wars website
| ||||||||||||||||||||||||||||||||
| |||||||||||||||||||||||||||||||||||
| ||||||||||||||||||||||||||||||||