StalwartUK (talk | contribs) |
No edit summary |
||
| (36 intermediate revisions by 21 users not shown) | |||
| Line 6: | Line 6: | ||
|team= |
|team= |
||
|team_members=Kevin Shirtcliffe<br/>John Robinson<br/>Philip Robinson |
|team_members=Kevin Shirtcliffe<br/>John Robinson<br/>Philip Robinson |
||
| + | |from=Burnley |
||
|other_entries=[[Undertaker]]<br/><small>(Series 3)</small> |
|other_entries=[[Undertaker]]<br/><small>(Series 3)</small> |
||
| + | |stats=Havoc stats.png |
||
|weight=77.3kg |
|weight=77.3kg |
||
|dimensions=1.30m x 0.72m x 0.40m |
|dimensions=1.30m x 0.72m x 0.40m |
||
|clearance=50mm |
|clearance=50mm |
||
|speed=6mph |
|speed=6mph |
||
| − | |power= |
+ | |power=2x 12 V batteries |
| + | |drive=2x 12 V ATCO lawnmower motors |
||
|weapons=Interchangeable zinc mace, steel spikes & flipper |
|weapons=Interchangeable zinc mace, steel spikes & flipper |
||
}} |
}} |
||
| − | {{ |
+ | {{Quote|And the teenage team mean to wreak just that...|[[Jonathan Pearce]] introduces Havoc}} |
| − | '''Havoc''' was a |
+ | '''Havoc''' was a heavyweight robot which solely competed in [[Robot Wars: The Second Wars|Series 2]] of ''[[Robot Wars]]''. After making steady progress in its Heat, it eventually lost to [[Haardvark]] in the Heat Final stage after being turned onto its side by [[Shunt]]. |
| + | ==Design== |
||
| ⚫ | |||
| ⚫ | |||
| + | Havoc was a black, white and red, box wedge-shaped robot with two-wheel drive, a coated steel/polyurethane chassis and three [[Interchangeable Weaponry|interchangeable weapons]]. These were a swinging spiked zinc-steel mace, a small flipping/lifting arm and a battering ram, all powered by a windscreen wiper motor sourced from a Lancia. Havoc also featured a set of steel spikes at the rear for extra armament, while its front panels were made out of T6-grade aircraft aluminium. Driven by two 1960s lawnmower motors, it proved reasonably powerful by Series 2 standards, although it featured a high ground clearance of 50mm and lacked a [[Self-righting mechanism|self-righting mechanism]]. |
||
| + | {{quote|the main things of interest are the 2*12V ATCO lawnmower motors which go through a 20:1 gear ratio before driving the pneumatic tyres. The speed controllers were FET based but driven off microswitches.|[[University of Reading|Oliver Steeples]] on Havoc<ref>https://web.archive.org/web/20160108201853/http://freespace.virgin.net/oliver.steeples/enter.htm</ref>}} |
||
| + | |||
| + | ==The Team== |
||
| + | Havoc was entered into the Second Wars by a Burnley-based team captained by Kevin Shirtcliffe. He was joined by John Robinson and Philip Robinson throughout Havoc's heat. |
||
| + | {{quote|We first saw the US robot wars on a kid's technology program called 'It'll Never Work'. It then said that a new UK show would be aired later that year. We made a note in our diaries and nothing was said....until the first show. After watching the very first program we were inspired. We immediately rushed to each other's houses. We met along the way and said together "We've got to build a robot!"|The Havoc team on deciding to enter ''Robot Wars''}} |
||
| + | |||
| ⚫ | |||
| + | |||
| + | == Qualification == |
||
| + | Havoc attended the Series 2 rehearsals fully complete with its lifter attached. It was successful in qualifying for the series. |
||
==Robot History== |
==Robot History== |
||
===Series 2=== |
===Series 2=== |
||
| + | {{Quote|So, it's go for youngsters Kevin Shirtcliffe and John Robinson... ooh no. It's – no! No go! What's gone wrong here?|Jonathan Pearce as Havoc fails to start its initial Gauntlet run}} |
||
| ⚫ | |||
| − | [[File: |
+ | [[File:Havocgauntlet.jpg|thumb|right|Havoc is blocked towards the end of its Gauntlet run]] |
| + | Havoc competed in Heat L, and was the fourth robot in that heat to attempt [[The Gauntlet]]. However, it immediately encountered problems, failing to start its initial run after 'activate' was called, and was taken back to [[The Pits|the Pits]] for the team to investigate its issues and make repairs. With the cause of its non-start being identified as a dislodged wire, Havoc was repaired in time to make a second Gauntlet run, which it began by driving slowly towards and through the left-hand route. It stopped short of [[The Sentinel]], and backed away before attempting to make a run past the latter. As it did so, it was intercepted and bumped away by [[Dead Metal]], and forced to retreat. |
||
| ⚫ | |||
| + | {{Quote|Ooh, let's play Dodgems, boys! Knocked straight back!|Jonathan Pearce as Dead Metal intercepts Havoc}} |
||
| − | Havoc's Robot Wars career did not start well as one of its motors stopped working just as it was about to take on the Gauntlet. The team managed to repair the broken wiring and then Havoc began its Gauntlet run. Havoc chose to take the Sentinel route and after some steering problems managed to drive past the Sentinel, but [[Dead Metal]] came in and pushed Havoc back past the Sentinel. Havoc lined up again but got pinned against the Sentinel by Dead Metal, it remained pinned until its time ran out, but it had covered 8.2 metres which placed it third on the leader board. Next was the Trial stage which was Sumo Basho in which Havoc dodged Dead Metal, but then got stuck on the edge of the ring and was slowly pushed of by the house robot. However Havoc had lasted long enough to go through to the Arena stage, where it met [[Flirty Skirty]]. Havoc immediately rammed into the much slower Flirty Skirty, pushing its opponent into the PPZ, where the House Robots tore Flirty Skirty apart, thus sending Havoc through to the Heat Final. In the final it faced [[Haardvark]], in which both robots bashed into each other. Havoc than span on the spot in an attempt to hit Haardvark with its mace. It was then pushed onto the Flame Pit, but it managed to steer away. Havoc then pushed Haardvark into the large pendulum, but Haardvark pushed back and Havoc was shoved into [[Shunt]], who axed Havoc's top armour and then pushed Havoc into the arena wall which flipped Havoc onto its side sending it out of the competition. |
||
| + | Havoc attempted to pass The Sentinel again, driving into its spiked club, and was eventually pinned between the club and Dead Metal as it attempted to drive past the [[House Robots|House Robot]]. It moved no further as [[Sir Killalot]] closed in and time ran out, having covered a distance of 8.2m by the end of its run. This was enough for Havoc to finish third in the results table, and to qualify for the [[The Trial|Trial]] stage. |
||
| + | [[File:HavocS2Sumo.jpg|thumb|left|Havoc is pushed off the Sumo ring]] |
||
| + | In the [[Sumo]] trial, the ram-equipped Havoc was the fourth competitor to face Dead Metal in the ring, and began by dodging the latter's initial charge. However, in doing so, it left itself partially suspended over the edge of the ring, and sustained damage from Dead Metal's saw before finally being pushed off. Havoc lasted 14.15 seconds as a result – putting it third on the leaderboard for the second time and guaranteeing its place in the Arena stage. |
||
| + | |||
| + | In its Semi-Final, Havoc faced [[Flirty Skirty]], now equipped with the flipping arm. In the opening seconds, it charged straight towards and into the sluggish Flirty Skirty, before backing away and pushing the latter. In doing so, its arm poked through Flirty Skirty's side, allowing Havoc to drag and push it into the PPZ. It retreated to the middle of the arena as Sir Killalot attacked, lifted and 'disrobed' Flirty Skirty, with both competitors surviving to a [[Judges|Judges' decision]] in spite of this. The decision went in favour of Havoc, allowing it to progress to the Heat Final. |
||
| + | |||
| ⚫ | |||
| + | There, it fought [[Haardvark]], by then having exchanged its flipping arm in favour of the mace. Havoc began by dodging Haardvark's initial charge, before being bumped and attempting to swing its mace against the latter's side. It was then pushed back across the arena by Haardvark, eventually ending up near the Flame Pit. Havoc escaped, ramming into Haardvark's side in response and allowing [[Matilda]] to attack it from inside the PPZ. However, it was then steered towards the other side of the PPZ and pushed into [[Shunt]] by Haardvark. Shunt proceeded to axe, lift, push and turn Havoc over against the railings, leaving it stranded on its side and unable to self-right. 'Cease' was called, and Havoc was eliminated from the Second Wars. |
||
==Results== |
==Results== |
||
| Line 31: | Line 54: | ||
{{Competition|The Second Wars - UK Championship|Heat Final}} |
{{Competition|The Second Wars - UK Championship|Heat Final}} |
||
{{Trial|[[Robot Wars: The Second Wars/Heat L|Heat L]], [[Gauntlet]]|10.3m (3rd)|Qualified}} |
{{Trial|[[Robot Wars: The Second Wars/Heat L|Heat L]], [[Gauntlet]]|10.3m (3rd)|Qualified}} |
||
| − | {{Trial|Heat L, Trial ([[ |
+ | {{Trial|[[Robot Wars: The Second Wars/Heat L|Heat L]], [[Trial]] ([[Sumo]])|14.15s (3rd)|Qualified}} |
| − | {{Battle|Heat L, Semi-Final|[[Flirty Skirty]]|Won}} |
+ | {{Battle|[[Robot Wars: The Second Wars/Heat L|Heat L, Semi-Final]]|[[Flirty Skirty]]|Won}} |
| − | {{Battle|Heat L, Final|[[Haardvark]]|Lost}} |
+ | {{Battle|[[Robot Wars: The Second Wars/Heat L|Heat L, Final]]|[[Haardvark]]|Lost}} |
|} |
|} |
||
| Line 39: | Line 62: | ||
*Wins: 1 |
*Wins: 1 |
||
*Losses: 1 |
*Losses: 1 |
||
| + | |||
| + | ''NOTE: Havoc's successful Gauntlet and Trial runs are not included'' |
||
==Series Record== |
==Series Record== |
||
| − | *Series 1: Did not enter |
||
| − | *Series 2: Heat Final |
||
| − | *Series 3: Entered with [[Undertaker]] |
||
| − | *Series 4: Failed to qualify with '''Cannibal''' |
||
| − | *Series 5-7: Did not enter |
||
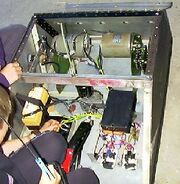
| + | [[File:Havoc2.jpg|thumb|The internals of Havoc]] |
||
| − | {{Notables}} |
||
| + | {{Series Record|Havoc|Did not enter|'''Heat Final'''|Entered with [[Undertaker]]|Failed to qualify with [[Cannibal]]}} |
||
| + | |||
| + | ==External Links== |
||
| + | *[http://web.archive.org/web/20000304054718/http://www.saqnet.co.uk/users/havoc/default.htm Havoc website (archived)] |
||
| + | |||
| + | ==References== |
||
| + | <references/> |
||
| + | |||
{{Series 2 Competitors}} |
{{Series 2 Competitors}} |
||
[[Category:UK Series competitors]] |
[[Category:UK Series competitors]] |
||
| ⚫ | |||
| ⚫ | |||
[[Category:Robots with Lifters]] |
[[Category:Robots with Lifters]] |
||
[[Category:Robots from Lancashire]] |
[[Category:Robots from Lancashire]] |
||
[[Category:Robots with Unique weapons]] |
[[Category:Robots with Unique weapons]] |
||
[[Category:Robots with Spikes]] |
[[Category:Robots with Spikes]] |
||
| + | [[Category:Robots with Interchangeable Weapons]] |
||
| + | [[Category:UK Heat Finalists]] |
||
| ⚫ | |||
| + | [[Category:Robots with Ramming Blades]] |
||
| ⚫ | |||
| + | [[Category:Robots which only fought in Series 2]] |
||
| + | [[Category:Robots with cameo appearances in Series 3]] |
||
Revision as of 22:24, 23 May 2020
- "And the teenage team mean to wreak just that..."
- — Jonathan Pearce introduces Havoc
Havoc was a heavyweight robot which solely competed in Series 2 of Robot Wars. After making steady progress in its Heat, it eventually lost to Haardvark in the Heat Final stage after being turned onto its side by Shunt.
Design
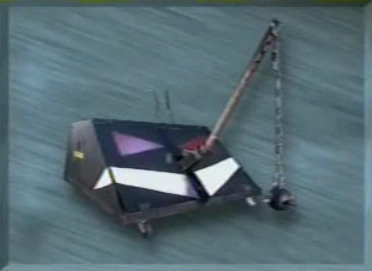
Havoc, with its mace weapon
Havoc was a black, white and red, box wedge-shaped robot with two-wheel drive, a coated steel/polyurethane chassis and three interchangeable weapons. These were a swinging spiked zinc-steel mace, a small flipping/lifting arm and a battering ram, all powered by a windscreen wiper motor sourced from a Lancia. Havoc also featured a set of steel spikes at the rear for extra armament, while its front panels were made out of T6-grade aircraft aluminium. Driven by two 1960s lawnmower motors, it proved reasonably powerful by Series 2 standards, although it featured a high ground clearance of 50mm and lacked a self-righting mechanism.
- "the main things of interest are the 2*12V ATCO lawnmower motors which go through a 20:1 gear ratio before driving the pneumatic tyres. The speed controllers were FET based but driven off microswitches."
- — Oliver Steeples on Havoc[1]
The Team
Havoc was entered into the Second Wars by a Burnley-based team captained by Kevin Shirtcliffe. He was joined by John Robinson and Philip Robinson throughout Havoc's heat.
- "We first saw the US robot wars on a kid's technology program called 'It'll Never Work'. It then said that a new UK show would be aired later that year. We made a note in our diaries and nothing was said....until the first show. After watching the very first program we were inspired. We immediately rushed to each other's houses. We met along the way and said together "We've got to build a robot!""
- — The Havoc team on deciding to enter Robot Wars
The team also entered Series 3 with Undertaker, without as much success. They later attempted to enter Series 4 with their new robot Cannibal, but failed to qualify for the main competition.
Qualification
Havoc attended the Series 2 rehearsals fully complete with its lifter attached. It was successful in qualifying for the series.
Robot History
Series 2
- "So, it's go for youngsters Kevin Shirtcliffe and John Robinson... ooh no. It's – no! No go! What's gone wrong here?"
- — Jonathan Pearce as Havoc fails to start its initial Gauntlet run
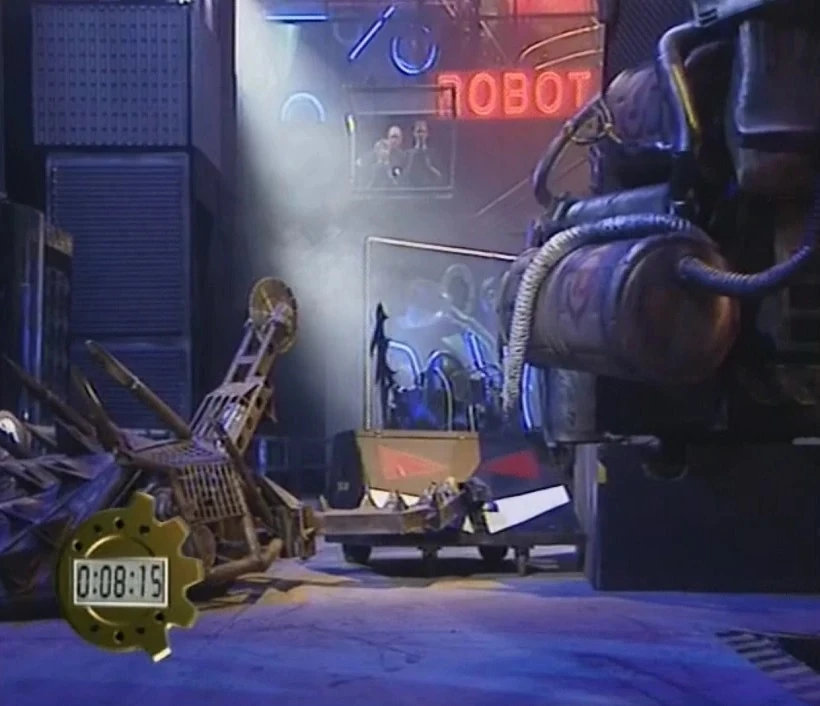
Havoc is blocked towards the end of its Gauntlet run
Havoc competed in Heat L, and was the fourth robot in that heat to attempt The Gauntlet. However, it immediately encountered problems, failing to start its initial run after 'activate' was called, and was taken back to the Pits for the team to investigate its issues and make repairs. With the cause of its non-start being identified as a dislodged wire, Havoc was repaired in time to make a second Gauntlet run, which it began by driving slowly towards and through the left-hand route. It stopped short of The Sentinel, and backed away before attempting to make a run past the latter. As it did so, it was intercepted and bumped away by Dead Metal, and forced to retreat.
- "Ooh, let's play Dodgems, boys! Knocked straight back!"
- — Jonathan Pearce as Dead Metal intercepts Havoc
Havoc attempted to pass The Sentinel again, driving into its spiked club, and was eventually pinned between the club and Dead Metal as it attempted to drive past the House Robot. It moved no further as Sir Killalot closed in and time ran out, having covered a distance of 8.2m by the end of its run. This was enough for Havoc to finish third in the results table, and to qualify for the Trial stage.
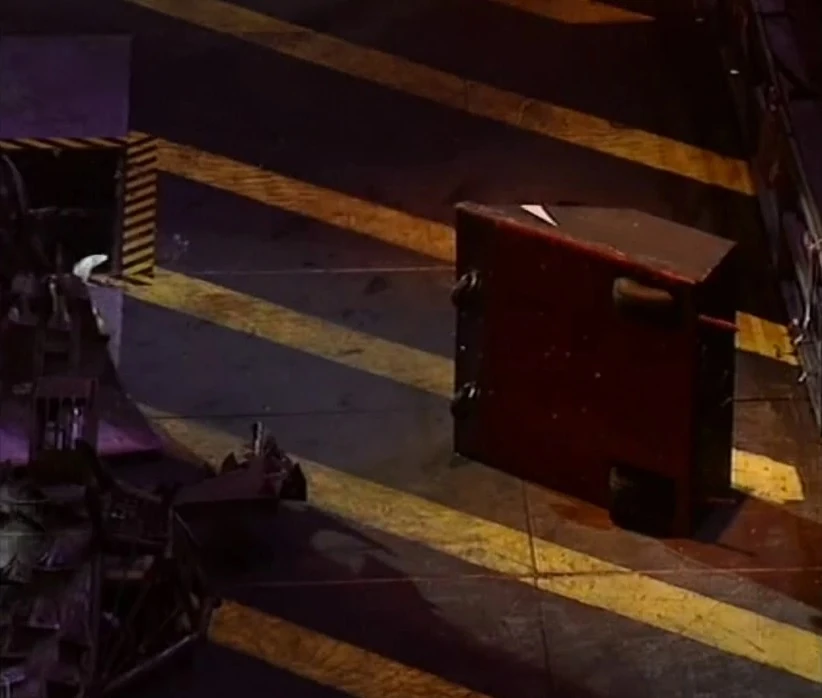
Havoc is pushed off the Sumo ring
In the Sumo trial, the ram-equipped Havoc was the fourth competitor to face Dead Metal in the ring, and began by dodging the latter's initial charge. However, in doing so, it left itself partially suspended over the edge of the ring, and sustained damage from Dead Metal's saw before finally being pushed off. Havoc lasted 14.15 seconds as a result – putting it third on the leaderboard for the second time and guaranteeing its place in the Arena stage.
In its Semi-Final, Havoc faced Flirty Skirty, now equipped with the flipping arm. In the opening seconds, it charged straight towards and into the sluggish Flirty Skirty, before backing away and pushing the latter. In doing so, its arm poked through Flirty Skirty's side, allowing Havoc to drag and push it into the PPZ. It retreated to the middle of the arena as Sir Killalot attacked, lifted and 'disrobed' Flirty Skirty, with both competitors surviving to a Judges' decision in spite of this. The decision went in favour of Havoc, allowing it to progress to the Heat Final.

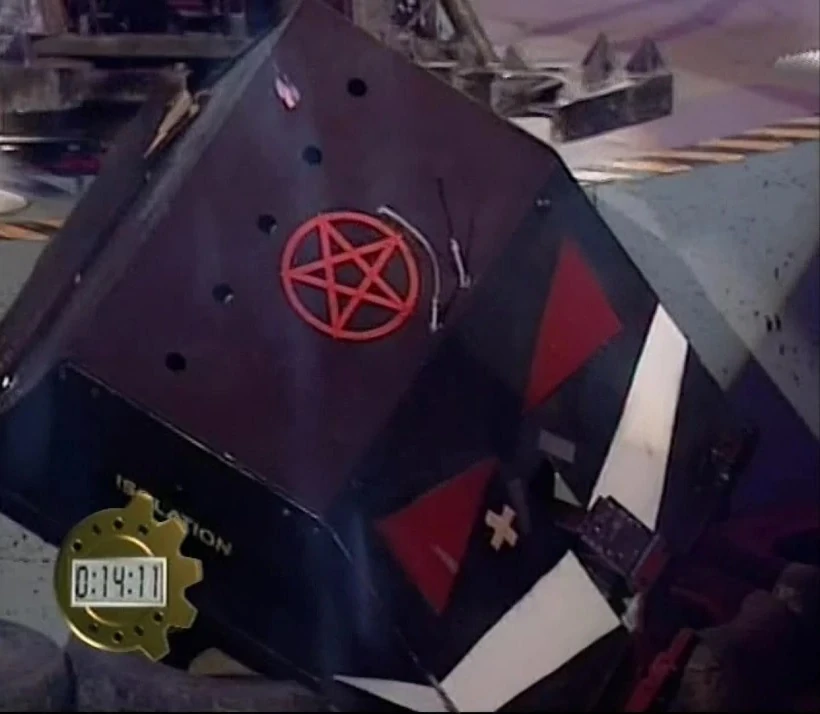
Havoc after being overturned in the PPZ
There, it fought Haardvark, by then having exchanged its flipping arm in favour of the mace. Havoc began by dodging Haardvark's initial charge, before being bumped and attempting to swing its mace against the latter's side. It was then pushed back across the arena by Haardvark, eventually ending up near the Flame Pit. Havoc escaped, ramming into Haardvark's side in response and allowing Matilda to attack it from inside the PPZ. However, it was then steered towards the other side of the PPZ and pushed into Shunt by Haardvark. Shunt proceeded to axe, lift, push and turn Havoc over against the railings, leaving it stranded on its side and unable to self-right. 'Cease' was called, and Havoc was eliminated from the Second Wars.
Results
| HAVOC - RESULTS | ||
| Series 2 | ||
| The Second Wars - UK Championship Heat Final | ||
| Heat L, Gauntlet | 10.3m (3rd) | Qualified |
| Heat L, Trial (Sumo) | 14.15s (3rd) | Qualified |
| Heat L, Semi-Final | vs. Flirty Skirty | Won |
| Heat L, Final | vs. Haardvark | Lost |
Wins/Losses
- Wins: 1
- Losses: 1
NOTE: Havoc's successful Gauntlet and Trial runs are not included
Series Record

The internals of Havoc
| Series | Havoc Series Record |
|---|---|
| The First Wars | Did not enter |
| The Second Wars | Heat Final |
| The Third Wars | Entered with Undertaker |
| The Fourth Wars | Failed to qualify with Cannibal |
| The Fifth Wars | Did not enter |
| The Sixth Wars | Did not enter |
| The Seventh Wars | Did not enter |
| Series 8 | Did not enter |
| Series 9 | Did not enter |
| Series 10 | Did not enter |