No edit summary |
VulcansHowl (talk | contribs) Tag: Source edit |
||
| (69 intermediate revisions by 17 users not shown) | |||
| Line 7: | Line 7: | ||
King B PowerWorks.png|EXT 1 |
King B PowerWorks.png|EXT 1 |
||
Kingb3.jpg|4 |
Kingb3.jpg|4 |
||
| − | King |
+ | King Buxton S3 Crop.png|3 |
| + | King Buxton S2 Crop.png|2 |
||
| − | King_buxton.jpg|2 |
||
</gallery> |
</gallery> |
||
|series=2-5, 7-8, Extreme 1 |
|series=2-5, 7-8, Extreme 1 |
||
| − | |other_names=King B3<br/><small>(Series 4)</small><br/>King B Powerworks<br/><small>(Series 5, 7, Extreme 1)</small><br/>King B Remix<br/><small>(Series 8)</small> |
+ | |other_names=King B<br/>King B3<br/><small>(Series 4)</small><br/>King B Powerworks<br/><small>(Series 5, 7, Extreme 1)</small><br/>King B Remix<br/><small>(Series 8)</small> |
|team=Team B |
|team=Team B |
||
| − | |team_members=Simon Harrison<br/>Steve Monk<br/><small>(Series 2 |
+ | |team_members=Simon Harrison<br/>Steve Monk<br/><small>(Series 2)</small><br/>Phil Brett<br/><small>(Series 2-3)</small><br/>Grant Hornsby<br/><small>(Series 4-5, 7-8, Extreme 1)</small><br>Tony Sharp<br/><small>(Series 4)</small><br>Ryan Hornsby<br/><small>(Series 7)</small><br/>Martin Slattery<br/><small>(Series 8)</small><br/>Natsuko Hori<br/><small>(Series 8)</small> |
| + | |from=Hornchurch, Greater London<br/><small>(Series 2-4)</small><br/>Havant, Hampshire<br/><small>(Series 5, Extreme 1)</small><br/>Portchester, Hampshire<br/><small>(Series 7)</small><br/>Portsmouth<br/><small>(Series 8)</small> |
||
| − | |from=Portsmouth |
||
|stats=<gallery> |
|stats=<gallery> |
||
King b remix stats.png|S8 |
King b remix stats.png|S8 |
||
| Line 32: | Line 32: | ||
}} |
}} |
||
{{Quote|Good power and speed, that's what it's all about, this is an old metro sort of robot, you just get out there, and hit 'em hard|Simon Harrison}} |
{{Quote|Good power and speed, that's what it's all about, this is an old metro sort of robot, you just get out there, and hit 'em hard|Simon Harrison}} |
||
| − | '''King Buxton''' was a heavyweight competitor that appeared in the British TV show ''[[Robot Wars]]''. A long-time veteran of the show, King Buxton would become the [[List of robots by series entered|fifth-longest appearing competitor]] in the show's history, competing in Series 2 through 5, additional appearances in Series 7 and 8, and an appearance in the first series of ''[[Robot Wars Extreme]]''. |
+ | '''King Buxton''' (also shortened to '''King B''') was a heavyweight competitor that appeared in the British TV show ''[[Robot Wars]]''. A long-time veteran of the show, King Buxton would become the [[List of robots by series entered|fifth-longest appearing competitor]] in the show's history, competing in Series 2 through 5, additional appearances in Series 7 and 8, and an appearance in the first series of ''[[Robot Wars Extreme]]''. |
King Buxton enjoyed a reasonable degree of success, amassing eleven [[List of robots by combat victories|combat victories]] across its career. Most of this success came in its first three years, where it reached top eight of Series 2, the heat final of Series 3 and won the [[Tag Team Terror]] of Series 4 alongside its teammate and rival 101. King Buxton began to wane in performance after Series 4 due to superior armed opponents and reliabilty issues. |
King Buxton enjoyed a reasonable degree of success, amassing eleven [[List of robots by combat victories|combat victories]] across its career. Most of this success came in its first three years, where it reached top eight of Series 2, the heat final of Series 3 and won the [[Tag Team Terror]] of Series 4 alongside its teammate and rival 101. King Buxton began to wane in performance after Series 4 due to superior armed opponents and reliabilty issues. |
||
| Line 40: | Line 40: | ||
==Versions of King Buxton== |
==Versions of King Buxton== |
||
{{quote|The movable titanium spikes are menacing. Low, fast and highly manoeuvrable...|[[Jonathan Pearce]] describes King Buxton in Series 2}} |
{{quote|The movable titanium spikes are menacing. Low, fast and highly manoeuvrable...|[[Jonathan Pearce]] describes King Buxton in Series 2}} |
||
| ⚫ | |||
| − | In all of its iterations, King Buxton was a flat |
+ | In all of its iterations, King Buxton was a flat box-shaped [[Invertible Robots|invertible]] machine with four-wheel drive and armed with [[Lifters|lifting forks]], sometimes also featuring a [[Cutting discs|cutting disc]] at the rear. In its subsequent interactions, King Buxton was known by derivatives '''King B3''' (King Buxton 3), '''King B Powerworks''' (in reference to its 36 volt motors) and '''King B Remix'''. |
| + | |||
| + | These derivatives lead to the robot being frequently referred to simply as '''King B''', which is also the name of the team's Facebook page, and can be seen on the front of even the earliest version of King Buxton, in its Series 2 Trial. |
||
===King Buxton=== |
===King Buxton=== |
||
{{quote|King Buxton is quite small compared with most of the other RobotWars contenders. The case is only 26 inches front to back, but it still weighs just under the 79.4KB weight limit.|King Buxton pages of Phil Brett's website}} |
{{quote|King Buxton is quite small compared with most of the other RobotWars contenders. The case is only 26 inches front to back, but it still weighs just under the 79.4KB weight limit.|King Buxton pages of Phil Brett's website}} |
||
[[File:Kingbuxton_official_image.JPG|thumb|left|King Buxton's official photo in Series 2]] |
[[File:Kingbuxton_official_image.JPG|thumb|left|King Buxton's official photo in Series 2]] |
||
| ⚫ | The first iteration of King Buxton was armoured in 3mm [[Metal armour|aluminium]], equipped with titanium lifting [[Spikes|spikes]] and two static spikes on the back. The spikes were made from bike handlebars with titanium sharpened points on the ends. It was powered by nine 6 volt cell batteries with 3 in parallel and 3 in series to give 18 volts. The team had 2 sets, swapping them after each round. |
||
| ⚫ | |||
| ⚫ | The first iteration of King Buxton was armoured in 3mm |
||
{{quote|It turned out that one set was better than the other so we saved them for big battles ( like with RoboDoc ).|King Buxton pages of Phil Brett's website<ref>[http://web.archive.org/web/20040317075052/http://www.thatphilbrettguy.com:80/mred/robots/details.html]</ref>}} |
{{quote|It turned out that one set was better than the other so we saved them for big battles ( like with RoboDoc ).|King Buxton pages of Phil Brett's website<ref>[http://web.archive.org/web/20040317075052/http://www.thatphilbrettguy.com:80/mred/robots/details.html]</ref>}} |
||
[[File:Kb insides.jpg|thumb|left|King Buxton's internals]] |
[[File:Kb insides.jpg|thumb|left|King Buxton's internals]] |
||
[[File:King buxton.jpg|thumb|King Buxton after filming Series 2]] |
[[File:King buxton.jpg|thumb|King Buxton after filming Series 2]] |
||
| − | + | King Buxton's 750W, 24 volt motors and four-wheel drive allowed it to reach a top speed of 18mph. This setup also provided it with significant pushing power, enabling the whole robot to push through bricks, House Robots and even other formidable pushers like [[All Torque]], [[Roadblock]] and [[101]]. The radio was kept at the back of the robot to keep it as far from the motors as possible, thus minimising the risk of interference<ref>[http://web.archive.org/web/20130628030335/http://www.thatphilbrettguy.com:80/mred/robots/details_back.html]</ref>. |
|
{{quote|This first machine was mechanically engineered equally between myself and Steve Monk with Phil Brett contributing to the concept and final assembly. All electronics were 100% engineered from scratch by myself. We used scrap and reclaimed steel for the build where we could as the budget was near zero.|Simon Harrison in 2018<ref>Correspondence with Wiki user [[User:Drop Zone mk2|Drop Zone mk2]]</ref>}} |
{{quote|This first machine was mechanically engineered equally between myself and Steve Monk with Phil Brett contributing to the concept and final assembly. All electronics were 100% engineered from scratch by myself. We used scrap and reclaimed steel for the build where we could as the budget was near zero.|Simon Harrison in 2018<ref>Correspondence with Wiki user [[User:Drop Zone mk2|Drop Zone mk2]]</ref>}} |
||
| − | The original version of King Buxton was the most successful, reaching the series Semi- |
+ | The original version of King Buxton was the most successful, reaching the series Semi-Finals before losing to the reigning champions Roadblock, in the Arena stage. |
| − | [[File:Kingb2 arena.png|thumb |
+ | [[File:Kingb2 arena.png|thumb|King Buxton in Series 3]] |
| − | + | King Buxton returned in Series 3 with several updates, especially to its electronics, which had caused problems in the last series by catching fire. The chassis was cut and re-worked to allow replaceable axles. It also featured a rotary cutter at the rear and the spikes were upgraded to serve as more effective lifters, capable of lifting 80kg. The robot could reach 14mph. This version took 8 months to build. It reached the Heat Final, but lost at that stage to its rival, 101. |
|
{{quote|That machine was built 90% myself and 10% Steve Monk.|Simon Harrison in 2018<ref>Correspondence with Wiki user Drop Zone mk2</ref>}} |
{{quote|That machine was built 90% myself and 10% Steve Monk.|Simon Harrison in 2018<ref>Correspondence with Wiki user Drop Zone mk2</ref>}} |
||
| − | The aluminium King Buxton was prone to fire damage, visibly alight during Series 2. The team installed air |
+ | The aluminium King Buxton was prone to fire damage, visibly alight during Series 2. The team installed air-cooled motors by way of ducted flow fans for Series 3, but the robot was notably smoking and slowing down during the heat final clash with 101. |
===King B3=== |
===King B3=== |
||
{{quote|This was the first I built entirely on my own. The chassis was all new so as to accommodate a rear 40cc petrol engine to power a cutting disc The electronics was 100% re-designed to add current limiting to protect the motors from burning out. It was a much longer and slightly wider machine and handled well|Simon Harrison in 2018<ref>Correspondence with Wiki user Drop Zone mk2</ref>}} |
{{quote|This was the first I built entirely on my own. The chassis was all new so as to accommodate a rear 40cc petrol engine to power a cutting disc The electronics was 100% re-designed to add current limiting to protect the motors from burning out. It was a much longer and slightly wider machine and handled well|Simon Harrison in 2018<ref>Correspondence with Wiki user Drop Zone mk2</ref>}} |
||
| − | [[File:Kingb3_arena.png|thumb|King B3]] |
+ | [[File:Kingb3_arena.png|thumb|left|King B3 in Series 4]] |
| + | [[File:Kingb3 arena back.png|thumb|King B3 from behind]] |
||
| − | '''King B3''', also styled as '''King Buxton III''' (King Buxton the Third), entered Series 4 as a new machine which retained the same design, but was now armoured in clear |
+ | '''King B3''', also styled as '''King Buxton III''' (King Buxton the Third), entered Series 4 as a new machine which retained the same design, but was now armoured in clear [[Plastic armour|Perspex]] on the top. King B3's arsenal consisted of a simple electric lifting mechanism at the front, which had spikes on the ends, and a 9" cutting disc was added to the robot, powered by a petrol engine, with a top speed of 3,000rpm. It took 11 months to build. |
{{quote|It's quite a mean little thing, it certainly wrecked my garage!|Simon Harrison on King B3's circular saw}} |
{{quote|It's quite a mean little thing, it certainly wrecked my garage!|Simon Harrison on King B3's circular saw}} |
||
Despite a new conductive cooling system to counteract the flame problems of the past, consisting of fan ducts to cool the motors, King B3 lost in the main competition by catching fire. However, it redeemed this by winning the first [[Tag Team Terror]] at the end of Series 4. |
Despite a new conductive cooling system to counteract the flame problems of the past, consisting of fan ducts to cool the motors, King B3 lost in the main competition by catching fire. However, it redeemed this by winning the first [[Tag Team Terror]] at the end of Series 4. |
||
{{quote|This machine Is the first that had any real money thrown at it - being financed from my credit card, even then the cost was nowhere near the price stated on the show as everything was cut, welded built at home without outside engineering being bought in|Simon Harrison in 2018<ref>Correspondence with Wiki user Drop Zone mk2</ref>}} |
{{quote|This machine Is the first that had any real money thrown at it - being financed from my credit card, even then the cost was nowhere near the price stated on the show as everything was cut, welded built at home without outside engineering being bought in|Simon Harrison in 2018<ref>Correspondence with Wiki user Drop Zone mk2</ref>}} |
||
| − | The robot cost around £ |
+ | The robot cost around £1,500, lower than the £4,000 it was said to have cost on the show. |
{{quote|... it was stated as costing more like £4000 ( i can’t remember now) but that was probably picked up in an interview somewhere - possibly we seid it would cost that if you bought in the parts and electronics that were made ourselves from scratch.|Simon Harrison in 2018<ref>Correspondence with Wiki user Drop Zone mk2</ref>}} |
{{quote|... it was stated as costing more like £4000 ( i can’t remember now) but that was probably picked up in an interview somewhere - possibly we seid it would cost that if you bought in the parts and electronics that were made ourselves from scratch.|Simon Harrison in 2018<ref>Correspondence with Wiki user Drop Zone mk2</ref>}} |
||
===King B Powerworks=== |
===King B Powerworks=== |
||
{{quote|The name "Powerworks" comes from the fact that we're using the highest voltage that the rules will allow in our power system for the drive, we're also running the same system for our saw at the back, we actually run at 8000 rpm. We've had some reliability problems in the past, but when we're on a run, I think we're going to be doing quite well.|Simon Harrison's introduction in Extreme 1/Series 5}} |
{{quote|The name "Powerworks" comes from the fact that we're using the highest voltage that the rules will allow in our power system for the drive, we're also running the same system for our saw at the back, we actually run at 8000 rpm. We've had some reliability problems in the past, but when we're on a run, I think we're going to be doing quite well.|Simon Harrison's introduction in Extreme 1/Series 5}} |
||
| − | [[File:King B PowerWorks.png|thumb |
+ | [[File:King B PowerWorks.png|thumb|King B Powerworks' official photo for Extreme 1]] |
| − | With the weight limit increase, King Buxton became the 88kg '''King B Powerworks''', named after its 36 volt motors; this was the highest voltage the rules would allow. It was later increased to 97kg for Series 7. The cutting disc could now spin at an upgraded |
+ | With the weight limit increase, King Buxton became the 88kg '''King B Powerworks''', named after its 36 volt motors; this was the highest voltage the rules would allow. It was later increased to 97kg for Series 7. The cutting disc could now spin at an upgraded 8,000rpm. |
{{quote|Alan Gribble kindly made this ‘Pussycat’ style rear disk after he caught us admiring his machine.|King B Facebook page}} |
{{quote|Alan Gribble kindly made this ‘Pussycat’ style rear disk after he caught us admiring his machine.|King B Facebook page}} |
||
| − | [[File:King B Powerworks.jpg|thumb|King B Powerworks in 2002]] |
+ | [[File:King B Powerworks.jpg|thumb|left|King B Powerworks in 2002]] |
This version of King Buxton fought in Series 5, 7 and Extreme 1, but failed to replicate its past success against capable opponents such as [[Dominator 2]], [[Dantomkia]] and [[The Steel Avenger]]. |
This version of King Buxton fought in Series 5, 7 and Extreme 1, but failed to replicate its past success against capable opponents such as [[Dominator 2]], [[Dantomkia]] and [[The Steel Avenger]]. |
||
{{quote|The electronics design was new again As I planned to use LEM 130 motors which I had ordered and would have been a big power upgrade However! Lynch motors suddenly refused to supply the motors just a few weeks before auditions and I was forced to move everything around in the chassis to re-fit Bosch motors ( totally different shape) I never found out why I was denied those motors whereas Storm 2 later used them to devastating effect Because I moved the motors, I had trouble with the drive electronics which was now behind the lifter motors.|Simon Harrison in 2018<ref>Correspondence with Wiki user Drop Zone mk2</ref>}} |
{{quote|The electronics design was new again As I planned to use LEM 130 motors which I had ordered and would have been a big power upgrade However! Lynch motors suddenly refused to supply the motors just a few weeks before auditions and I was forced to move everything around in the chassis to re-fit Bosch motors ( totally different shape) I never found out why I was denied those motors whereas Storm 2 later used them to devastating effect Because I moved the motors, I had trouble with the drive electronics which was now behind the lifter motors.|Simon Harrison in 2018<ref>Correspondence with Wiki user Drop Zone mk2</ref>}} |
||
| − | [[File:King B Powerworks S7.jpg|thumb |
+ | [[File:King B Powerworks S7.jpg|thumb|King B Powerworks in the arena in Series 7]] |
| − | King B Powerworks had a tendency to go berserk |
+ | King B Powerworks had a tendency to go berserk midway through battles; two of its losses in Extreme Series 1 were for this reason, although this problem was later resolved by Series 5. Notably, its Series 7 stat cards referred to the robot as '''King B "Powerworks"''', punctuation included. |
The robot used a different chassis in both of its main series - the robot was box-shaped in Series 5, but used a new, angled design in Series 7. |
The robot used a different chassis in both of its main series - the robot was box-shaped in Series 5, but used a new, angled design in Series 7. |
||
| − | [[File:King B Powerworks Scoop.jpg|thumb|The Series 5 version of King B Powerworks with its scoop]] |
+ | [[File:King B Powerworks Scoop.jpg|thumb|left|The Series 5 version of King B Powerworks with its scoop]] |
| − | For its attempted qualification in Series 6, optional attachments were developed for King B Powerworks which could be used instead of the spinning disc, such as a curved rear scoop which would replace the spinning disc, and the convex rear bodywork which was later used on King B Remix, but these were not brought to Series 7. |
+ | For its attempted qualification in Series 6, optional attachments were developed for King B Powerworks which could be used instead of the spinning disc, such as a curved [[Ramming blades|rear scoop]] which would replace the spinning disc, and the convex rear bodywork which was later used on King B Remix, but these were not brought to Series 7. |
| − | [[File:King B Powerworks S7.png|thumb |
+ | [[File:King B Powerworks S7.png|thumb|Official Series 7 photo]] |
{{quote|Powerworks took every minute of my life from the end of S4 to the beginning of S5 to build ( bad days) It was hard work and a lot of aggravation I remember. It never recovered to run really well for TV. It was my ‘unlucky’ chassis - even revived with updates as ‘Remix’ it had a lot of issues. I had stuck with it as I believed it had potential ( it won many fights after in Ireland after the first run of RW shut down) but it never really came right when it mattered|Simon Harrison in 2018<ref>Correspondence with Wiki user Drop Zone mk2</ref>}} |
{{quote|Powerworks took every minute of my life from the end of S4 to the beginning of S5 to build ( bad days) It was hard work and a lot of aggravation I remember. It never recovered to run really well for TV. It was my ‘unlucky’ chassis - even revived with updates as ‘Remix’ it had a lot of issues. I had stuck with it as I believed it had potential ( it won many fights after in Ireland after the first run of RW shut down) but it never really came right when it mattered|Simon Harrison in 2018<ref>Correspondence with Wiki user Drop Zone mk2</ref>}} |
||
| Line 92: | Line 95: | ||
[[File:King B Remix.png|thumb|left|Official shot of King B Remix]] |
[[File:King B Remix.png|thumb|left|Official shot of King B Remix]] |
||
[[File:King b remix team 2016.jpg|thumb|Team B in 2016]] |
[[File:King b remix team 2016.jpg|thumb|Team B in 2016]] |
||
| − | In 2016, the team created '''King B Remix''', a robot similar in design to King B Powerworks, but with even greater internal strength, albeit with a rear bumper plate instead of the rear cutting disc. The armour was 16mm polycarbonate on top, with Maganese Steel on the front and rear and 16mm Ultra High Molecular Weight Polymer (UHMWPE) also on the rear<ref>[https://www.youtube.com/watch?v=GhyY1FYqFoA King B Remix on the ''Robot Wars'' website]</ref>. The robot was powered by a 40 volt Lithium Iron Phosphate battery, and could reach speeds of 14mph. The steel lifting spikes were also able to rotate, each acting like a small drill. However, the robot's primary weakness came from its drive chains, which snapped in more than one battle, and continually led to King B Remix's loss of mobility. |
+ | In 2016, the team created '''King B Remix''', a robot similar in design to King B Powerworks, but with even greater internal strength, albeit with a rear bumper plate instead of the rear cutting disc. The armour was 16mm polycarbonate on top, with Maganese Steel on the front and rear and 16mm Ultra High Molecular Weight Polymer (UHMWPE) also on the rear<ref>[https://www.youtube.com/watch?v=GhyY1FYqFoA King B Remix on the ''Robot Wars'' website]</ref>. The robot was powered by a 40 volt Lithium Iron Phosphate battery, and could reach speeds of 14mph. The steel lifting spikes were also able to rotate, each acting like a small [[Drills|drill]]. However, the robot's primary weakness came from its drive chains, which snapped in more than one battle, and continually led to King B Remix's loss of mobility. |
[[File:King B Remix.jpg|thumb|left|King B Remix enters the arena in Series 8]] |
[[File:King B Remix.jpg|thumb|left|King B Remix enters the arena in Series 8]] |
||
[[File:King_B_Remix_Series_8.jpg|thumb|King B Remix sits in the arena during Series 8]] |
[[File:King_B_Remix_Series_8.jpg|thumb|King B Remix sits in the arena during Series 8]] |
||
{{quote|Remix was built in 6 weeks from Powerworks which had been revived from rusty scrap in 2015 to run again in Ireland just for fun - so I was lucky to have something ready for Robot Wars’ revival.|Simon Harrison in 2018<ref>Correspondence with Wiki user Drop Zone mk2</ref>}} |
{{quote|Remix was built in 6 weeks from Powerworks which had been revived from rusty scrap in 2015 to run again in Ireland just for fun - so I was lucky to have something ready for Robot Wars’ revival.|Simon Harrison in 2018<ref>Correspondence with Wiki user Drop Zone mk2</ref>}} |
||
| − | According to the ''Robot Wars'' website, the team thought of the robot as a living entity and spoke to it in Japanese through team member Natsuko, who acts as King B |
+ | According to the ''Robot Wars'' website, the team thought of the robot as a living entity and spoke to it in Japanese through team member Natsuko, who acts as King B Remix's 'translator'. |
====Etymology==== |
====Etymology==== |
||
| Line 114: | Line 117: | ||
</gallery> |
</gallery> |
||
The team captain was Simon Harrison, the only team member present in all the team's appearances. Originally, he was joined by Phil Brett and Steve Monk, two close friends of his that had helped to build King Buxton. |
The team captain was Simon Harrison, the only team member present in all the team's appearances. Originally, he was joined by Phil Brett and Steve Monk, two close friends of his that had helped to build King Buxton. |
||
| + | |||
{{quote|...when the original King Buxton was built, I had no facilities to do any construction- so I called on my friend Steve Monk and asked if I could use his workshop (as seen where we are building on ‘Robot Wars Revealed’) He did a lot of the machining of parts so he became a major team member. Phil Brett was a close friend then, as we had been engineering apprentice together after leaving school. He helped out organising parts- so was also on the first team|Simon Harrison in 2018<ref>Correspondence with Wiki user Drop Zone mk2</ref>}} |
{{quote|...when the original King Buxton was built, I had no facilities to do any construction- so I called on my friend Steve Monk and asked if I could use his workshop (as seen where we are building on ‘Robot Wars Revealed’) He did a lot of the machining of parts so he became a major team member. Phil Brett was a close friend then, as we had been engineering apprentice together after leaving school. He helped out organising parts- so was also on the first team|Simon Harrison in 2018<ref>Correspondence with Wiki user Drop Zone mk2</ref>}} |
||
| + | |||
| − | Steve Monk did not appear in Series 3, but was still listed on the stat board. Monk and Brett left after Series 3, and Grant Hornsby joined the team, along with Tony Sharp. Sharp was only part of the team in Series 4, though Grant Hornsby has been in the team in all their appearances since Series 4. |
||
| + | Steve Monk was a car mechanic who had previously raced turbo saloon cars in a national competition league and also owned a workshop with a metal lathe machine. Steve provided the motors for King Buxton, which were custom wound by friends of his who made race car alternators. It was Steve who developed the practical solutions to build King Buxton with the low level technology the team had available at the time.<ref>Correspondence with [[User:RobotManiac|RobotManiac]], 23 February 2022</ref> |
||
| ⚫ | {{quote|Grant Hornsby has in reality been the longest serving team member, before anyone else. He does not have the engineering skills to build anything ( though he is an engineering buyer in his career - so does understand the technologies) Grant is immensely |
||
| + | |||
| − | When the team returned in Series 8, Simon's wife Natsuko Hori and Martin Slattery were also team members. |
||
| + | Phil Brett was a long time friend of Simon, the two having previously worked as technical apprentices together at the Marconi company. Phil was knowledgeable in coding and cut a few panels for King Buxton. Despite not being mechanical, Phil still offered postivity for the team.<ref>Correspondence with [[User:RobotManiac|RobotManiac]], 23 February 2022</ref> |
||
| + | |||
| + | Steve Monk left after Series 2, as he was self-employed and needed the time to make a living and the amount of time needed to build robots was too much for him.<ref>Correspondence with [[User:RobotManiac|RobotManiac]], 23 February 2022</ref> However, he was still credited on the statistics board in Series 3. Similarly, Phil Brett would leave after Series 3 due to him living in central London and having to travel and work on King Buxton until late nights was also taking up too much time.<ref>Correspondence with [[User:RobotManiac|RobotManiac]], 23 February 2022</ref> Despite Steve and Phil leaving the team in the early stages, Simon still remains friends with both of them to this day.<ref>Correspondence with [[User:RobotManiac|RobotManiac]], 23 February 2022</ref> |
||
| + | |||
| + | In Series 4, Simon was joined by Grant Hornsby and Tony Sharp. Tony was another work colleague of Simon and he was offered a place on the team after Steve and Phil departed as Simon thought he'd enjoy the experience of being on the show. However, Simon would later leave the workplace he and Tony both worked at and Tony never reached out about being on the team again. Simon then lost contact with Tony in the following years.<ref>Correspondence with [[User:RobotManiac|RobotManiac]], 23 February 2022</ref> Meanwhile, Grant Hornsby, another work colleague, was able to join the team after Steve and Phil left after being the member who encouraged Simon to enter ''Robot Wars''. Grant had previously taken a step back from being part of the televised team as he felt that Simon would need more technical expertise to help on the robot. He remained a member until the team's final outing in Series 8. |
||
| + | |||
| ⚫ | {{quote|Grant Hornsby has in reality been the longest serving team member, before anyone else. He does not have the engineering skills to build anything ( though he is an engineering buyer in his career - so does understand the technologies) Grant is immensely excited by Robot Wars and being part of the show - and that feeling of excitement always helps me get things done and keep the vision alive. ... Grant wasn’t in the TV team at first as I needed then to call on friends with engineering skills to get the project off the ground and teams were limited to 3 members - but later on Grant got his chance. |Simon Harrison in 2018<ref>Correspondence with Wiki user Drop Zone mk2</ref>}} |
||
| + | |||
| + | In Series 7, Grant's son, Ryan Hornsby, was present on the team for the All-Stars Championship only, but he was not credited on the statistics board or acknowledged by Jonathan Pearce. When the team returned in Series 8, Simon's wife Natsuko Hori and Martin Slattery were also team members. Martin had previously been another friend of Simon and Phil at the Marconi company. Though he did not have any building experience, Simon appreciated having Martin on the team in Series 8 for moral support, as sometimes filming sessions would get him down.<ref>Correspondence with [[User:RobotManiac|RobotManiac]], 23 February 2022</ref> |
||
| + | |||
| + | {{quote|Martin didn't do any building at all - but it didn't matter. You see, sometimes doing the filming got me down - i just needed moral support from long term friends. Every time I went to the filming, I couldn't help feel disappointed with the machine I brought. I always had ideas I couldn't build with my limited ability - I'd turn up and simply look at other machines I could have made myself and felt a bit sad sometimes. Having those team members as moral support was more important to me than sponsors with $$$ or teaming up with some big machine shop or whatever.|Simon Harrison in 2022}} |
||
==Qualification== |
==Qualification== |
||
| + | [[File:King Buxton S2 auditions.png|thumb|left|King Buxton attacks barrels during the auditions]] |
||
| − | King Buxton attended the Series 2 auditions in an unfinished state, without the bodywork or motors for the lifter. Despite this, the robot ran the course well, impressing the judges enough to qualify. |
||
| + | King Buxton attended the Series 2 [[Qualifiers|auditions]] on 19 July 1998, albeit in an unfinished state. Lacking armour plates or motors for the lifter, it nevertheless ran well in the obstacle course, pushing barrels aside and a metal ball into a goal during its practice run. Video diary footage of King Buxton's build and audition was televised in ''[[Robot Wars Revealed]]'', [[Robot Wars Revealed/Episode 9|Episode 9]], which also showcased an early attempt at a [[Removable link|removable link]] system. The partially-finished King Buxton would secure its place in the televised series following this early appearance.<ref>[https://www.facebook.com/photo?fbid=781946300387806&set=pcb.781952007053902 Letter received by Team B for King Buxton's Series 2 audition, written by Mary-Jane Evans, digitised (page 1)]</ref> |
||
{{quote|I don’t remember many bots running very well but luckily we ran ok- just asked to run around some obstacles and hit a ball into a goal ( which we did easily compared to many others) and were promised a place on the show. We then had a few weeks to make the bodywork and complete the lifter electronics - but still I remember that we were still assembling the Robot until about 3:30 AM on the day of filming|Simon Harrison in 2018<ref>Correspondence with Wiki user Drop Zone mk2</ref>}} |
{{quote|I don’t remember many bots running very well but luckily we ran ok- just asked to run around some obstacles and hit a ball into a goal ( which we did easily compared to many others) and were promised a place on the show. We then had a few weeks to make the bodywork and complete the lifter electronics - but still I remember that we were still assembling the Robot until about 3:30 AM on the day of filming|Simon Harrison in 2018<ref>Correspondence with Wiki user Drop Zone mk2</ref>}} |
||
| Line 126: | Line 142: | ||
{{quote|We ran the obstacle course and were then asked to try to knock down a pile of concrete blocks. We obliterated the blocks! ( big gasp from the small audience) But one of the heavy blocks got thrown up and came down hard in the electronics ( as the body was not fitted) and caused a large short circuit / electrical fire. We qualified but it gave me an extra 2 weeks of work to repair the fire damage and meant that it was again difficult to be ready in time for the filming.|Simon Harrison in 2018<ref>Correspondence with Wiki user Drop Zone mk2</ref>}} |
{{quote|We ran the obstacle course and were then asked to try to knock down a pile of concrete blocks. We obliterated the blocks! ( big gasp from the small audience) But one of the heavy blocks got thrown up and came down hard in the electronics ( as the body was not fitted) and caused a large short circuit / electrical fire. We qualified but it gave me an extra 2 weeks of work to repair the fire damage and meant that it was again difficult to be ready in time for the filming.|Simon Harrison in 2018<ref>Correspondence with Wiki user Drop Zone mk2</ref>}} |
||
| − | King B3 qualified automatically for Series 4 due to its status as the 17th seed. King B Powerworks |
+ | King B3 qualified automatically for Series 4 due to its status as the 17th seed. King B Powerworks did not go through the Series 5 qualifiers. As the team had attended filming for ''Extreme'', they gained entry into The Fifth Wars, which was filmed around the same time, as the producers felt as though they were reliable competitors that were able to start up without any problems.<ref>Correspondence with [[User:RobotManiac|RobotManiac]], 20 February 2022</ref> |
| + | |||
| + | {{quote|I sneaked in to S5 as production always like to keep a pool of competitors that they can rely on to start up on the dot and don't argue or cause them stress|Simon Harrison in 2022}} |
||
King B Powerworks suffered an unexpected failure to qualify for ''[[Robot Wars: The Sixth Wars]]''. Simon Harrison had made a build error in his hasty rebuild of King B Powerworks and the robot had spent a week packed into the boot of his car. King B Powerworks was originally due to fight [[Tip-Top]], however the latter's petrol engine stalled before the fight, so King B was re-scheduled to fight [[Scorpion|Spirit of Scorpion]] instead. In this battle, King B Powerworks' drive failed nearly instantly and the robot could not move. King B Powerworks was not damaged but was not given a discretionary place either, presumably having failed to make an impact on the producers. |
King B Powerworks suffered an unexpected failure to qualify for ''[[Robot Wars: The Sixth Wars]]''. Simon Harrison had made a build error in his hasty rebuild of King B Powerworks and the robot had spent a week packed into the boot of his car. King B Powerworks was originally due to fight [[Tip-Top]], however the latter's petrol engine stalled before the fight, so King B was re-scheduled to fight [[Scorpion|Spirit of Scorpion]] instead. In this battle, King B Powerworks' drive failed nearly instantly and the robot could not move. King B Powerworks was not damaged but was not given a discretionary place either, presumably having failed to make an impact on the producers. |
||
| Line 134: | Line 152: | ||
{{quote|I do remember talking to the show’s producer at the time (Bill Hobbins) on the phone about Extreme II - but he was looking for new stuff or new ideas and I had to admit that I had nothing to offer that was different to Extreme 1. I was upset that Extreme 1 was such a disaster for King B so didn’t feel good about Extreme II - i worried that Buxton would struggle again- so just didn’t push to do it.|Simon Harrison in 2018<ref>Correspondence with Wiki user Drop Zone mk2</ref>}} |
{{quote|I do remember talking to the show’s producer at the time (Bill Hobbins) on the phone about Extreme II - but he was looking for new stuff or new ideas and I had to admit that I had nothing to offer that was different to Extreme 1. I was upset that Extreme 1 was such a disaster for King B so didn’t feel good about Extreme II - i worried that Buxton would struggle again- so just didn’t push to do it.|Simon Harrison in 2018<ref>Correspondence with Wiki user Drop Zone mk2</ref>}} |
||
| − | [[File:King B Powerworks vs Thunderpants.jpg|thumb| |
+ | [[File:King B Powerworks vs Thunderpants.jpg|thumb|right|King B Powerworks in its Series 7 qualifier]] |
| − | King B Powerworks redeemed this in Series 7, facing [[M2]], [[Pressure]] and [[Thunderpants]] in its qualifying battle<ref>[https://www.youtube.com/watch?v=GhyY1FYqFoA Video of King B Powerworks' Series 7 qualifier]</ref>. It opened the battle by ramming into Pressure, and then slammed Thunderpants into the arena wall. Afterwards, it caused terminal damage to a wheel of Thunderpants, immobilising it with damage which would not be successfully repaired in time for Thunderpants' appearance in [[Robot Wars: The Seventh Wars/Heat E|Heat E]], leading to the disqualification of Thunderpants. It pushed Pressure back, and was lifted up in response, but managed to slam Pressure into the arena wall, although this allowed M2 to launch King B Powerworks into the air, and then flip it a further three times in sequence. King B Powerworks drove over the ramp shape of M2 to sneak behind it, but could not land any major attacks, and fled, only attacking M2 when it was distracted by Pressure. [[File:M2 vs King B Powerworks vs Pressure vs thUnderpants.jpg|thumb|King B Powerworks is flipped over by M2]]It was flipped a further two times, but managed to push M2 into the wall. Retreating to the centre of the arena, King B Powerworks pressed its spikes into M2, but was thrown over, and M2 followed this up with four more consecutive flips. Pressure finally returned to the battle and lifted King B Powerworks, but it was quickly flipped over by M2, and immobilised. King B Powerworks could only drive in circles, and was repeatedly flipped by M2 until it was stranded on the arena wall. Although it escaped, King B Powerworks could not leave the side of the arena, and the battle ended after three minutes had expired. Although M2 had commanded the match, King B Powerworks still qualified for the Seventh Wars. |
+ | King B Powerworks redeemed this in Series 7, facing [[M2]], [[Pressure]] and [[Thunderpants]] in its qualifying battle<ref>[https://www.youtube.com/watch?v=GhyY1FYqFoA Video of King B Powerworks' Series 7 qualifier]</ref>. It opened the battle by ramming into Pressure, and then slammed Thunderpants into the arena wall. Afterwards, it caused terminal damage to a wheel of Thunderpants, immobilising it with damage which would not be successfully repaired in time for Thunderpants' appearance in [[Robot Wars: The Seventh Wars/Heat E|Heat E]], leading to the disqualification of Thunderpants. It pushed Pressure back, and was lifted up in response, but managed to slam Pressure into the arena wall, although this allowed M2 to launch King B Powerworks into the air, and then flip it a further three times in sequence. King B Powerworks drove over the ramp shape of M2 to sneak behind it, but could not land any major attacks, and fled, only attacking M2 when it was distracted by Pressure. [[File:M2 vs King B Powerworks vs Pressure vs thUnderpants.jpg|thumb|left|King B Powerworks is flipped over by M2]]It was flipped a further two times, but managed to push M2 into the wall. Retreating to the centre of the arena, King B Powerworks pressed its spikes into M2, but was thrown over, and M2 followed this up with four more consecutive flips. Pressure finally returned to the battle and lifted King B Powerworks, but it was quickly flipped over by M2, and immobilised. King B Powerworks could only drive in circles, and was repeatedly flipped by M2 until it was stranded on the arena wall. Although it escaped, King B Powerworks could not leave the side of the arena, and the battle ended after three minutes had expired. Although M2 had commanded the match, King B Powerworks still qualified for the Seventh Wars. |
King B Remix would later qualify for Series 8 through open applications, with the vast competitive experience of the robot providing a case for its entry, while the team chose not to enter Series 9 or 10. |
King B Remix would later qualify for Series 8 through open applications, with the vast competitive experience of the robot providing a case for its entry, while the team chose not to enter Series 9 or 10. |
||
| Line 172: | Line 190: | ||
Robo Doc was grabbed by Dead Metal, which dragged it around for a while, before letting it go. It got the lifting arm under King Buxton, only for King Buxton to push it into Shunt, then into the PPZ. Robo Doc was caught between Sir Killalot and Shunt, the latter of which axed it, until King Buxton carried it out as it reversed. King Buxton rammed into Robo Doc's front, but was unable to push it back, so instead drove around the side again, pushing it against Dead Metal. After letting Robo Doc escape, it drove at the side again, but failed to push it. Robo Doc almost reversed into the pit, and when it drove forward, it was blocked by Matilda, which was out of the PPZ. King Buxton pushed Matilda's rear, nearly getting Robo Doc into the pit. Robo Doc pushed back at Matilda, and King Buxton reversed. Robo Doc drove up Matilda, and King Buxton rammed it, overturning it. Robo Doc fell onto the flame pit, but drove off before cease was called. It went to a judges' decision, which after much deliberation resulted in King Buxton winning through to the Heat Final. |
Robo Doc was grabbed by Dead Metal, which dragged it around for a while, before letting it go. It got the lifting arm under King Buxton, only for King Buxton to push it into Shunt, then into the PPZ. Robo Doc was caught between Sir Killalot and Shunt, the latter of which axed it, until King Buxton carried it out as it reversed. King Buxton rammed into Robo Doc's front, but was unable to push it back, so instead drove around the side again, pushing it against Dead Metal. After letting Robo Doc escape, it drove at the side again, but failed to push it. Robo Doc almost reversed into the pit, and when it drove forward, it was blocked by Matilda, which was out of the PPZ. King Buxton pushed Matilda's rear, nearly getting Robo Doc into the pit. Robo Doc pushed back at Matilda, and King Buxton reversed. Robo Doc drove up Matilda, and King Buxton rammed it, overturning it. Robo Doc fell onto the flame pit, but drove off before cease was called. It went to a judges' decision, which after much deliberation resulted in King Buxton winning through to the Heat Final. |
||
{{quote|I have to say that it was made to look like we won with ease but this wasn't the case. Our battle with Robo Doc was fantastic. A full 5 minutes of fighting. The judges took over 10 minutes to make the decision. Ok we won it but it really was 50/50. If we had lost we would have been happy as it was such a good battle.|Phil Brett commenting on King Buxton's semi final fight}} |
{{quote|I have to say that it was made to look like we won with ease but this wasn't the case. Our battle with Robo Doc was fantastic. A full 5 minutes of fighting. The judges took over 10 minutes to make the decision. Ok we won it but it really was 50/50. If we had lost we would have been happy as it was such a good battle.|Phil Brett commenting on King Buxton's semi final fight}} |
||
| + | |||
| − | |||
In the Heat Final, it fought [[All Torque]] for a place in the Semi-Finals. |
In the Heat Final, it fought [[All Torque]] for a place in the Semi-Finals. |
||
{{quote|Two quick, powerful robots. All Torque is slightly the lighter but speedier. King Buxton seems to have more manoeuvrability, with the spikes as well|Jonathan Pearce at the start of the fight}} |
{{quote|Two quick, powerful robots. All Torque is slightly the lighter but speedier. King Buxton seems to have more manoeuvrability, with the spikes as well|Jonathan Pearce at the start of the fight}} |
||
| Line 195: | Line 213: | ||
{{quote|We always disliked the non-power / fighting games and we didn't like the look of this at all. It was all too easy to get stuck on a brick or jammed under a house robot. To tell you the truth Id thought we'd gone out. 165 was a poor score. It didn't help that Steve the driver thought we only needed 120 for some reason and didn't go for it until near the end. But we were though again, just. All our optimism from the last round had gone. Now we were happy with every round we completed.|King Buxton pages of Phil Brett's website}} |
{{quote|We always disliked the non-power / fighting games and we didn't like the look of this at all. It was all too easy to get stuck on a brick or jammed under a house robot. To tell you the truth Id thought we'd gone out. 165 was a poor score. It didn't help that Steve the driver thought we only needed 120 for some reason and didn't go for it until near the end. But we were though again, just. All our optimism from the last round had gone. Now we were happy with every round we completed.|King Buxton pages of Phil Brett's website}} |
||
| − | King Buxton then fought reigning |
+ | King Buxton then fought reigning champion [[Roadblock]] for a place in the Grand Final. |
{{quote|Roadblock. It doesn't look like a great bit of engineering but it works very well. We didn't think we'd have too much trouble though. But the problem we'd been hiding from the world was going to be our downfall.|King Buxton pages of Phil Brett's website}} |
{{quote|Roadblock. It doesn't look like a great bit of engineering but it works very well. We didn't think we'd have too much trouble though. But the problem we'd been hiding from the world was going to be our downfall.|King Buxton pages of Phil Brett's website}} |
||
[[File:King Buxton vs Roadblock.jpg|thumb|left|King Buxton pushes Roadblock back]] |
[[File:King Buxton vs Roadblock.jpg|thumb|left|King Buxton pushes Roadblock back]] |
||
[[File:Roadblock_vs_King_Buxton.JPG|thumb|Roadblock cuts into King Buxton]] |
[[File:Roadblock_vs_King_Buxton.JPG|thumb|Roadblock cuts into King Buxton]] |
||
| + | [[File:Roadblock King Buxton saw 1.jpg|thumb|left|King Buxton's wheel is sliced into by Roadblock]] |
||
King Buxton started faster and tried to get around to Roadblock's side, but Roadblock turned in time, and got its scoop under King Buxton. King Buxton drove over its opponent's wedge, and tried to get at is opponents side again, but Roadblock turned, preventing King Buxton from getting in a position to push. King Buxton drove up the side of the ramp, before falling off. It got one of its spikes in the top corner and pushed its opponent, but then turned to its opponent's front. The spike loosened, and King Buxton drove away as Roadblock pushed. Whilst escaping, it drove into Dead Metal. This allowed Roadblock to bring its saw into play, making sparks on contact. Dead Metal reversed, and King Buxton drove into the centre of the arena, but appeared to be moving erratically. Roadblock tried to use the saw, but King Buxton pushed it into the PPZ, where Shunt axed it and Dead Metal rammed into it. Roadblock escaped, and King Buxton drove at its front, trying to push it, but ended up driving up and over the wedge. It became stuck on the spikes, allowing Roadblock to use its saw some more. King Buxton drove away from the saw, before ramming into Roadblock in reverse. However, smoke then began to pour from King Buxton, a fire became visible, and King Buxton lost mobility. |
King Buxton started faster and tried to get around to Roadblock's side, but Roadblock turned in time, and got its scoop under King Buxton. King Buxton drove over its opponent's wedge, and tried to get at is opponents side again, but Roadblock turned, preventing King Buxton from getting in a position to push. King Buxton drove up the side of the ramp, before falling off. It got one of its spikes in the top corner and pushed its opponent, but then turned to its opponent's front. The spike loosened, and King Buxton drove away as Roadblock pushed. Whilst escaping, it drove into Dead Metal. This allowed Roadblock to bring its saw into play, making sparks on contact. Dead Metal reversed, and King Buxton drove into the centre of the arena, but appeared to be moving erratically. Roadblock tried to use the saw, but King Buxton pushed it into the PPZ, where Shunt axed it and Dead Metal rammed into it. Roadblock escaped, and King Buxton drove at its front, trying to push it, but ended up driving up and over the wedge. It became stuck on the spikes, allowing Roadblock to use its saw some more. King Buxton drove away from the saw, before ramming into Roadblock in reverse. However, smoke then began to pour from King Buxton, a fire became visible, and King Buxton lost mobility. |
||
{{quote|The engines have gone! King Buxton in all sorts of trouble!|Jonathan Pearce}} |
{{quote|The engines have gone! King Buxton in all sorts of trouble!|Jonathan Pearce}} |
||
| − | Roadblock pushed King Buxton onto the spikes, using the saw to damage the wheels. Dead Metal grabbed King Buxton just before cease was called. |
+ | Roadblock pushed King Buxton onto the spikes, using the saw to damage the wheels. Dead Metal grabbed King Buxton just before cease was called. In a post-fight interview on [[Robot Wars Revealed]] Simon Harrison explained that the previous fight with Robo Doc had caused problems with the motors and that they would overheat if a battle lasted longer than two minutes. |
{{quote|Even in testing before RobotWars we had seen smoke coming from the motors. Just before the first program we had changed the speed controllers for much lower resistance ones. This meant that on full power the batteries were effectively connected straight too the motors, driving the 750W motors at more like double that ! Under stall the motors just got hotter and hotter. With Roadblock we could push him quite easily at first, but the already badly damaged motors just could not last. Smoke / Fire / end of RobotWars for us.|King Buxton pages of Phil Brett's website}} |
{{quote|Even in testing before RobotWars we had seen smoke coming from the motors. Just before the first program we had changed the speed controllers for much lower resistance ones. This meant that on full power the batteries were effectively connected straight too the motors, driving the 750W motors at more like double that ! Under stall the motors just got hotter and hotter. With Roadblock we could push him quite easily at first, but the already badly damaged motors just could not last. Smoke / Fire / end of RobotWars for us.|King Buxton pages of Phil Brett's website}} |
||
===Series 3=== |
===Series 3=== |
||
| − | {{ |
+ | {{quote|A little spinny thing, a little spinny thing, what good's that going to do?|Philippa Forrester commenting on King Buxton's new weapon}} |
[[File:King_buxton_eric.JPG|thumb|Buxton drives up Eric's side. Notice the left prong missing its tip]] |
[[File:King_buxton_eric.JPG|thumb|Buxton drives up Eric's side. Notice the left prong missing its tip]] |
||
| − | The King Buxton team returned for the Third Wars, and participated in Heat J of the main competition. King Buxton was placed up against |
+ | The King Buxton team returned for the Third Wars, and participated in Heat J of the main competition. King Buxton was placed up against newcomer [[Eric]] in its first round battle of the heat. The two robots met in the centre, with King Buxton getting at Eric's side and pushing. It quickly lost purchase on the smooth sloped side of Eric, and Eric turned away. King Buxton charged at Eric's front, but Eric fired its lifter and pulled King Buxton into mid-air, blocking the charge. Buxton pushed into Eric, but lost the tip of one of its prongs in the process. |
{{quote|Ooh! King Buxton's lost one of the tips to its front rams there. Somewhere on the arena floor is a steel tip.|Jonathan Pearce}} |
{{quote|Ooh! King Buxton's lost one of the tips to its front rams there. Somewhere on the arena floor is a steel tip.|Jonathan Pearce}} |
||
[[File:Eric_king_buxton.JPG|thumb|left|Eric and King Buxton wedged on the pit]] |
[[File:Eric_king_buxton.JPG|thumb|left|Eric and King Buxton wedged on the pit]] |
||
It drove away for another charge, but drove up the side of Eric when it charged at its opponent, who opened its lifter to keep Buxton suspended. King Buxton reversed down, then drove at Eric's front, so Eric flicked King Buxton up, but King Buxton managed to get behind Eric and nearly pushed it into the pit. However, King Buxton drove at the wrong angle, so two of King Buxton's wheels were suspended over the pit, along with one of Eric's wheels. and when Eric attempted to pit it, it freed Buxton and reversed itself in. |
It drove away for another charge, but drove up the side of Eric when it charged at its opponent, who opened its lifter to keep Buxton suspended. King Buxton reversed down, then drove at Eric's front, so Eric flicked King Buxton up, but King Buxton managed to get behind Eric and nearly pushed it into the pit. However, King Buxton drove at the wrong angle, so two of King Buxton's wheels were suspended over the pit, along with one of Eric's wheels. and when Eric attempted to pit it, it freed Buxton and reversed itself in. |
||
{{quote|Eric towards the pit - oh goodness me! And King Buxton is left teetering on the brink of oblivion! And Eric - oh no! - has backed itself down into the pit! King Buxton spun away and Eric went down!|Jonathan Pearce}} |
{{quote|Eric towards the pit - oh goodness me! And King Buxton is left teetering on the brink of oblivion! And Eric - oh no! - has backed itself down into the pit! King Buxton spun away and Eric went down!|Jonathan Pearce}} |
||
| − | King Buxton was through to Round 2. In the second round, King Buxton went up against [[Weld-Dor]]. |
+ | King Buxton was through to Round 2. In the second round, King Buxton went up against Irish newcomer [[Weld-Dor]]. |
{{dialogue a-b-a-c-a|Philippa Forrester|Nothing I need to know about? No technical traumas?|Phil Brett|No, no...couple of scratches|Yeah, I know, that's not technical trauma.|Simon Harrison|It is for us|Its vanity, for goodness sake.|King Buxton's pre-match interview}} |
{{dialogue a-b-a-c-a|Philippa Forrester|Nothing I need to know about? No technical traumas?|Phil Brett|No, no...couple of scratches|Yeah, I know, that's not technical trauma.|Simon Harrison|It is for us|Its vanity, for goodness sake.|King Buxton's pre-match interview}} |
||
{{quote|Love and peace? I'll give them a few technical traumas unless they get it on here!|Jonathan Pearce, on the friendly working relationship between King Buxton and Weld-Dor}} |
{{quote|Love and peace? I'll give them a few technical traumas unless they get it on here!|Jonathan Pearce, on the friendly working relationship between King Buxton and Weld-Dor}} |
||
| Line 284: | Line 303: | ||
===Extreme 1=== |
===Extreme 1=== |
||
King B Powerworks made a number of appearances in Extreme 1, with little success. Its first appearance was in the Tag Team Terror, where it teamed up with 101 again to defend their title. In the first round, they fought [[Diotoir]] and [[The Morgue|Mega Morg]]. |
King B Powerworks made a number of appearances in Extreme 1, with little success. Its first appearance was in the Tag Team Terror, where it teamed up with 101 again to defend their title. In the first round, they fought [[Diotoir]] and [[The Morgue|Mega Morg]]. |
||
| − | {{quote|King B3 and 101 were worthy winners of the title, beating Firestorm and Scorpion in the final, quite easily I thought, but then best of friends? Best of enemies, they turned on each other! Is there friction in the camp? What's going to happen in this series of the Tag Team Terror?| |
+ | {{quote|King B3 and 101 were worthy winners of the title, beating Firestorm and Scorpion in the final, quite easily I thought, but then best of friends? Best of enemies, they turned on each other! Is there friction in the camp? What's going to happen in this series of the Tag Team Terror?|Jonathan Pearce before Round 1}} |
[[File:DiotoirMegavsKingB101.jpg|thumb|left|King B Powerworks is trapped by Diotoir]] |
[[File:DiotoirMegavsKingB101.jpg|thumb|left|King B Powerworks is trapped by Diotoir]] |
||
101 started out first against Mega Morg, and after a little pushing between the two, 101 tagged King B Powerworks. As it came out, Mega Morg tagged Diotoir. King B Powerworks appeared to stop for a moment, allowing Diotoir to ram into the side of King B Powerworks, but made no attempt to flip it, and King B soon reversed away. It then rammed Diotoir hard side-on, knocking off the inflatable sheep mascot. King B then got underneath Diotoir's raised scoop and pushed it towards the arena wall. It was close enough to the CPZ to allow Mega Morg to attack, but it reversed away before it could be flipped. |
101 started out first against Mega Morg, and after a little pushing between the two, 101 tagged King B Powerworks. As it came out, Mega Morg tagged Diotoir. King B Powerworks appeared to stop for a moment, allowing Diotoir to ram into the side of King B Powerworks, but made no attempt to flip it, and King B soon reversed away. It then rammed Diotoir hard side-on, knocking off the inflatable sheep mascot. King B then got underneath Diotoir's raised scoop and pushed it towards the arena wall. It was close enough to the CPZ to allow Mega Morg to attack, but it reversed away before it could be flipped. |
||
| Line 339: | Line 358: | ||
{{Dialogue a-b|Craig Charles|What are the tactics on a thing like that, because it is very, sort of fast?|Simon Harrison|Hit 'em hard, hit e'm hard!|Post-battle interview}} |
{{Dialogue a-b|Craig Charles|What are the tactics on a thing like that, because it is very, sort of fast?|Simon Harrison|Hit 'em hard, hit e'm hard!|Post-battle interview}} |
||
| − | King B Powerworks was then placed up against the number 11 |
+ | King B Powerworks was then placed up against the number 11 seed [[Dominator 2]] in the second round. |
{{quote|Very good battle, this. Dominator 2 possibly more impressive in its earlier fight, King B Powerworks needed a judges' decision to separate it from Kronic...|Jonathan Pearce at the start of the battle}} |
{{quote|Very good battle, this. Dominator 2 possibly more impressive in its earlier fight, King B Powerworks needed a judges' decision to separate it from Kronic...|Jonathan Pearce at the start of the battle}} |
||
[[File:Dominator_2_king_b_powerworks.JPG|thumb|left|King B Powerworks runs up the wedge of Dominator 2]] |
[[File:Dominator_2_king_b_powerworks.JPG|thumb|left|King B Powerworks runs up the wedge of Dominator 2]] |
||
| Line 352: | Line 371: | ||
===Series 7=== |
===Series 7=== |
||
| − | King B Powerworks was drawn against the 5th |
+ | King B Powerworks was drawn against the 5th seed [[Dantomkia]], [[The Hassocks Hog|Hassocks Hog 2]] and fellow Tag Team champion [[Rick]] in the first round. |
{{dialogue a-b-c|Jayne Middlemiss|Biggest fear?|Grant Hornsby|Biggest fear: Spinners, flippers, crushers, axes, hammers...|Simon Harrison|...other robots basically.|Series 7 Pre-first round interview}} |
{{dialogue a-b-c|Jayne Middlemiss|Biggest fear?|Grant Hornsby|Biggest fear: Spinners, flippers, crushers, axes, hammers...|Simon Harrison|...other robots basically.|Series 7 Pre-first round interview}} |
||
[[File:Dantomkia flips king b powerworks series 7 melee.jpg|thumb|left|King B Powerworks is flipped against an angle grinder by Dantomkia]] |
[[File:Dantomkia flips king b powerworks series 7 melee.jpg|thumb|left|King B Powerworks is flipped against an angle grinder by Dantomkia]] |
||
| Line 368: | Line 387: | ||
The Judges decided, in a 2-1 split decision, that King B Powerworks would continue alongside Dantomkia, over Rick. |
The Judges decided, in a 2-1 split decision, that King B Powerworks would continue alongside Dantomkia, over Rick. |
||
| − | King B Powerworks was then placed up against [[Team Vader]] and their new [[IG-88]] |
+ | King B Powerworks was then placed up against [[Team Vader]] and their new machine [[IG-88]] in the second round. |
{{quote|Well, I think our robot was conceived at a rather more gentle age, probably a bit cruel to stick it in there with IG-88, but I saw an aerial sticking out the side, in a great big loop, so I think if that comes off this thing, we're alright. If not, we're not.|Simon Harrison before the battle}} |
{{quote|Well, I think our robot was conceived at a rather more gentle age, probably a bit cruel to stick it in there with IG-88, but I saw an aerial sticking out the side, in a great big loop, so I think if that comes off this thing, we're alright. If not, we're not.|Simon Harrison before the battle}} |
||
[[File:Ig-88 vs King B powerworks.JPG|thumb|IG-88 attacks the immobile King B Powerworks]] |
[[File:Ig-88 vs King B powerworks.JPG|thumb|IG-88 attacks the immobile King B Powerworks]] |
||
| Line 379: | Line 398: | ||
{{quote|King B: dethroned. ... Oh what a shame, that had the makings of a great battle.|Jonathan Pearce as King B Powerworks is counted out}} |
{{quote|King B: dethroned. ... Oh what a shame, that had the makings of a great battle.|Jonathan Pearce as King B Powerworks is counted out}} |
||
[[File:Sergeant_Bash_King_B.jpg|thumb|King B Powerworks is crushed by Sgt. Bash]] |
[[File:Sergeant_Bash_King_B.jpg|thumb|King B Powerworks is crushed by Sgt. Bash]] |
||
| − | Shunt axed King B Powerworks a couple of times, but failed to pierce the top. Sgt. Bash grabbed King B Powerworks' side with hits claw, crumpling through it easily. Sgt. Bash then led King B Powerworks to the floor flipper, where Shunt positioned it. It was thrown, |
+ | Shunt axed King B Powerworks a couple of times, but failed to pierce the top. Sgt. Bash grabbed King B Powerworks' side with hits claw, crumpling through it easily. Sgt. Bash then led King B Powerworks to the floor flipper, where Shunt positioned it. It was thrown, then Shunt finished King B Powerworks off by pushing it into the pit. |
{{quote|...There wasn't much chance anyway, it's a very old robot now, you won't see it again. ... I can't tell you [what we're planning], but it's gonna be fantastic!|Simon Harrison after the battle}} |
{{quote|...There wasn't much chance anyway, it's a very old robot now, you won't see it again. ... I can't tell you [what we're planning], but it's gonna be fantastic!|Simon Harrison after the battle}} |
||
| Line 392: | Line 411: | ||
{{Dialogue a-b-a-b-a-b|[[Angela Scanlon]]|...talk to me about the weapon.|Simon Harrison|Well, the main weapon is actually just to be fast and powerful. We have got these spikes you see. We can get under them and just lift them an take them all round the arena.|You're going to dance around?|Absolutely, that's our main power.|Muhammad Ali style?|Exactly!|Pre-Round 1 interview}} |
{{Dialogue a-b-a-b-a-b|[[Angela Scanlon]]|...talk to me about the weapon.|Simon Harrison|Well, the main weapon is actually just to be fast and powerful. We have got these spikes you see. We can get under them and just lift them an take them all round the arena.|You're going to dance around?|Absolutely, that's our main power.|Muhammad Ali style?|Exactly!|Pre-Round 1 interview}} |
||
[[File:King B vs Overdozer.jpg|thumb|left|King B Remix immobilises Overdozer]] |
[[File:King B vs Overdozer.jpg|thumb|left|King B Remix immobilises Overdozer]] |
||
| − | King B Remix appeared in Heat |
+ | King B Remix appeared in [[Robot Wars: Series 8/Heat C|Heat C]] of Series 8, where it was once again drawn against Dantomkia in its opening Group Battle. The two Classic Series veterans would also face newcomers [[GlitterBomb]] and [[Overdozer]] in this melee. Prior to the match, Simon Harrison touted his upgraded machine's forks, with the Team B workbench also being decorated with a disco ball. |
| + | |||
| ⚫ | |||
| + | In combat, King B Remix went for the wooden Overdozer first, taking advantage of its opponent's high ground clearance to push it around with ease. It proceeded to ram Overdozer over the raised pit, causing the Falkirk machine's brushcutter blade to fall off. |
||
| ⚫ | |||
| ⚫ | |||
| ⚫ | Overdozer stopped moving after this, and King B Remix pushed it some more. King B Remix then left Overdozer, and drove around the remaining two opponents as they fought. It charged at |
||
| ⚫ | |||
| ⚫ | |||
| ⚫ | Overdozer stopped moving after this, and King B Remix pushed it some more. King B Remix then left Overdozer, and drove around the remaining two opponents as they fought. It charged at GlitterBomb, but drove up its sloping side, flipping itself over as GlitterBomb moved away. After a pause, it drove at GlitterBomb again, but GlitterBomb drove straight past it, attacking the immobile Overdozer, ramming it into a wall. King B Remix chased after GlitterBomb, but upon catching up with it, drove up the side again, landing on Overdozer. King B Remix got itself down, and reversed into the corner. Dantomkia came in and flipped GlitterBomb over, then bumped into King B Remix, before driving away to flip around the immobile Overdozer. King B Remix reversed into GlitterBomb, which self-righted using its axe. However, GlitterBomb's axe became stuck in the down position, leaving it without a weapon. King B Remix pinned it against the wall as the two fought in the corner, and Dantomkia came in and flipped GlitterBomb over again. With the axe not working, GlitterBomb was unable to self-right. |
||
| ⚫ | |||
King B Remix kept away from Dantomkia until Cease was called, leaving it to flip the remains of Overdozer around. King B Remix was through to the Head-to-Heads, where its first battle at this stage was against Dantomkia, the fourth encounter between the two. |
King B Remix kept away from Dantomkia until Cease was called, leaving it to flip the remains of Overdozer around. King B Remix was through to the Head-to-Heads, where its first battle at this stage was against Dantomkia, the fourth encounter between the two. |
||
{{quote|King B Remix weren't really tested in the Group Stage, so this could really be a rude awakening for the Portsmouth them.|Angela Scanlon before the battle}} |
{{quote|King B Remix weren't really tested in the Group Stage, so this could really be a rude awakening for the Portsmouth them.|Angela Scanlon before the battle}} |
||
| Line 416: | Line 437: | ||
{{dialogue a-b|Simon Harrison|What let us down is, as in Robot Wars, always, the link came out. We've got two links. We've actually got the one we've got in the top but we've got a second one under there and unfortunately, it ...|Grant Hornsby|Came out!|After the battle}} |
{{dialogue a-b|Simon Harrison|What let us down is, as in Robot Wars, always, the link came out. We've got two links. We've actually got the one we've got in the top but we've got a second one under there and unfortunately, it ...|Grant Hornsby|Came out!|After the battle}} |
||
| − | King B Remix was left unable to progress to the Heat Final after its second loss, but still had to fight [[TR2]]. This fight was recorded a day later than scheduled, due to difficulties with repairing King B Remix. |
+ | King B Remix was left unable to progress to the Heat Final after its second loss, but still had to fight [[TR2]], another newcomer. This fight was recorded a day later than scheduled, due to difficulties with repairing King B Remix. |
{{dialogue a-b|Grant Hornsby|TR2 is a great robot, but let's show we are too, let's give them a real battle.|Simon Harrison|Yeah, I mean I've seen this machine can do better and I think we should do better. We'll do our best!|Team B before the battle}} |
{{dialogue a-b|Grant Hornsby|TR2 is a great robot, but let's show we are too, let's give them a real battle.|Simon Harrison|Yeah, I mean I've seen this machine can do better and I think we should do better. We'll do our best!|Team B before the battle}} |
||
[[File:TR2 vs King B.jpg|thumb|King B Remix is thrown into the arena wall]] |
[[File:TR2 vs King B.jpg|thumb|King B Remix is thrown into the arena wall]] |
||
| Line 468: | Line 489: | ||
{{Competition|The Fifth Wars - UK Championship|Heat, Round 2}} |
{{Competition|The Fifth Wars - UK Championship|Heat, Round 2}} |
||
{{Battle|[[Robot Wars: The Fifth Wars/Heat F|Heat F, Eliminator]]|[[Kronic the Wedgehog|Kronic 2]]|Won}} |
{{Battle|[[Robot Wars: The Fifth Wars/Heat F|Heat F, Eliminator]]|[[Kronic the Wedgehog|Kronic 2]]|Won}} |
||
| − | {{Battle|[[Robot Wars: The Fifth Wars/Heat F|Heat F, Semi |
+ | {{Battle|[[Robot Wars: The Fifth Wars/Heat F|Heat F, Semi-Final]]|[[Dominator 2]] ''(11)''|Lost}} |
{{Show|Series 7}} |
{{Show|Series 7}} |
||
{{Competition|The Seventh Wars - UK Championship|Heat, Round 2}} |
{{Competition|The Seventh Wars - UK Championship|Heat, Round 2}} |
||
| Line 479: | Line 500: | ||
{{Show|Series 8}} |
{{Show|Series 8}} |
||
{{Competition|Series 8 - UK Championship|Round 2, Fourth Place}} |
{{Competition|Series 8 - UK Championship|Round 2, Fourth Place}} |
||
| − | {{Battle|[[Robot Wars: Series 8/Heat |
+ | {{Battle|[[Robot Wars: Series 8/Heat C|Heat C, Group Battle]]|[[Dantomkia]], [[GlitterBomb]], [[Overdozer]]|Qualified}} |
| − | {{Battle|[[Robot Wars: Series 8/Heat |
+ | {{Battle|[[Robot Wars: Series 8/Heat C|Heat C, Head-to-Heads]]|[[Dantomkia]] |Lost (0 points)}} |
| − | {{Battle|[[Robot Wars: Series 8/Heat |
+ | {{Battle|[[Robot Wars: Series 8/Heat C|Heat C, Head-to-Heads]]|[[Big Nipper]] |Lost (0 points)}} |
| − | {{Battle|[[Robot Wars: Series 8/Heat |
+ | {{Battle|[[Robot Wars: Series 8/Heat C|Heat C, Head-to-Heads]]|[[TR2]] |Lost (0 points)}} |
|} |
|} |
||
===Wins/Losses=== |
===Wins/Losses=== |
||
| Line 491: | Line 512: | ||
==Series Record== |
==Series Record== |
||
| ⚫ | {{Series Record EX|King Buxton|Did not enter|'''Semi-Finals, Arena as King Buxton'''|'''Heat Final as King Buxton'''|'''Heat, Round 2 as King B3'''|'''Heat, Round 2 as King B Powerworks'''|''Failed to qualify as King B Powerworks''|'''Heat, Round 2 as King B "Powerworks"'''|'''Round 2, Fourth Place as King B Remix'''|Did not enter|Did not enter|'''Entered as King B Powerworks'''}} |
||
| ⚫ | |||
| + | |||
| ⚫ | |||
| + | ==Gallery== |
||
| + | <gallery> |
||
| + | King Buxton.jpg|King Buxton in the Gauntlet |
||
| ⚫ | |||
KingB3Insides.jpg|The insides of King B3 |
KingB3Insides.jpg|The insides of King B3 |
||
kingb3 pinball.png|King B3 in the Pinball |
kingb3 pinball.png|King B3 in the Pinball |
||
| Line 501: | Line 526: | ||
King b remix.jpg|Official photo of King B Remix in Series 8 |
King b remix.jpg|Official photo of King B Remix in Series 8 |
||
KingBRemixInsides.jpg|King B Remix's internals |
KingBRemixInsides.jpg|King B Remix's internals |
||
| + | King B Remix internals.jpg|The inside of King B Remix in its VT |
||
king b remix arena.png|King B Remix in the arena |
king b remix arena.png|King B Remix in the arena |
||
</gallery> |
</gallery> |
||
| ⚫ | {{Series Record EX|King Buxton|Did not enter|'''Semi-Finals, Arena as King Buxton'''|'''Heat Final as King Buxton'''|'''Heat, Round 2 as King B3'''|'''Heat, Round 2 as King B Powerworks'''|''Failed to qualify as King B Powerworks''|'''Heat, Round 2 as King B "Powerworks"'''|'''Round 2, Fourth Place as King B Remix'''|Did not enter|Did not enter|'''Entered as King B Powerworks'''}} |
||
==Outside Robot Wars== |
==Outside Robot Wars== |
||
| + | King B3 makes a cameo appearance in the ''[[Wikipedia:Spaced|Spaced]]'' Series 2 episode "Mettle". Alongside fellow ''Robot Wars'' competitors [[Cerberus]], Inverterbrat, [[Plunderbird|Plunderbird 4]] and [[Hard Cheese]], it is among the robots featured in the 'Robot Club' scenes.<ref name="Spaced">https://youtu.be/e22IPMKFfyM?t=193 'FIGHTING In Your Own Robot Wars | Spaced | All 4', ''Channel 4'' (YouTube), uploaded 9 April 2022]</ref> |
||
| − | <gallery type="slideshow"> |
||
| ⚫ | |||
Invertcerbekingbspaced.jpg|King B3 (foreground) in ''Spaced'' |
Invertcerbekingbspaced.jpg|King B3 (foreground) in ''Spaced'' |
||
| − | KingBSpaced.jpg|King B3 (foreground) filming for Spaced |
+ | KingBSpaced.jpg|King B3 (foreground) during filming for ''Spaced'' |
WBC vs KB3.jpg|King B3 fighting Wheely Big Cheese at an event in 2001 |
WBC vs KB3.jpg|King B3 fighting Wheely Big Cheese at an event in 2001 |
||
KingBShovel.jpg|King B Powerworks with its rear-mounted scoop at Oundle Mill 2001 |
KingBShovel.jpg|King B Powerworks with its rear-mounted scoop at Oundle Mill 2001 |
||
| Line 516: | Line 542: | ||
SidewinderEstron_2003.png|Sidewinder when it appeared on an Irish TV show in 2003 with other Mechanoid competitors |
SidewinderEstron_2003.png|Sidewinder when it appeared on an Irish TV show in 2003 with other Mechanoid competitors |
||
</gallery> |
</gallery> |
||
| + | At a live event at Oundle Mill in 2001, King B Powerworks was armed with a ramming scoop at the rear. The scoop was largely used for protection while the robot was competing in the open car park fights so any spectators nearby would not be injured. Simon Harrison stored the scoop in an outbuilding not long after and it was rediscovered in October 2021 under a pile of rubble after the building's roof had collapsed. Simon also mentioned that the scoop was only made from mild steel and would not have been beneficial for use on ''Robot Wars''.<ref>https://www.facebook.com/KingBuxtonCombatRobot/posts/369101215005652</ref> |
||
| − | At a Live Event at Oundle Mill in 2001, King B Powerworks was armed with a ramming scoop at the rear. |
||
| + | |||
| + | {{quote|It was built primarily so I could fit it to the back of King B (Powerworks) for safely running around the car park of the Oundle Mill robot meets (early 2000’s) and so be able to have a bit of a car park bashup without having the fear of spiking someone’s leg ! It was just a rubbish mild steel job knocked up quick- and why it would have been useless to take to series 7 or whatever - but it did a good job at the 2001 Oundle Mill meet …|Simon Harrison on Facebook explaining the use of the scoop in October 2021}} |
||
In 2003, King B Powerworks made an appearance at the ''World of Robots'' event in Dublin but guised as '''Sidewinder''' which was the teams entry into the other BBC show, ''Mechanoids'' where it was seen doing demonstrations in an area alongside [[Anarchy|Scuttle]], Skeletron and a life size RC Dalek. During the trip it also appeared on an Irish show alongside fellow Mechanoids robot [[Panic Attack|Estron]]. |
In 2003, King B Powerworks made an appearance at the ''World of Robots'' event in Dublin but guised as '''Sidewinder''' which was the teams entry into the other BBC show, ''Mechanoids'' where it was seen doing demonstrations in an area alongside [[Anarchy|Scuttle]], Skeletron and a life size RC Dalek. During the trip it also appeared on an Irish show alongside fellow Mechanoids robot [[Panic Attack|Estron]]. |
||
| Line 522: | Line 550: | ||
King B made an appearance at the London MCM Expo in 2007 where it fought [[Merlin]]. It also fought [[Tiberius]] and lost, requiring Sam Smith to jump on King B in order to separate King B Tiberius' crusher when it pierced the polycarbonate and a motor, locking both robots together. |
King B made an appearance at the London MCM Expo in 2007 where it fought [[Merlin]]. It also fought [[Tiberius]] and lost, requiring Sam Smith to jump on King B in order to separate King B Tiberius' crusher when it pierced the polycarbonate and a motor, locking both robots together. |
||
| − | It returned in January 2015 after a seven |
+ | It returned in January 2015 after a seven-year hiatus at the [[Team Nemesis#Outside Robot Wars|''Mechatrons'']] combat event in Dublin, where it fought [[Beast|Beast 2]] and [[Ripper]]. |
{{quote|It was great to be back - thanks so much to the whole Robots Live crew for putting on such a great show, felt good to be driving King B for an enthusiastic UK audience again!|Simon Harrison on Facebook}} |
{{quote|It was great to be back - thanks so much to the whole Robots Live crew for putting on such a great show, felt good to be driving King B for an enthusiastic UK audience again!|Simon Harrison on Facebook}} |
||
King B participated at the same event in 2016, where it lost to Beast again, but performed well against [[Meggamouse]]. |
King B participated at the same event in 2016, where it lost to Beast again, but performed well against [[Meggamouse]]. |
||
| − | It was King B Remix that competed at Mechatrons Dublin 2017, having been reconstructed for the event. It fought [[Team Roaming Robots|Mangler]]<ref>https://www.youtube.com/watch?v=dBPcNB6-5EI</ref>, winning the battle on a Judges' decision, and then defeated Dozer by flipping it over<ref>https://www.facebook.com/martin.slattery.12/posts/1413961041947891</ref>. It then qualified for the semi-finals when the battery connection fell out of [[Beast|Harpy]], allowing King B Remix to place third overall, after consecutive losses to [[Iron-Awe|Iron-Awe 7]] and Ripper. |
+ | It was King B Remix that competed at ''Mechatrons'' Dublin 2017, having been reconstructed for the event. It fought [[Team Roaming Robots|Mangler]]<ref>https://www.youtube.com/watch?v=dBPcNB6-5EI</ref>, winning the battle on a Judges' decision, and then defeated Dozer by flipping it over<ref>https://www.facebook.com/martin.slattery.12/posts/1413961041947891</ref>. It then qualified for the semi-finals when the battery connection fell out of [[Beast|Harpy]], allowing King B Remix to place third overall, after consecutive losses to [[Iron-Awe|Iron-Awe 7]] and Ripper. |
[[File:King_Buxton_20.jpg|thumb|left|King Buxton 20, the latest version of the robot]] |
[[File:King_Buxton_20.jpg|thumb|left|King Buxton 20, the latest version of the robot]] |
||
| Line 534: | Line 562: | ||
{{quote|King Buxton 20 was designed before Robot Wars came back ( and befor anyone was expecting it to come back) as suddenly I had the feeing the time was right to build a King B that fixed all of the Powerworks problems. Unfortunately it could not be ready for S8 and as it turned out, not ready for S9 or S10 either Quite literally I had to re-remember how to build robots from scratch- and it took me 4x the time I ever imagined !|Simon Harrison in 2018<ref>Correspondence with Wiki user Drop Zone mk2</ref>}} |
{{quote|King Buxton 20 was designed before Robot Wars came back ( and befor anyone was expecting it to come back) as suddenly I had the feeing the time was right to build a King B that fixed all of the Powerworks problems. Unfortunately it could not be ready for S8 and as it turned out, not ready for S9 or S10 either Quite literally I had to re-remember how to build robots from scratch- and it took me 4x the time I ever imagined !|Simon Harrison in 2018<ref>Correspondence with Wiki user Drop Zone mk2</ref>}} |
||
[[File:King_Buxton_20_no_armour.jpg|thumb|King Buxton 20 without armour]] |
[[File:King_Buxton_20_no_armour.jpg|thumb|King Buxton 20 without armour]] |
||
| − | King Buxton 20's actual debut was at the Dublin-based event |
+ | King Buxton 20's actual debut was at the Dublin-based ''Mechatrons - Robots of Destruction'' event in January 2018. In its first fight, King Buxton 20 fought '''Dozer''', but faced difficulties with turning left due to motor sensor timing issues, and ultimately lost the battle. King Buxton 20 then won its second battle against [[Rusty]], as the latter had not enabled its gas supply. King Buxton 20 also immobilised '''Shelala''' by attacking its exposed wheels. For its third Mechatrons in a row, King Buxton 20 fought Team BEAST, and their robot [[Beast|Harpy]]. King Buxton 20 was initially thrown into the air repeatedly, but was able to hook its forks into the framework of Harpy to use its new brushless drive to ram it around the arena, causing it to lose mobility, and King Buxton 20 won the resulting Judges' decision. King Buxton 20 was finally eliminated by Iron-Awe 7, which was being driven by [[Diotoir|Peter Redmond]]. Regardless, King Buxton 20 also fought in a whiteboard match against [[Coyote]], and won by stranding it on the wall, then eventually immobilised it altogether. It defeated Harpy for a second time in another whiteboard match, rupturing its gas supply before flipping it over. |
[[File:DSC07630.JPG|left|thumb|159x159px|King Buxton 20 before its fight against Touro Maximus]] |
[[File:DSC07630.JPG|left|thumb|159x159px|King Buxton 20 before its fight against Touro Maximus]] |
||
[[File:Touro Maximus vs King Buxton 20.jpg|thumb|King Buxton 20 is immobilised by Touro Maximus]] |
[[File:Touro Maximus vs King Buxton 20.jpg|thumb|King Buxton 20 is immobilised by Touro Maximus]] |
||
| − | King Buxton 20 competed in the heavyweight division at ''RoboGames'' in 2018, and was the first confirmed competitor for that event<ref>https://www.facebook.com/KingBuxtonCombatRobot/posts/531063793894555I</ref>. It received a bye in the first round, and fought [http://robogames.wikia.com/wiki/Touro_Maximus Touro Maximus] in the second round. It initially started with an advantage against the experienced Brazilian machine, with Touro Maximus only operating on one wheel. However, King Buxton 20 drove into its opponent's drum, |
+ | King Buxton 20 competed in the heavyweight division at ''RoboGames'' in 2018, and was the first confirmed competitor for that event<ref>https://www.facebook.com/KingBuxtonCombatRobot/posts/531063793894555I</ref>. It received a bye in the first round, and fought [http://robogames.wikia.com/wiki/Touro_Maximus Touro Maximus] in the second round. It initially started with an advantage against the experienced Brazilian machine, with Touro Maximus only operating on one wheel. However, King Buxton 20 drove into its opponent's drum, which damaged one of its wheels and later both of its lifting forks. Eventually, Touro Maximus became mobile again and removed the front wheel of King Buxton 20, before immobilising the machine fully when both of King Buxton 20's rear drive chains had failed. This put King Buxton 20 into the losers' bracket, where it faced [http://robogames.wikia.com/wiki/Megalodon Megalodon]. However, the robot itself had not been fully repaired, entering the arena without one of its wheels as a result of the chassis damage inflicted by Touro Maximus. King Buxton 20 was quickly immobilised upon slamming into Megalodon, having again suffered issues with its drive chains as well as damage to the drive system.<ref>https://www.facebook.com/TeamStormUK/posts/1725389570882489</ref><ref>https://www.facebook.com/299400573727546/photos/a.312155239118746/613851502282450</ref> |
[[File:Robo Doc 2018.jpg|thumb|left|The Series 3 King Buxton in 2018, with [[Robo Doc]]]] |
[[File:Robo Doc 2018.jpg|thumb|left|The Series 3 King Buxton in 2018, with [[Robo Doc]]]] |
||
[[File:King Buxton Beetleweight.jpg|thumb|King BtL in August 2019]] |
[[File:King Buxton Beetleweight.jpg|thumb|King BtL in August 2019]] |
||
| − | In September 2018, Simon Harrison organised the first '' |
+ | In September 2018, Simon Harrison organised the first ''RoboNerd'' meetup in Wolverhampton, held in conjunction with Bristol Bot Builders and the Kinematics Events Team.<ref>https://www.facebook.com/KingBuxtonCombatRobot/posts/702147403452859</ref> Two versions of King Buxton - the Series 2-3 version and King B Remix - were among the former ''Robot Wars'' competitors attending the event. This event also prompted Simon Harrison to plan a beetleweight robot named '''King BtL''' in order to challenge Mike Franklin and his then-upcoming beetleweight '''10.1'''. A battle between the two would go ahead at the 2019 ''RoboNerd'' event. King BtL was completed in August 2019, based most prominently on King Buxton 20, although it lost the head-to-head battle against 10.1 after quickly losing drive on one side. King BtL was present at the event alongside the Series 3 version of King Buxton, King B Remix and King Buxton 20, with ''RoboNerd'' itself running successfully. |
| + | |||
| + | The success of ''RoboNerd'' lead Simon Harrison to run the event again in 2020 in an online format, and in 2021, 2022 and 2023 as a traditional live gathering. The 2023 edition saw King Buxton 20 (labelled simply as '''King B''') and King B Powerworks displayed together, and more informal grudge matches taking place between King BtL and 10.1. |
||
| + | |||
| + | King Buxton 20 returned to combat at the 2021 ''Robots Live!'' Crawley event. For this event, it received an additional set of interchangeable fork spikes designed to pierce titanium armour.<ref>https://www.facebook.com/KingBuxtonCombatRobot/posts/359971982585242</ref> Despite encountering issues with a disintegrating drive motor,<ref>https://www.facebook.com/KingBuxtonCombatRobot/posts/359913965924377</ref> and incurring an opening loss in the main competition to [[Thor]], King Buxton 20 picked up at least one melee win, during which it flipped Behemoth over with its forks and pitted it with a separate lift and charge attack. Upon reversing away, it survived a charge from Team Shock's [[Team Shock#Outside Robot Wars|Tectonic]] which also fell into the pit, handing King Buxton 20 victory.<ref>https://www.facebook.com/KingBuxtonCombatRobot/videos/2674741299501738/</ref> |
||
| + | |||
| + | Ahead of the 2022 ''RoboRiots'' event, it was announced by Team B that both King Buxton 20 and King B Remix would be competing, marking the ex-Powerworks build's final appearance at a combat event before being permanently retired.<ref>https://www.facebook.com/KingBuxtonCombatRobot/posts/pfbid02ooSfEd55RAoqbywJeyvvhsArzkKSR9wZiCLaV5mbqZ4DDnBP5i4wCxK3haErJrmUl</ref> Both versions would perform well in competition, finishing third and second respectively to [[Diotoir#Outside Robot Wars|Diot-Awe]].<ref>https://www.facebook.com/KingBuxtonCombatRobot/posts/pfbid0yb1cKHXUnNjQ3NAwS9prMpoEPbxubiVpeSLBXiB1YGYso542sc6QFBD6XK3Cxtxdl</ref> This exemplary run was followed by a debut ''Extreme Robots'' appearance on the Maidstone leg, where King Buxton 20 won four of its five battles.<ref>https://www.facebook.com/KingBuxtonCombatRobot/posts/pfbid02azc6QV5NxSiFH6UwooJBoVhHpezWYikbRSDdaMmCBediGGDvW1sFtPFAhka4NEPzl</ref> |
||
| + | [[File:DSC09764.JPG|thumb|King B 20 in the Extreme Robots Cheltenham event in 2023]] |
||
| + | King Buxton 20 would return to ''RoboRiots'' for the 2023 edition, running over the weekend of 7-8 October. Here, it twice faced [[Team Immersion#Team Immersion heavyweights|Immersion]], the second match-up occurring in the quarter-finals of the main Irish heavyweight championship. Though both battles ran for the full three minutes, King Buxton 20 was eliminated in the latter, with Immersion going on to become the 2023 Irish champion.<ref>[https://www.facebook.com/KingBuxtonCombatRobot/videos/1095526034946726/ Facebook video of King Buxton vs Immersion, ''RoboRiots'' 2023, King B (recorded by Isaac Sharp)]</ref><ref>[https://www.facebook.com/watch/?v=282886331232296 Facebook video of King Buxton vs Immersion, ''RoboRiots'' 2023 quarter-final, King B]</ref> King Buxton 20 would also feature in the Cheltenham leg of the 2023 ''Extreme Robots'' tour (11-12 November), with Simon Harrison 'testing the waters' for more live event shows.<ref>Correspondence between [[User:Diotoir the son of nemesis]] and Simon Harrison, 12 November 2023</ref> On the Saturday, it initially fought [[Team Shock#Outside Robot Wars|Poseidon]], but suffered control issues and ultimately lost on a judges' decision. This was followed by two head-to-heads against Ripper 6; while King Buxton 20 again lasted the full three minutes in both, it would also lose each on a judges' decision.<ref name="XRCheltenham23-1">[https://www.youtube.com/watch?v=TJKUySzxQKQ 'Extreme Robots 2023 Cheltenham Show 1 LIVESTREAM', ''Extreme Robots'' (YouTube), streamed 11 November 2023]</ref><ref name="XRCheltenham23-2">[https://www.youtube.com/watch?v=i6uhQQNxdWk 'Extreme Robots 2023 Cheltenham Show 2 LIVESTREAM', ''Extreme Robots'' (YouTube), streamed 11 November 2023]</ref><ref name="XRCheltenham23-3">[https://www.youtube.com/watch?v=_Hivkc48fDQ 'Extreme Robots 2023 Cheltenham Show 3 LIVESTREAM', ''Extreme Robots'' (YouTube), streamed 12 November 2023]</ref> |
||
| + | |||
| + | ===Other Robots=== |
||
| + | Beyond the live event circuit, Simon Harrison also collaborated with [[Hobgoblin|Harry Hills]] to design a new eggbeater heavyweight, '''Monster''', for an unspecified season of ''King of Bots'', though it would not be selected to compete. Monster would ultimately not materialise beyond CAD drawings prepared by Hills from a concept devised by Harrison.<ref>https://www.facebook.com/permalink.php?story_fbid=1253474138320180&id=299400573727546</ref> In 2021, both would unite once again to form '''Team Sabotage''' along with [[Deadlock|Mark Mellors]] and [[Coyote|Jamie McHarg]],<ref>https://www.facebook.com/KingBuxtonCombatRobot/photos/1392138704453722</ref> who applied for that year's season of ''BattleBots'' with '''Hoodlum'''. Hoodlum was planned to be a four-wheel drive heavyweight armed with an undercutter; as a tribute to [[Cold Fusion Team#Alan Gribble|Alan Gribble]], one render depicted it wielding a four-toothed blade reminiscent of that used by [[Pussycat]] between Series 4 and Series 7. Despite Harrison's experience, Hoodlum would not be selected for ''BattleBots'' that season, a matter confirmed by the King B Facebook page in May along with its name and planned design.<ref>https://www.facebook.com/permalink.php?story_fbid=1446794055654853&id=299400573727546</ref> |
||
==Trivia== |
==Trivia== |
||
| Line 547: | Line 586: | ||
*Team captain Simon Harrison became a crew member during the filming of [[Extreme Warriors: Season 2|''Extreme Warriors'' Season 2]].<ref>Correspondence with Wiki user Drop Zone mk2</ref> |
*Team captain Simon Harrison became a crew member during the filming of [[Extreme Warriors: Season 2|''Extreme Warriors'' Season 2]].<ref>Correspondence with Wiki user Drop Zone mk2</ref> |
||
*King Buxton was profiled in [[Robot Wars: The Ultimate Guide]]. |
*King Buxton was profiled in [[Robot Wars: The Ultimate Guide]]. |
||
| + | *King Buxton was incorrectly announced as being from Hornchurch in Essex, whereas Hornchurch has been part of the county of Greater London since the 1960s. |
||
*King Buxton was originally named after the main antagonist of the same name from the 1972 ''Magic Roundabout'' film ''[[wikipedia:Dougal and the Blue Cat|Dougal and the Blue Cat]]'', or ''Pollux et le Chat Bleu'' in its original French dub. |
*King Buxton was originally named after the main antagonist of the same name from the 1972 ''Magic Roundabout'' film ''[[wikipedia:Dougal and the Blue Cat|Dougal and the Blue Cat]]'', or ''Pollux et le Chat Bleu'' in its original French dub. |
||
*Only a single trophy was produced for the winners of the Tag Team Terror in Series 4, so Simon Harrison admitted to taking the trophy for himself. Eventually a second trophy was built for [[Team 101]], although Simon Harrison claims it was smaller and inferior<ref>https://www.youtube.com/watch?v=cTbVsCnB5PQ</ref>. |
*Only a single trophy was produced for the winners of the Tag Team Terror in Series 4, so Simon Harrison admitted to taking the trophy for himself. Eventually a second trophy was built for [[Team 101]], although Simon Harrison claims it was smaller and inferior<ref>https://www.youtube.com/watch?v=cTbVsCnB5PQ</ref>. |
||
*During Series 2, King Buxton suffered from interference caused by the spark plugs in the motor powering Matilda's chainsaw, which meant that every time the chainsaw started, King Buxton jumped forward. |
*During Series 2, King Buxton suffered from interference caused by the spark plugs in the motor powering Matilda's chainsaw, which meant that every time the chainsaw started, King Buxton jumped forward. |
||
*Initially, the cost of the motors was sponsored by Dominion Computers. Team captain Simon Harrison claimed to have put up "99.9%" of the money it cost to build King B3. |
*Initially, the cost of the motors was sponsored by Dominion Computers. Team captain Simon Harrison claimed to have put up "99.9%" of the money it cost to build King B3. |
||
| − | *King Buxton was one of |
+ | *King Buxton was one of twenty-three robots to have [[:Category:Robots to complete the Gauntlet|completed]] [[The Gauntlet]]. Similar to [[Killertron]], it failed to complete it in the heats, but succeeded in the Series Semi-Finals. |
*Within two series of ''Robot Wars'', King Buxton fought Dantomkia in three different first-round melees. |
*Within two series of ''Robot Wars'', King Buxton fought Dantomkia in three different first-round melees. |
||
| − | *King B3 is one of only seven robots to break |
+ | *King B3 is one of only seven robots to break two hundred points in a Pinball tournament. The others to have achieved this are [[Gemini]], [[Killerhurtz]], [[Spawn of Scutter]], [[Panic Attack]], Roadblock and [[Razer]]. |
| − | *King Buxton was one of five seeds for the Fourth Wars that reached the heat final of the Third Wars but fell in the second round of the heat in |
+ | *King Buxton was one of five seeds for the Fourth Wars that reached the heat final of the Third Wars but fell in the second round of the heat in that series. It shares this statistic with [[Dreadnaut]], [[Aggrobot]], [[Berserk 2]] and the [[Dartford Girls Grammar]]. |
| − | *King B Powerworks was one of only two previous Semi-Finalists that was not seeded for the Seventh Wars, the other being [[Black and Blue]], thus making it the only ''robot'', as Black and Blue only reached the Series Semi-Finals in the form of [[ |
+ | *King B Powerworks was one of only two previous Semi-Finalists that was not seeded for the Seventh Wars, the other being [[Black and Blue]], thus making it the only ''robot'', as Black and Blue only reached the Series Semi-Finals in the form of [[MouseTrap]]. |
*King B3 had a brief cameo on the sitcom ''[http://en.wikipedia.org/wiki/Spaced Spaced]'' in the episode "Mettle." |
*King B3 had a brief cameo on the sitcom ''[http://en.wikipedia.org/wiki/Spaced Spaced]'' in the episode "Mettle." |
||
*King B Powerworks was the only robot in its Extreme 1 Tag Team Terror battle to be a seeded robot but not lose in the first round of a UK Championship. |
*King B Powerworks was the only robot in its Extreme 1 Tag Team Terror battle to be a seeded robot but not lose in the first round of a UK Championship. |
||
| + | *King B Powerworks made a cameo appearance in the [[Extreme Warriors: Season 1/Robot Rebellion]]. |
||
*King B Remix was the first robot to fly the flag of two different countries, in its case the United Kingdom's Union Flag, and Japan's national flag, Nisshōki. |
*King B Remix was the first robot to fly the flag of two different countries, in its case the United Kingdom's Union Flag, and Japan's national flag, Nisshōki. |
||
*In an unused take when King B Remix entered the arena in 2016, the announcer erroneously pronounced the robot's name as "King Bremmix". |
*In an unused take when King B Remix entered the arena in 2016, the announcer erroneously pronounced the robot's name as "King Bremmix". |
||
| Line 565: | Line 606: | ||
*The battles between King Buxton and Robo Doc/101 marked the first instance of two teams reaching a semi-final by defeating the other. This pattern would be repeated by [[Team Scutterbots]] and [[Team Knightmare]] in Series 4 and 7, and [[Pulsar]] and [[Ironside3]] in Series 8 and 9. |
*The battles between King Buxton and Robo Doc/101 marked the first instance of two teams reaching a semi-final by defeating the other. This pattern would be repeated by [[Team Scutterbots]] and [[Team Knightmare]] in Series 4 and 7, and [[Pulsar]] and [[Ironside3]] in Series 8 and 9. |
||
*King Buxton was the only Series 2 semi-finalist to be [[Invertible Robots|invertible]]. |
*King Buxton was the only Series 2 semi-finalist to be [[Invertible Robots|invertible]]. |
||
| − | *King Buxton is one of four robots to have held a positive win-loss ratio in the original run of ''Robot Wars'', before losing this acclaim in the reboot, alongside |
+ | *King Buxton is one of four robots to have held a positive win-loss ratio in the original run of ''Robot Wars'', before losing this acclaim in the reboot, alongside Diotoir, [[Supernova]] and [[Tough as Nails]]. |
**Of these four machines, King Buxton is the only robot to now have a negative win/loss ratio, rather than an equal one. |
**Of these four machines, King Buxton is the only robot to now have a negative win/loss ratio, rather than an equal one. |
||
**However, out of every robot with a negative win/loss ratio, King Buxton has the most wins. |
**However, out of every robot with a negative win/loss ratio, King Buxton has the most wins. |
||
*Simon Harrison's favourite fight on the show was King Buxton's Series 3 Heat Final against 101, despite King Buxton losing. |
*Simon Harrison's favourite fight on the show was King Buxton's Series 3 Heat Final against 101, despite King Buxton losing. |
||
{{quote|Nothing comes close|Simon Harrison in 2018<ref>Correspondence with Wiki user Drop Zone mk2</ref>}} |
{{quote|Nothing comes close|Simon Harrison in 2018<ref>Correspondence with Wiki user Drop Zone mk2</ref>}} |
||
| + | *King B Powerworks/Remix is one of four machines [[Thrown Out of the Arena|thrown out of the arena]] by both a competitor and a house robot (Dantomkia and Matilda respectively). It shares this with [[Stinger]], [[Vader]] and [[Napalm]]. |
||
| + | **King B was the only machine in this quartet to have its second OOTA scored against it in the reboot. |
||
| + | **King B was also the only one of the four to be thrown out by the competitor robot first. |
||
| + | *King Buxton is one of three robots to be thrown out of the arena in both the original series and the reboot. The other two are [[Behemoth]] and [[Terror Turtle]]. |
||
| + | *King Buxton appeared in both episodes where [[Scorpion]] did not lose in the first round. |
||
| + | *According to Simon Harrison, King B3's official photograph for Series 4 was taken after it had been eliminated from the competition. Simon has also stated that burn marks are visible on King B3's forks and front cover in the photograph.<ref>Correspondence with [[User:RobotManiac|RobotManiac]], 22 February 2022</ref> |
||
| + | {{quote|I'm still disappointed I only got my photo done after I'd already been in the pit - and the pyrotechnics had burnt the polycarbonate on the lifting forks and front ocver on KB 3 - as it landed on it's back on top of the smoke bombs and sparklers.|Simon Harrison in 2022}} |
||
==References== |
==References== |
||
| + | [[File:Kingb s3 official.png|thumb|Official Series 3 photo]] |
||
<references/> |
<references/> |
||
| Line 589: | Line 638: | ||
{{End Box}} |
{{End Box}} |
||
| + | ==Navigation== |
||
{{UK Finalists}} |
{{UK Finalists}} |
||
{{Tag Team Terror Finalists}} |
{{Tag Team Terror Finalists}} |
||
| Line 605: | Line 655: | ||
[[Category:Robots Thrown out of the Arena]] |
[[Category:Robots Thrown out of the Arena]] |
||
[[Category:Robots from Hampshire]] |
[[Category:Robots from Hampshire]] |
||
| − | [[Category:Robots from |
+ | [[Category:Robots from Greater London]] |
[[Category:Robots with Lifters]] |
[[Category:Robots with Lifters]] |
||
[[Category:Robots with alternate versions]] |
[[Category:Robots with alternate versions]] |
||
| Line 626: | Line 676: | ||
[[Category:Robots which debuted in Series 2]] |
[[Category:Robots which debuted in Series 2]] |
||
[[Category:Robots which are still competing today]] |
[[Category:Robots which are still competing today]] |
||
| − | [[Category: |
+ | [[Category:Robots thrown out of the arena more than once]] |
| − | [[Category: |
+ | [[Category:Side Competition Winners]] |
| − | [[Category:Robots with cameo appearances in Series 10]] |
||
| − | [[Category:Robots with cameo appearances in Extreme Warriors Season 1]] |
||
Latest revision as of 20:58, 9 February 2024
- "Good power and speed, that's what it's all about, this is an old metro sort of robot, you just get out there, and hit 'em hard"
- — Simon Harrison
King Buxton (also shortened to King B) was a heavyweight competitor that appeared in the British TV show Robot Wars. A long-time veteran of the show, King Buxton would become the fifth-longest appearing competitor in the show's history, competing in Series 2 through 5, additional appearances in Series 7 and 8, and an appearance in the first series of Robot Wars Extreme.
King Buxton enjoyed a reasonable degree of success, amassing eleven combat victories across its career. Most of this success came in its first three years, where it reached top eight of Series 2, the heat final of Series 3 and won the Tag Team Terror of Series 4 alongside its teammate and rival 101. King Buxton began to wane in performance after Series 4 due to superior armed opponents and reliabilty issues.
King Buxton is most well-known for its friendly rivalry with Team 101, with whom it fought against and alongside a number of times throughout the show.
Versions of King Buxton[]
- "The movable titanium spikes are menacing. Low, fast and highly manoeuvrable..."
- — Jonathan Pearce describes King Buxton in Series 2
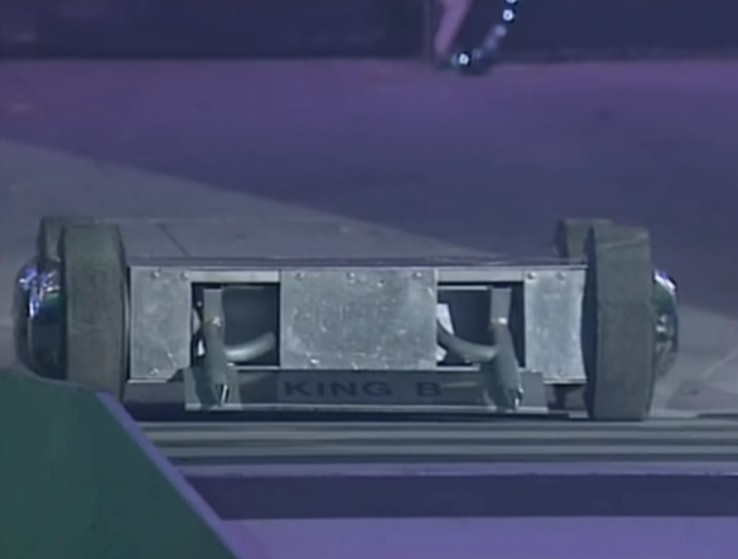
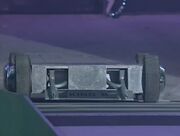
The "King B" name in Series 2
In all of its iterations, King Buxton was a flat box-shaped invertible machine with four-wheel drive and armed with lifting forks, sometimes also featuring a cutting disc at the rear. In its subsequent interactions, King Buxton was known by derivatives King B3 (King Buxton 3), King B Powerworks (in reference to its 36 volt motors) and King B Remix.
These derivatives lead to the robot being frequently referred to simply as King B, which is also the name of the team's Facebook page, and can be seen on the front of even the earliest version of King Buxton, in its Series 2 Trial.
King Buxton[]
- "King Buxton is quite small compared with most of the other RobotWars contenders. The case is only 26 inches front to back, but it still weighs just under the 79.4KB weight limit."
- — King Buxton pages of Phil Brett's website

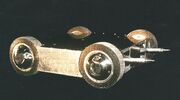
King Buxton's official photo in Series 2
The first iteration of King Buxton was armoured in 3mm aluminium, equipped with titanium lifting spikes and two static spikes on the back. The spikes were made from bike handlebars with titanium sharpened points on the ends. It was powered by nine 6 volt cell batteries with 3 in parallel and 3 in series to give 18 volts. The team had 2 sets, swapping them after each round.
- "It turned out that one set was better than the other so we saved them for big battles ( like with RoboDoc )."
- — King Buxton pages of Phil Brett's website[1]

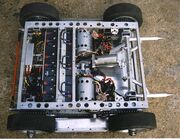
King Buxton's internals

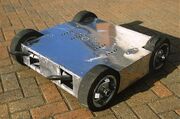
King Buxton after filming Series 2
King Buxton's 750W, 24 volt motors and four-wheel drive allowed it to reach a top speed of 18mph. This setup also provided it with significant pushing power, enabling the whole robot to push through bricks, House Robots and even other formidable pushers like All Torque, Roadblock and 101. The radio was kept at the back of the robot to keep it as far from the motors as possible, thus minimising the risk of interference[2].
- "This first machine was mechanically engineered equally between myself and Steve Monk with Phil Brett contributing to the concept and final assembly. All electronics were 100% engineered from scratch by myself. We used scrap and reclaimed steel for the build where we could as the budget was near zero."
- — Simon Harrison in 2018[3]
The original version of King Buxton was the most successful, reaching the series Semi-Finals before losing to the reigning champions Roadblock, in the Arena stage.

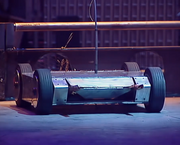
King Buxton in Series 3
King Buxton returned in Series 3 with several updates, especially to its electronics, which had caused problems in the last series by catching fire. The chassis was cut and re-worked to allow replaceable axles. It also featured a rotary cutter at the rear and the spikes were upgraded to serve as more effective lifters, capable of lifting 80kg. The robot could reach 14mph. This version took 8 months to build. It reached the Heat Final, but lost at that stage to its rival, 101.
- "That machine was built 90% myself and 10% Steve Monk."
- — Simon Harrison in 2018[4]
The aluminium King Buxton was prone to fire damage, visibly alight during Series 2. The team installed air-cooled motors by way of ducted flow fans for Series 3, but the robot was notably smoking and slowing down during the heat final clash with 101.
King B3[]
- "This was the first I built entirely on my own. The chassis was all new so as to accommodate a rear 40cc petrol engine to power a cutting disc The electronics was 100% re-designed to add current limiting to protect the motors from burning out. It was a much longer and slightly wider machine and handled well"
- — Simon Harrison in 2018[5]


King B3 in Series 4

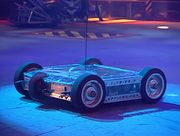
King B3 from behind
King B3, also styled as King Buxton III (King Buxton the Third), entered Series 4 as a new machine which retained the same design, but was now armoured in clear Perspex on the top. King B3's arsenal consisted of a simple electric lifting mechanism at the front, which had spikes on the ends, and a 9" cutting disc was added to the robot, powered by a petrol engine, with a top speed of 3,000rpm. It took 11 months to build.
- "It's quite a mean little thing, it certainly wrecked my garage!"
- — Simon Harrison on King B3's circular saw
Despite a new conductive cooling system to counteract the flame problems of the past, consisting of fan ducts to cool the motors, King B3 lost in the main competition by catching fire. However, it redeemed this by winning the first Tag Team Terror at the end of Series 4.
- "This machine Is the first that had any real money thrown at it - being financed from my credit card, even then the cost was nowhere near the price stated on the show as everything was cut, welded built at home without outside engineering being bought in"
- — Simon Harrison in 2018[6]
The robot cost around £1,500, lower than the £4,000 it was said to have cost on the show.
- "... it was stated as costing more like £4000 ( i can’t remember now) but that was probably picked up in an interview somewhere - possibly we seid it would cost that if you bought in the parts and electronics that were made ourselves from scratch."
- — Simon Harrison in 2018[7]
King B Powerworks[]
- "The name "Powerworks" comes from the fact that we're using the highest voltage that the rules will allow in our power system for the drive, we're also running the same system for our saw at the back, we actually run at 8000 rpm. We've had some reliability problems in the past, but when we're on a run, I think we're going to be doing quite well."
- — Simon Harrison's introduction in Extreme 1/Series 5
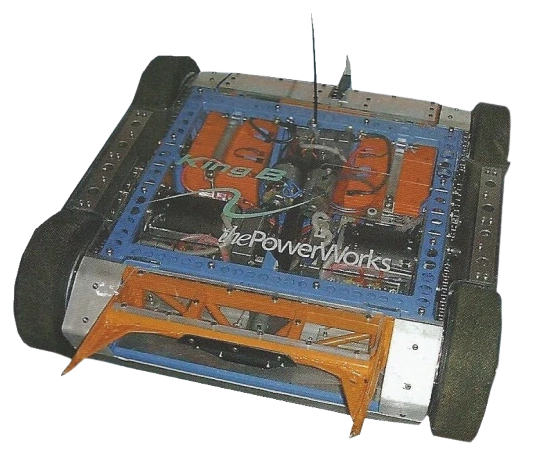
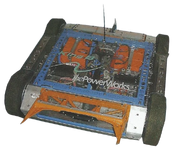
King B Powerworks' official photo for Extreme 1
With the weight limit increase, King Buxton became the 88kg King B Powerworks, named after its 36 volt motors; this was the highest voltage the rules would allow. It was later increased to 97kg for Series 7. The cutting disc could now spin at an upgraded 8,000rpm.
- "Alan Gribble kindly made this ‘Pussycat’ style rear disk after he caught us admiring his machine."
- — King B Facebook page

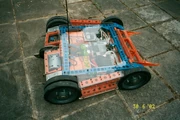
King B Powerworks in 2002
This version of King Buxton fought in Series 5, 7 and Extreme 1, but failed to replicate its past success against capable opponents such as Dominator 2, Dantomkia and The Steel Avenger.
- "The electronics design was new again As I planned to use LEM 130 motors which I had ordered and would have been a big power upgrade However! Lynch motors suddenly refused to supply the motors just a few weeks before auditions and I was forced to move everything around in the chassis to re-fit Bosch motors ( totally different shape) I never found out why I was denied those motors whereas Storm 2 later used them to devastating effect Because I moved the motors, I had trouble with the drive electronics which was now behind the lifter motors."
- — Simon Harrison in 2018[8]

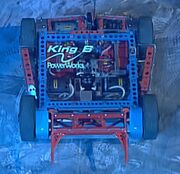
King B Powerworks in the arena in Series 7
King B Powerworks had a tendency to go berserk midway through battles; two of its losses in Extreme Series 1 were for this reason, although this problem was later resolved by Series 5. Notably, its Series 7 stat cards referred to the robot as King B "Powerworks", punctuation included.
The robot used a different chassis in both of its main series - the robot was box-shaped in Series 5, but used a new, angled design in Series 7.

The Series 5 version of King B Powerworks with its scoop
For its attempted qualification in Series 6, optional attachments were developed for King B Powerworks which could be used instead of the spinning disc, such as a curved rear scoop which would replace the spinning disc, and the convex rear bodywork which was later used on King B Remix, but these were not brought to Series 7.
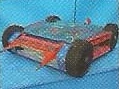
Official Series 7 photo
- "Powerworks took every minute of my life from the end of S4 to the beginning of S5 to build ( bad days) It was hard work and a lot of aggravation I remember. It never recovered to run really well for TV. It was my ‘unlucky’ chassis - even revived with updates as ‘Remix’ it had a lot of issues. I had stuck with it as I believed it had potential ( it won many fights after in Ireland after the first run of RW shut down) but it never really came right when it mattered"
- — Simon Harrison in 2018[9]
King B Remix[]
- "A previous Robot Wars competitor, under the name King Buxton, King B Remix is a Flipper and Ram-bot which has been rebuilt using “the best parts and philosophies from each of its previous evolutions,” with 30% of its current make-up dating back to 1998."
- — Robot Wars website
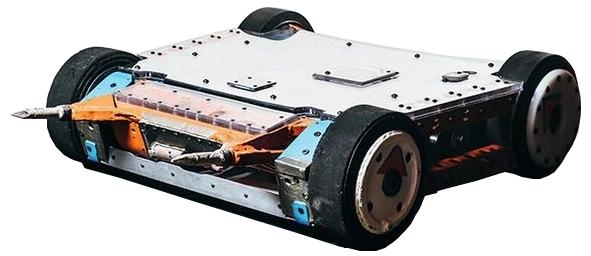
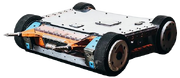
Official shot of King B Remix

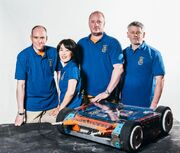
Team B in 2016
In 2016, the team created King B Remix, a robot similar in design to King B Powerworks, but with even greater internal strength, albeit with a rear bumper plate instead of the rear cutting disc. The armour was 16mm polycarbonate on top, with Maganese Steel on the front and rear and 16mm Ultra High Molecular Weight Polymer (UHMWPE) also on the rear[10]. The robot was powered by a 40 volt Lithium Iron Phosphate battery, and could reach speeds of 14mph. The steel lifting spikes were also able to rotate, each acting like a small drill. However, the robot's primary weakness came from its drive chains, which snapped in more than one battle, and continually led to King B Remix's loss of mobility.

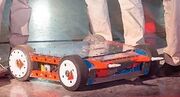
King B Remix enters the arena in Series 8

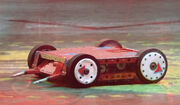
King B Remix sits in the arena during Series 8
- "Remix was built in 6 weeks from Powerworks which had been revived from rusty scrap in 2015 to run again in Ireland just for fun - so I was lucky to have something ready for Robot Wars’ revival."
- — Simon Harrison in 2018[11]
According to the Robot Wars website, the team thought of the robot as a living entity and spoke to it in Japanese through team member Natsuko, who acts as King B Remix's 'translator'.
Etymology[]
King Buxton was named after the character "Buxton" from the TV programme The Magic Roundabout. Harrison and Hornsby both found the series very creepy when they were kids, and had been discussing it just before the application process. When asked the name of his robot, Harrison blurted "King Buxton" with no prior discussion.
- "Grant (the trouble maker) phoned up the Beeb/Mentorn and declared that after seeing the first couple of episodes of that dodgy new series 'Robot Wars' that his mate / work colleague Simon had a Robot to enter for series 2. He put me on the phone and I stutteringly replied to their first question "well whats it called then?" I blurted out "King Buxton" all of a sudden (and have regretted it ever since!)"
- — King B Facebook page on the etymology of King Buxton[12]
The "Powerworks" in King B Powerworks (alternatively capitalised as PowerWorks) is derived from the robot's usage of the highest voltage in its drive power that the rules would allow, while "Remix" is a musical reference.
The Team[]
- "The morning after I saw the first episode of series 1, I went into work and talked to Grant about what I’d watched. Told him I saw this robot fighting show and I’d like to enter. He’d seen it too and he said I MUST apply, as he thought I’d do a great ‘bot as he knew about my interests snd hobbies in this area. In fact he called Mentorn right then and told them I had an entry.... so I entered ! When they asked the name of the robot I was entering - I suddenly blurted out ‘King Buxton’ as it was a character from a rate children’s film that Grant and I were chatting about the day before ( we were discussing how we had never met anyone else who knew about the film)"
- — Simon Harrison in 2018[13]


The team captain was Simon Harrison, the only team member present in all the team's appearances. Originally, he was joined by Phil Brett and Steve Monk, two close friends of his that had helped to build King Buxton.
- "...when the original King Buxton was built, I had no facilities to do any construction- so I called on my friend Steve Monk and asked if I could use his workshop (as seen where we are building on ‘Robot Wars Revealed’) He did a lot of the machining of parts so he became a major team member. Phil Brett was a close friend then, as we had been engineering apprentice together after leaving school. He helped out organising parts- so was also on the first team"
- — Simon Harrison in 2018[14]
Steve Monk was a car mechanic who had previously raced turbo saloon cars in a national competition league and also owned a workshop with a metal lathe machine. Steve provided the motors for King Buxton, which were custom wound by friends of his who made race car alternators. It was Steve who developed the practical solutions to build King Buxton with the low level technology the team had available at the time.[15]
Phil Brett was a long time friend of Simon, the two having previously worked as technical apprentices together at the Marconi company. Phil was knowledgeable in coding and cut a few panels for King Buxton. Despite not being mechanical, Phil still offered postivity for the team.[16]
Steve Monk left after Series 2, as he was self-employed and needed the time to make a living and the amount of time needed to build robots was too much for him.[17] However, he was still credited on the statistics board in Series 3. Similarly, Phil Brett would leave after Series 3 due to him living in central London and having to travel and work on King Buxton until late nights was also taking up too much time.[18] Despite Steve and Phil leaving the team in the early stages, Simon still remains friends with both of them to this day.[19]
In Series 4, Simon was joined by Grant Hornsby and Tony Sharp. Tony was another work colleague of Simon and he was offered a place on the team after Steve and Phil departed as Simon thought he'd enjoy the experience of being on the show. However, Simon would later leave the workplace he and Tony both worked at and Tony never reached out about being on the team again. Simon then lost contact with Tony in the following years.[20] Meanwhile, Grant Hornsby, another work colleague, was able to join the team after Steve and Phil left after being the member who encouraged Simon to enter Robot Wars. Grant had previously taken a step back from being part of the televised team as he felt that Simon would need more technical expertise to help on the robot. He remained a member until the team's final outing in Series 8.
- "Grant Hornsby has in reality been the longest serving team member, before anyone else. He does not have the engineering skills to build anything ( though he is an engineering buyer in his career - so does understand the technologies) Grant is immensely excited by Robot Wars and being part of the show - and that feeling of excitement always helps me get things done and keep the vision alive. ... Grant wasn’t in the TV team at first as I needed then to call on friends with engineering skills to get the project off the ground and teams were limited to 3 members - but later on Grant got his chance. "
- — Simon Harrison in 2018[21]
In Series 7, Grant's son, Ryan Hornsby, was present on the team for the All-Stars Championship only, but he was not credited on the statistics board or acknowledged by Jonathan Pearce. When the team returned in Series 8, Simon's wife Natsuko Hori and Martin Slattery were also team members. Martin had previously been another friend of Simon and Phil at the Marconi company. Though he did not have any building experience, Simon appreciated having Martin on the team in Series 8 for moral support, as sometimes filming sessions would get him down.[22]
- "Martin didn't do any building at all - but it didn't matter. You see, sometimes doing the filming got me down - i just needed moral support from long term friends. Every time I went to the filming, I couldn't help feel disappointed with the machine I brought. I always had ideas I couldn't build with my limited ability - I'd turn up and simply look at other machines I could have made myself and felt a bit sad sometimes. Having those team members as moral support was more important to me than sponsors with $$$ or teaming up with some big machine shop or whatever."
- — Simon Harrison in 2022
Qualification[]

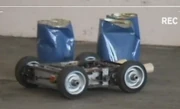
King Buxton attacks barrels during the auditions
King Buxton attended the Series 2 auditions on 19 July 1998, albeit in an unfinished state. Lacking armour plates or motors for the lifter, it nevertheless ran well in the obstacle course, pushing barrels aside and a metal ball into a goal during its practice run. Video diary footage of King Buxton's build and audition was televised in Robot Wars Revealed, Episode 9, which also showcased an early attempt at a removable link system. The partially-finished King Buxton would secure its place in the televised series following this early appearance.[23]
- "I don’t remember many bots running very well but luckily we ran ok- just asked to run around some obstacles and hit a ball into a goal ( which we did easily compared to many others) and were promised a place on the show. We then had a few weeks to make the bodywork and complete the lifter electronics - but still I remember that we were still assembling the Robot until about 3:30 AM on the day of filming"
- — Simon Harrison in 2018[24]
To qualify for Series 3, King Buxton had to do the obstacle course. It attended the audition without its bodywork again[25], and ran the course well enough to qualify, but one of the concrete blocks fell on the electronics, causing an electrical fire.
- "We ran the obstacle course and were then asked to try to knock down a pile of concrete blocks. We obliterated the blocks! ( big gasp from the small audience) But one of the heavy blocks got thrown up and came down hard in the electronics ( as the body was not fitted) and caused a large short circuit / electrical fire. We qualified but it gave me an extra 2 weeks of work to repair the fire damage and meant that it was again difficult to be ready in time for the filming."
- — Simon Harrison in 2018[26]
King B3 qualified automatically for Series 4 due to its status as the 17th seed. King B Powerworks did not go through the Series 5 qualifiers. As the team had attended filming for Extreme, they gained entry into The Fifth Wars, which was filmed around the same time, as the producers felt as though they were reliable competitors that were able to start up without any problems.[27]
- "I sneaked in to S5 as production always like to keep a pool of competitors that they can rely on to start up on the dot and don't argue or cause them stress"
- — Simon Harrison in 2022
King B Powerworks suffered an unexpected failure to qualify for Robot Wars: The Sixth Wars. Simon Harrison had made a build error in his hasty rebuild of King B Powerworks and the robot had spent a week packed into the boot of his car. King B Powerworks was originally due to fight Tip-Top, however the latter's petrol engine stalled before the fight, so King B was re-scheduled to fight Spirit of Scorpion instead. In this battle, King B Powerworks' drive failed nearly instantly and the robot could not move. King B Powerworks was not damaged but was not given a discretionary place either, presumably having failed to make an impact on the producers.
- "Buxton was rather ‘faded’ as a feature by then, so had no chance to expect a discretionary. That was fair - I didn’t argue. I understood"
- — Simon Harrison[28]
After failing to qualify for Series 6, the team decided not to enter Extreme 2.
- "I do remember talking to the show’s producer at the time (Bill Hobbins) on the phone about Extreme II - but he was looking for new stuff or new ideas and I had to admit that I had nothing to offer that was different to Extreme 1. I was upset that Extreme 1 was such a disaster for King B so didn’t feel good about Extreme II - i worried that Buxton would struggle again- so just didn’t push to do it."
- — Simon Harrison in 2018[29]

King B Powerworks in its Series 7 qualifier
King B Powerworks redeemed this in Series 7, facing M2, Pressure and Thunderpants in its qualifying battle[30]. It opened the battle by ramming into Pressure, and then slammed Thunderpants into the arena wall. Afterwards, it caused terminal damage to a wheel of Thunderpants, immobilising it with damage which would not be successfully repaired in time for Thunderpants' appearance in Heat E, leading to the disqualification of Thunderpants. It pushed Pressure back, and was lifted up in response, but managed to slam Pressure into the arena wall, although this allowed M2 to launch King B Powerworks into the air, and then flip it a further three times in sequence. King B Powerworks drove over the ramp shape of M2 to sneak behind it, but could not land any major attacks, and fled, only attacking M2 when it was distracted by Pressure.

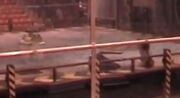
King B Powerworks is flipped over by M2
It was flipped a further two times, but managed to push M2 into the wall. Retreating to the centre of the arena, King B Powerworks pressed its spikes into M2, but was thrown over, and M2 followed this up with four more consecutive flips. Pressure finally returned to the battle and lifted King B Powerworks, but it was quickly flipped over by M2, and immobilised. King B Powerworks could only drive in circles, and was repeatedly flipped by M2 until it was stranded on the arena wall. Although it escaped, King B Powerworks could not leave the side of the arena, and the battle ended after three minutes had expired. Although M2 had commanded the match, King B Powerworks still qualified for the Seventh Wars.
King B Remix would later qualify for Series 8 through open applications, with the vast competitive experience of the robot providing a case for its entry, while the team chose not to enter Series 9 or 10.
Rivalry[]
- Mike Franklin: "We're the better side, we'll help them out, I'm sure we'll get them out of a lot of trouble."
- Simon Harrison: "Uh, I don't think so actually, I think we've got the faster robot here and you'll find we'll be running all over you."
- Mike Franklin: "I think this is a bit more manoeuvrable than yours, with a lot more battles, and we're better drivers."
- Grant Hornsby: "Well, we don't need fluffy bunnies on our side!"
- — Inter-team clashes prior to the Tag Team
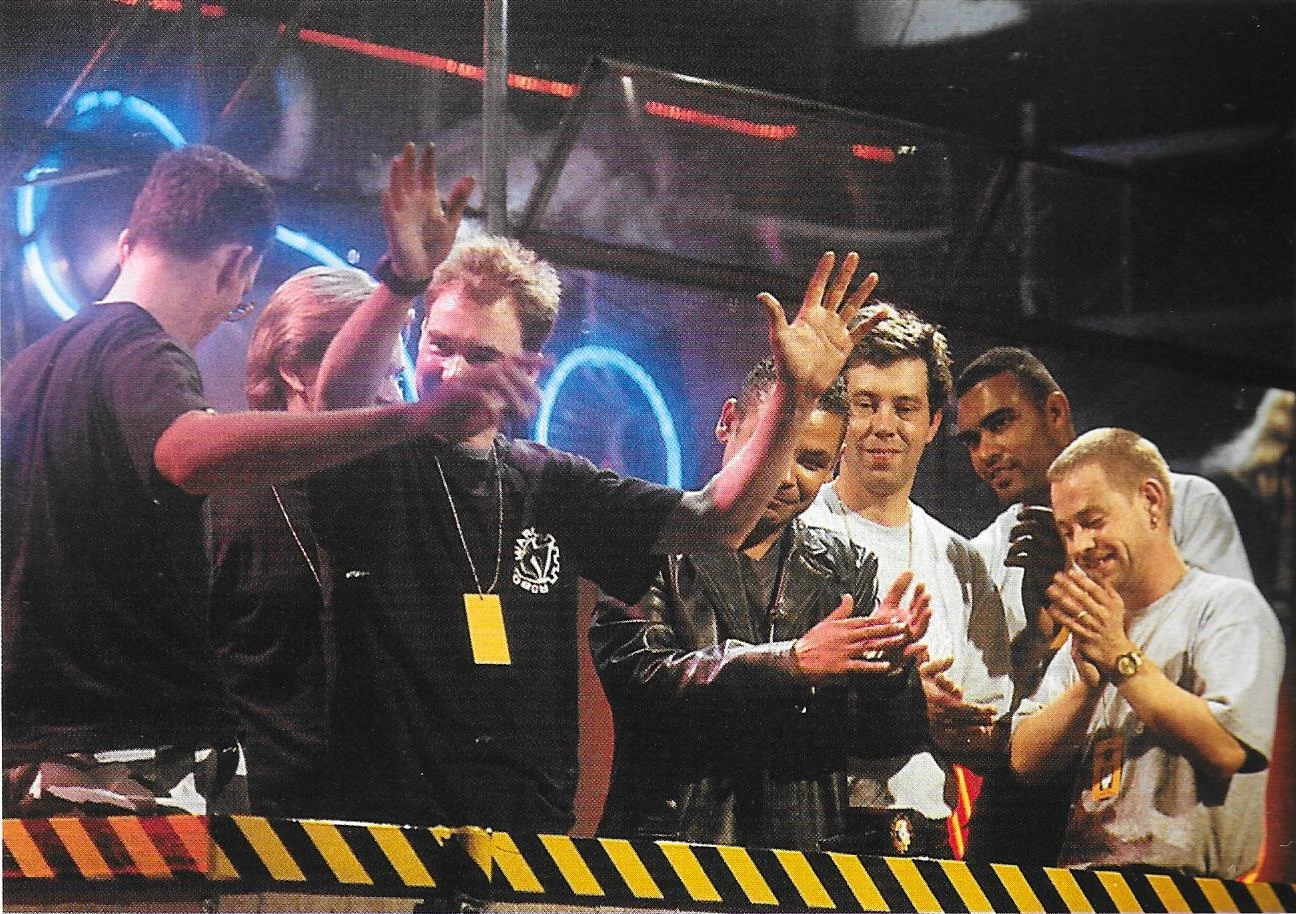
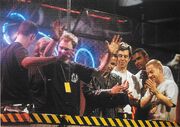
Team B come out victorious from the two's first battle
The King Buxton team had a long-standing rivalry with Team 101, which initially began after both teams fought each other in Series 2. Following King Buxton's victory against Robo Doc in that series, 101 avenged the grudge by defeating King Buxton when both teams met each other again in Series 3.
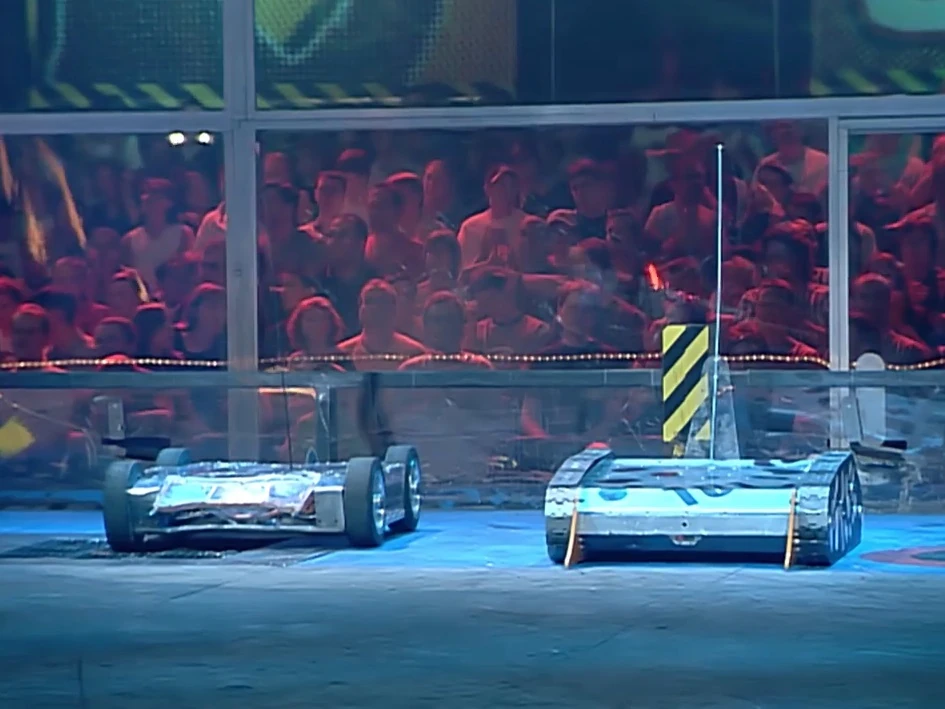

King B3 united with 101 in the Series 4 Tag Team Terror
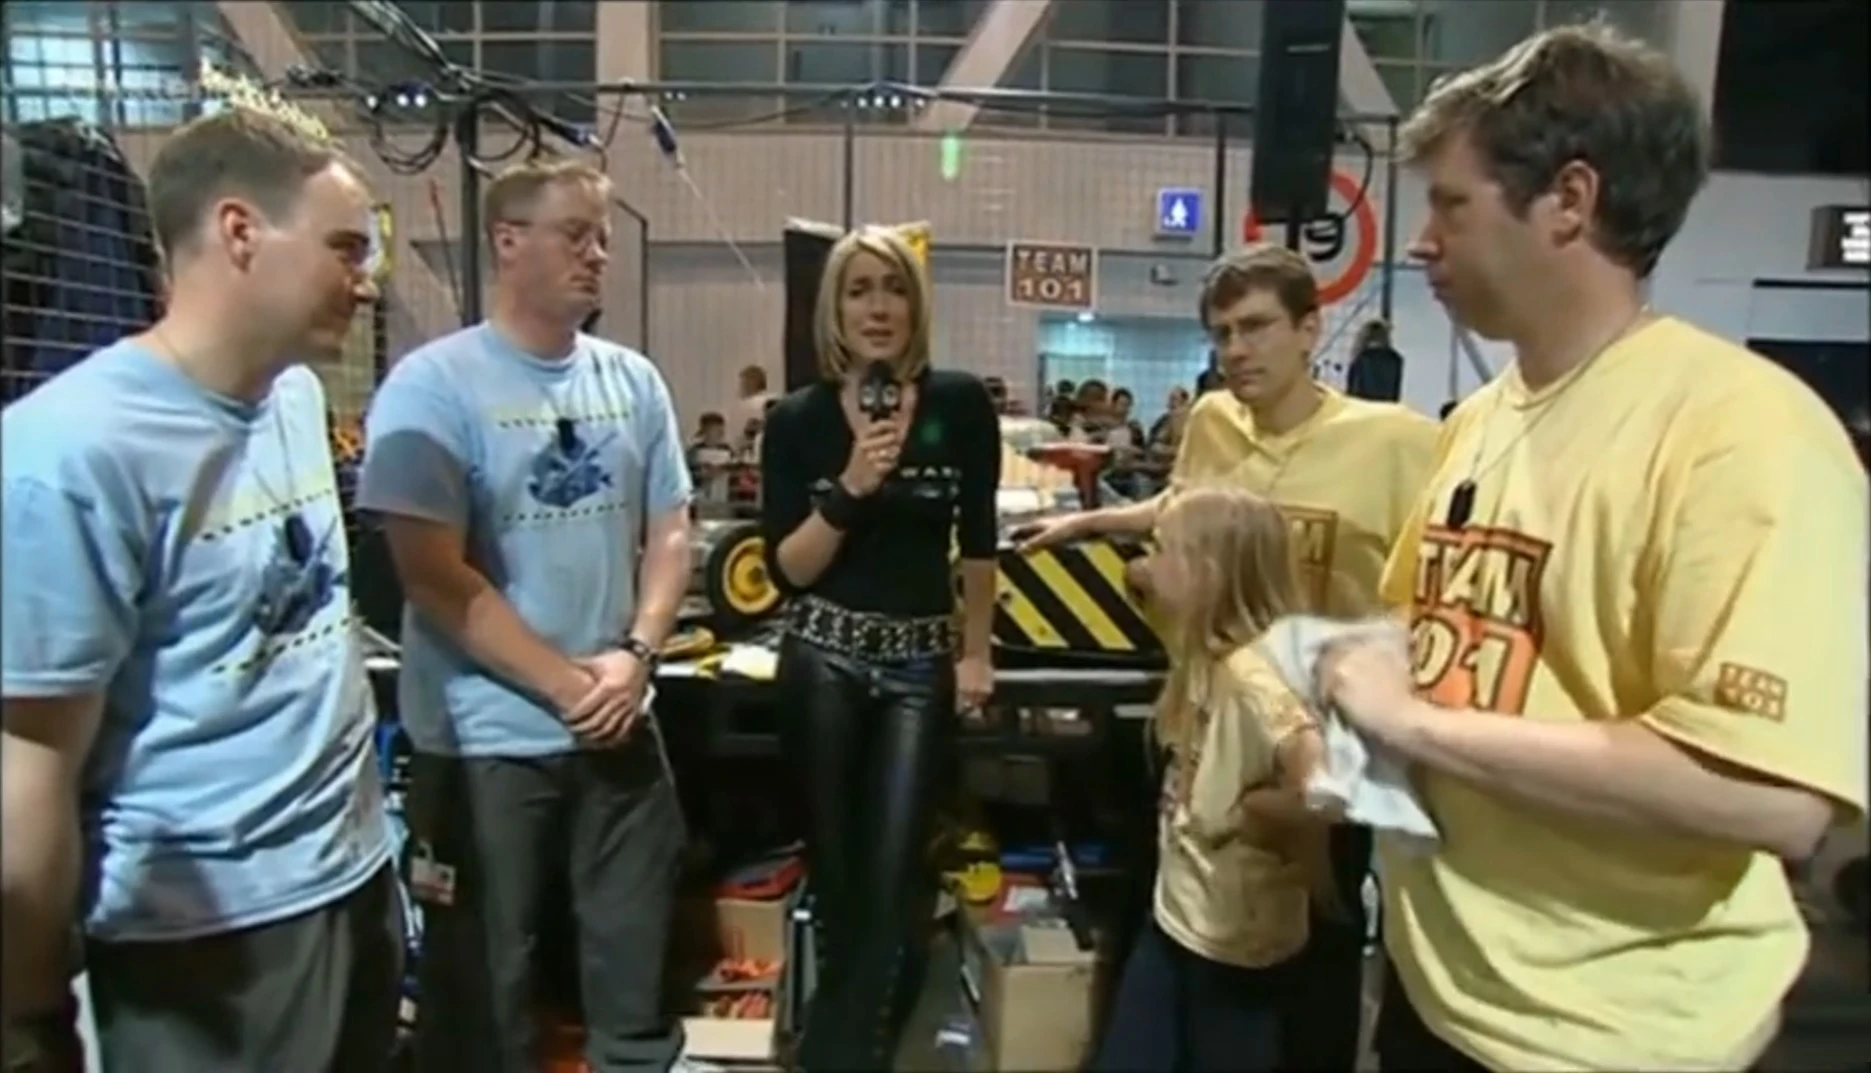
The King B and 101 teams before their Vengeance battle in Extreme 1
Both teams put their rivalry behind them when they were paired together for the Series 4 Tag Team Terror competition. King B3 and 101 won the tournament, but ironically the alliance was cut short when both robots fought each other in the final round in celebration of their victory. In Extreme Series 1, King B Powerworks and 101 re-entered the Tag Team Terror as reigning champions, but lost in the first round after King B Powerworks lost control and Diotoir and Mega Morg kept attacking 101 aggressively and continuously. Both teams blamed each other for their loss, and settled their newly-rekindled grudge in a Vengeance battle, which 101 won after King B Powerworks again malfunctioned and went 'berserk'.
King B Powerworks submitted and acknowledged the superiority of 101, with the teams promising to continue the Tag Team partnership. However, neither King B Powerworks, nor 101's successor, Anarchy, took part in the second series of Extreme, so they did not have the opportunity to do so.
Robot History[]
Series 2[]
- "I don't believe they made this robot, because I've only ever seen them polish it."
- — Philippa Forrester before the Arena stage
King Buxton fought in Heat I of the Second Wars.
- "What a nightmare ! We'd been having radio control problems from the start. In the test area we'd set things up nicely. As soon as we got into the arena it all went badly wrong. Had we moved the trimmers on the radio ? Had a speed controller reset and changed it's null point ? Was it external interference ? Too late now we just had to go."
- — King Buxton pages of Phil Brett's website[31]

King Buxton in the Gauntlet
In the Gauntlet stage of the heat, it turned towards the ram rig route, shaking erratically, seeming to have control problems as it drove into a wall. It reversed towards the spikes, narrowly avoiding them. King Buxton turned around and after being blocked by the spikes briefly, tried to go over the ramp, but turned the wrong way and fell off halfway. It drove straight into a tank trap, then reversed away and charged at the sphere, only to be blocked by Matilda. The sphere rolled away, as King Buxton reversed for another charge. With a burst of speed, it shot past Matilda, but Sir Killalot caught it and lifted it up. Dropping down, Sergeant Bash (who was in the ramrig route torched it, then Sir Killalot pinned it down with his lance against one of the spikes on the fence. Matilda rammed it from behind, while Bash) continued to burn it. King Buxton made no further progress, as Sir Killalot and Matilda prevented finishing the run until cease was called. King Buxton managed a respectable distance of 10.6m, despite the team barely being in control, placing it third on the leaderboard overall.
- "We got power, when we get it under control, it'll be ... interesting."
- — Simon Harrison
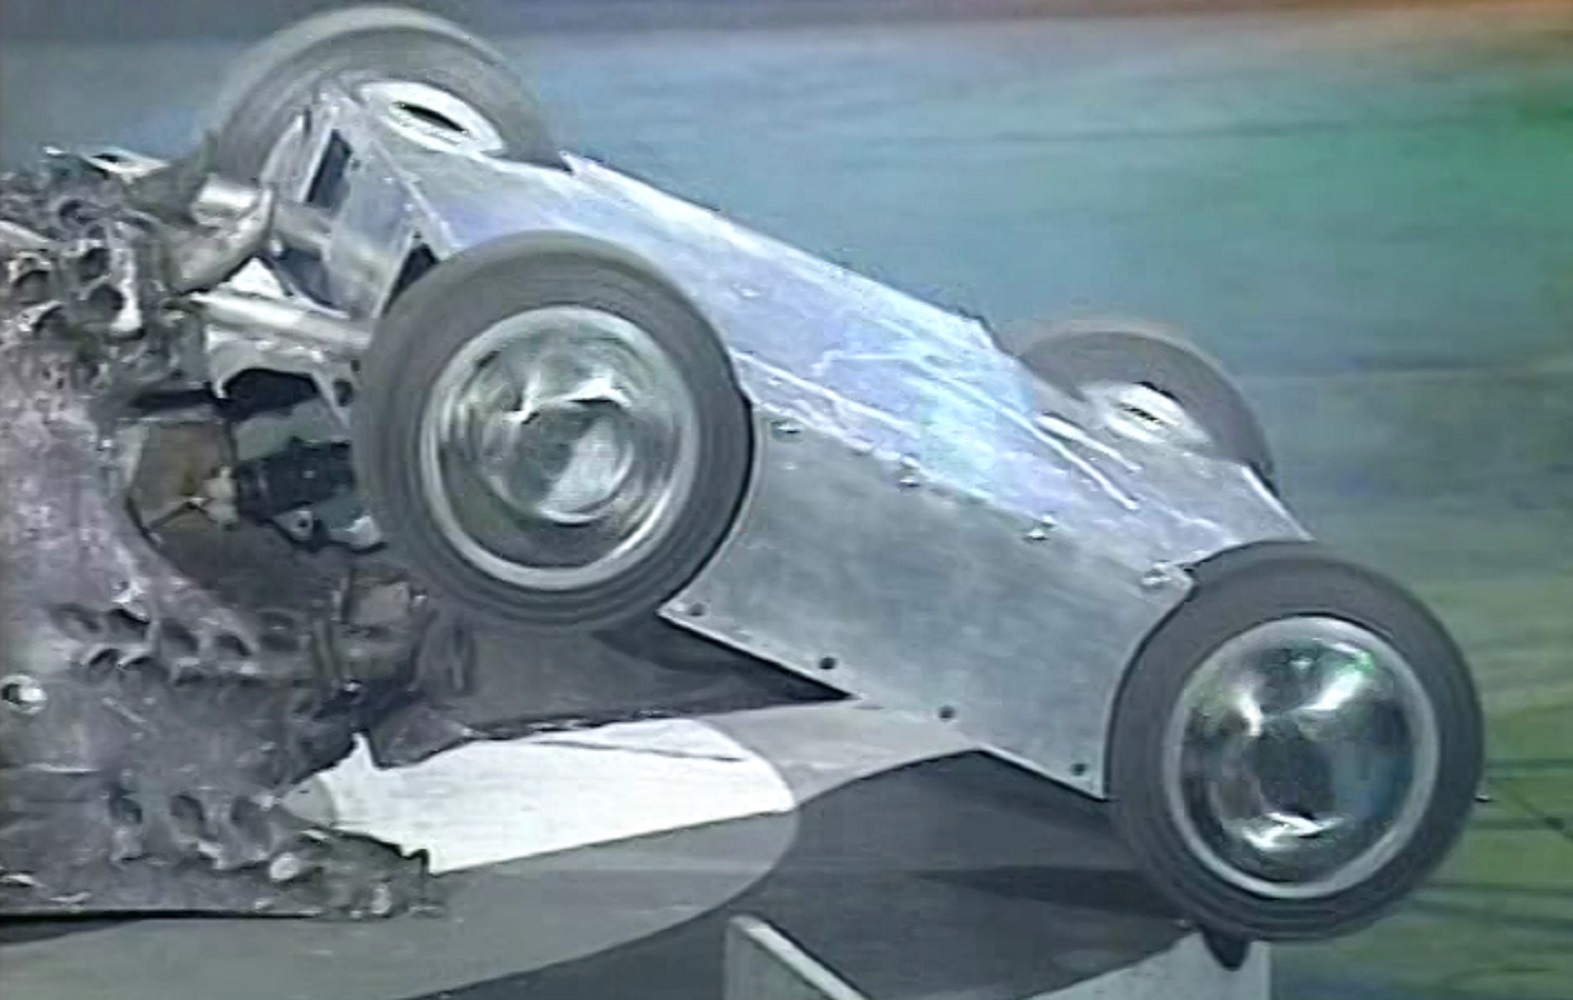
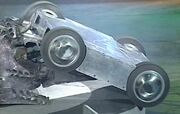
King Buxton is Jousted by Matilda
This was enough to qualify for the Trial. The team modified the robot to allow it to be reset if it suffered interference.
- "Test area running was fine after resetting the speed controller. That was it then ! Simon and I carried 2 reset prodders ( Alan Keys ) and a set of wooden blocks to put the robot on after that point. If the robot started acting up we'd just block it up off it's wheels, reset it and blast into the distance in perfect control ! Or so we planned."
- — King Buxton pages of Phil Brett's website
The Trial for Heat I was Joust, and the team planned to charge straight at Matilda.
- "This looked easy. We fitted a scoop on the front between the spikes too try to dive under Matilda's front. We'd just race up the ramp past the middle and meet her halfway down the other side. Speed was the key and we had lots of it."
- — King Buxton pages of Phil Brett's website
However, when Matilda's chainsaw was started, King Buxton began to jitter again, and was unable to move at full speed.[32] It drove up the ramp, but drove into the side and briefly got caught on the side. It managed to get off the side and charged at Matilda in the centre, which lifted it up. Matilda turned King Buxton around, and pushed it off. It had managed 6.95 metres, enough to qualify for the arena.
Its Heat Semi-Final was against Robo Doc, beginning a long and storied rivalry between the two teams.
- "King Buxton is the quicker, lighter, smaller robot as you can see, by a long chalk"
- — Jonathan Pearce at the start of the battle
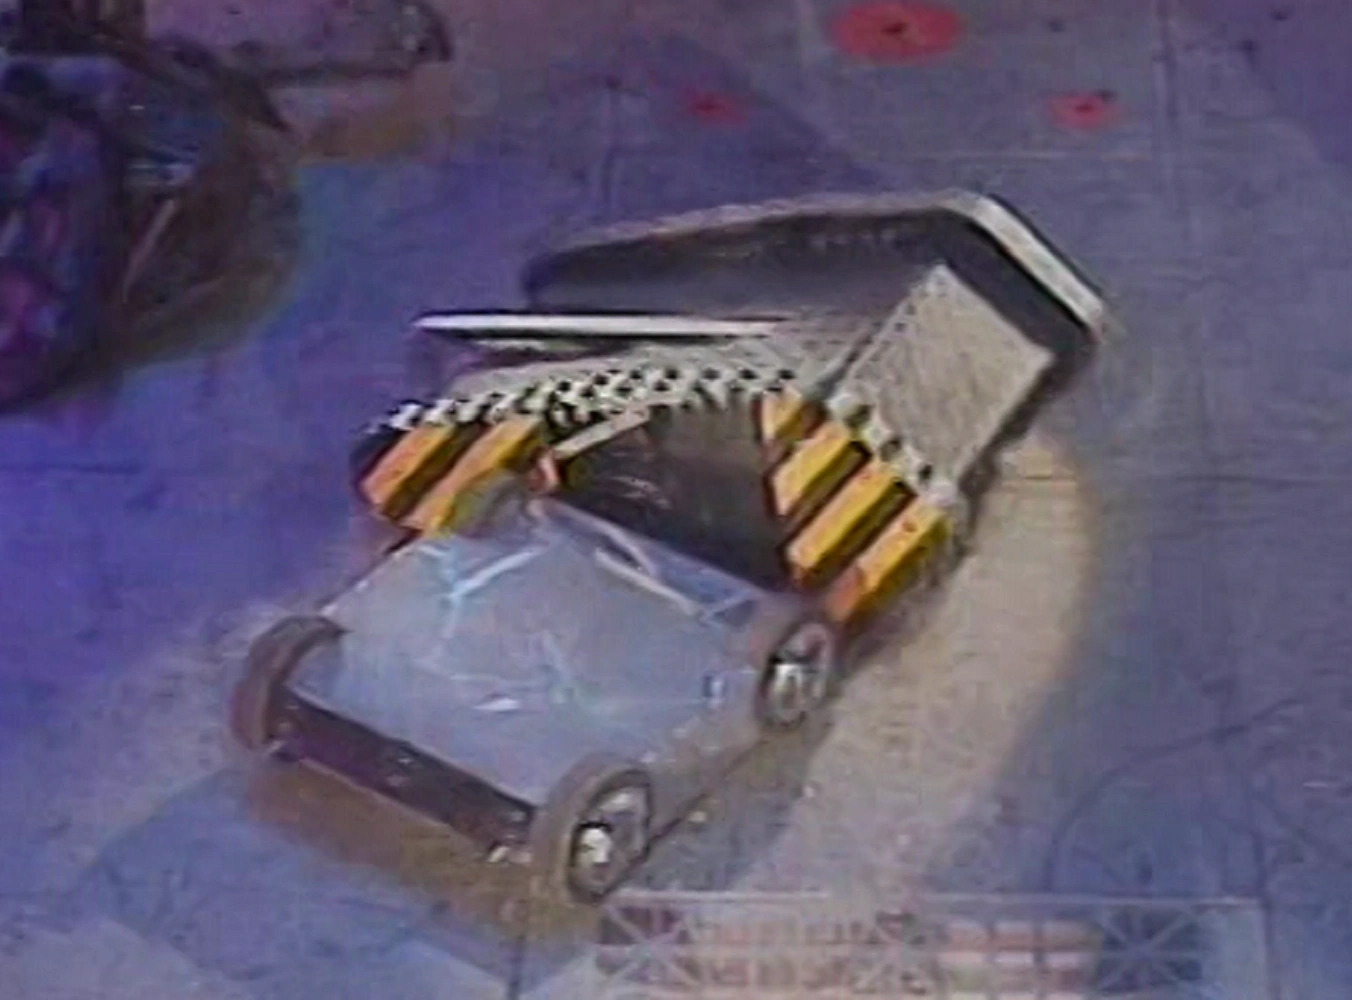

King Buxton rams Robo Doc
As Robo Doc charged at King Buxton, King Buxton drove around to attack Robo Doc's side. Robo Doc tried to spin off King Buxton's spikes, but despite spinning the two together, could not get free. King Buxton pushed it into the PPZ, leaving it for Matilda.
- "This is good mobility, this is good style, this is good control..."
- — Praise from Jonathan Pearce
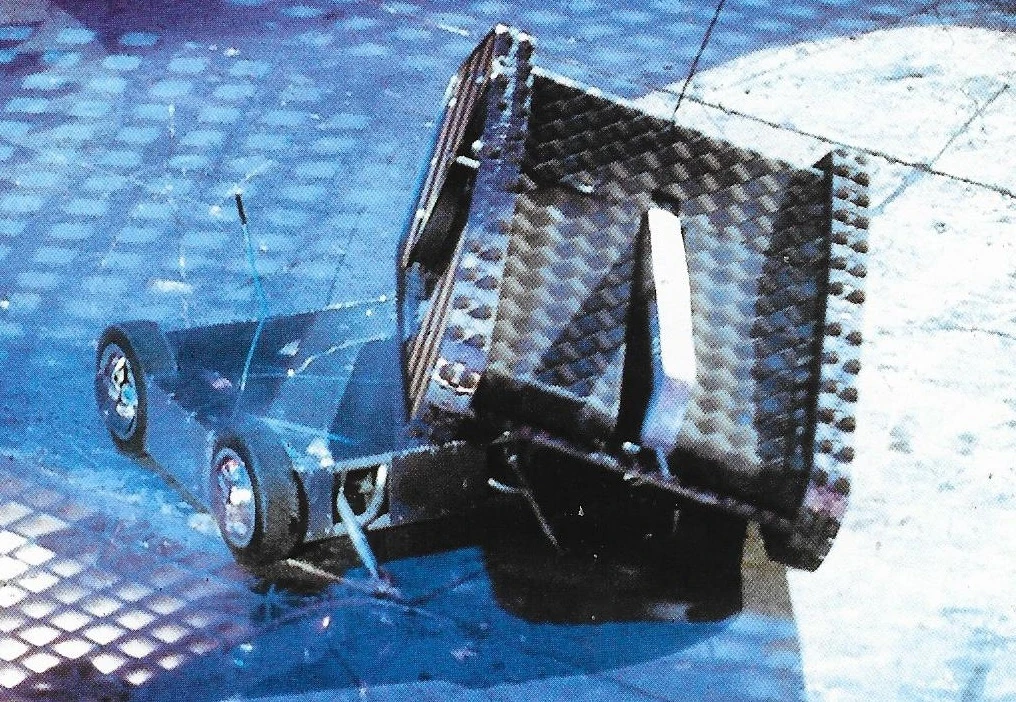

King Buxton carries Robo Doc around
Robo Doc was grabbed by Dead Metal, which dragged it around for a while, before letting it go. It got the lifting arm under King Buxton, only for King Buxton to push it into Shunt, then into the PPZ. Robo Doc was caught between Sir Killalot and Shunt, the latter of which axed it, until King Buxton carried it out as it reversed. King Buxton rammed into Robo Doc's front, but was unable to push it back, so instead drove around the side again, pushing it against Dead Metal. After letting Robo Doc escape, it drove at the side again, but failed to push it. Robo Doc almost reversed into the pit, and when it drove forward, it was blocked by Matilda, which was out of the PPZ. King Buxton pushed Matilda's rear, nearly getting Robo Doc into the pit. Robo Doc pushed back at Matilda, and King Buxton reversed. Robo Doc drove up Matilda, and King Buxton rammed it, overturning it. Robo Doc fell onto the flame pit, but drove off before cease was called. It went to a judges' decision, which after much deliberation resulted in King Buxton winning through to the Heat Final.
- "I have to say that it was made to look like we won with ease but this wasn't the case. Our battle with Robo Doc was fantastic. A full 5 minutes of fighting. The judges took over 10 minutes to make the decision. Ok we won it but it really was 50/50. If we had lost we would have been happy as it was such a good battle."
- — Phil Brett commenting on King Buxton's semi final fight
In the Heat Final, it fought All Torque for a place in the Semi-Finals.
- "Two quick, powerful robots. All Torque is slightly the lighter but speedier. King Buxton seems to have more manoeuvrability, with the spikes as well"
- — Jonathan Pearce at the start of the fight
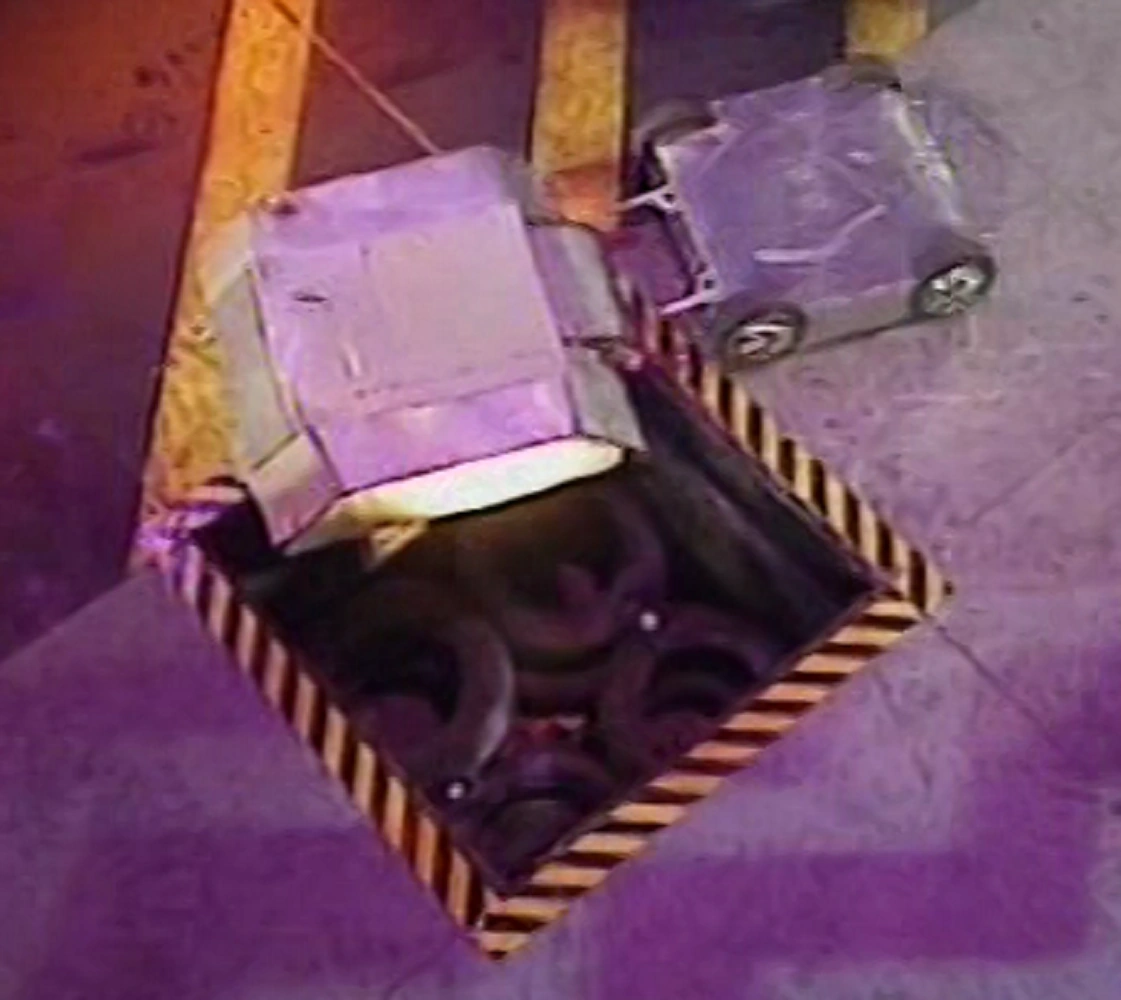
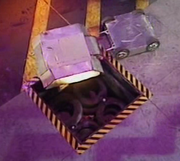
King Buxton pushes All Torque onto the pit
Both robots started by charging at each other, but King Buxton turned to the side just before the two made contact, so All Torque hit King Buxton's side and bounced off. The two ran past each other, then King Buxton turned around and attempted to get behind All Torque, but couldn't. Instead it rammed All Torque head on, All Torque began by pushing King Buxton back first but was shoved back itself soon enough. King Buxton pushed it all the way onto the edge of the pit, then rammed into it repeatedly, trying to knock it in fully. Sir Killalot soon came in to finish the job, knocking All Torque in with its lance.
- "Another bit of T.V. editing made another easy looking victory. Not the case again. At first WE got pushed back. But after a while All Torque's power seemed to drop off ( the speed controllers current limiting probably ). In the pit you go ! Still, not a bad fight. The worst bit is we had a fun time with the house robots afterwards but it wasn't shown. Never mind, we continue....."
- — Phil Brett commenting on King Buxton's semi final fight
King Buxton progressed to the Series Semi-Finals.
- "We're confident, we'll just go out and see what happens"
- — Steve Monk before the Gauntlet

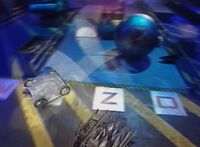
King Buxton runs the Gauntlet in the Semi-Finals
In the Gauntlet stage of the Semi-Finals, King Buxton was the only robot to complete the course. It took the middle route, easily smashing through the blocks. Shunt pushed the sphere into King Buxton to block its path, but turned into the pit, giving King B a clear run through to Matilda. King Buxton pushed the sphere with no problem, but Matilda lifted it up with its forks. However, King Buxton quickly managed to get itself down, and get past. Dead Metal was waiting in the endzone, blocking King Buxton's path, but King Buxton drove around it, and reached the endzone in a very impressive time.
- Craig Charles: "Well, you put the ball in the endzone, better shot than Robbie Fowler, you're in the endzone, Shunt's in the pit!"
- Steve Monk: "Where he should be!"
- Craig Charles: "Excellent, excellent!"
- — Post-Gauntlet interview
King Buxton finished first on the leaderboard.
- "With perfect control we dived under the big ball. This fazed the house robot so much he drove straight into the middle pit. 26 seconds later were in the end zone and through ! It looked easy and was ! We could go all the way. There was just a little problem in the background.... that would soon be in the foreground. But on we go."
- — King Buxton pages of Phil Brett's website[33]
Before the subsequent Pinball round, the team filed the sides of King Buxton.
- "It's something to do, isn't it? I just thought we'd have a bit of extra clearance..."
- — Simon Harrison explains to Philippa Forrester why he was filing
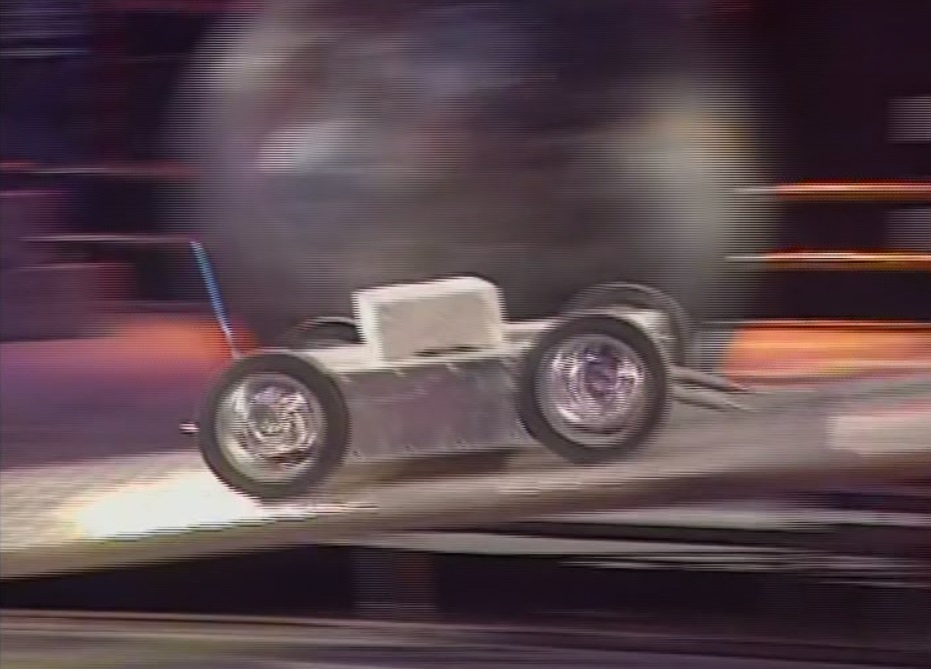

King Buxton negotiates the ramp in the Pinball
In the round itself, King Buxton started well, knocking over the blocks and barrels. One of the blocks became stuck on top of it, but this did not hinder its progress. It went for the see-saw, clearing it easily, the block falling off as it did so. However, King Buxton found Sir Killalot waiting on the other side of the ramp, so turned round and went back over the see-saw.
- "King Buxton, could be something of an underdog for the title. ... Certainly, confounding the experts here."
- — Jonathan Pearce
King Buxton went for the other set of bricks and barrels, knocking many of them down. However, as it turned around to go for another target, it became stuck on one of the bricks. Although it managed to get down from the brick, this gave Sir Killalot time to come in and corner King Buxton. Sir Killalot became stuck on the bricks as well, but when King Buxton tried to get away, it couldn't drive over the bricks. It tried to push past the bricks, but failed to do so. After another attempt to drive over the bricks, King Buxton successfully drove over the bricks, and shot towards the 50 point target, guarded by Matilda, as time ran out. However, Matilda blocked King Buxton, and lifted it up before cease was called. Despite the problems, King Buxton had scored enough points to go through to the Arena stage.
- "We always disliked the non-power / fighting games and we didn't like the look of this at all. It was all too easy to get stuck on a brick or jammed under a house robot. To tell you the truth Id thought we'd gone out. 165 was a poor score. It didn't help that Steve the driver thought we only needed 120 for some reason and didn't go for it until near the end. But we were though again, just. All our optimism from the last round had gone. Now we were happy with every round we completed."
- — King Buxton pages of Phil Brett's website
King Buxton then fought reigning champion Roadblock for a place in the Grand Final.
- "Roadblock. It doesn't look like a great bit of engineering but it works very well. We didn't think we'd have too much trouble though. But the problem we'd been hiding from the world was going to be our downfall."
- — King Buxton pages of Phil Brett's website

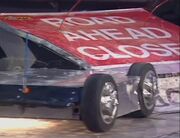
King Buxton pushes Roadblock back

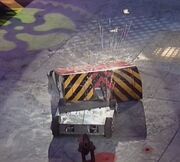
Roadblock cuts into King Buxton

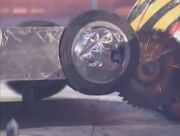
King Buxton's wheel is sliced into by Roadblock
King Buxton started faster and tried to get around to Roadblock's side, but Roadblock turned in time, and got its scoop under King Buxton. King Buxton drove over its opponent's wedge, and tried to get at is opponents side again, but Roadblock turned, preventing King Buxton from getting in a position to push. King Buxton drove up the side of the ramp, before falling off. It got one of its spikes in the top corner and pushed its opponent, but then turned to its opponent's front. The spike loosened, and King Buxton drove away as Roadblock pushed. Whilst escaping, it drove into Dead Metal. This allowed Roadblock to bring its saw into play, making sparks on contact. Dead Metal reversed, and King Buxton drove into the centre of the arena, but appeared to be moving erratically. Roadblock tried to use the saw, but King Buxton pushed it into the PPZ, where Shunt axed it and Dead Metal rammed into it. Roadblock escaped, and King Buxton drove at its front, trying to push it, but ended up driving up and over the wedge. It became stuck on the spikes, allowing Roadblock to use its saw some more. King Buxton drove away from the saw, before ramming into Roadblock in reverse. However, smoke then began to pour from King Buxton, a fire became visible, and King Buxton lost mobility.
- "The engines have gone! King Buxton in all sorts of trouble!"
- — Jonathan Pearce
Roadblock pushed King Buxton onto the spikes, using the saw to damage the wheels. Dead Metal grabbed King Buxton just before cease was called. In a post-fight interview on Robot Wars Revealed Simon Harrison explained that the previous fight with Robo Doc had caused problems with the motors and that they would overheat if a battle lasted longer than two minutes.
- "Even in testing before RobotWars we had seen smoke coming from the motors. Just before the first program we had changed the speed controllers for much lower resistance ones. This meant that on full power the batteries were effectively connected straight too the motors, driving the 750W motors at more like double that ! Under stall the motors just got hotter and hotter. With Roadblock we could push him quite easily at first, but the already badly damaged motors just could not last. Smoke / Fire / end of RobotWars for us."
- — King Buxton pages of Phil Brett's website
Series 3[]
- "A little spinny thing, a little spinny thing, what good's that going to do?"
- — Philippa Forrester commenting on King Buxton's new weapon
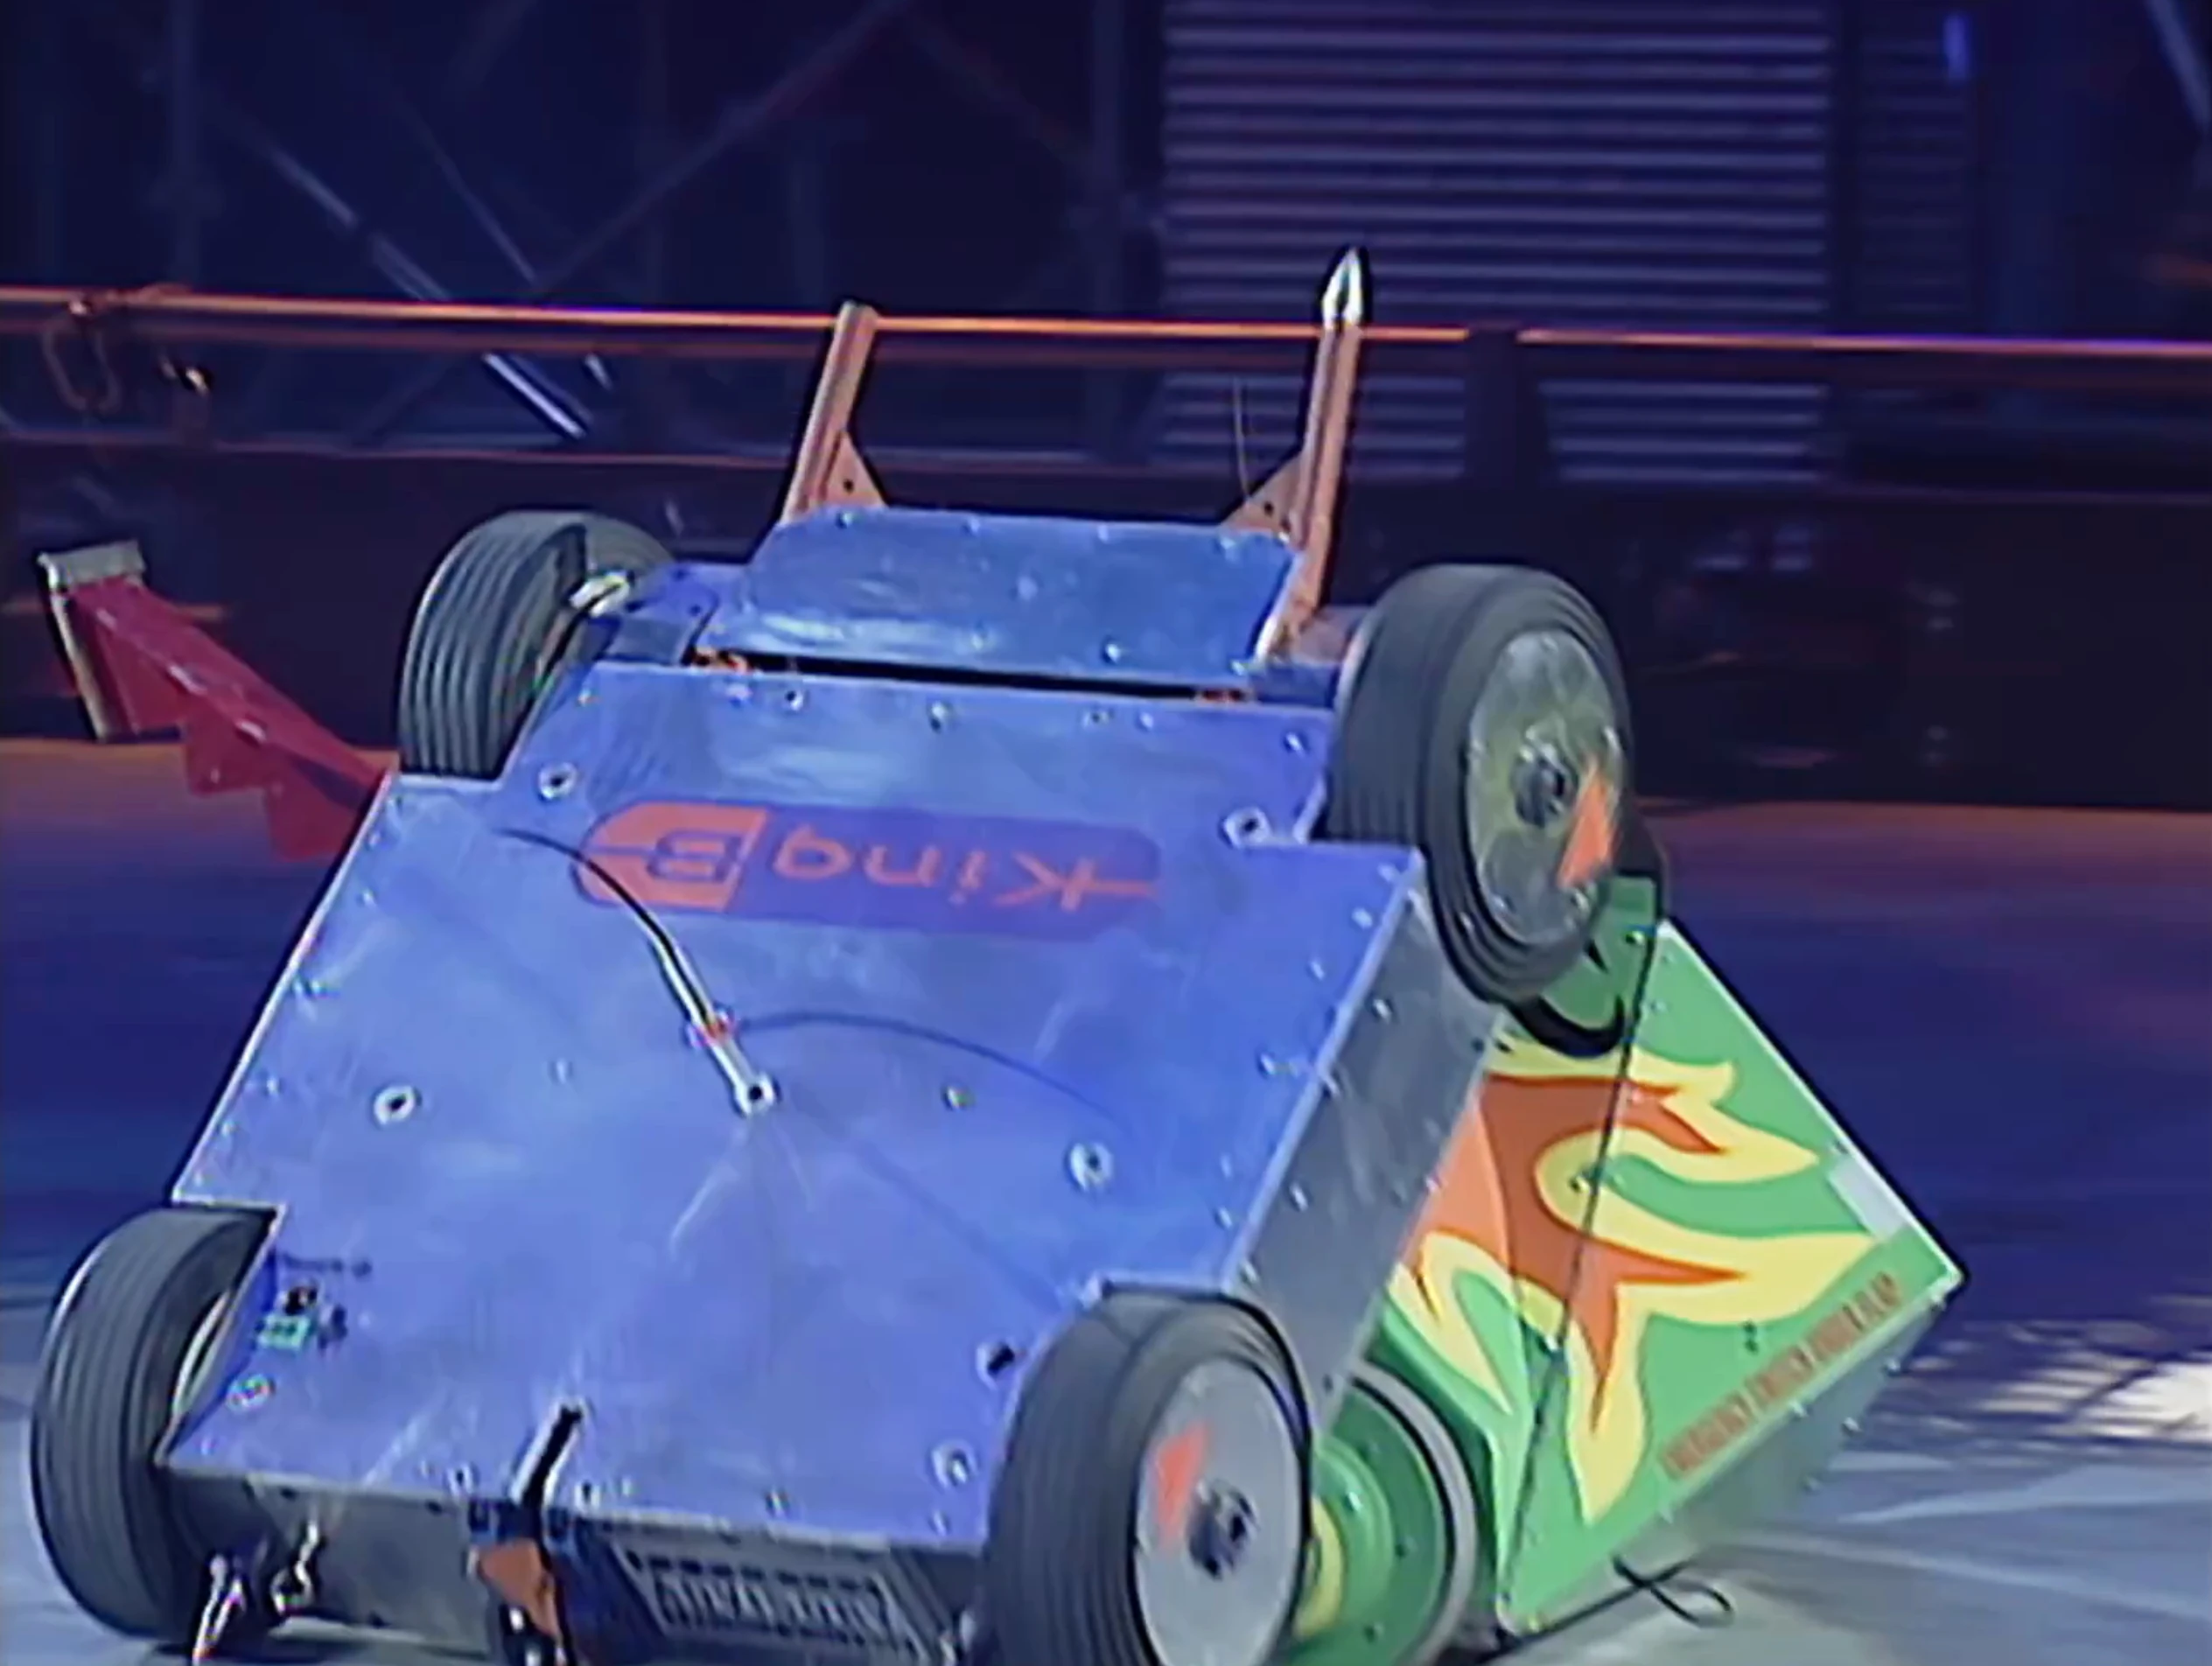

Buxton drives up Eric's side. Notice the left prong missing its tip
The King Buxton team returned for the Third Wars, and participated in Heat J of the main competition. King Buxton was placed up against newcomer Eric in its first round battle of the heat. The two robots met in the centre, with King Buxton getting at Eric's side and pushing. It quickly lost purchase on the smooth sloped side of Eric, and Eric turned away. King Buxton charged at Eric's front, but Eric fired its lifter and pulled King Buxton into mid-air, blocking the charge. Buxton pushed into Eric, but lost the tip of one of its prongs in the process.
- "Ooh! King Buxton's lost one of the tips to its front rams there. Somewhere on the arena floor is a steel tip."
- — Jonathan Pearce
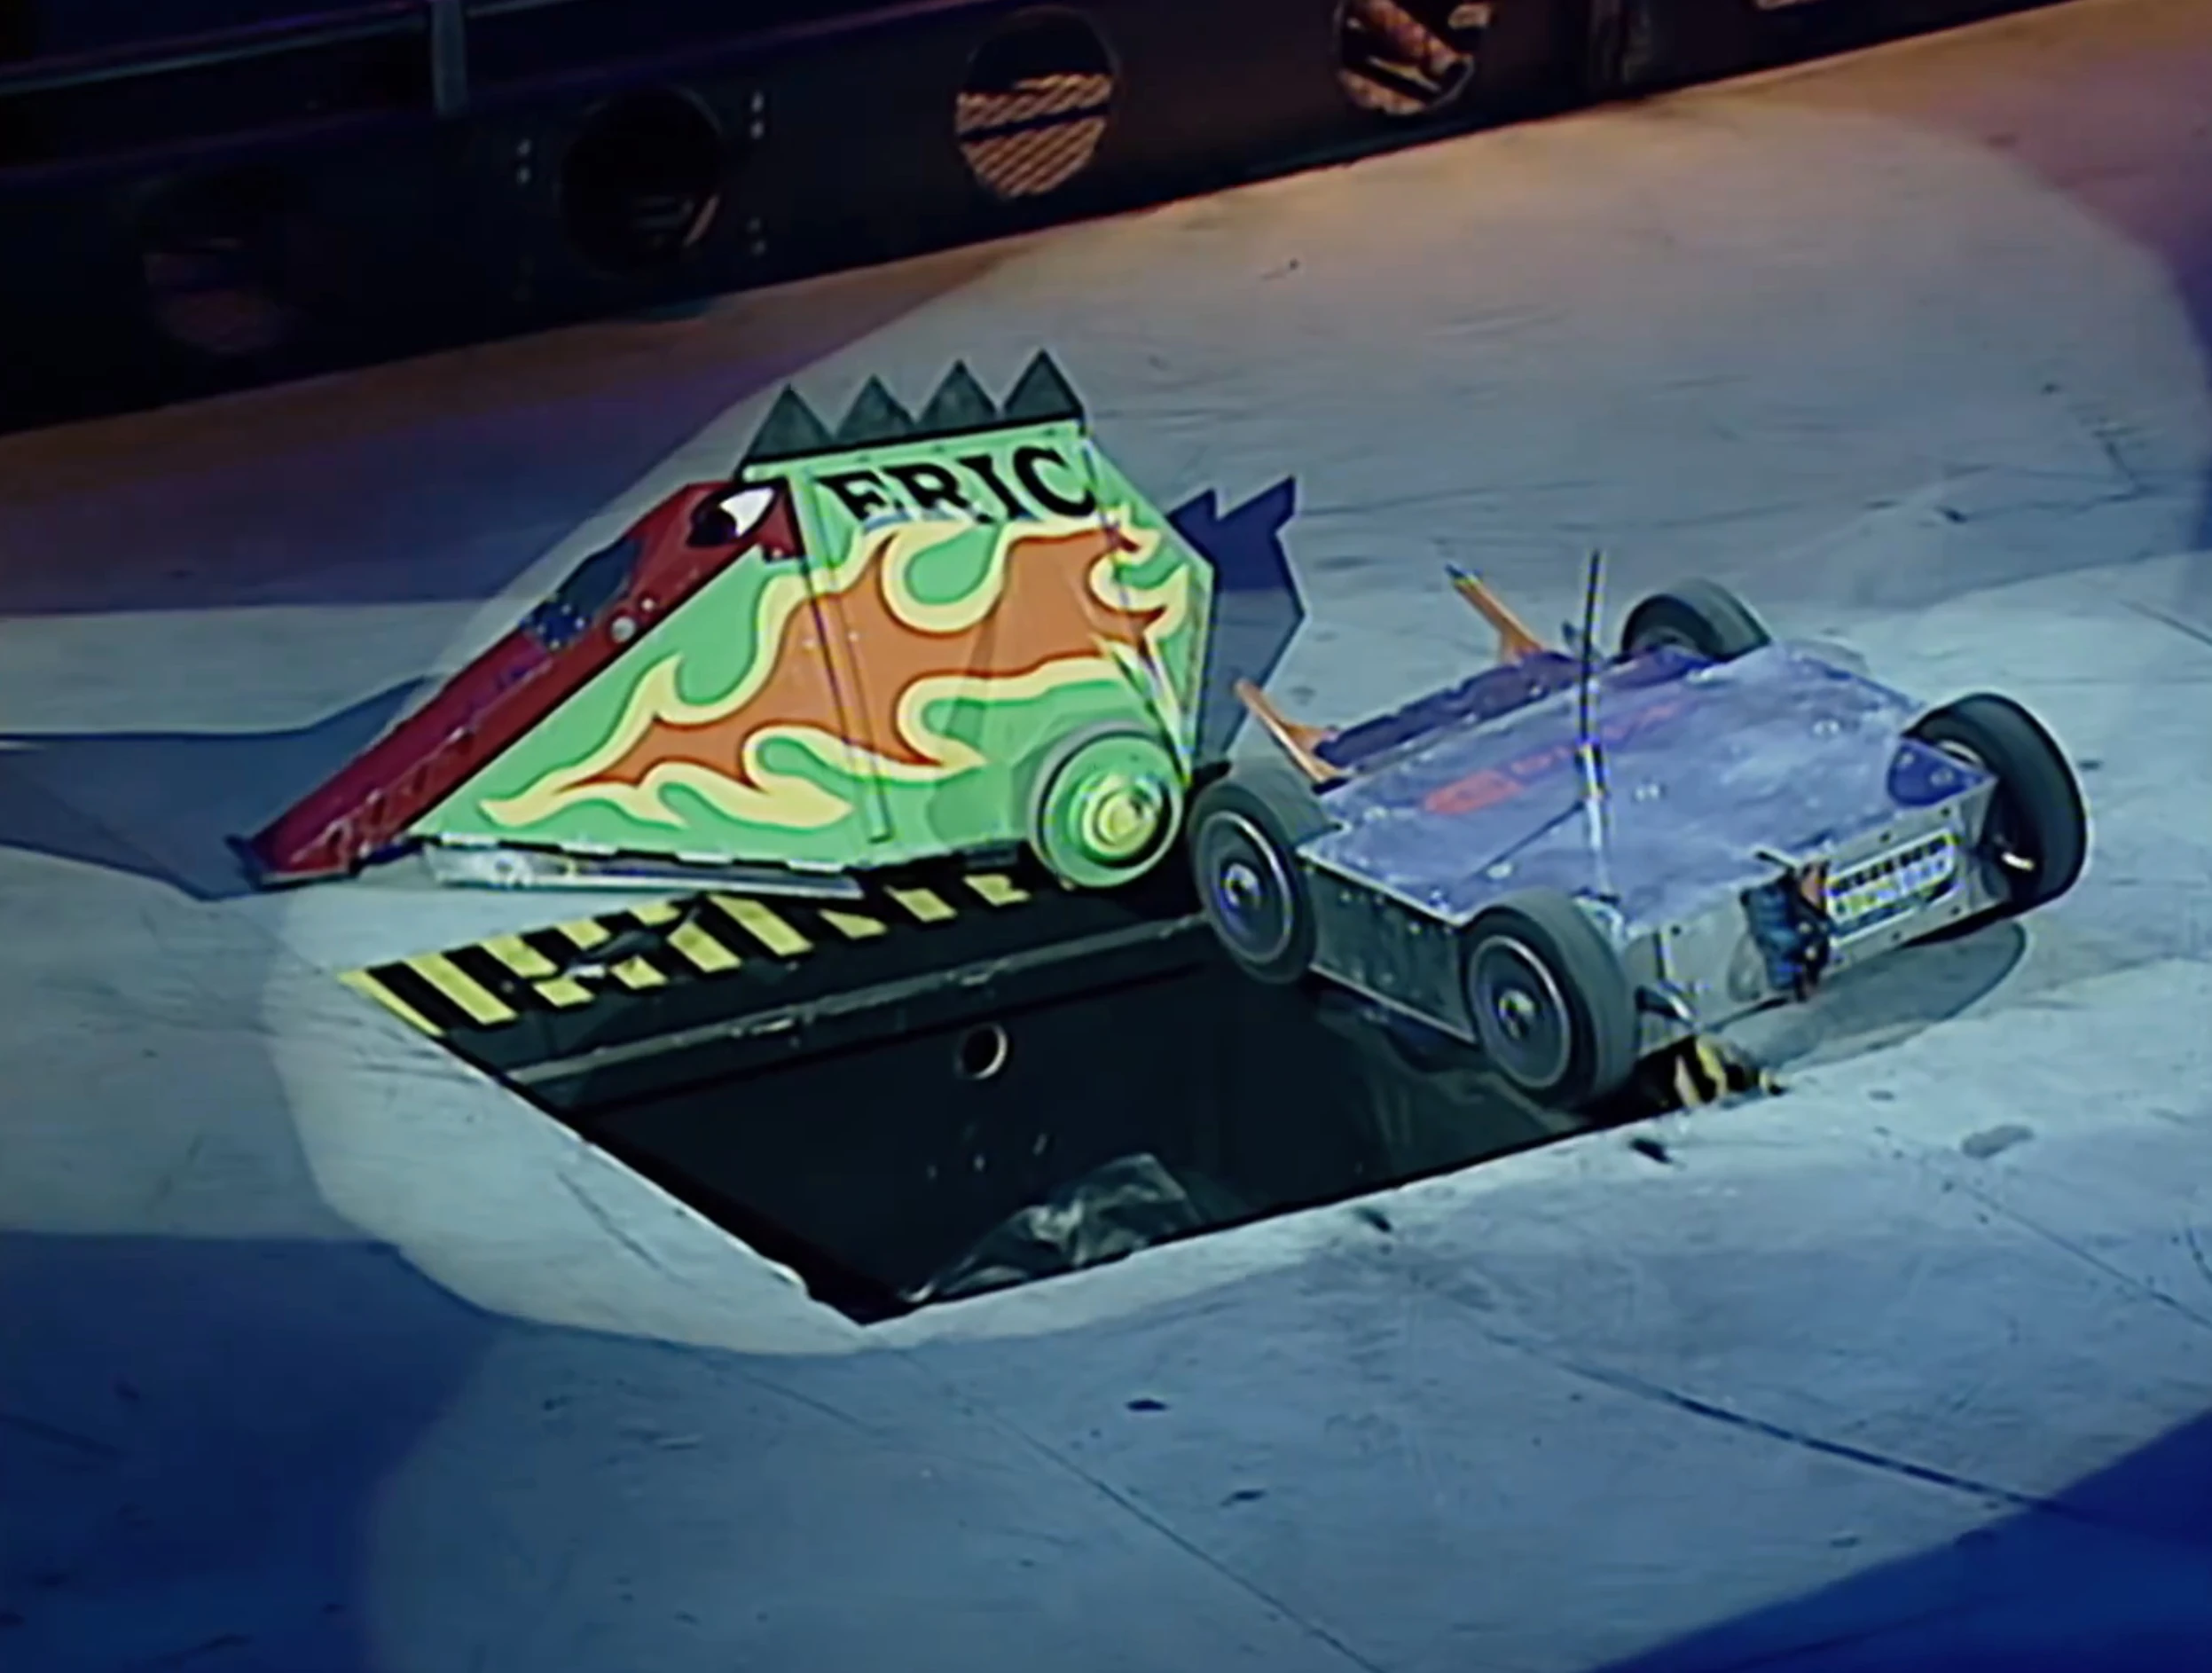

Eric and King Buxton wedged on the pit
It drove away for another charge, but drove up the side of Eric when it charged at its opponent, who opened its lifter to keep Buxton suspended. King Buxton reversed down, then drove at Eric's front, so Eric flicked King Buxton up, but King Buxton managed to get behind Eric and nearly pushed it into the pit. However, King Buxton drove at the wrong angle, so two of King Buxton's wheels were suspended over the pit, along with one of Eric's wheels. and when Eric attempted to pit it, it freed Buxton and reversed itself in.
- "Eric towards the pit - oh goodness me! And King Buxton is left teetering on the brink of oblivion! And Eric - oh no! - has backed itself down into the pit! King Buxton spun away and Eric went down!"
- — Jonathan Pearce
King Buxton was through to Round 2. In the second round, King Buxton went up against Irish newcomer Weld-Dor.
- Philippa Forrester: "Nothing I need to know about? No technical traumas?"
- Phil Brett: "No, no...couple of scratches"
- Philippa Forrester: "Yeah, I know, that's not technical trauma."
- Simon Harrison: "It is for us"
- Philippa Forrester: "Its vanity, for goodness sake."
- — King Buxton's pre-match interview
- "Love and peace? I'll give them a few technical traumas unless they get it on here!"
- — Jonathan Pearce, on the friendly working relationship between King Buxton and Weld-Dor
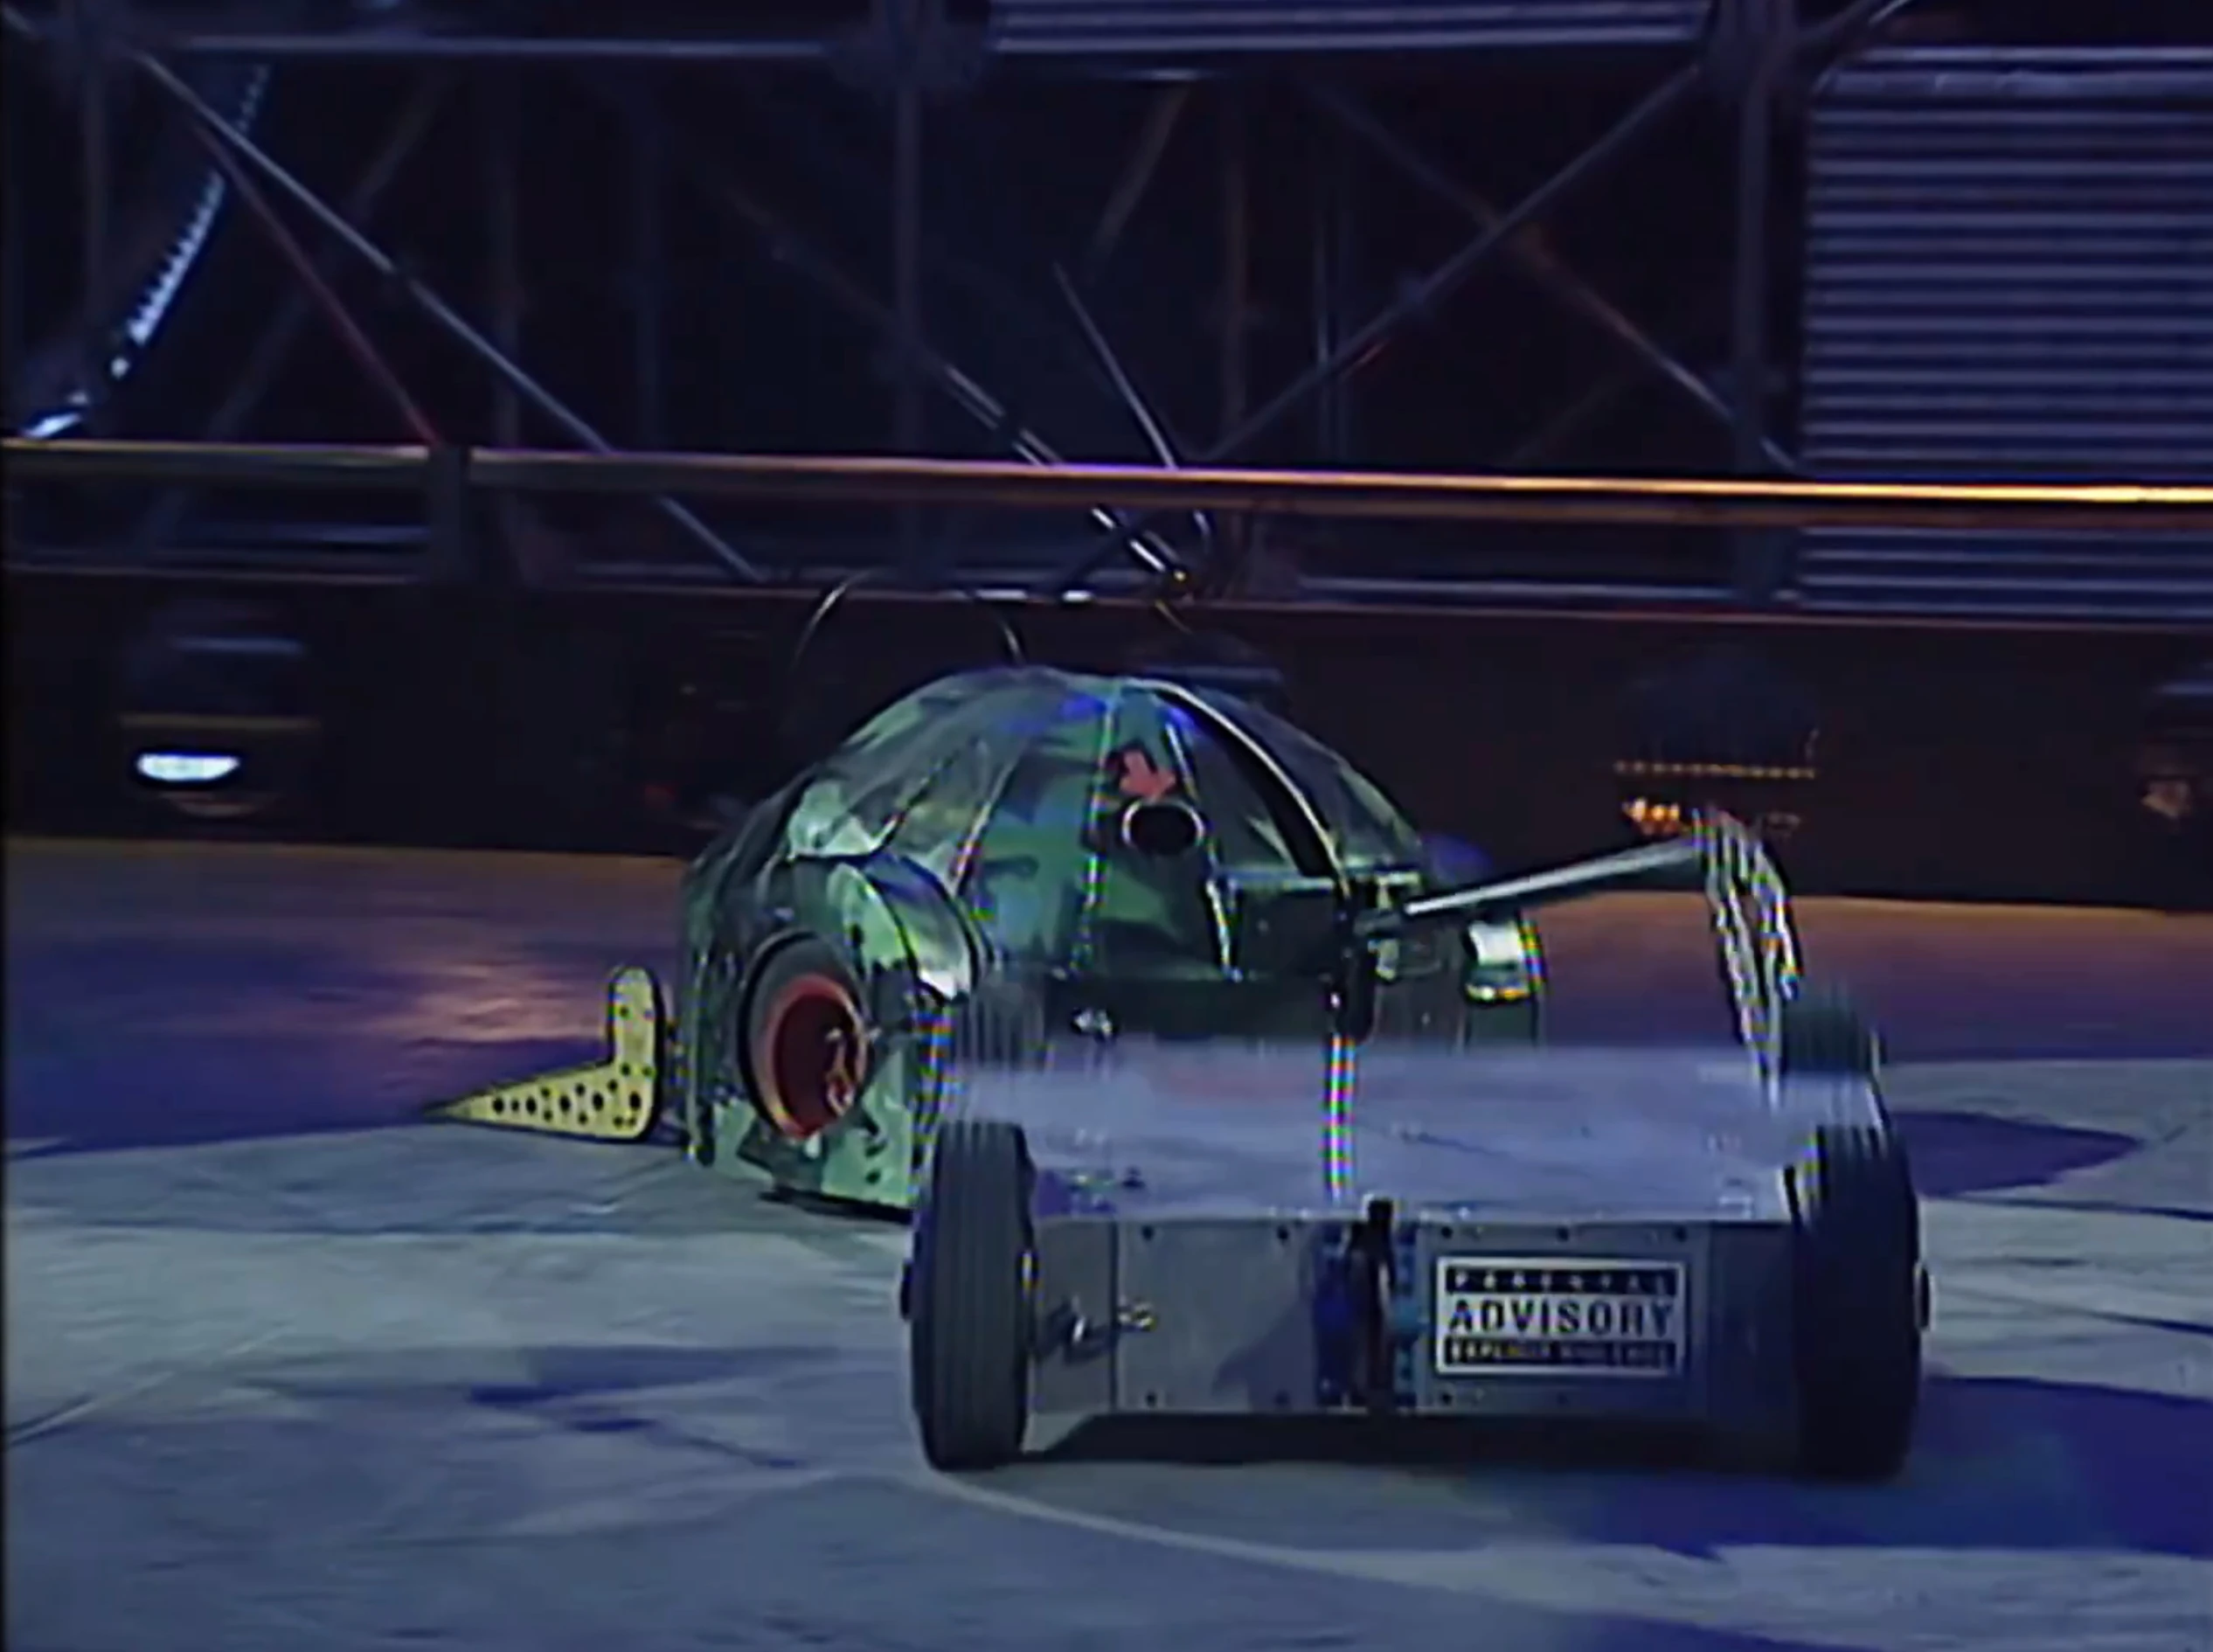
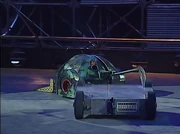
Weld-Dor misses with its axe
King Buxton and Weld-Dor both attempted to push their weapons against the other, and King Buxton drove up the side of Weld-Dor. It reversed off; avoiding Weld-Dor's axe, and ran up it again, pushing it around. It received one axe blow doing this, but got its forks in a position to block the next. King Buxton pushed Weld-Dor towards the pit twice, driving up onto Weld-Dor on the second attempt. It circled around and pushed Weld-Dor towards the flame pit, pressing its fork into the wheel arch. King Buxton mistakenly drove onto the flames, but quickly got off and pushed and dragged Weld-Dor around the arena, its spike still lodged in the wheel arch.
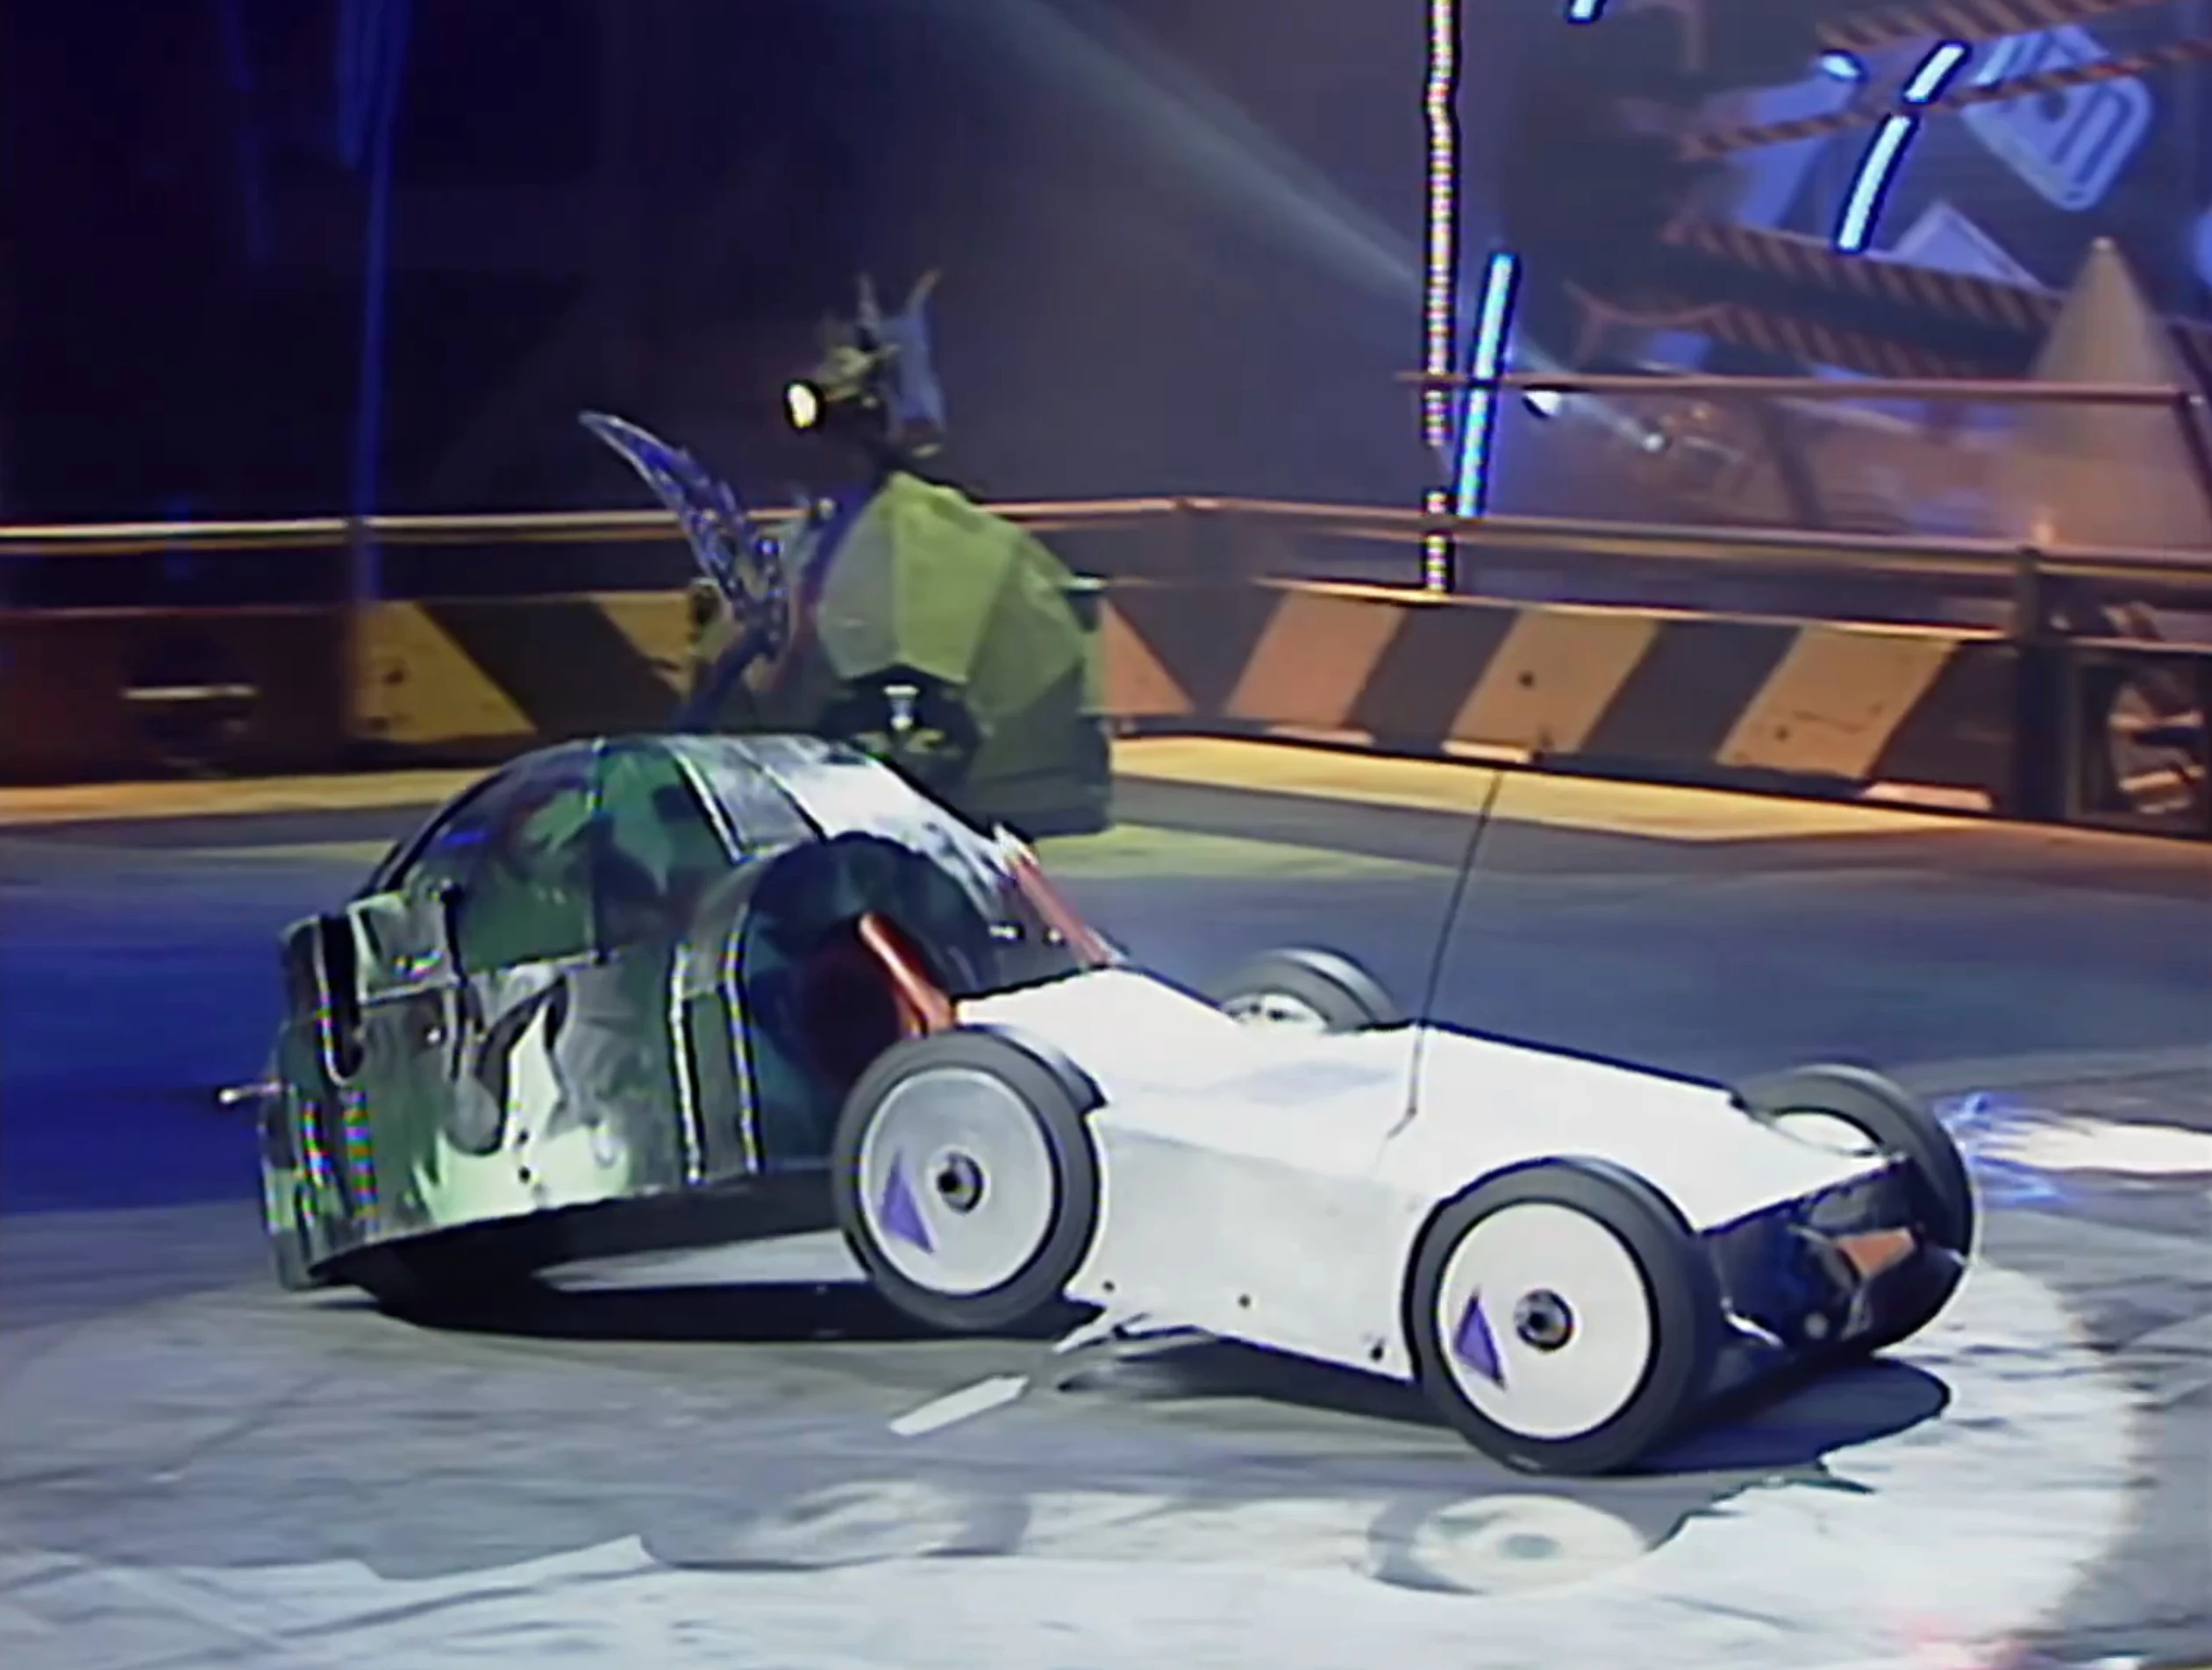
King Buxton inside Weld-Dor's wheel hub
- "That’s King Buxton dragging Weld-Dor across the arena for one purpose – to push it towards the pit. Towards the pit. Ooh, they’re trying – Simon Harrison there – just to turn Weld-Dor towards the pit."
- — Jonathan Pearce
King Buxton attempted to pit Weld-Dor, but failed to do so. King Buxton then dragged Weld-Dor back and revealed damage had been inflicted to Weld-Dor's left wheel, before ramming it into the side wall. Shunt then crossed the arena and rammed its snowplough into the two, freeing King Buxton from the wheel arch. Weld-Dor seemed unable to move away from the wall, and King Buxton rammed into it. King Buxton charged again, but Weld-Dor's lifter raised King Buxton, smashing its charge against the rounded body and bending one of the prongs completely out of place. Despite the offensive move, Weld-Dor had broken down, and the House Robots attacked.
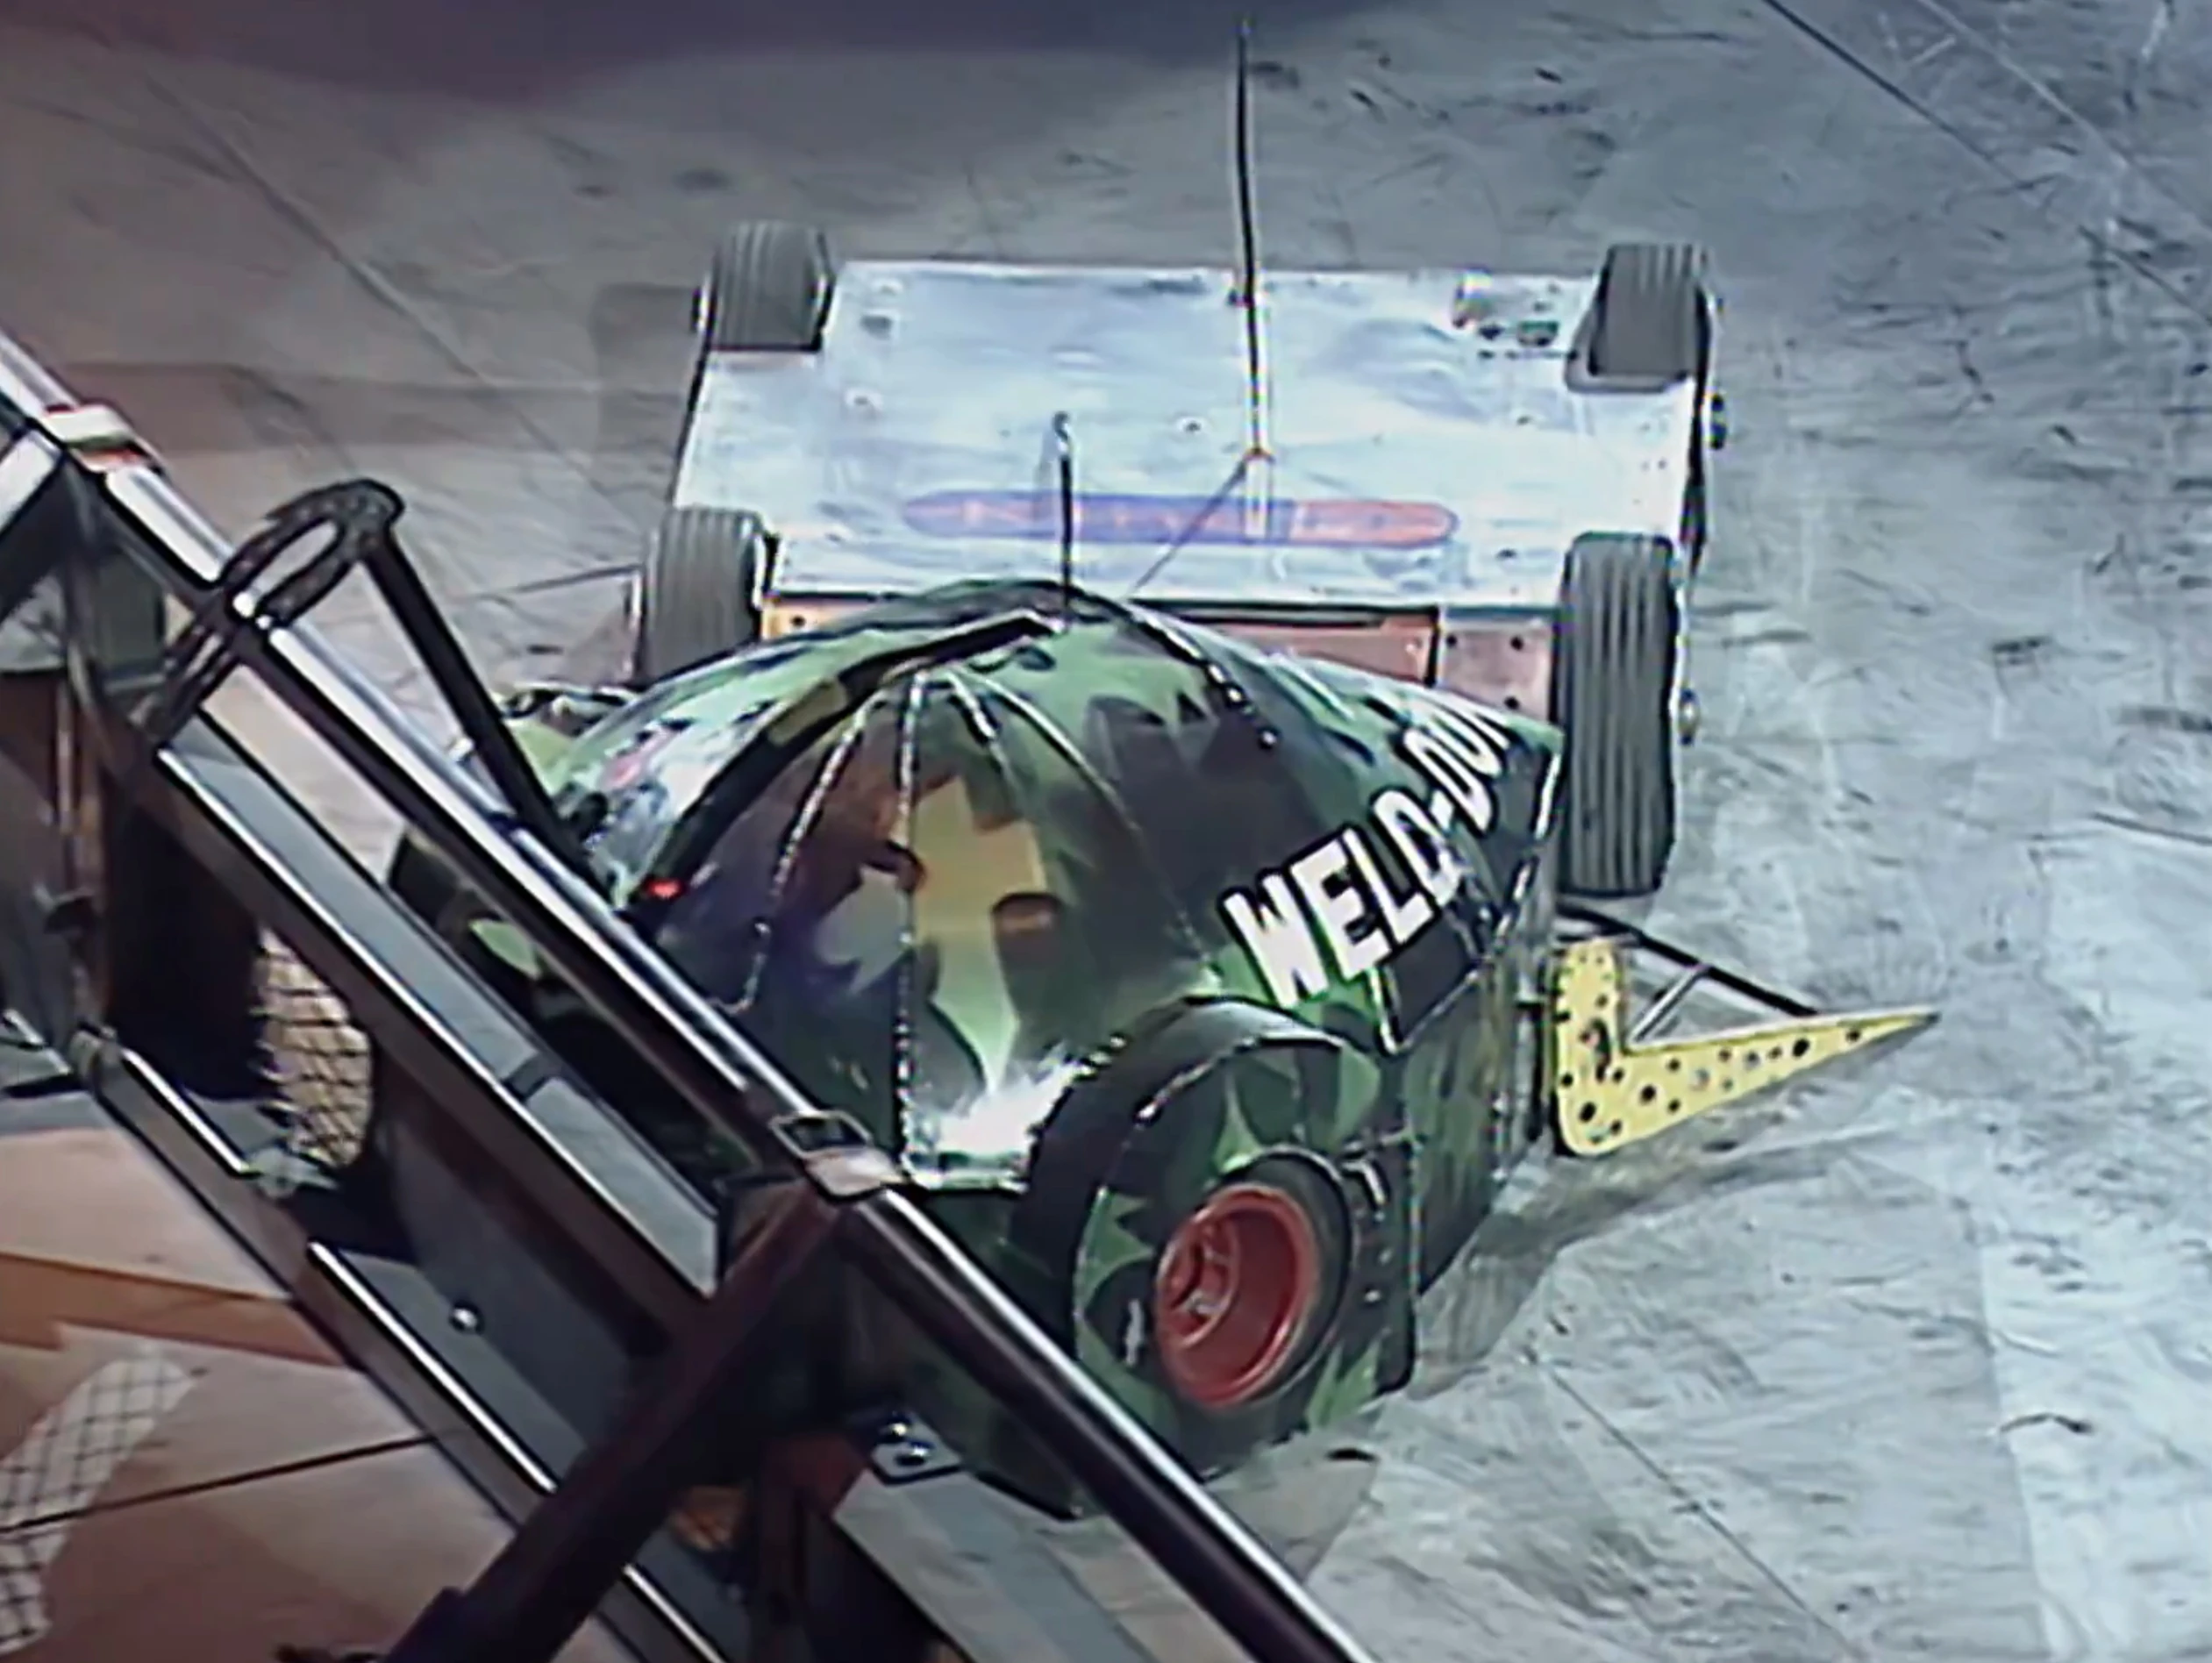

King Buxton slams Weld-Dor into the side wall
- "I don't know, but I think Weld-Dor here has been immobilised and it could be - moments ago, we saw a problem with the wheel on the left...oh look at Killalot! In with the pincers! Merciless! Off goes the ostrich feather. No weapons left then on Weld-Dor, and I’m sorry boys, very little hope."
- — Jonathan Pearce
Shunt’s axe damaged the dome of Weld-Dor, and Sir Killalot drilled into the shell, lifting it off the ground. Despite minor harassment from King Buxton, Sir Killalot carried Weld-Dor around and placed Weld-Dor into the pit.
- Philippa Forrester: "And congratulations on being such lovely friends and having a little go at Sir Killalot like that. It was like a flea on a dog."
- Jonathan Pearce: "Killalot’s just been onto me King Buxton – he wants your phone number. In the final, you're up against 101."
- — After the battle
King Buxton was through to the Heat Final, where it fought 101, the new robot from Team 101, the team behind Robo Doc, which King Buxton had defeated in the last wars.
- "Who'd have thought it would come to this? We're going to have to fight like demons to beat him, but we must beat him. ... It's going to be so tough, it was tough last time, it was just the hardest thing. He's such a good robot, it's the best tracked robot here."
- — Simon Harrison before the fight with 101
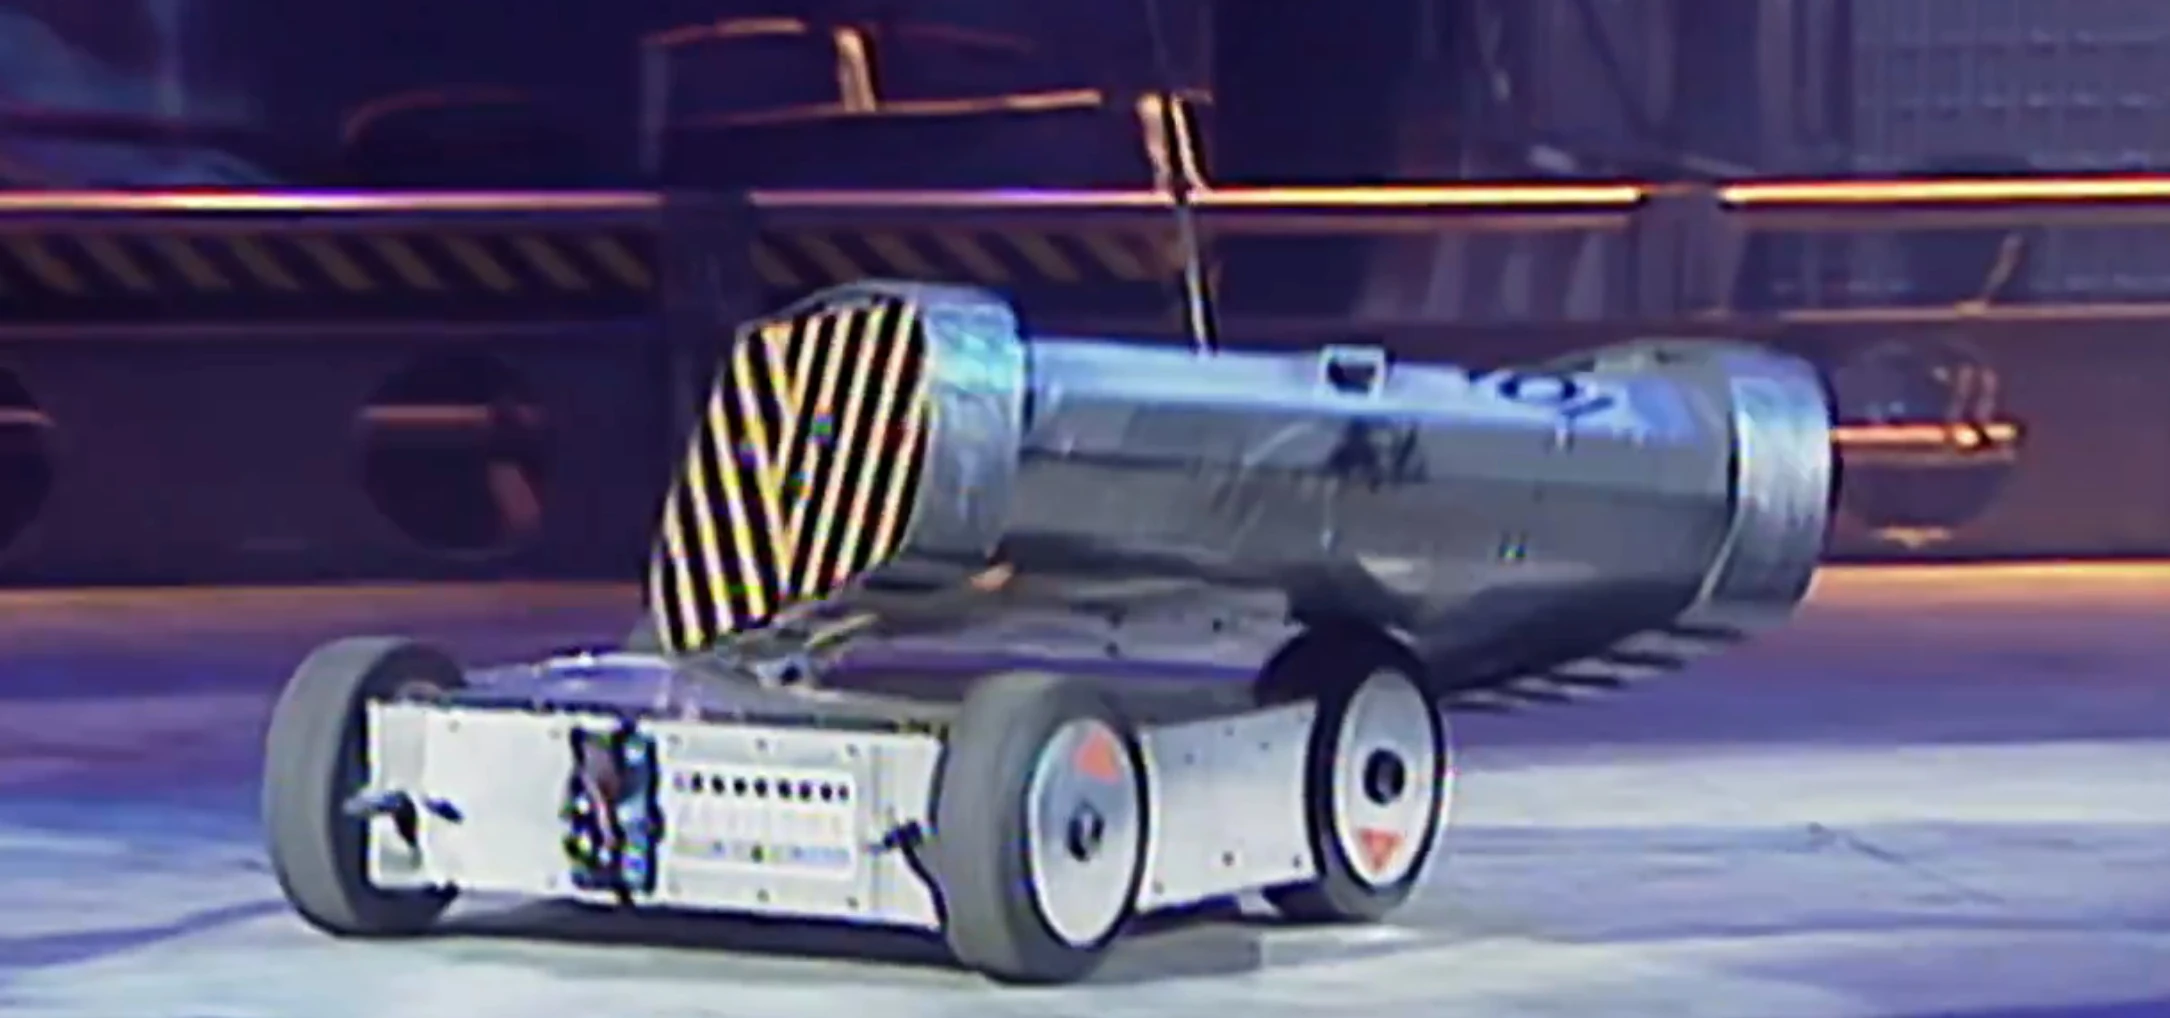

101 drives off King Buxton's top
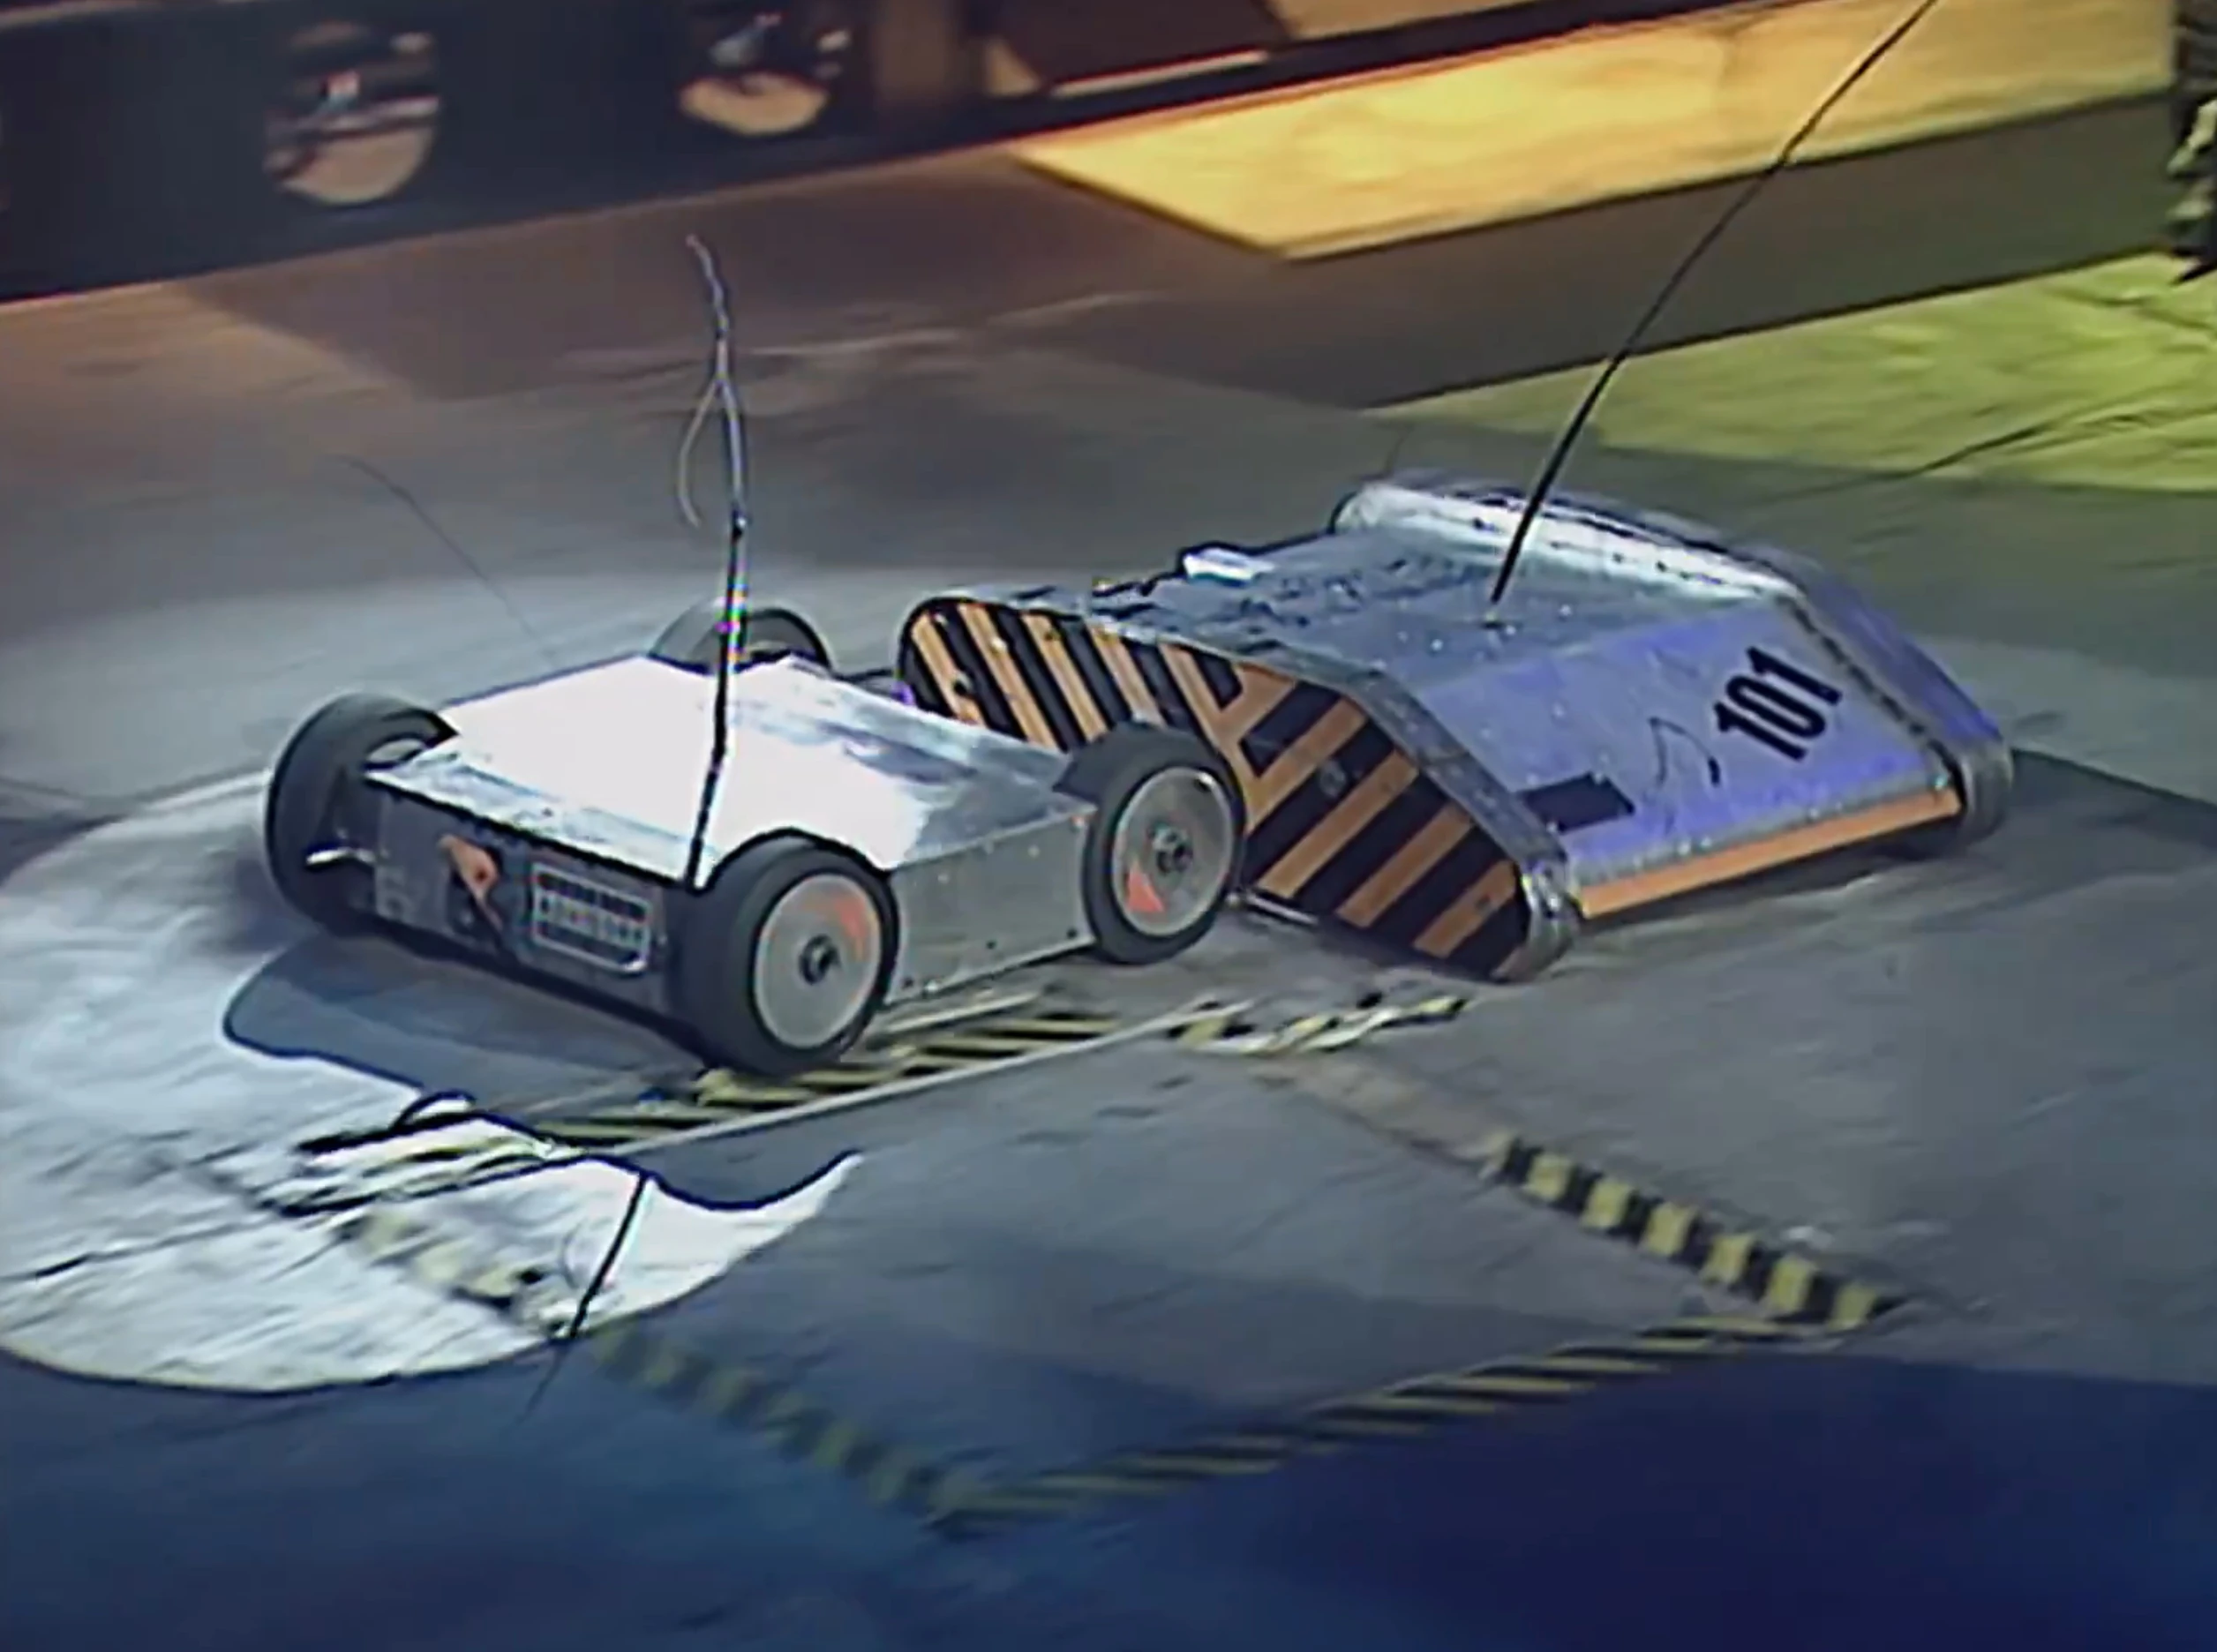

King Buxton shoves 101
Both robots started by slowly driving around, trying to get into a good position to attack. The two met head on, and King Buxton drove up 101, and was pushed back until it drove off. King Buxton then met 101, which slid on top of Buxton, sitting on top. 101 managed to place part of its tracks on the ground, allowing it to get off King Buxton easily. 101 then drove into the single spike and was bumped, but met King Buxton again, knocking its opponent away with its automatic spike. King Buxton stopped briefly near the flame pit, and 101 kicked it over the flames and into Dead Metal. King Buxton was damaged by the circular saws mounted on the wall, but ended up knocking the circular saw out of position. King Buxton escaped and rammed 101 broadside once more.

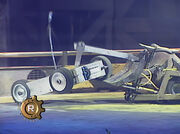
Buxton attacked by Shunt
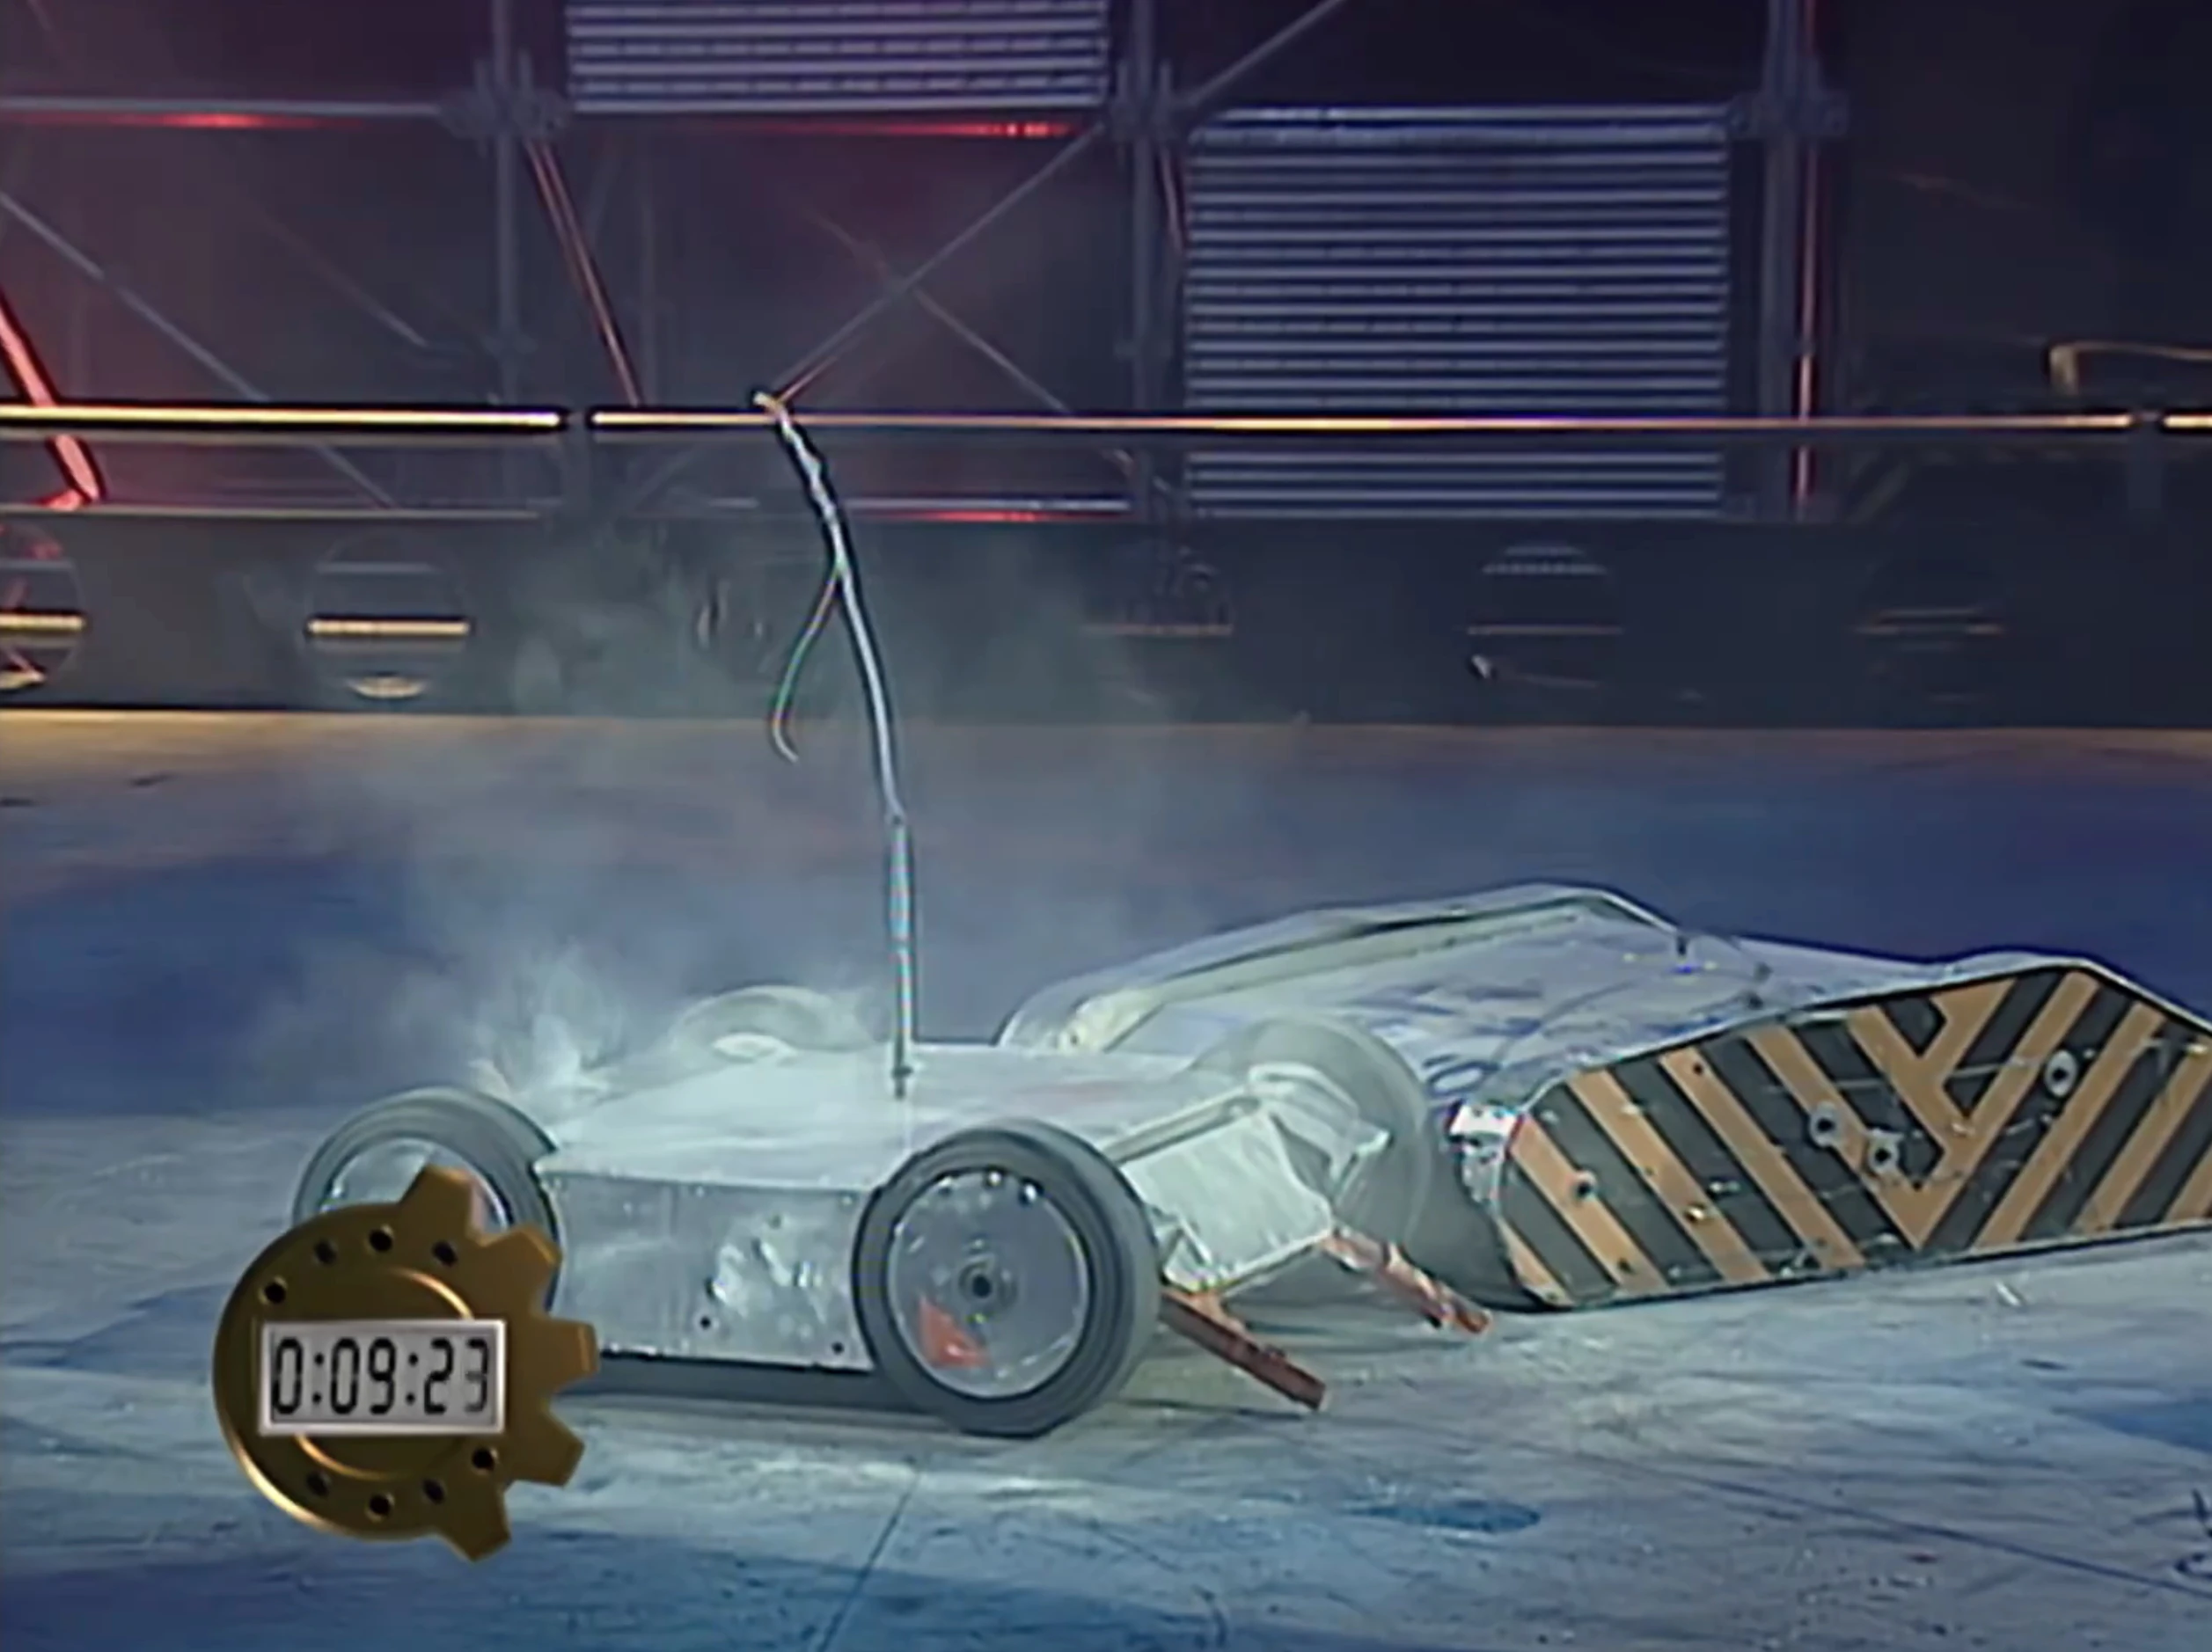

King Buxton starts smoking in the final seconds
It lost its purchase briefly and ran into the side wall, only to recover quickly and slam back into 101. King Buxton pushed 101 into the side wall after escaping Shunt, but 101 drove on top of King Buxton and positioned itself behind its opponent, and pushed King Buxton into the side wall. The two robots crashed into Shunt whilst battling around the arena, and the House Robot axed King Buxton. Buxton escaped and ran back into 101, driving on top of one of the moving tracks, and being tussled by it before driving off.
- "Very very close this so far. A good old tussle, isn't it?"
- — Jonathan Pearce
King Buxton drove onto one of the tracks, and sat there with smoke beginning to pour from the machine. Buxton had slowed down significantly by now, and time began to run out. 101 and King Buxton were both still moving when cease was called, and the match was decided by the judges, who put 101 through to the semi-finals.
- "The judges have made their decision. It's unanimous. That surprised me, but they've gone for 101!"
- — Craig Charles announcing who the judges decide to send through to the semi-finals
In a scene shown after the credits, Simon Harrison explained to Philippa Forrester that the back engine had caught fire, and during the opening moments of the fight, he had broken his controller by accident.
- "First ten seconds, I was so excited, I broke the control stick of the steering! I had to turn it upside-down, jam it in, and then swiggle it about, so I got something out of it!"
- — Simon Harrison after the battle
Series 4[]
- "...we've been seeded, so I think everybody will be expecting the goods from us, and hopefully we're going to deliver!"
- — Simon Harrison before Round 1


King B3 drives over Medusa 2000
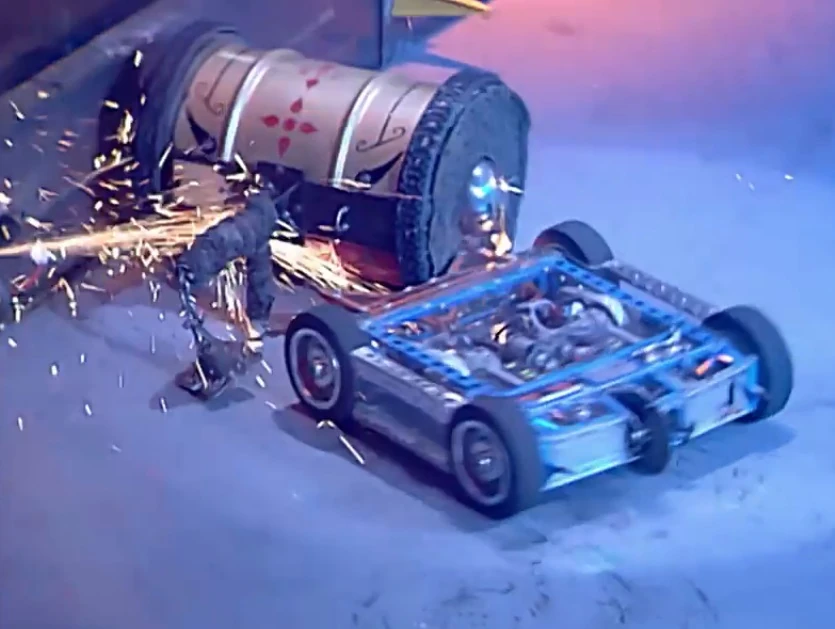

King B3 slams Attila the Drum into the arena side wall
King B3, seeded number seventeen, was drawn against newcomers Attila the Drum and Medusa 2000 in its first round melee. King B3 started by slamming into Medusa 2000, pushing it around as Attila the Drum began spinning. Medusa 2000 drove under King B3, but the smaller machine simply drove over the side. King B3 spun and pushed Attila the Drum a little, then drove on top of Medusa 2000, before Attila the Drum knocked King B3 off the latter. King B3 then rammed Attila the Drum, piercing its opponent with its spikes and ramming the axlebot into the arena wall. Sgt. Bash set Attila the Drum's furry wheels alight, but Attila the Drum was able to escape. Attila the Drum spun on the spot, but King B3 was able to stop the spinning with another charge. Time ran out, and the judges had to decide which robot to eliminate.
- "For me, King B3 did enough; aggressive, causing damage, that's for certain..."
- — Jonathan Pearce whilst reviewing the highlights
The judges eliminated Attila the Drum, putting King B3 through with Medusa 2000. King B3 was then drawn against another newcomer, Atomic, in Round 2.
- "We have already had a small fire, a very small fire and our small motors that drive the arm up and down at the front, so we've lost that now, but we've still got the spikes and we've still got the saw, we've repaired the saw, so we can still do some damage, and we've still got power. ... It could still go up, there could be a bigger fire!"
- — Simon Harrison before the battle

Atomic flips and pins King B3
King B3 started off avoiding Atomic, before slamming into its flipper. Both robots pushed each other, with King B3 the more successful at pushing and was able to avoid Atomic's flipper. Both robots edged into Dead Metal's CPZ, with King B3 then ramming Atomic from behind as the two evaded the House Robot. King B3 pushed Atomic into the arena wall, driving over its opponent's front. Atomic chased King B3 down and flipped it, then clamped the flipping blade down onto King B3, using it to shovel King B3 into Sir Killalot. As King B3 attempted to escape, Atomic tried to keep the pressure on King B3 by pushing it back towards the CPZ. However, the attack missed and the flipper clipped the arena wall, snapping the flipper in half and leaving Atomic weaponless.

Sir Killalot pits King B3
Atomic pinned King B3 against the wall, and smoke began pouring from King B3 and it became clear that an internal fire had caused the robot to become immobile. The right drives stopped working and Sir Killalot grabbed King B3, dropping it into the Pit of Oblivion.
- Craig Charles: "You've been here three times, it's been getting worse every time!"
- Simon Harrison: "No, it's not good, it's not been good this year for us I'm afraid."
- — Post-battle interview
King B3 also entered the Tag Team Terror Championship during the Christmas season of the Fourth Wars. It fought with its long time rival 101. In the first round, the two were drawn against X-Terminator 2 and Inverterbrat.
- Julia Reed: "Of all the robots in Robot Wars, I can't believe these two have paired up, it's extraordinary! The score between them so far is one-all, and I thought they were sworn enemies! Mike?"
- Mike Franklin: "Well we are in the arena, but in the end of the day, we've got mutual respect for each other's robot - they've got a good robot, we've got a good robot, so we decided that we'll go do some damage to some others now."
- Julia Reed: "But not to each other?"
- Mike Franklin: "Well possibly..."
- — Pre-Tag Team talk with Julia Reed

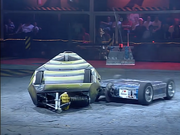
King B3 reverses into Inverterbrat
Inverterbrat started off against King B3, which drove around behind King B3. Inverterbrat tried to use its lifter on King B3, but did not get the lifter under its opponent properly, and after attacking Inverterbrat with the saw, King B3 tagged 101. As 101 came out, Inverterbrat tagged X-Terminator 2. The two met head to head and 101 pushed X-Terminator 2 back. X-Terminator 2 used its axe again and again on 101, but was unable to cause any damage.
- "Well, they're abiding by the rules... remarkably!"
- — Jonathan Pearce
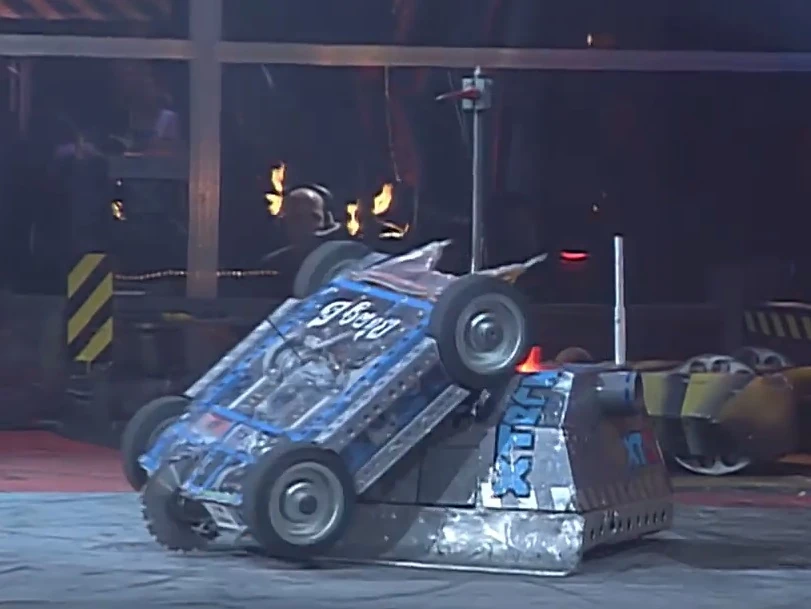

King B3 assails X-Terminator 2
King B3 came out without being tagged, but when chasing after X-Terminator 2, ran into 101, being knocked on top of the team mate by Sgt. Bash. King B3 drove off and attacked X-Terminator 2, whilst 101 drove into the red zone to fight Inverterbrat, which was in the top CPZ. 101 left Inverterbrat and tried to get behind X-Terminator 2, which was still fighting King B3. However, 101 drove into Refbot by mistake when X-Terminator 2 moved away, before going back to attack Inverterbrat, ramming it against the arena wall.
- "Rules, what rules? Refbot: dismiss him, sack him, he has no control over these robots!"
- — Jonathan Pearce
Inverterbrat reversed away into a CPZ as 101 backed off, and King B3 pushed X-Terminator into that CPZ. 101 pinned Inverterbrat against the wall, but got caught by Dead Metal temporarily, who dragged it back and held it, before it escaped and shoved X-Terminator 2 into Inverterbrat in the CPZ. X-Terminator 2 moved away, but was ganged up on by both King B3 and 101. By now, it had become clear that Inverterbrat had been immobilised in the corner, leaving X-Terminator 2 to fight alone. Eventually, King B3 and 101 started having quick slams on each other.
- "With friends like that, who needs enemies?"
- — Jonathan Pearce
Time ran out, and the judges were called upon, but with the blue team being up one team member, it was an easy decision in favour of King B3 and 101. This put them into the final against Firestorm 2 and Scorpion, both of which had suffered damage from the last round, and Firestorm 2 in particular had a lot of trouble getting going.
- "A united team!"
- — Julia Reed optimistically describes the two rivals who have sorted out their differences
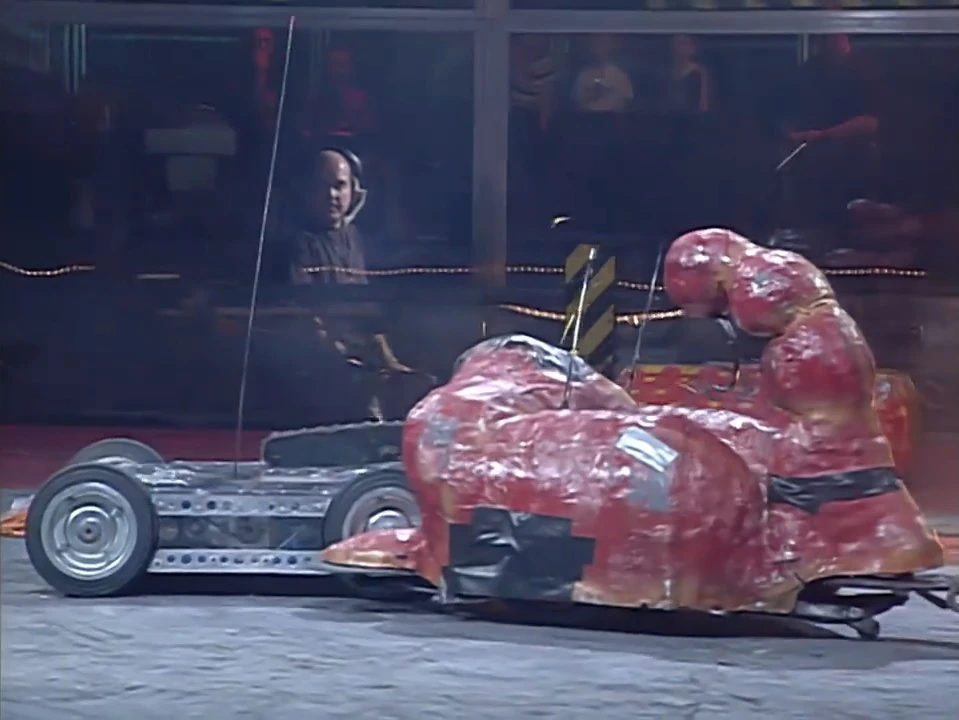

King B3 battles Scorpion
Scorpion started off against King B3. King B3 used its disc to cut into Scorpion and pushed it around, then retreated to the blue zone, so 101 came out and started attacking Scorpion. Firestorm 2 came out and lingered next to 101 and Scorpion before moving away. King B3 then came out and attacked Firestorm 2. Scorpion was clutched by Dead Metal, while the other three robots scuffled in the red zone.
- "And all of a sudden we've got all four robots on the arena floor! Yes! This is what we want! Scorpion may have gone blind and they've shown a blind eye to rules and regulations! It's gone mad in Robot Wars: Tag Team Terror!"
- — Jonathan Pearce
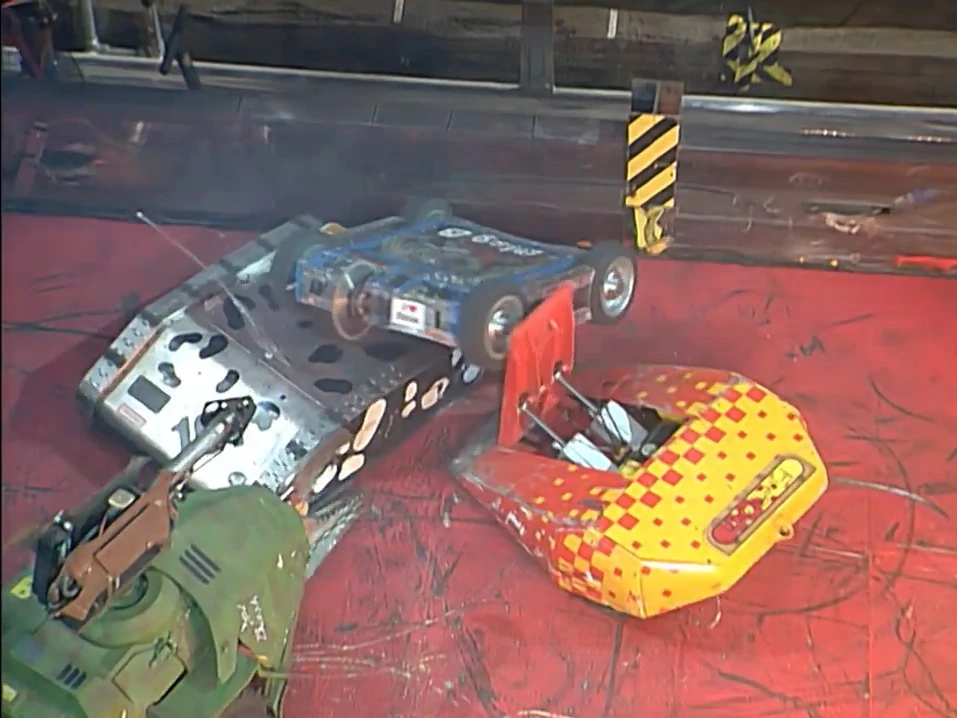

101 pressures King B3 and an immobilised Firestorm 2
Firestorm 2 was still suffering from problems, as it struggled to move, even when King B3 and 101 both rammed it. However, King B3 then drove onto Firestorm 2's wedge and was flipped on top of 101, which took the opportunity to slam its team-mate and rival into the arena wall. Firestorm 2 broke down after this and was not seen again in the battle.
- "I think the Tag Team Terror has been won by 101 and King B3...and now we have what I thought we'd have, right from the first activate! We've got 101 against King B3, this is a massive grudge!"
- — Jonathan Pearce
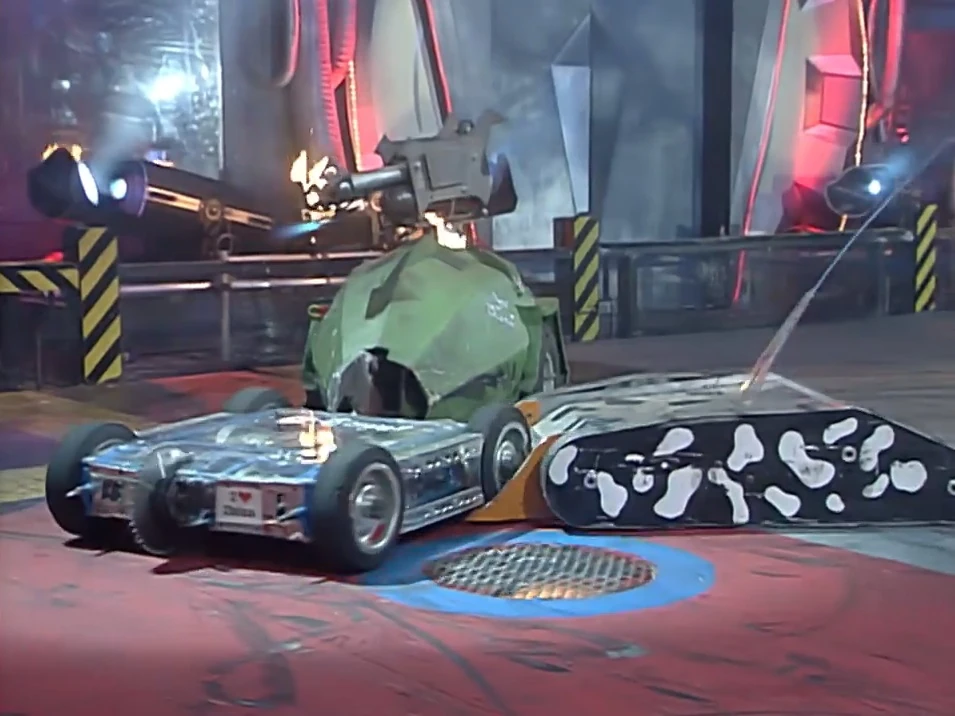
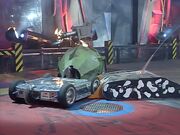
101 attacks its Tag Team partner
King B3 retaliated and pushed 101 back, before then pushing the wounded and limping Scorpion back towards the immobilised Firestorm 2. With both of their opponents no longer working properly, King B3 and 101 finally turned on each other for real, pushing each other all around the arena.
- "You are team members! Come together? Friends? You're having a laugh! You're still enemies, I'm sure......I repeat! You are supposed to be teammates, 101 and King B3"
- — Jonathan Pearce, as the winning tag team reprise their rivalry
Dead Metal and Sgt. Bash finally managed to separate them, damaging them in the process. Cease was called, and King B3 and 101 were the Tag Team champions.
- Craig Charles: "What is going on with you two, though? Okay, so you dismantle the other two robots, and then what do you do? You get a little bit bored, and start fighting each other!"
- Simon Harrison: "I think we're dying to just sort it out, once and for all, you know, between us two. One day, we're going to sort it out."
- Craig Charles: "You've had grudge matches before, haven't you? So how come you've chosen to be in the same team if their's that sort of animosity between the two of you?"
- Simon Harrison: "Oh, we know each others robots really well, it's a good team, because we've fought each other, and we know each other's strengths, and that's why we're a good team, and we'll carry on, but we can't resist having a little go at each other, every now and again!"
- — Post-battle interview

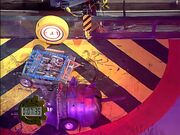
King B3 in the Pinball tournament
King B3 also competed in the Pinball Warrior Tournament during the Fourth Wars. King B3 drove started by knocking the barrels over, then rammed past Sgt. Bash to score points from Sgt. Bash's target. King B3 then hit the multiball release and drove through the car doors, before pushing Matilda out of the way to reach the house robot's target but ran out of time just as it reached Dead Metal's.
- "...and that's a super run by King B3, ran out of time a little at the end."
- — Jonathan Pearce at the end of the run
It had scored 225 points, and eventually finished on the leaderboard in 4th place.
Extreme 1[]
King B Powerworks made a number of appearances in Extreme 1, with little success. Its first appearance was in the Tag Team Terror, where it teamed up with 101 again to defend their title. In the first round, they fought Diotoir and Mega Morg.
- "King B3 and 101 were worthy winners of the title, beating Firestorm and Scorpion in the final, quite easily I thought, but then best of friends? Best of enemies, they turned on each other! Is there friction in the camp? What's going to happen in this series of the Tag Team Terror?"
- — Jonathan Pearce before Round 1

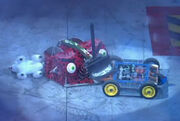
King B Powerworks is trapped by Diotoir
101 started out first against Mega Morg, and after a little pushing between the two, 101 tagged King B Powerworks. As it came out, Mega Morg tagged Diotoir. King B Powerworks appeared to stop for a moment, allowing Diotoir to ram into the side of King B Powerworks, but made no attempt to flip it, and King B soon reversed away. It then rammed Diotoir hard side-on, knocking off the inflatable sheep mascot. King B then got underneath Diotoir's raised scoop and pushed it towards the arena wall. It was close enough to the CPZ to allow Mega Morg to attack, but it reversed away before it could be flipped.
- "Be prepared for mayhem here, absolute confusion. I'm sure that it'll all just break down into an utter rumble"
- — Jonathan Pearce foreshadows the inevitable
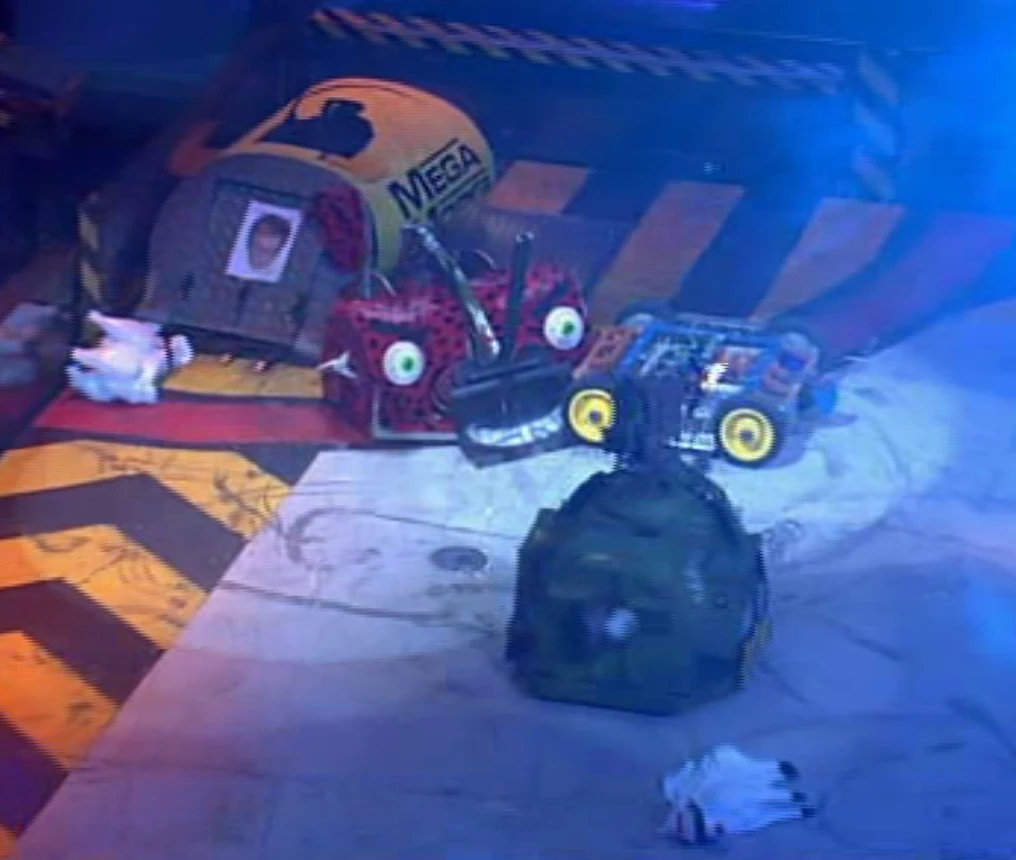

King B Powerworks pushes Diotoir into Mega Morg
King B charged at Diotoir's side, before using its rear saw, but it only caused a few scratches on Diotoir's scoop. Diotoir missed a flip, and King B Powerworks then attacked the inflatable sheep with its saw. Diotoir then pushed it back towards Mega Morg's CPZ, but Sgt. Bash suddenly came out of his CPZ and attacked Diotoir with his flamethrower, slowly igniting the fur. Mega Morg tried to defend its partner, but for some reason did not come out of the CPZ. Eventually, Mega Morg was able to come out of its CPZ and rammed into 101. Barely seconds later, all four robots joined in the battle, with King B pushing Mega Morg into the arena wall and 101 doing the same with the now burning Diotoir.
- "I warned you of this! ... Absolute confusion"
- — Jonathan Pearce as all four robots fight

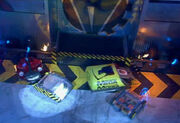
All four robots fight at the same time
The two changed their targets and 101 managed to push Mega Morg, but Diotoir managed to pin King B against the top arena wall. King B was able to get away, but then started spinning around on the spot. 101 pursued Mega Morg towards the far arena wall, which allowed Diotoir to get underneath it and flip it over. As soon as 101 landed on its back, however, it became apparent that only one of its tracks was working.
- "And all of a sudden, the reigning champions are in trouble cos I think King B is spinning wildly out of control, and the reigning champions could be facing elimination here in the Tag Team Terror! There's no control on King B, and 101 in trouble too. This could be a shock!"
- — Jonathan Pearce in the last few seconds
King B Powerworks, meanwhile, had driven into the CPZ and was still spinning wildly on the spot, apparently having lost all control. Diotoir pushed it around, and amidst the spinning, King B's forklifts tore off one of Diotoir's eyes. Time ran out and the judges made the decision. Mega Morg and Diotoir were put through to the next round.
- "It's very dismal, wasn't it? We've not gone like that before, it's very, very disappointing. We are very down about this now!"
- — Simon Harrison on the team's performance after the battle
After the battle, both sides blamed each other for the loss, and Mike Franklin claimed he would like a grudge match later in the series.
King B Powerworks was chosen to act as a veteran against a Wild Card Warrior against Draven. This was arranged after Pussycat was forced to withdraw from the battle, and Draven's team wished to fight their inspirations. Pussycat was unable to compete as spinning weaponry was banned on this day - this also meant that King B Powerworks could not use its own spinner.
- "They are an unknown quantity, but I have been following them, and I've been talking to Martin [Gutkowski] who's the team captain, and I've always laughed at his robot, saying "Oh, it's so complicated, you've taken two years to get that going, you'll never get it going, it's going to fall over as soon as you get in there" and he HAS got it going and now it's frightening! And it actually looks quite nasty, it's little bit of a worry really 'cause we're just the sort of robot he'd like to take on, a nice low flat one that he can get his jaw around and crush it up"
- — Simon Harrison on Draven
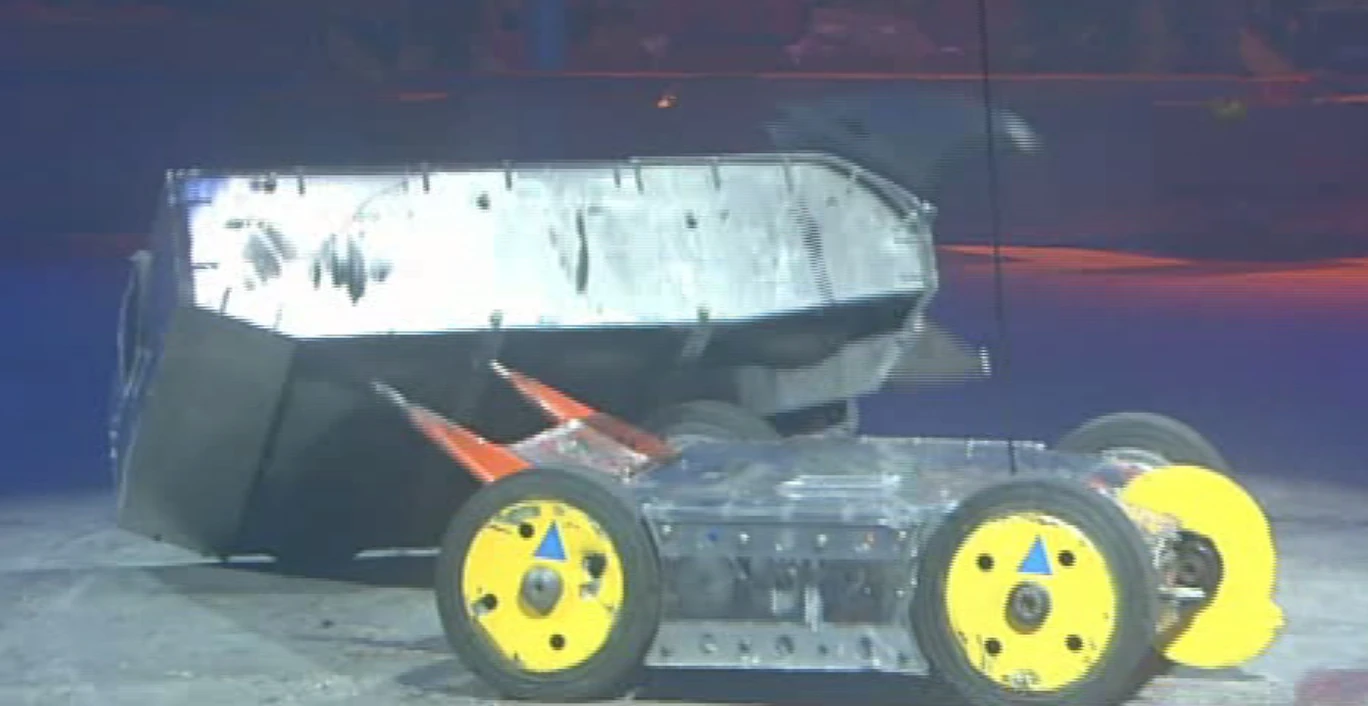
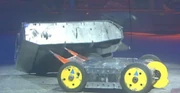
King B Powerworks hooks Draven
King B Powerworks started, but for the first few moments of the battle, the two robots simply drove around one another. Eventually, Draven caught King B Powerworks within its jaw, but failed to close it in time and instead pushed it around the arena. Draven took the advantage and pushed King B Powerworks into the CPZ, but the more experienced machine escaped. With its saw out of action, King B Powerworks attempted to use its lifting spikes to ram Draven's side, but no damage was caused. Draven eventually caught King B Powerworks again, but the jaw was too slow to catch its opponent, which escaped again.
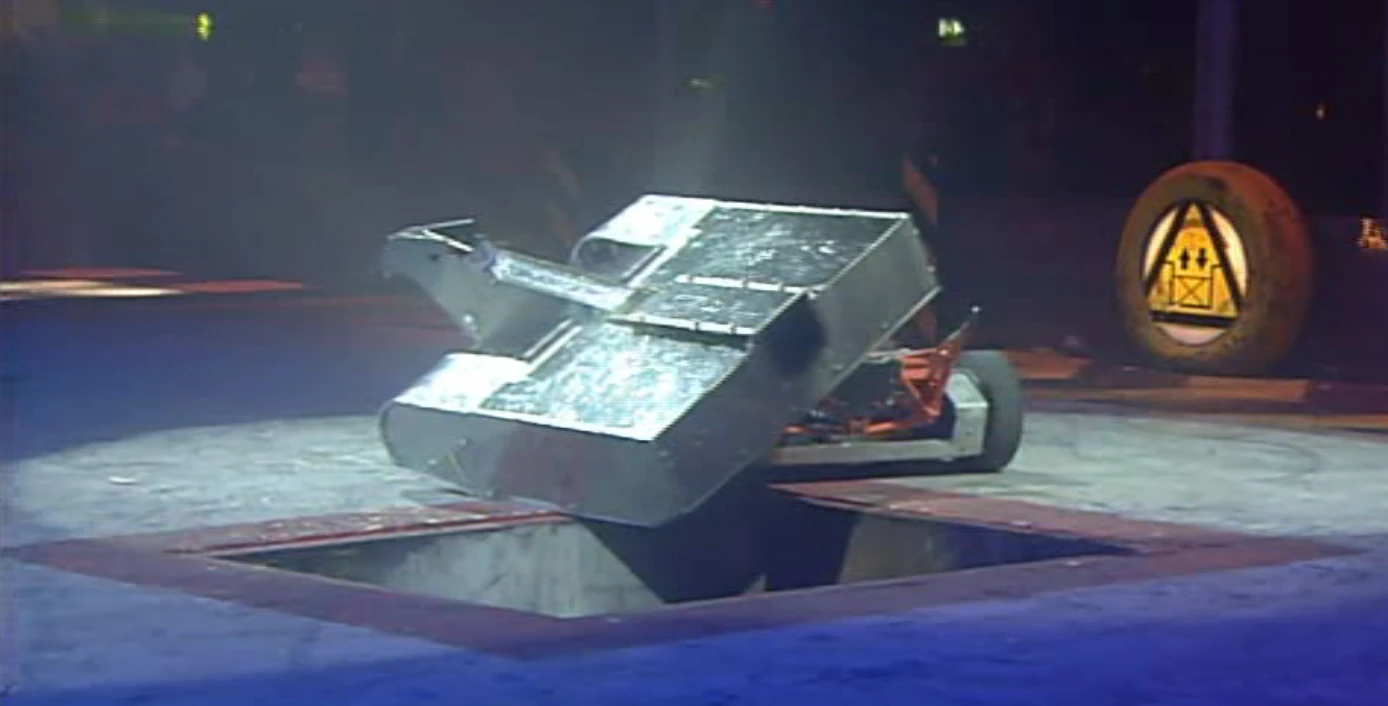

King B Powerworks pushes Draven towards the pit
King B Powerworks then reversed into Draven again, before turning around and ramming into Draven's side with the spikes. With this failing, it attempted to use its spikes again and this time it was able to get underneath Draven and hook itself between its wheels. Draven attempted to escape by raising its lifting mechanism, but this only caused part of its armour to break off. Unable to escape, King B Powerworks took the immediate advantage and, in a decidedly Panic Attack-esque move, activated the pit and pushed Draven straight in.
- "And once again, it's the more experienced robot, King B Powerworks, that wins it!"
- — Jonathan Pearce
As a result of their failure in the Tag Team Terror tournament, both 101 and King B Powerworks organised a Vengeance battle.
- "So who was to blame and who is the better robot of the two?"
- — Jonathan Pearce, in the build-up for the vengeance battle

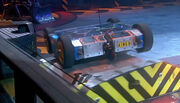
101 slips under King B Powerworks
At the start, both robots charged at each other, but merely deflected each other away. After a bit of spinning, King B Powerworks pushed 101 from the side, before turning around and attempting to use its saw, but it caused no obvious damage. 101 then rammed into King B Powerworks, twice getting underneath it, but deflecting it away again. After a short while, it forced itself underneath again and pushed King B Powerworks into the arena wall. King B Powerworks escaped, climbing off 101's top. 101 pushed back King B Powerworks and, after some more driving around, pushed it into the arena wall once more, forcing underneath and then pulling back before driving King B Powerworks into the CPZ. Both Sgt. Bash and Shunt attacked King B Powerworks, the latter hitting it with his axe but causing no obvious damage. As Sgt. Bash pushed King B Powerworks back, it began to spin, which prevented him from pushing it any further. It continued to dart away from Sgt Bash, but 101 caught it side on. After another push, where it was attacked briefly, 101 let King B Powerworks go, but its opponent ran into the CPZ and began spinning again. When it suddenly charged into the opposite CPZ and began spinning again, it became apparent that King B Powerworks had lost control.
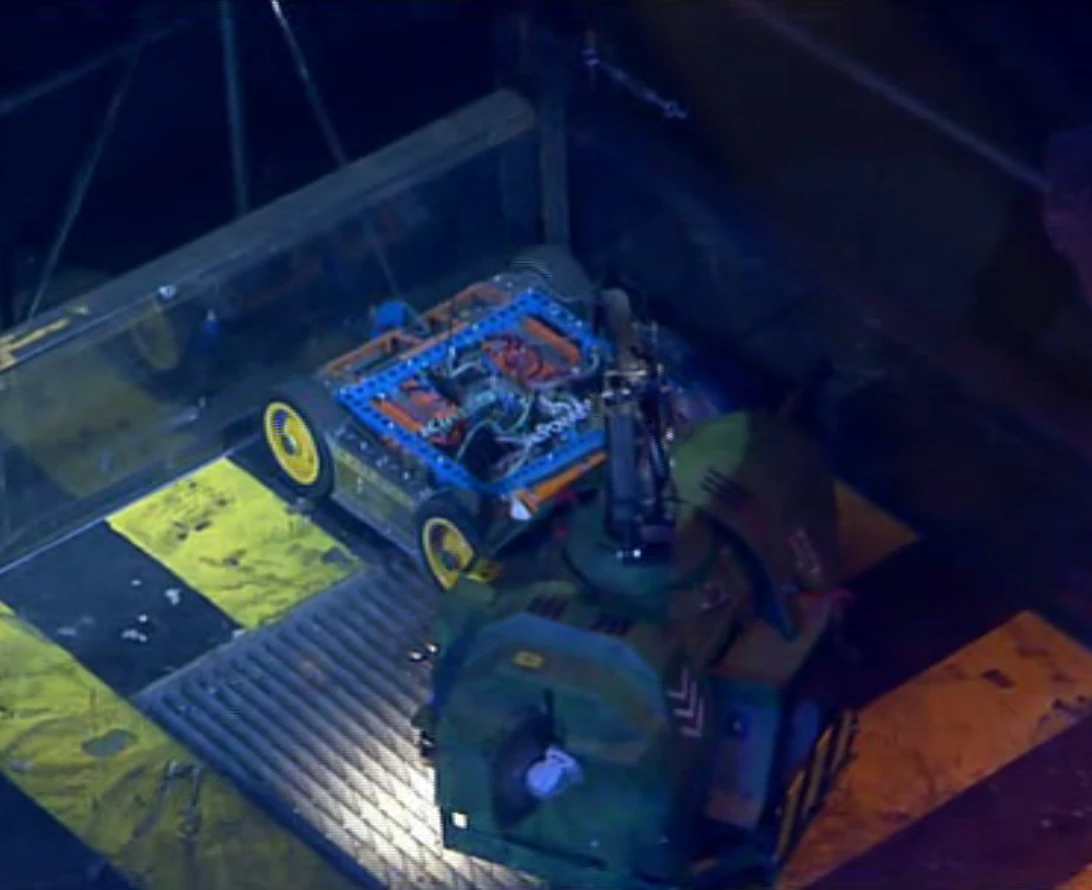

King B Powerworks loses control
- "Are they in control? We've seen this before from them, when they lost the Tag Team Terror earlier!"
- — Jonathan Pearce remembers the spin-drive rampage
With control now completely gone, King B Powerworks charged around the arena, crashing into the angle grinders, spinning around the floor flipper, crashing into Refbot and Shunt, before reversing into a CPZ and spinning there.
- "Let's go crazy for a while, shall we?"
- — Jonathan Pearce watches King B Powerworks in delight
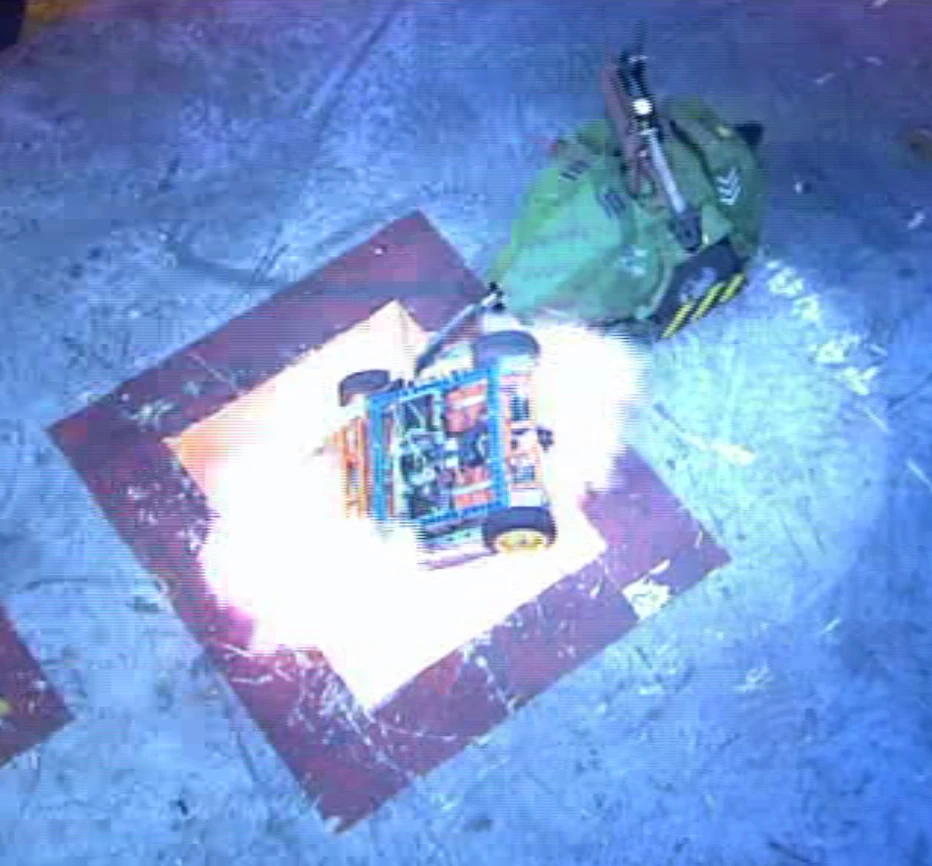

Sgt. Bash calms King B Powerworks down
Eventually, Shunt and Sgt. Bash managed to trap King B Powerworks in the corner, and Sgt. Bash was able to restrain it using his pincer. As the pit was activated, the House Robot attempted to drive King B Powerworks into the pit, but very nearly drove in himself instead. However, as Sgt. Bash dropped King B Powerworks into the pit, he fell in anyway. After the battle, King B Powerworks concluded that 101 was the superior robot, and the teams shook hands, pledging to continue their Tag Team partnership in the future - although the opportunity never arose.
- "History is made!"
- — Craig Charles, as the King Buxton/101 rivalry is finally brought to an end
King B Powerworks' final appearance in Extreme 1 was in a Mayhem qualifier battle, for a right to fight in the second annihilator of the series. Here, it was placed up against Tornado and The Steel Avenger.
- "I've lost count of the amount of times someone has said to me "You copied Tornado!", but we didn't, we were here first, they're the young upstarts, so we're going to punch them down!"
- — Simon Harrison before the battle

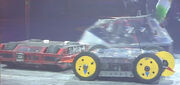
King B Powerworks rams an immobile Tornado
At the start of the battle, The Steel Avenger drove between Tornado and King B Powerworks, dodging attacks by them, but failing to land an axe blow. Tornado used its drum to get under The Steel Avenger and push it around, but The Steel Avenger was unharmed and pursued, dodging a small ram by King B Powerworks. Tornado and The Steel Avenger drove at each other, before Tornado ran at The Steel Avenger's front, resisting an axe blow and pushing underneath it again, but failing to overturn it. King B Powerworks attempted to push into The Steel Avenger, but the attacks caused no issues as The Steel Avenger went after Tornado again. The resulting axe blow missed, but The Steel Avenger dodged to the side before Tornado could push it. Next it pushed into King B Powerworks, but did not fire the axe. After driving around the arena for a while, Tornado charged from the other side of the arena, drove around The Steel Avenger and rammed into it again, resisting another axe blow and pushing it towards the top-left CPZ. As the two continued their battle across to near where the flame pit was, King B Powerworks was struggling to keep up with the other two, only managing to get the occasional small ram as they ran around the arena.
- "King B is out of the fray at the moment, not really getting involved. Tryna... basically tryna to catch the others. It's almost like a game of tag. "Come on, come on. Try and catch us if you can!"
- — Jonathan Pearce on King B Powerworks
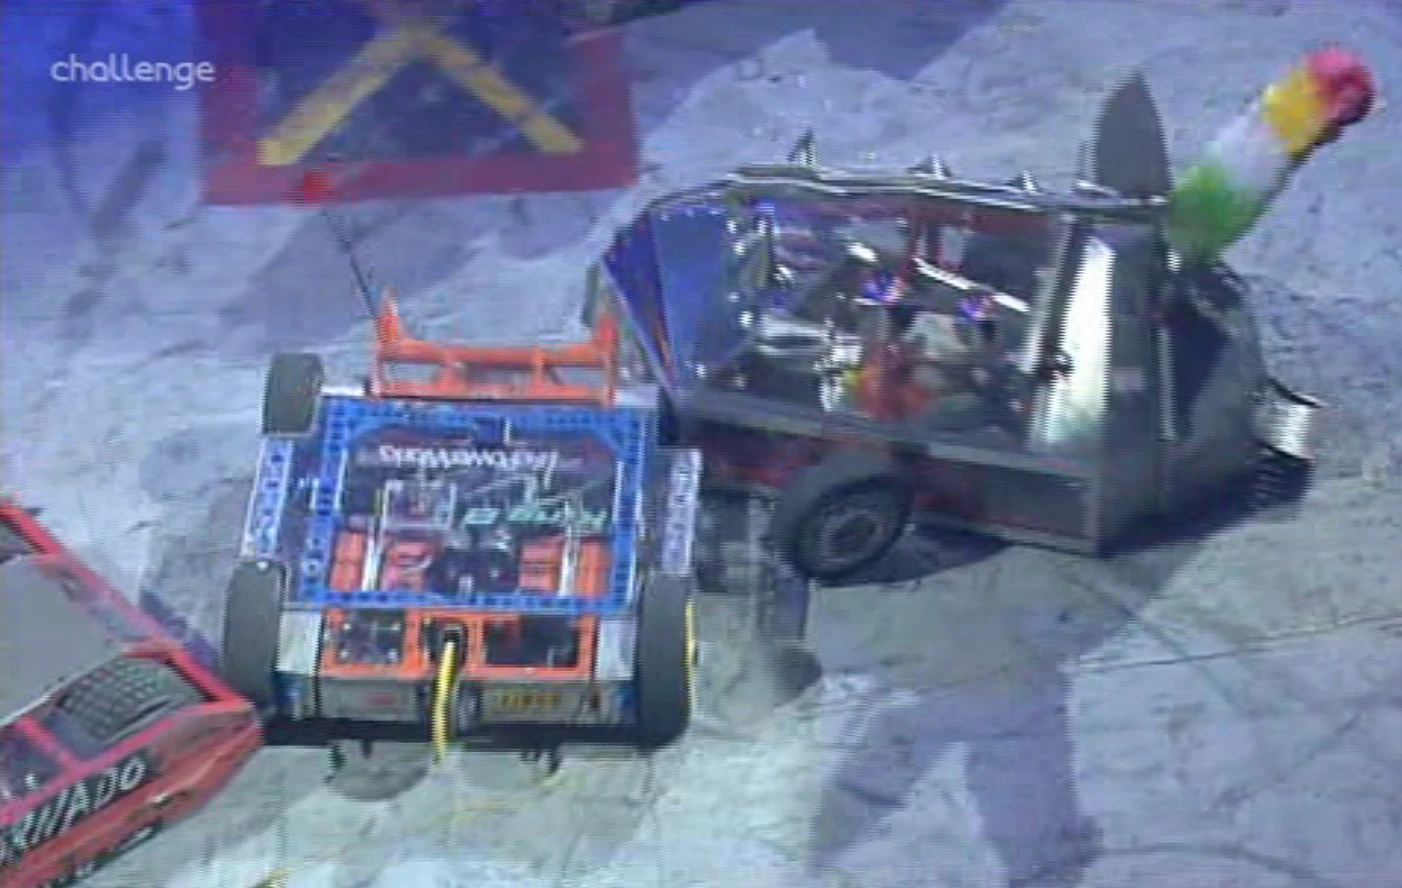

The Steel Avenger's ram breaks one of King B Powerworks' wheels off
Eventually, Tornado managed to land a side slam on King B Powerworks, before landing an even more powerful slam on the side of The Steel Avenger. As they attacked each other, King B Powerworks finally landed an attack, pressing into the side of Tornado which appeared to stop moving. King B Powerworks then launched a stronger ram, penetrating the side of Tornado with its lifting spikes, and pushed Tornado towards the floor flipper and, as it reversed away for another push, Tornado did not move; its link had popped out. King B Powerworks took advantage and continued to push Tornado around, with The Steel Avenger landing minor attacks on the red robot. Eventually, the two robots broke away to fight each other, with The Steel Avenger lifting up King B Powerworks. As the two clashed with their rear weapons, Tornado was counted out and thrown by the floor flipper. Meanwhile, King B Powerworks had gotten underneath The Steel Avenger with its lifting forks and pulled it into the pit release button. As The Steel Avenger broke away, King B Powerworks attempted to push Tornado into the pit. This proved to be a crucial mistake, as The Steel Avenger rammed hard into King B Powerworks' front-right wheel whilst it was distracted, and under the pressure, the wheel broke off.
- "And there are three wheels on that particular wagon now!"
- — Jonathan Pearce

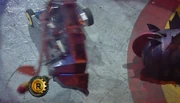
The Steel Avenger is tossed by Matilda and King B Powerworks is lifted slightly as well
As Matilda pushed Tornado into the pit, King B Powerworks desperately tried to use its saw on The Steel Avenger, but caused no damage. The Steel Avenger landed a few more axe blows on King B Powerworks as time ran out, but in the last three seconds, The Steel Avenger missed a crucial charge and nearly drove into Matilda's CPZ. It began to reverse, but Matilda hit it with her flywheel anyway, throwing it upside down. The judges decided, however, that The Steel Avenger had not quite crossed into the CPZ and that the attack should not have happened. Judging the battle up until that point, The Steel Avenger was given a very close win on damage points, though the Judges did commend the fight as the best Mayhem in Extreme.
- "The most important thing though, Tornado, he was out, that's all I care about"
- — Simon Harrison after the decision
Series 5[]
- "Experienced, quick, manoeuvrable, worth watching closely."
- — Jonathan Pearce introduces King B Powerworks to Series 5


King B Powerworks slams Kronic 2 into the angle grinder

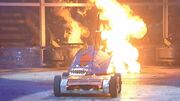
Kronic burns on the flame pit after an attack from King B

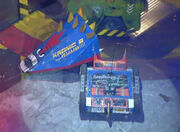
King B Powerworks carries Kronic 2 into Sgt. Bash
King B Powerworks returned for the Fifth Wars and was placed up against Kronic 2 in the first round of the heat. King B Powerworks initially dodged Kronic 2 but whilst avoiding its opponent, it paused for a moment, allowing Kronic 2 to get underneath it and flip it. King B Powerworks landed on its wheels, and drove up Kronic 2's side, reversing away when Kronic 2 fired its flipper. After driving at Kronic 2's front and backing away before Kronic 2 could flip, King B Powerworks turned and reversed towards Kronic 2 with the saw, but merely drove over Kronic 2's wedge. Kronic 2 turned and moved away, but King B Powerworks was close behind it, reversing into it and pushing it past the flame pit, slamming it into the arena wall. Kronic 2 reversed over the flame pit, but seemed to stop outside a CPZ, where Shunt and Sgt. Bash were. It slowly moved away, only for King B Powerworks to ram it side-on, pushing it against an angle grinder, then the wall, then ramming it towards Sgt. Bash. Kronic 2 lumbered away, but then stopped again. King B Powerworks got side-on against Kronic 2, getting one its lifting spikes to puncture Kronic 2's side and lifted it, pushing it around the arena and into Sgt. Bash. Kronic 2 was nudged by Sgt. Bash, then Shunt came out and axed King B Powerworks, freeing Kronic 2 as King B Powerworks reversed away. However, King B Powerworks continued pushing Kronic 2's side, and Kronic 2 was making little movement. Struggling to move, Kronic 2 reversed onto the flame pit, and its spikes caught fire. For the rest of the fight, King B Powerworks rammed into Kronic 2 a couple of times, whilst Kronic 2 only twitched a little. As it was not counted out, the fight went to the judges, who unsurprisingly voted for King B Powerworks.
- Craig Charles: "What are the tactics on a thing like that, because it is very, sort of fast?"
- Simon Harrison: "Hit 'em hard, hit e'm hard!"
- — Post-battle interview
King B Powerworks was then placed up against the number 11 seed Dominator 2 in the second round.
- "Very good battle, this. Dominator 2 possibly more impressive in its earlier fight, King B Powerworks needed a judges' decision to separate it from Kronic..."
- — Jonathan Pearce at the start of the battle
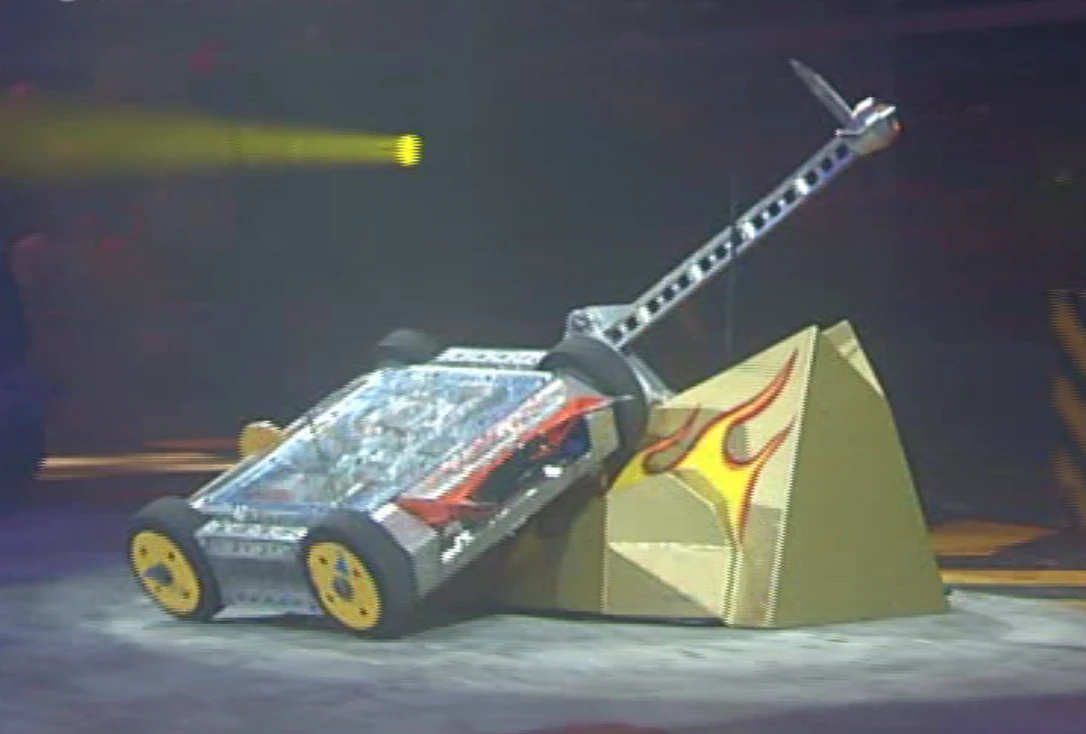

King B Powerworks runs up the wedge of Dominator 2
Dominator 2 drove straight towards King B Powerworks, which turned away, before turning around and driving up Dominator 2's wedge, and Dominator 2's axe crashed down onto the top of it. Dominator 2 pushed it into a CPZ, then released it, allowing King B Powerworks to get off Dominator 2, and it darted away, with Dominator 2 close behind it. Both machines bumped into Sir Killalot, which was out of his CPZ, but the House Robot did not attack either of them before they escaped. King B Powerworks reversed across the arena, but was pushed into a CPZ by Shunt, who was also out of his CPZ. King B Powerworks managed to drive around Shunt and escape the CPZ, and dodged Dominator 2 for a while, driving up the arena.
- "...very quick to turn and get away at 16 mph top speeds, manoeuvrable around that arena."
- — Jonathan Pearce on King B Powerworks
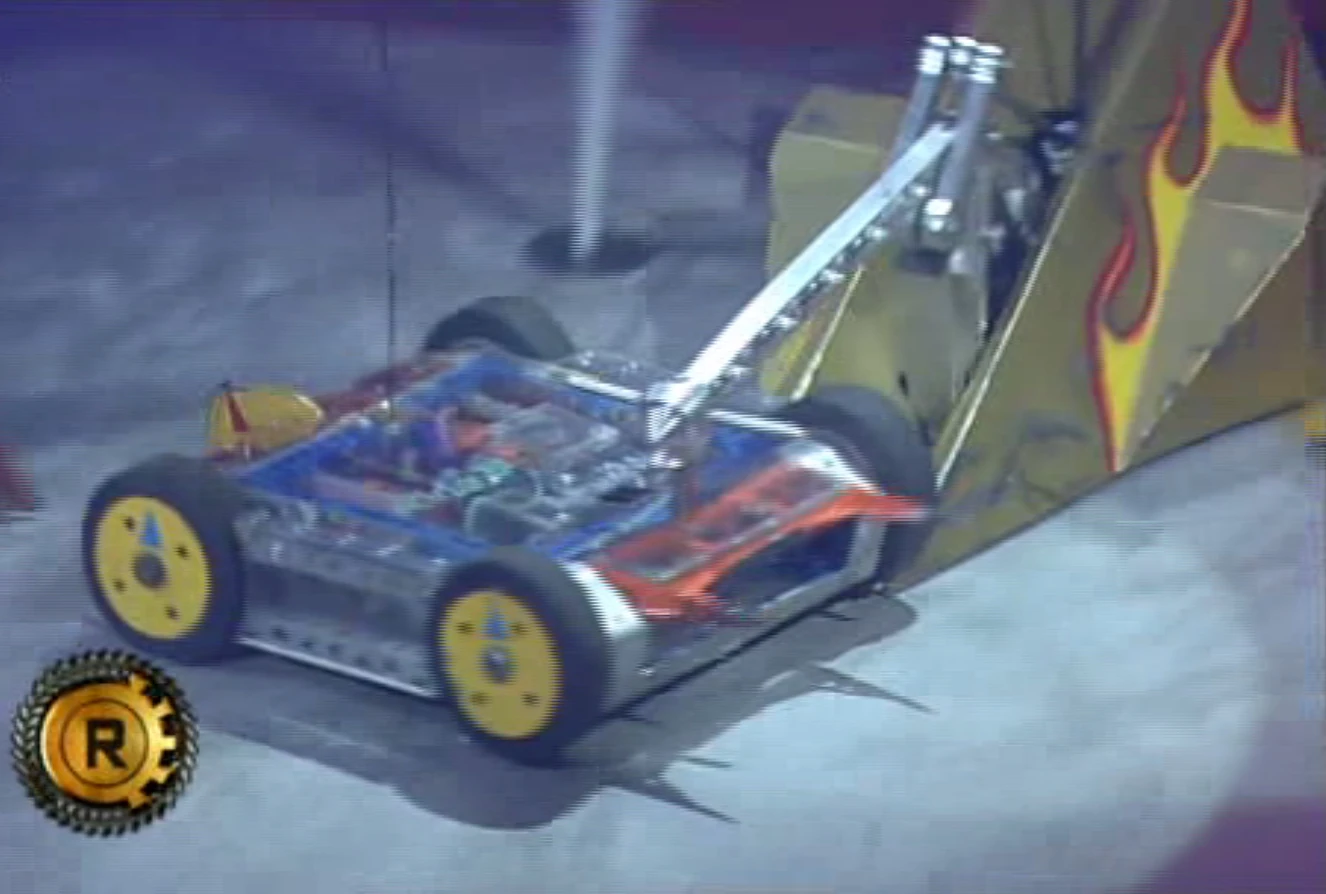

Dominator 2 penetrates King B Powerworks above the forks
Dominator 2 eventually caught up with King B Powerworks, pushing it towards the wall and axing it a couple of times. King B Powerworks turned itself off the wedge and used its saw on Dominator 2's side, but caused no damage. Dominator 2 tried to axe King B Powerworks, but missed, then pushed it around, with King B Powerworks stuck on the side of the wedge.
- "How can it damage Dominator 2, though? It's a major problem. Side by side, no place to duck or hide!"
- — Jonathan Pearce

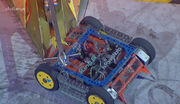
The robots after cease
King B Powerworks was able to get down after Dominator 2 fired the axe, which missed its target, but as it tried to escape, Dominator 2 caught up with it almost instantly, and after missing one axe blow, caught up with it again, and the next axe blow pierced through King B Powerworks' plexiglass top, right above the forks, and was able to push it around. It retracted the axe, and King B Powerworks tried to escape, but Dominator 2 was right behind it and axed it again. King B Powerworks drove at the Dominator 2 with the saw, only for Dominator 2 to axe it again, dragging it back. The match ended with Dominator 2's axe buried in King B Powerworks. The fight went to the judges, who went for Dominator 2.
- Craig Charles: "Sometimes it looked like it'd gone in so deep, they couldn't actually get it out again."
- Simon Harrison: "It's tough, it's tough, it'll keep going if it's got a lot of damage."
- Craig Charles: "Well you guys're tough too, because I mean, that's one of the best axes in the business, and you were still going, and a lot of times it was just bouncing off your casing."
- Simon Harrison: "Well, we didn't want to stop, you know, we wanna just keep trying to go, trying to go, there's no point giving it up, you never give up in this game, it's not worth it, you just never know what's going to happen."
- — Simon Harrison is gracious in defeat
Series 7[]
King B Powerworks was drawn against the 5th seed Dantomkia, Hassocks Hog 2 and fellow Tag Team champion Rick in the first round.
- Jayne Middlemiss: "Biggest fear?"
- Grant Hornsby: "Biggest fear: Spinners, flippers, crushers, axes, hammers..."
- Simon Harrison: "...other robots basically."
- — Series 7 Pre-first round interview

King B Powerworks is flipped against an angle grinder by Dantomkia
King B Powerworks started by charging at Hassocks Hog 2, but when it reached it, Hassocks Hog 2 dodged and King B Powerworks bumped into Rick, which missed a flip. King B Powerworks held back as Dantomkia got under Hassocks Hog 2 and flipped it over, from where it was unable to self-right. Rick tried to flip it, but didn't get the flipper under King B Powerworks properly, so failed to flip it again, and Rick turned on Dantomkia. Dantomkia flipped Rick over and started pushing it, so King B rammed into the side of the seeded robot. It tried to lift it, but Dantomkia slid off as the forks where not under it properly, so King B Powerworks backed off and Dantomkia carried on pushing Rick, ramming it to the other side of the arena, where it unsuccessfully tried to flip it out of the arena. King B came charging after them, hitting the side wall, and turned to face Dantomkia. However, Dantomkia easily got under King B Powerworks, so Team B quickly reversed away before Dantomkia could flip. Dantomkia flipped Rick back up against the wall, and got under it, but before it could flip, King B Powerworks rammed into the side, so Dantomkia turned on it. Whilst Rick got itself off the wall, Dantomkia got under King B Powerworks and flipped it onto an angle grinder. King B Powerworks quickly got itself down, but drove straight onto the front of Dantomkia, which pushed it towards the CPZ, and flipped it to Mr. Psycho. Meanwhile, Hassocks Hog 2 was counted out.

King B Powerworks is carried by Dantomkia
Dantomkia pushed King B Powerworks to the bottom arena wall, with King B Powerworks having got caught under the flipper blade after the last flip, but received a hammer blow from Mr. Psycho. After pushing King B Powerworks into the arena wall, King B Powerworks escaped, driving up the arena. However, Dantomkia was close behind it, and soon caught up with it, flipping it over again. It then turned on Rick, flipping it up against the arena wall again. Rick fired the flipper to get off the wall, but fell onto Dantomkia's flipper, which flipped it again, but Rick did not go over the fence because Dantomkia was not in the right position or angle, instead landing by the immobile Hassocks Hog 2. As it tried to escape, Dantomkia got under it, and King B Powerworks reversed in, blocking Rick's escape and pinning it against the wall.
- "This is a very, very good overall display from the seeded robot ... King B isn't a bad machine either. It was a Semi-Finalist way back in Robot Wars 2"
- — Jonathan Pearce
Dantomkia tried to get under King B Powerworks, but its rear retractable castor was in the wrong position, so instead of getting under its opponent, King B Powerworks got under Dantomkia and reversed it against the wall. Both machines darted away as Mr. Psycho came in to attack Hassocks Hog 2. Dantomkia flipped King B Powerworks over close to Growler's CPZ, and the two fought in the centre of the arena. Dantomkia sped under King B Powerworks again, but Mr. Psycho, who was carrying Hassocks Hog 2, reversed into Dantomkia, as it was trying to get to the Drop Zone. This allowed King B Powerworks to get off Dantomkia, causing Dantomkia to miss its flip. King B Powerworks started pushing Rick, but reversed away to avoid Dantomkia. Dantomkia chased King B Powerworks down the arena, and though King B Powerworks was able to evade the seeds for a time, Dantomkia soon got under it again. Dantomkia started spinning, which caused King B Powerworks to slip off the side, so Dantomkia missed its flip. King B Powerworks hurried away, bumping into Hassocks Hog 2 as it did so. Dantomkia initially chased King B Powerworks, but then turned on the immobile Hassocks Hog 2, flipping it onto King B Powerworks as it passed. This distraction allowed Rick to get under Dantomkia and swiftly flip it over. Dantomkia immediately self-righted, and King B Powerworks charged at it. Dantomkia turned around, trying to get under King B Powerworks, so King B Powerworks turned, pushed past Dantomkia, and escaped. After Hassocks Hog 2 was dumped out of the arena by Mr. Psycho, Dantomkia turned on Rick again, as the three robots fought at the top of the arena. Dantomkia tried and failed again to flip Rick over the fence, and King B Powerworks rushed in as Dantomkia pinned Rick against the wall, preventing Rick's escape.
- "Dantomkia and King B together, almost like a Tag Team, on poor old Rick."
- — Jonathan Pearce

King B Powerworks picks up Rick
Dantomkia flipped Rick onto King B Powerworks, which used its forks to pull Rick away, before Dantomkia pushed it against Mr. Psycho. King B Powerworks rammed into Dantomkia from behind, pushing it against the House Robot, before pulling it away, then driving over Dantomkia's front just before cease was called. The Judges were called upon to decide which robot of the remaining three would be eliminated.
- "We know the Hassocks Hog 2 went out, Rick I think will be the other decision to be excluded by the judges, because Dantomkia and King B Powerworks just looked too strong"
- — Jonathan Pearce reviewing the highlights
The Judges decided, in a 2-1 split decision, that King B Powerworks would continue alongside Dantomkia, over Rick.
King B Powerworks was then placed up against Team Vader and their new machine IG-88 in the second round.
- "Well, I think our robot was conceived at a rather more gentle age, probably a bit cruel to stick it in there with IG-88, but I saw an aerial sticking out the side, in a great big loop, so I think if that comes off this thing, we're alright. If not, we're not."
- — Simon Harrison before the battle
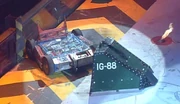
IG-88 attacks the immobile King B Powerworks
King B Powerworks turned away from IG-88 at the start, as its opponent closed in, trying to keep its distance, but made a wrong turn and received a glancing blow from IG-88's blade. It turned away, nearly driving into the wall, before driving around IG-88, then drove away from it, with Team Vader's machine following it. King B Powerworks turned and drove at the front of its opponent, only to receive another glancing blow from the spinning axe, then reversed down the arena, down by the pit release button.
- "King B very tenacious, it's a stayer, dancing away, speeds up to 18mph, by far the quicker of these two."
- — Jonathan Pearce
King B Powerworks did not open the pit, instead waiting for IG-88 to follow it, then driving away. It drove around the area, before turning and driving at the spinning blade again.
- "...a little blind, a little dummy, got away from IG-88, "catch me if you can". No, we're not playing kiss chase here boys!"
- — Jonathan Pearce
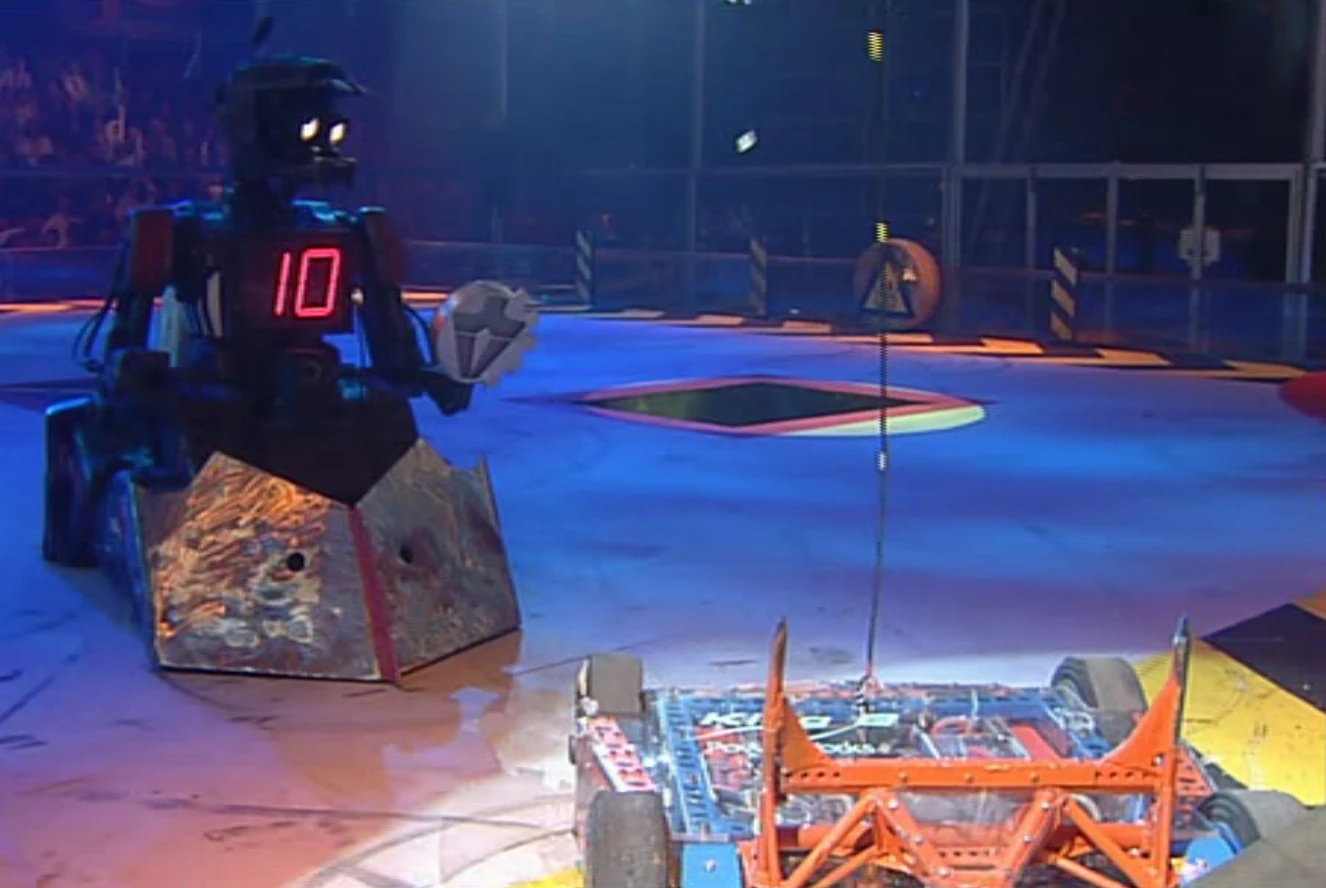

King B Powerworks is counted out
This blow knocked King B Powerworks up, and it sped into the arena wall, its forks sticking up. After hitting the wall, King B Powerworks stopped moving, and IG-88 closed in, landing blows on its immobile opponent, ripping off one of the back panels. Smoke began to pour from King B Powerworks, and Refbot came in to count it out.
- "King B: dethroned. ... Oh what a shame, that had the makings of a great battle."
- — Jonathan Pearce as King B Powerworks is counted out
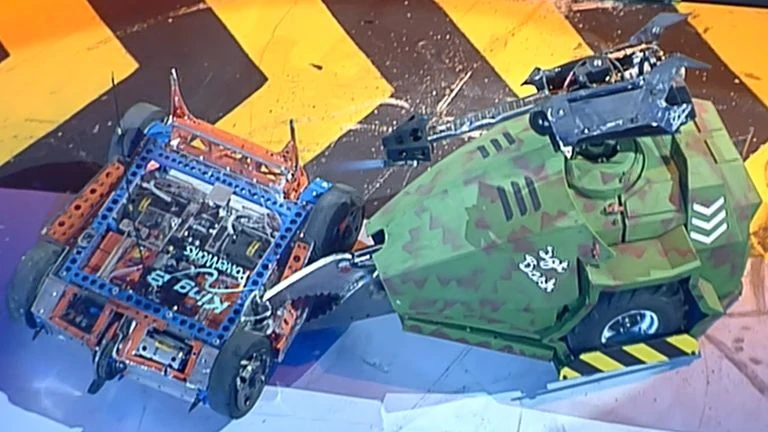

King B Powerworks is crushed by Sgt. Bash
Shunt axed King B Powerworks a couple of times, but failed to pierce the top. Sgt. Bash grabbed King B Powerworks' side with hits claw, crumpling through it easily. Sgt. Bash then led King B Powerworks to the floor flipper, where Shunt positioned it. It was thrown, then Shunt finished King B Powerworks off by pushing it into the pit.
- "...There wasn't much chance anyway, it's a very old robot now, you won't see it again. ... I can't tell you [what we're planning], but it's gonna be fantastic!"
- — Simon Harrison after the battle
King B Powerworks, as one of the oldest competing robots in the Seventh Wars, returned for the All-Stars Tournament at the end of the series. In the first round, it was placed up against Pussycat, Behemoth and Dantomkia, its second encounter with Dantomkia.
- Jayne Middlemiss: "Who's your biggest threat out there?"
- Simon Harrison: "I think Dantomkia, really, because we could be out so soon. The others I feel we could have a good fight with them, I like a long drawn out fight, that's what we like, I don't like something that's over too fast!"
- — Pre-battle interview
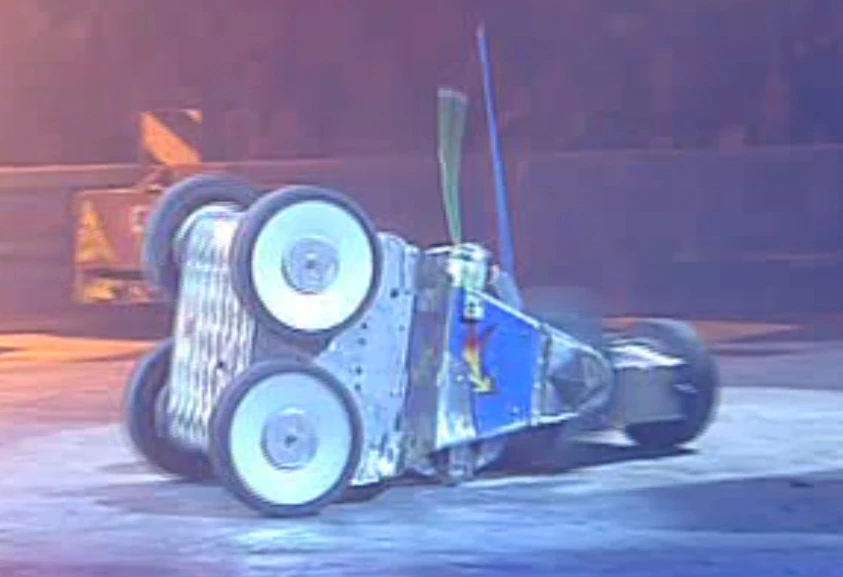

King B Powerworks' drive is damaged by Pussycat
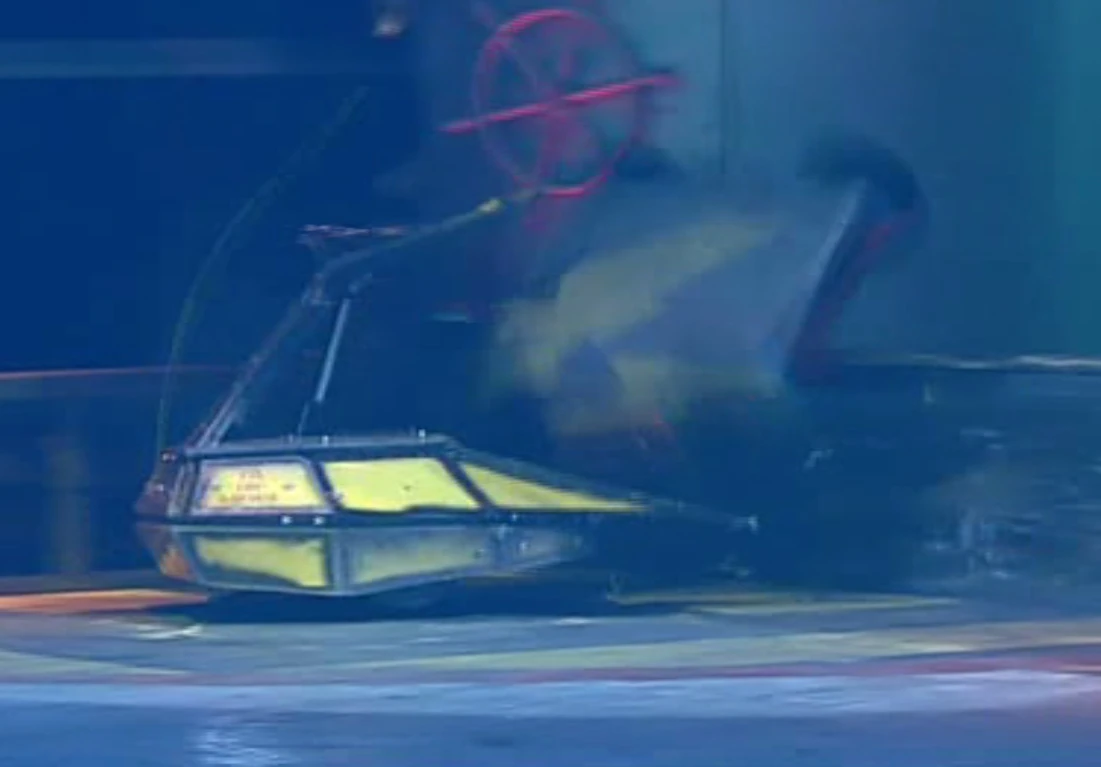
King B Powerworks is flipped out of the arena by Dantomkia
In the battle, Pussycat chose to target it with its twin four-toothed blades, which was added mainly in the hope of slicing King B Powerworks' armour right off. Pussycat occupied King B Powerworks' attention for much of the battle, and snapped its right drive train on the first hit. After this, King B Powerworks could only drive in circles. Pussycat continued to land blows on it with the disc as it moved back and forth. As Dantomkia defeated Behemoth by flipping it out of the arena in the opening stages, Dantomkia then targeted the struggling King B Powerworks, which fruitlessly tried to ram Dantomkia. However, Pussycat intervened, hitting both robots with its disc. This freed King B Powerworks from Dantomkia, but it did not move away, and Simon Harrison's original fear was met as Dantomkia then carried King B Powerworks over to the arena side wall and then threw the Series 2 Semi-Finalists out of the arena, thus eliminating King B Powerworks from the competition.
- "We went straight after King B3, which we planned, and we jammed their wheel up while Dantomkia took on Behemoth, and then King B was dead, and we knocked their chain off their weapon, and then they got rid of King B in the end."
- — Stuart Barnwell after the battle
Series 8[]
- Angela Scanlon: "...talk to me about the weapon."
- Simon Harrison: "Well, the main weapon is actually just to be fast and powerful. We have got these spikes you see. We can get under them and just lift them an take them all round the arena."
- Angela Scanlon: "You're going to dance around?"
- Simon Harrison: "Absolutely, that's our main power."
- Angela Scanlon: "Muhammad Ali style?"
- Simon Harrison: "Exactly!"
- — Pre-Round 1 interview
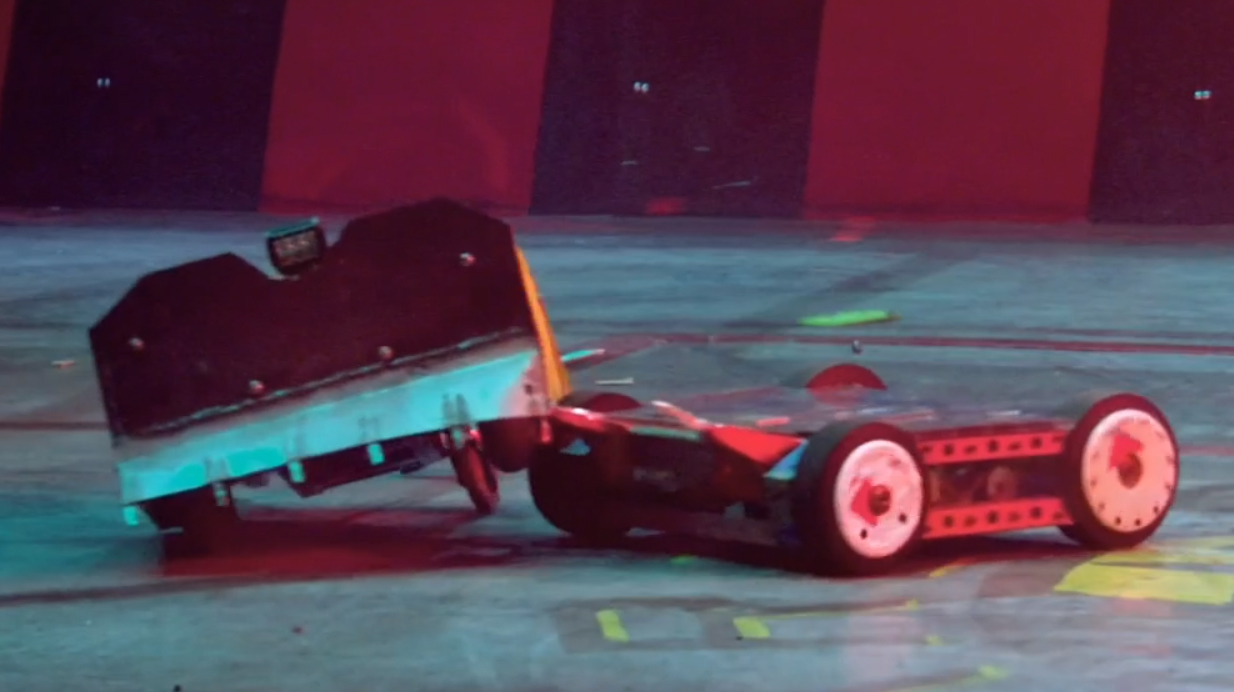
King B Remix immobilises Overdozer
King B Remix appeared in Heat C of Series 8, where it was once again drawn against Dantomkia in its opening Group Battle. The two Classic Series veterans would also face newcomers GlitterBomb and Overdozer in this melee. Prior to the match, Simon Harrison touted his upgraded machine's forks, with the Team B workbench also being decorated with a disco ball.
In combat, King B Remix went for the wooden Overdozer first, taking advantage of its opponent's high ground clearance to push it around with ease. It proceeded to ram Overdozer over the raised pit, causing the Falkirk machine's brushcutter blade to fall off.
- "GlitterBomb being pushed away and attacked by King B Remix, on Overdozer and has left the boarded armament of Overdozer ruptured ... pieces, splinters I dare say, flying off!"
- — Jonathan Pearce

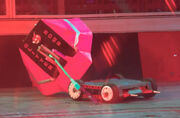
King B Remix backs GlitterBomb into the wall
Overdozer stopped moving after this, and King B Remix pushed it some more. King B Remix then left Overdozer, and drove around the remaining two opponents as they fought. It charged at GlitterBomb, but drove up its sloping side, flipping itself over as GlitterBomb moved away. After a pause, it drove at GlitterBomb again, but GlitterBomb drove straight past it, attacking the immobile Overdozer, ramming it into a wall. King B Remix chased after GlitterBomb, but upon catching up with it, drove up the side again, landing on Overdozer. King B Remix got itself down, and reversed into the corner. Dantomkia came in and flipped GlitterBomb over, then bumped into King B Remix, before driving away to flip around the immobile Overdozer. King B Remix reversed into GlitterBomb, which self-righted using its axe. However, GlitterBomb's axe became stuck in the down position, leaving it without a weapon. King B Remix pinned it against the wall as the two fought in the corner, and Dantomkia came in and flipped GlitterBomb over again. With the axe not working, GlitterBomb was unable to self-right.
- "Now, King B Remix here are being clever. They've stayed out of trouble largely, they know those tyres are exposed."
- — Jonathan Pearce after GlitterBomb was flipped
King B Remix kept away from Dantomkia until Cease was called, leaving it to flip the remains of Overdozer around. King B Remix was through to the Head-to-Heads, where its first battle at this stage was against Dantomkia, the fourth encounter between the two.
- "King B Remix weren't really tested in the Group Stage, so this could really be a rude awakening for the Portsmouth them."
- — Angela Scanlon before the battle

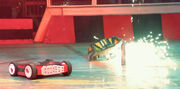
A momentary lead for King B Remix
At the start, Dantomkia charged at King B Remix, but Simon Harrison's machine turned and got at Dantomkia's side. Dantomkia turned away before King B Remix could ram it, then tried to get under King B Remix, but it was at the wrong angle, so King B Remix drove over the side. King B Remix drove at Dantomkia's front, but bounced off.
- "Good driving by King B Remix, and they came in on the attack with those front spikes"
- — Jonathan Pearce
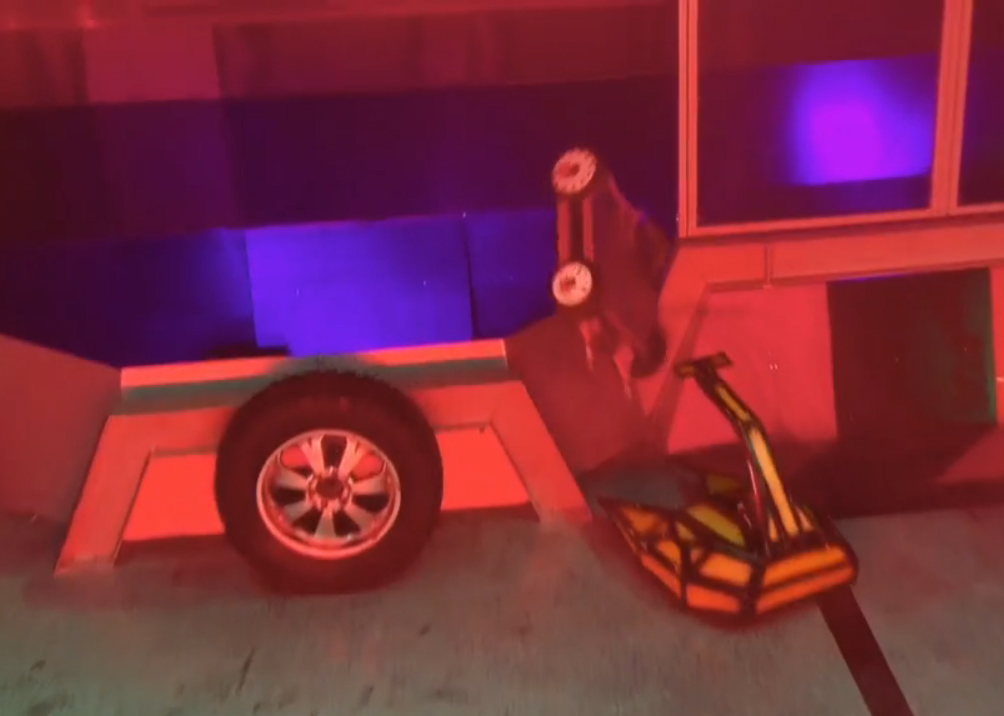
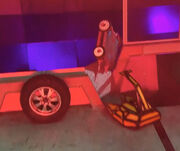
King B Remix is stranded against the wall by Dantomkia
Dantomkia turned and drove to the other side of the arena, before turning to fight King B Remix, which slowly moved towards Dantomkia. However, Dantomkia got under King B Remix, but turned the wrong way, so King B Remix slid off. Dantomkia drove onto the arena spikes, one of which lifted it up, but Dantomkia soon got down and tried to get under King B Remix again. Dantomkia got under King B Remix again, but this time King B Remix reversed off. However, King B Remix then drove back onto the flipper, which proved to be a fatal mistake. Dantomkia drove it to the side wall where the pit button was, and tried to flip King B Remix out of the arena. King B Remix didn't go over the wall, but it landed in a gap between the pit release button and the wall, where it became stuck.
- "Well, one mistake by King B Remix, they open themselves up to the flip! And they're not going to get out from there!"
- — Jonathan Pearce

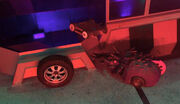
Matilda flips King B Remix out of the arena
Matilda came in, and finished King B Remix off by flipping it from the position it was stuck in, over the wall and out of the arena. As a result, King B Remix lost the battle by knockout. After the battle, the team found chain had snapped off during the battle.
- "We broke it by just giving it too much throttle, basically. ... We have clean snapped the chain with power. I whizzed up the power to maximum and that's what happened. That's 1.6 tons of breaking force on that chain."
- — Simon Harrison
With no points to its name, King B Remix needed to defeat Big Nipper to stand a chance of qualification.
- Angela Scanlon: "Are you confident?"
- Simon Harrison: "Relatively, mildly, not at all, one of those!"
- Angela Scanlon: "This is do or die."
- Simon Harrison: "Yeah, we're going for it!"
- — Team B's lack of confidence

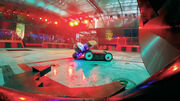
King B Remix holds Big Nipper over the spike
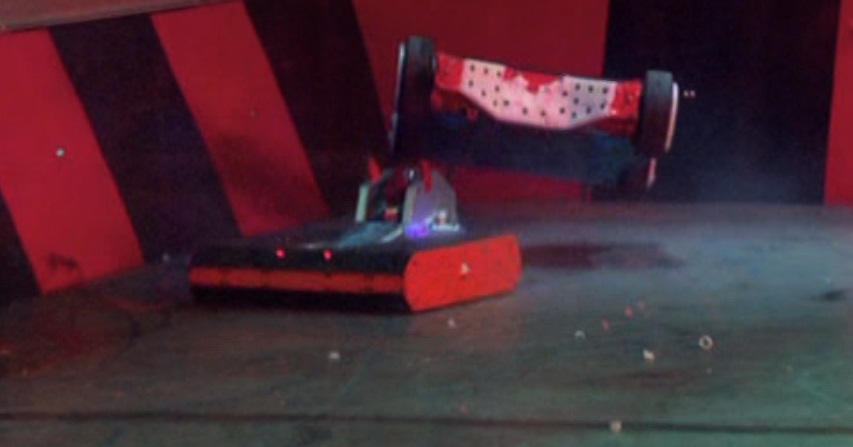
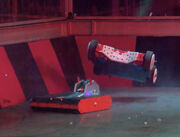
King B Remix takes a blow from Big Nipper
King B Remix drove straight at the pit release, opening it straight away, before ramming into Big Nipper, pushing it a little before it escaped. Big Nipper drove over the arena spikes, one of which lifted it up. King B Remix took advantage, getting in position so that when the spike lowered, Big Nipper fell onto it. King B reversed Big Nipper towards the pit, but stopped and turned too soon, so Big Nipper fell off without falling into the pit. Big Nipper tried to use its spinning disc on King B Remix's side, but King B Remix escaped, keeping away from Big Nipper, before reversing into it. King B Remix tried pushing Big Nipper back, but kept being knocked upwards by the disc, and Big Nipper pushed it against the wall. King B Remix pushed back, but Big Nipper's disc kept knocking it up, with pieces falling off as it did. Big Nipper got a blow on the rear, which caused King B Remix to stop moving. Big Nipper span in celebration and Cease was called. After the battle, it was revealed that King B Remix had stopped moving because its removable link fell out.
- Simon Harrison: "What let us down is, as in Robot Wars, always, the link came out. We've got two links. We've actually got the one we've got in the top but we've got a second one under there and unfortunately, it ..."
- Grant Hornsby: "Came out!"
- — After the battle
King B Remix was left unable to progress to the Heat Final after its second loss, but still had to fight TR2, another newcomer. This fight was recorded a day later than scheduled, due to difficulties with repairing King B Remix.
- Grant Hornsby: "TR2 is a great robot, but let's show we are too, let's give them a real battle."
- Simon Harrison: "Yeah, I mean I've seen this machine can do better and I think we should do better. We'll do our best!"
- — Team B before the battle
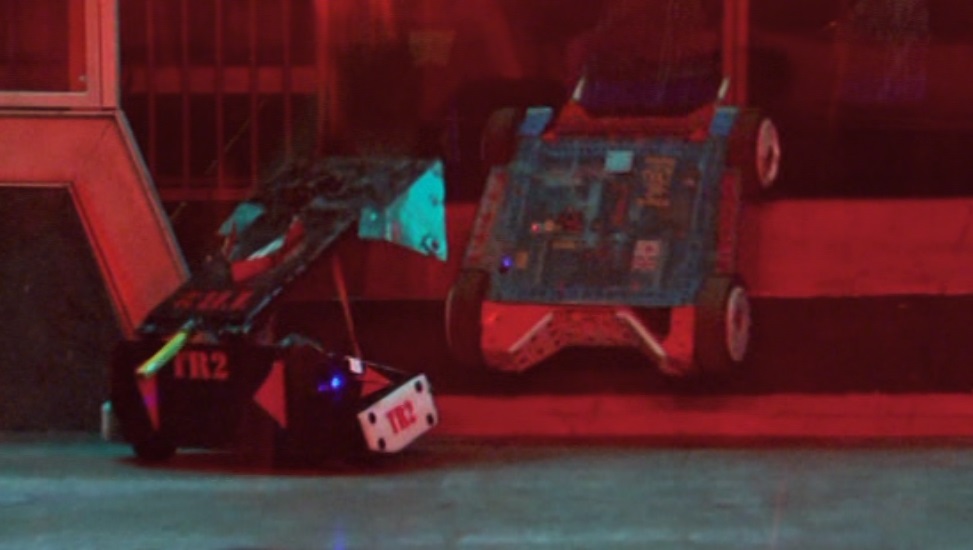
King B Remix is thrown into the arena wall
King B Remix started by charging straight at TR2, driving up the flipper, then driving over the side. After a pause, it drove up the front again, turning off before TR2 could flip. TR2 chased after it, and King B Remix fled, but TR2 soon caught up with it, and TR2 flipped it against the arena wall. TR2 got under King B Remix again, pinning it by the wall and flipping it up. King B Remix could not get away, and TR2 flipped it over. TR2 got the flipper under King B Remix, span around and flipped again.
- "...and there goes another flip on King B Remix. Point-less in the competition so far, but still full of heart."
- — Jonathan Pearce
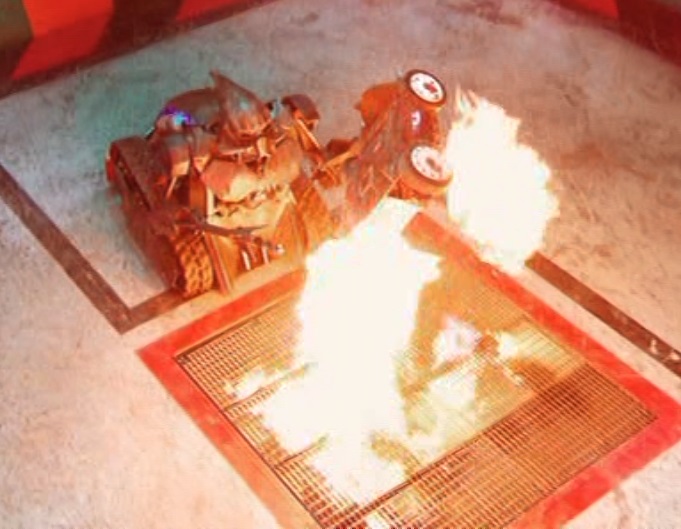
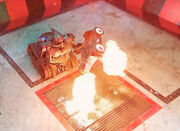
Sir Killalot burns King B Remix
TR2 flipped King B Remix against the arena wall by the trench. King B Remix slowly reversed, but did not get away, and TR2 got under it again, flipping it onto the claw of Sir Killalot. King B Remix quickly reversed off, but drove back into the CPZ as TR2 opened the pit. Sir Killalot grabbed it with the claw, picked it up and carried it to the flame pit, where it dangled it over the fire, then dropped it.
- "Not the flame pit, please! That's cruel! That's horrible! I'll tell you what, we love it!"
- — Jonathan Pearce

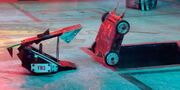
King B Remix is resigned to the pit
King B Remix was pushed off the flame pit, but it became clear it was not moving. TR2 nudged it towards the pit, then flipped it in. King B Remix concluded the round with three straight losses, and was fully eliminated from the competition.
- "You see the robots that are out there now, it's scary! It's incredible technology nowadays!"
- — Grant Hornsby after the battle
Results[]
| KING BUXTON - RESULTS | ||
| Series 2 | ||
| The Second Wars - UK Championship Semi-Final, Arena | ||
| Heat I, Gauntlet | 10.6m (3rd) | Qualified |
| Heat I, Trial (Joust) | 6.95m (2nd) | Qualified |
| Heat I, Semi-Final | vs. Robo Doc | Won |
| Heat I, Final | vs. All Torque | Won |
| Semi-Final 2, Gauntlet | Completed (1st) | Qualified |
| Semi-Final 2, Trial (Pinball) | 165 Points (3rd) | Qualified |
| Semi-Final 2, Arena | vs. Roadblock (1) | Lost |
| Series 3 | ||
| The Third Wars - UK Championship Heat Final | ||
| Heat J, Round 1 | vs. Eric | Won |
| Heat J, Round 2 | vs. Weld-Dor | Won |
| Heat J, Final | vs. 101 | Lost |
| KING B3 - RESULTS | ||
| Series 4 | ||
| The Fourth Wars - UK Championship 17th Seed, Heat Semi-Final | ||
| Heat A, Eliminator | vs. Attila the Drum, Medusa 2000 | Qualified |
| Heat A, Semi-Final | vs. Atomic | Lost |
| Pinball Warrior Tournament Fourth | ||
| Pinball | 225pts | 4th |
| Tag Team Terror with 101, Champion | ||
| Round 1 | vs. Inverterbrat & X-Terminator 2 | Won |
| Final | vs. Firestorm 2 & Scorpion | Won |
| KING B POWERWORKS - RESULTS | ||
| Extreme Series 1 | ||
| Tag Team Terror with 101, Round 1 | ||
| Round 1 | vs. Diotoir & Mega Morg | Lost |
| Mayhem | ||
| Mayhem | vs. The Steel Avenger, Tornado | Lost |
| Other Battles Vengeance & Wild Card Warriors | ||
| Vengeance | vs. 101 | Lost |
| Wild Card Warriors | vs. Draven | Won |
| Series 5 | ||
| The Fifth Wars - UK Championship Heat, Round 2 | ||
| Heat F, Eliminator | vs. Kronic 2 | Won |
| Heat F, Semi-Final | vs. Dominator 2 (11) | Lost |
| Series 7 | ||
| The Seventh Wars - UK Championship Heat, Round 2 | ||
| Heat C, Round 1 | vs. Dantomkia (5), Hassocks Hog 2, Rick | Qualified |
| Heat C, Round 2 | vs. IG-88 | Lost |
| All-Stars Round 1 | ||
| Round 1 | vs. Behemoth, Dantomkia, Pussycat | Eliminated |
| KING B REMIX - RESULTS | ||
| Series 8 | ||
| Series 8 - UK Championship Round 2, Fourth Place | ||
| Heat C, Group Battle | vs. Dantomkia, GlitterBomb, Overdozer | Qualified |
| Heat C, Head-to-Heads | vs. Dantomkia | Lost (0 points) |
| Heat C, Head-to-Heads | vs. Big Nipper | Lost (0 points) |
| Heat C, Head-to-Heads | vs. TR2 | Lost (0 points) |
Wins/Losses[]
- Wins: 11
- Losses: 12
NOTE: King Buxton's successful Gauntlet and Trial runs are not included
Series Record[]
| Main Series | King Buxton Series Record |
|---|---|
| The First Wars | Did not enter |
| The Second Wars | Semi-Finals, Arena as King Buxton |
| The Third Wars | Heat Final as King Buxton |
| The Fourth Wars | Heat, Round 2 as King B3 |
| The Fifth Wars | Heat, Round 2 as King B Powerworks |
| The Sixth Wars | Failed to qualify as King B Powerworks |
| The Seventh Wars | Heat, Round 2 as King B "Powerworks" |
| Series 8 | Round 2, Fourth Place as King B Remix |
| Series 9 | Did not enter |
| Series 10 | Did not enter |
| Robot Wars Extreme | Appearances |
| Series 1 | Entered as King B Powerworks |
| Series 2 | Did not enter |
Gallery[]
")
")
")
")
")
")
")
")
")
")
")
")
Outside Robot Wars[]
King B3 makes a cameo appearance in the Spaced Series 2 episode "Mettle". Alongside fellow Robot Wars competitors Cerberus, Inverterbrat, Plunderbird 4 and Hard Cheese, it is among the robots featured in the 'Robot Club' scenes.[34]
")
")
")
")
")
")
")
")
At a live event at Oundle Mill in 2001, King B Powerworks was armed with a ramming scoop at the rear. The scoop was largely used for protection while the robot was competing in the open car park fights so any spectators nearby would not be injured. Simon Harrison stored the scoop in an outbuilding not long after and it was rediscovered in October 2021 under a pile of rubble after the building's roof had collapsed. Simon also mentioned that the scoop was only made from mild steel and would not have been beneficial for use on Robot Wars.[35]
- "It was built primarily so I could fit it to the back of King B (Powerworks) for safely running around the car park of the Oundle Mill robot meets (early 2000’s) and so be able to have a bit of a car park bashup without having the fear of spiking someone’s leg ! It was just a rubbish mild steel job knocked up quick- and why it would have been useless to take to series 7 or whatever - but it did a good job at the 2001 Oundle Mill meet …"
- — Simon Harrison on Facebook explaining the use of the scoop in October 2021
In 2003, King B Powerworks made an appearance at the World of Robots event in Dublin but guised as Sidewinder which was the teams entry into the other BBC show, Mechanoids where it was seen doing demonstrations in an area alongside Scuttle, Skeletron and a life size RC Dalek. During the trip it also appeared on an Irish show alongside fellow Mechanoids robot Estron.
King B made an appearance at the London MCM Expo in 2007 where it fought Merlin. It also fought Tiberius and lost, requiring Sam Smith to jump on King B in order to separate King B Tiberius' crusher when it pierced the polycarbonate and a motor, locking both robots together.
It returned in January 2015 after a seven-year hiatus at the Mechatrons combat event in Dublin, where it fought Beast 2 and Ripper.
- "It was great to be back - thanks so much to the whole Robots Live crew for putting on such a great show, felt good to be driving King B for an enthusiastic UK audience again!"
- — Simon Harrison on Facebook
King B participated at the same event in 2016, where it lost to Beast again, but performed well against Meggamouse.
It was King B Remix that competed at Mechatrons Dublin 2017, having been reconstructed for the event. It fought Mangler[36], winning the battle on a Judges' decision, and then defeated Dozer by flipping it over[37]. It then qualified for the semi-finals when the battery connection fell out of Harpy, allowing King B Remix to place third overall, after consecutive losses to Iron-Awe 7 and Ripper.

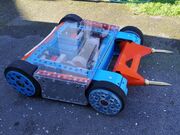
King Buxton 20, the latest version of the robot
The latest version of King Buxton, King Buxton 20, was completed in winter 2017-2018 after two years of construction. A brand-new robot with a design following faithfully to those of its previous incarnations, King Buxton 20 features a brushless drive system offering between 3 and 3.5kW of power on each side, as well as new lifting forks with duplicate drive systems and a 220 degree reach[38]. Its name marks the twentieth anniversary of the original robot's completion and combat debut.
- "King Buxton 20 was designed before Robot Wars came back ( and befor anyone was expecting it to come back) as suddenly I had the feeing the time was right to build a King B that fixed all of the Powerworks problems. Unfortunately it could not be ready for S8 and as it turned out, not ready for S9 or S10 either Quite literally I had to re-remember how to build robots from scratch- and it took me 4x the time I ever imagined !"
- — Simon Harrison in 2018[39]

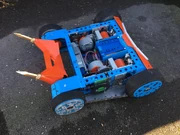
King Buxton 20 without armour
King Buxton 20's actual debut was at the Dublin-based Mechatrons - Robots of Destruction event in January 2018. In its first fight, King Buxton 20 fought Dozer, but faced difficulties with turning left due to motor sensor timing issues, and ultimately lost the battle. King Buxton 20 then won its second battle against Rusty, as the latter had not enabled its gas supply. King Buxton 20 also immobilised Shelala by attacking its exposed wheels. For its third Mechatrons in a row, King Buxton 20 fought Team BEAST, and their robot Harpy. King Buxton 20 was initially thrown into the air repeatedly, but was able to hook its forks into the framework of Harpy to use its new brushless drive to ram it around the arena, causing it to lose mobility, and King Buxton 20 won the resulting Judges' decision. King Buxton 20 was finally eliminated by Iron-Awe 7, which was being driven by Peter Redmond. Regardless, King Buxton 20 also fought in a whiteboard match against Coyote, and won by stranding it on the wall, then eventually immobilised it altogether. It defeated Harpy for a second time in another whiteboard match, rupturing its gas supply before flipping it over.

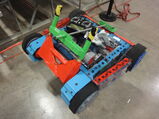
King Buxton 20 before its fight against Touro Maximus

King Buxton 20 is immobilised by Touro Maximus
King Buxton 20 competed in the heavyweight division at RoboGames in 2018, and was the first confirmed competitor for that event[40]. It received a bye in the first round, and fought Touro Maximus in the second round. It initially started with an advantage against the experienced Brazilian machine, with Touro Maximus only operating on one wheel. However, King Buxton 20 drove into its opponent's drum, which damaged one of its wheels and later both of its lifting forks. Eventually, Touro Maximus became mobile again and removed the front wheel of King Buxton 20, before immobilising the machine fully when both of King Buxton 20's rear drive chains had failed. This put King Buxton 20 into the losers' bracket, where it faced Megalodon. However, the robot itself had not been fully repaired, entering the arena without one of its wheels as a result of the chassis damage inflicted by Touro Maximus. King Buxton 20 was quickly immobilised upon slamming into Megalodon, having again suffered issues with its drive chains as well as damage to the drive system.[41][42]

The Series 3 King Buxton in 2018, with Robo Doc

King BtL in August 2019
In September 2018, Simon Harrison organised the first RoboNerd meetup in Wolverhampton, held in conjunction with Bristol Bot Builders and the Kinematics Events Team.[43] Two versions of King Buxton - the Series 2-3 version and King B Remix - were among the former Robot Wars competitors attending the event. This event also prompted Simon Harrison to plan a beetleweight robot named King BtL in order to challenge Mike Franklin and his then-upcoming beetleweight 10.1. A battle between the two would go ahead at the 2019 RoboNerd event. King BtL was completed in August 2019, based most prominently on King Buxton 20, although it lost the head-to-head battle against 10.1 after quickly losing drive on one side. King BtL was present at the event alongside the Series 3 version of King Buxton, King B Remix and King Buxton 20, with RoboNerd itself running successfully.
The success of RoboNerd lead Simon Harrison to run the event again in 2020 in an online format, and in 2021, 2022 and 2023 as a traditional live gathering. The 2023 edition saw King Buxton 20 (labelled simply as King B) and King B Powerworks displayed together, and more informal grudge matches taking place between King BtL and 10.1.
King Buxton 20 returned to combat at the 2021 Robots Live! Crawley event. For this event, it received an additional set of interchangeable fork spikes designed to pierce titanium armour.[44] Despite encountering issues with a disintegrating drive motor,[45] and incurring an opening loss in the main competition to Thor, King Buxton 20 picked up at least one melee win, during which it flipped Behemoth over with its forks and pitted it with a separate lift and charge attack. Upon reversing away, it survived a charge from Team Shock's Tectonic which also fell into the pit, handing King Buxton 20 victory.[46]
Ahead of the 2022 RoboRiots event, it was announced by Team B that both King Buxton 20 and King B Remix would be competing, marking the ex-Powerworks build's final appearance at a combat event before being permanently retired.[47] Both versions would perform well in competition, finishing third and second respectively to Diot-Awe.[48] This exemplary run was followed by a debut Extreme Robots appearance on the Maidstone leg, where King Buxton 20 won four of its five battles.[49]


King B 20 in the Extreme Robots Cheltenham event in 2023
King Buxton 20 would return to RoboRiots for the 2023 edition, running over the weekend of 7-8 October. Here, it twice faced Immersion, the second match-up occurring in the quarter-finals of the main Irish heavyweight championship. Though both battles ran for the full three minutes, King Buxton 20 was eliminated in the latter, with Immersion going on to become the 2023 Irish champion.[50][51] King Buxton 20 would also feature in the Cheltenham leg of the 2023 Extreme Robots tour (11-12 November), with Simon Harrison 'testing the waters' for more live event shows.[52] On the Saturday, it initially fought Poseidon, but suffered control issues and ultimately lost on a judges' decision. This was followed by two head-to-heads against Ripper 6; while King Buxton 20 again lasted the full three minutes in both, it would also lose each on a judges' decision.[53][54][55]
Other Robots[]
Beyond the live event circuit, Simon Harrison also collaborated with Harry Hills to design a new eggbeater heavyweight, Monster, for an unspecified season of King of Bots, though it would not be selected to compete. Monster would ultimately not materialise beyond CAD drawings prepared by Hills from a concept devised by Harrison.[56] In 2021, both would unite once again to form Team Sabotage along with Mark Mellors and Jamie McHarg,[57] who applied for that year's season of BattleBots with Hoodlum. Hoodlum was planned to be a four-wheel drive heavyweight armed with an undercutter; as a tribute to Alan Gribble, one render depicted it wielding a four-toothed blade reminiscent of that used by Pussycat between Series 4 and Series 7. Despite Harrison's experience, Hoodlum would not be selected for BattleBots that season, a matter confirmed by the King B Facebook page in May along with its name and planned design.[58]
Trivia[]
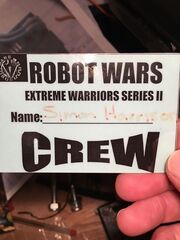
Simon Harrison's crew card for Extreme Warriors Season 2
- Team captain Simon Harrison became a crew member during the filming of Extreme Warriors Season 2.[59]
- King Buxton was profiled in Robot Wars: The Ultimate Guide.
- King Buxton was incorrectly announced as being from Hornchurch in Essex, whereas Hornchurch has been part of the county of Greater London since the 1960s.
- King Buxton was originally named after the main antagonist of the same name from the 1972 Magic Roundabout film Dougal and the Blue Cat, or Pollux et le Chat Bleu in its original French dub.
- Only a single trophy was produced for the winners of the Tag Team Terror in Series 4, so Simon Harrison admitted to taking the trophy for himself. Eventually a second trophy was built for Team 101, although Simon Harrison claims it was smaller and inferior[60].
- During Series 2, King Buxton suffered from interference caused by the spark plugs in the motor powering Matilda's chainsaw, which meant that every time the chainsaw started, King Buxton jumped forward.
- Initially, the cost of the motors was sponsored by Dominion Computers. Team captain Simon Harrison claimed to have put up "99.9%" of the money it cost to build King B3.
- King Buxton was one of twenty-three robots to have completed The Gauntlet. Similar to Killertron, it failed to complete it in the heats, but succeeded in the Series Semi-Finals.
- Within two series of Robot Wars, King Buxton fought Dantomkia in three different first-round melees.
- King B3 is one of only seven robots to break two hundred points in a Pinball tournament. The others to have achieved this are Gemini, Killerhurtz, Spawn of Scutter, Panic Attack, Roadblock and Razer.
- King Buxton was one of five seeds for the Fourth Wars that reached the heat final of the Third Wars but fell in the second round of the heat in that series. It shares this statistic with Dreadnaut, Aggrobot, Berserk 2 and the Dartford Girls Grammar.
- King B Powerworks was one of only two previous Semi-Finalists that was not seeded for the Seventh Wars, the other being Black and Blue, thus making it the only robot, as Black and Blue only reached the Series Semi-Finals in the form of MouseTrap.
- King B3 had a brief cameo on the sitcom Spaced in the episode "Mettle."
- King B Powerworks was the only robot in its Extreme 1 Tag Team Terror battle to be a seeded robot but not lose in the first round of a UK Championship.
- King B Powerworks made a cameo appearance in the Extreme Warriors: Season 1/Robot Rebellion.
- King B Remix was the first robot to fly the flag of two different countries, in its case the United Kingdom's Union Flag, and Japan's national flag, Nisshōki.
- In an unused take when King B Remix entered the arena in 2016, the announcer erroneously pronounced the robot's name as "King Bremmix".
- Simon Harrison was part of The Steering Committee, and was the first roboteer to bring this to the public eye, in July 2018.
- Captain Simon Harrison once built hi-fi speakers so large that they could not be moved.
- King Buxton is the only robot to go from having more wins than losses to having more losses than wins after returning for the reboot.
- The battles between King Buxton and Robo Doc/101 marked the first instance of two teams reaching a semi-final by defeating the other. This pattern would be repeated by Team Scutterbots and Team Knightmare in Series 4 and 7, and Pulsar and Ironside3 in Series 8 and 9.
- King Buxton was the only Series 2 semi-finalist to be invertible.
- King Buxton is one of four robots to have held a positive win-loss ratio in the original run of Robot Wars, before losing this acclaim in the reboot, alongside Diotoir, Supernova and Tough as Nails.
- Of these four machines, King Buxton is the only robot to now have a negative win/loss ratio, rather than an equal one.
- However, out of every robot with a negative win/loss ratio, King Buxton has the most wins.
- Simon Harrison's favourite fight on the show was King Buxton's Series 3 Heat Final against 101, despite King Buxton losing.
- "Nothing comes close"
- — Simon Harrison in 2018[61]
- King B Powerworks/Remix is one of four machines thrown out of the arena by both a competitor and a house robot (Dantomkia and Matilda respectively). It shares this with Stinger, Vader and Napalm.
- King B was the only machine in this quartet to have its second OOTA scored against it in the reboot.
- King B was also the only one of the four to be thrown out by the competitor robot first.
- King Buxton is one of three robots to be thrown out of the arena in both the original series and the reboot. The other two are Behemoth and Terror Turtle.
- King Buxton appeared in both episodes where Scorpion did not lose in the first round.
- According to Simon Harrison, King B3's official photograph for Series 4 was taken after it had been eliminated from the competition. Simon has also stated that burn marks are visible on King B3's forks and front cover in the photograph.[62]
- "I'm still disappointed I only got my photo done after I'd already been in the pit - and the pyrotechnics had burnt the polycarbonate on the lifting forks and front ocver on KB 3 - as it landed on it's back on top of the smoke bombs and sparklers."
- — Simon Harrison in 2022
References[]

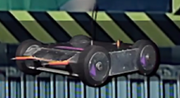
Official Series 3 photo
- ↑ [1]
- ↑ [2]
- ↑ Correspondence with Wiki user Drop Zone mk2
- ↑ Correspondence with Wiki user Drop Zone mk2
- ↑ Correspondence with Wiki user Drop Zone mk2
- ↑ Correspondence with Wiki user Drop Zone mk2
- ↑ Correspondence with Wiki user Drop Zone mk2
- ↑ Correspondence with Wiki user Drop Zone mk2
- ↑ Correspondence with Wiki user Drop Zone mk2
- ↑ King B Remix on the Robot Wars website
- ↑ Correspondence with Wiki user Drop Zone mk2
- ↑ https://www.facebook.com/KingBuxtonCombatRobot/posts/586114488389485
- ↑ Correspondence with Wiki user Drop Zone mk2
- ↑ Correspondence with Wiki user Drop Zone mk2
- ↑ Correspondence with RobotManiac, 23 February 2022
- ↑ Correspondence with RobotManiac, 23 February 2022
- ↑ Correspondence with RobotManiac, 23 February 2022
- ↑ Correspondence with RobotManiac, 23 February 2022
- ↑ Correspondence with RobotManiac, 23 February 2022
- ↑ Correspondence with RobotManiac, 23 February 2022
- ↑ Correspondence with Wiki user Drop Zone mk2
- ↑ Correspondence with RobotManiac, 23 February 2022
- ↑ Letter received by Team B for King Buxton's Series 2 audition, written by Mary-Jane Evans, digitised (page 1)
- ↑ Correspondence with Wiki user Drop Zone mk2
- ↑ https://robotwars.fandom.com/wiki/File:Series_3_audition_images_small_dominator_%2B_king_b.png
- ↑ Correspondence with Wiki user Drop Zone mk2
- ↑ Correspondence with RobotManiac, 20 February 2022
- ↑ Correspondence with User:Toon Ganondorf, 25 July 2018
- ↑ Correspondence with Wiki user Drop Zone mk2
- ↑ Video of King B Powerworks' Series 7 qualifier
- ↑ [3]
- ↑ [4]
- ↑ [5]
- ↑ https://youtu.be/e22IPMKFfyM?t=193 'FIGHTING In Your Own Robot Wars | Spaced | All 4', Channel 4 (YouTube), uploaded 9 April 2022]
- ↑ https://www.facebook.com/KingBuxtonCombatRobot/posts/369101215005652
- ↑ https://www.youtube.com/watch?v=dBPcNB6-5EI
- ↑ https://www.facebook.com/martin.slattery.12/posts/1413961041947891
- ↑ https://www.facebook.com/KingBuxtonCombatRobot/posts/556889237978677
- ↑ Correspondence with Wiki user Drop Zone mk2
- ↑ https://www.facebook.com/KingBuxtonCombatRobot/posts/531063793894555I
- ↑ https://www.facebook.com/TeamStormUK/posts/1725389570882489
- ↑ https://www.facebook.com/299400573727546/photos/a.312155239118746/613851502282450
- ↑ https://www.facebook.com/KingBuxtonCombatRobot/posts/702147403452859
- ↑ https://www.facebook.com/KingBuxtonCombatRobot/posts/359971982585242
- ↑ https://www.facebook.com/KingBuxtonCombatRobot/posts/359913965924377
- ↑ https://www.facebook.com/KingBuxtonCombatRobot/videos/2674741299501738/
- ↑ https://www.facebook.com/KingBuxtonCombatRobot/posts/pfbid02ooSfEd55RAoqbywJeyvvhsArzkKSR9wZiCLaV5mbqZ4DDnBP5i4wCxK3haErJrmUl
- ↑ https://www.facebook.com/KingBuxtonCombatRobot/posts/pfbid0yb1cKHXUnNjQ3NAwS9prMpoEPbxubiVpeSLBXiB1YGYso542sc6QFBD6XK3Cxtxdl
- ↑ https://www.facebook.com/KingBuxtonCombatRobot/posts/pfbid02azc6QV5NxSiFH6UwooJBoVhHpezWYikbRSDdaMmCBediGGDvW1sFtPFAhka4NEPzl
- ↑ Facebook video of King Buxton vs Immersion, RoboRiots 2023, King B (recorded by Isaac Sharp)
- ↑ Facebook video of King Buxton vs Immersion, RoboRiots 2023 quarter-final, King B
- ↑ Correspondence between User:Diotoir the son of nemesis and Simon Harrison, 12 November 2023
- ↑ 'Extreme Robots 2023 Cheltenham Show 1 LIVESTREAM', Extreme Robots (YouTube), streamed 11 November 2023
- ↑ 'Extreme Robots 2023 Cheltenham Show 2 LIVESTREAM', Extreme Robots (YouTube), streamed 11 November 2023
- ↑ 'Extreme Robots 2023 Cheltenham Show 3 LIVESTREAM', Extreme Robots (YouTube), streamed 12 November 2023
- ↑ https://www.facebook.com/permalink.php?story_fbid=1253474138320180&id=299400573727546
- ↑ https://www.facebook.com/KingBuxtonCombatRobot/photos/1392138704453722
- ↑ https://www.facebook.com/permalink.php?story_fbid=1446794055654853&id=299400573727546
- ↑ Correspondence with Wiki user Drop Zone mk2
- ↑ https://www.youtube.com/watch?v=cTbVsCnB5PQ
- ↑ Correspondence with Wiki user Drop Zone mk2
- ↑ Correspondence with RobotManiac, 22 February 2022
External Links[]
Honours[]
[]
| ||||||||||||||||||||
| ||||||||||||||
| |||||||||||||||||||||||||||||||||||||||||
| |||||||||||||||||||||||||||||
| |||||||||||||||||||||||||||||||||||
| ||||||||||||||||||||||||||
| ||||||||||||||||||||||||||||||||||||||
| ||||||||||||||||||||||||||||||||