No edit summary |
No edit summary |
||
| (34 intermediate revisions by 12 users not shown) | |||
| Line 2: | Line 2: | ||
|robot_name=Major Tom |
|robot_name=Major Tom |
||
|image=<gallery> |
|image=<gallery> |
||
| − | Tom.JPG| |
+ | Tom.JPG|S7 |
| − | + | Major Tom EX2.jpg|EXT 2 |
|
| + | MajorTomSeries6.png|6 |
||
| − | Major_Tom_2.jpg|5 |
||
| + | Major Tom.png|5 |
||
| − | Extreme major tom.JPG|Extreme 1 |
||
| + | Major Tom EXT.png|EXT 1 |
||
Majortom.jpg|4 |
Majortom.jpg|4 |
||
</gallery> |
</gallery> |
||
| Line 14: | Line 15: | ||
|team=Team Garden Shed Bashers |
|team=Team Garden Shed Bashers |
||
|team_members=Henry Ryan<br/>Arthur Robinson<br/><small>(Series 4-7, Extreme 2)</small><br/>Gerald Morris<br/><small>(Series 4)</small><br/>Sam Ryan<br/><small>(Extreme 1)</small><br/>Joe Brown<br/><small>(Extreme 1)</small><br/>John Morris<br/><small>(Series 5-6, Extreme 2)</small><br/>Scott Kippen<br/><small>(Series 7)</small> |
|team_members=Henry Ryan<br/>Arthur Robinson<br/><small>(Series 4-7, Extreme 2)</small><br/>Gerald Morris<br/><small>(Series 4)</small><br/>Sam Ryan<br/><small>(Extreme 1)</small><br/>Joe Brown<br/><small>(Extreme 1)</small><br/>John Morris<br/><small>(Series 5-6, Extreme 2)</small><br/>Scott Kippen<br/><small>(Series 7)</small> |
||
| − | |from=Minster |
+ | |from=Minster, Isle of Sheppey |
| + | |stats=<gallery> |
||
| + | Major tom s7 stats.png|Series 7 |
||
| + | Major tom ext2 stats.png|EXT 2 |
||
| + | Majortom s6 stats.png|S6 |
||
| + | Major tom ext1 stats.png|S5 |
||
| + | Major tom s4 stats.png|S4 |
||
| + | </gallery> |
||
|weight=100kg |
|weight=100kg |
||
|dimensions=0.30m x 1.30m x 0.77m |
|dimensions=0.30m x 1.30m x 0.77m |
||
|clearance= |
|clearance= |
||
|speed=4mph |
|speed=4mph |
||
| − | | |
+ | |drive=300w electric motors |
|weapons=Double clamping spike |
|weapons=Double clamping spike |
||
}} |
}} |
||
{{quote|The idea for Major Tom was originally to out-rank [[Sergeant Bash]].|Henry Ryan}} |
{{quote|The idea for Major Tom was originally to out-rank [[Sergeant Bash]].|Henry Ryan}} |
||
| − | '''Major Tom''' was a robot from the Isle of Sheppey that competed in Series 4 to 7 of ''[[Robot Wars]]'', also entering in both series of Extreme. |
+ | '''Major Tom''' was a robot from the Isle of Sheppey that competed in Series 4 to 7 of ''[[Robot Wars]]'', also entering in both series of Extreme. Despite competing in four separate series of ''Robot Wars'', Major Tom never enjoyed great success, having only reached the second round in Series 4 and 5, while it was eliminated in the first round of Series 6 and 7. Its best performance was in the Annihilator during the second series of ''Extreme'', where it finished third. |
| − | |||
| − | Despite competing in 4 separate series of Robot Wars, Major Tom never reached a Heat Final, having only reached round 2 in Series 4 and 5, and going out in round 1 in Series 6 and 7. Its best performance was in the Annihilator in Extreme 2, where it finished third. |
||
| − | |||
| ⚫ | |||
==Versions of Major Tom== |
==Versions of Major Tom== |
||
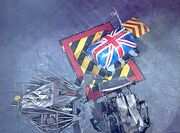
Despite taking on many different forms, every version of Major Tom (except for Series 3) was always painted in the colours of the Union flag. Major Tom was also famous for its plastic bubble-gum dispenser head which was present on every machine that featured on the televised show. The head itself was either knocked off or destroyed easily, as shown during Major Tom's most infamous moment after its loss to 101. The head also sported different head gear throughout Major Tom's appearances; a cap in Series 4, a helmet and crown in Series 5, 6 and both Extremes, and just a crown in Series 7. |
Despite taking on many different forms, every version of Major Tom (except for Series 3) was always painted in the colours of the Union flag. Major Tom was also famous for its plastic bubble-gum dispenser head which was present on every machine that featured on the televised show. The head itself was either knocked off or destroyed easily, as shown during Major Tom's most infamous moment after its loss to 101. The head also sported different head gear throughout Major Tom's appearances; a cap in Series 4, a helmet and crown in Series 5, 6 and both Extremes, and just a crown in Series 7. |
||
| − | |||
| − | ===Major Tom (Series 3 Qualifiers)=== |
||
| ⚫ | |||
| ⚫ | The Series 3 version of Major Tom was very different to all of its successors, mainly because it did not have its trademark head or Union Jack colours. It was white with blue, green and red triangle shapes painted on it. Its weapon was a lifting device that had a secondary usage as a split scoop. It was originally meant to be a tracked robot, but the rubber tracks were replaced with wheels for the qualifier. The robot was also 13kg overweight so the team had to replace the thick steel shell with aluminium. |
||
===Major Tom (Series 4)=== |
===Major Tom (Series 4)=== |
||
| + | {{quote|Ground control for Major Tom from two golf caddy motors as well as the garden barrel, old bicycles and lawnmowers also used. A ramp weapon. Captain Cosmic's head atop.|Jonathan Pearce introduces Major Tom in its first appearance}} |
||
[[File:Majortom_s4_arena.png|thumb|left|Series 4 appearance]] |
[[File:Majortom_s4_arena.png|thumb|left|Series 4 appearance]] |
||
| − | For Series 4, the split scoop of the Series 3 machine was taken off and half of a garden water barrel was added to the top armour along with parts from bicycles and lawnmowers. The weapon was converted into a lifting ramp powered by a golf |
+ | For Series 4, the split scoop of the Series 3 machine was taken off and half of a garden water barrel was added to the top armour along with parts from bicycles and lawnmowers. The robot itself was powered by two golf buggy motors, and the weapon was converted into a lifting ramp, also powered by a golf buggy motor, and was capable of lifting 12 stone. {{quote|Firstly, changes were made to the weapon. The splitting wedge was dropped from the robot in favour of the lifting arm. To this was added a hefty plate, turning it into a kind of wedge. Because of its weight and size, a much faster revving motor was used to achieve a quicker lifting action|On the team's website}} The new weapon was capable of lifting Henry Ryan's car and also caused quite a large dent in one of the doors. This version is referred to as Major Tom Mark 1 in [[Robot Wars Extreme: The Official Guide]]. The Series 4 version was originally painted black with meteors down the sides, but this was repainted with the Union Jack for its appearance in the main series. |
===Major Tom (Extreme 1-2, Series 5-6)=== |
===Major Tom (Extreme 1-2, Series 5-6)=== |
||
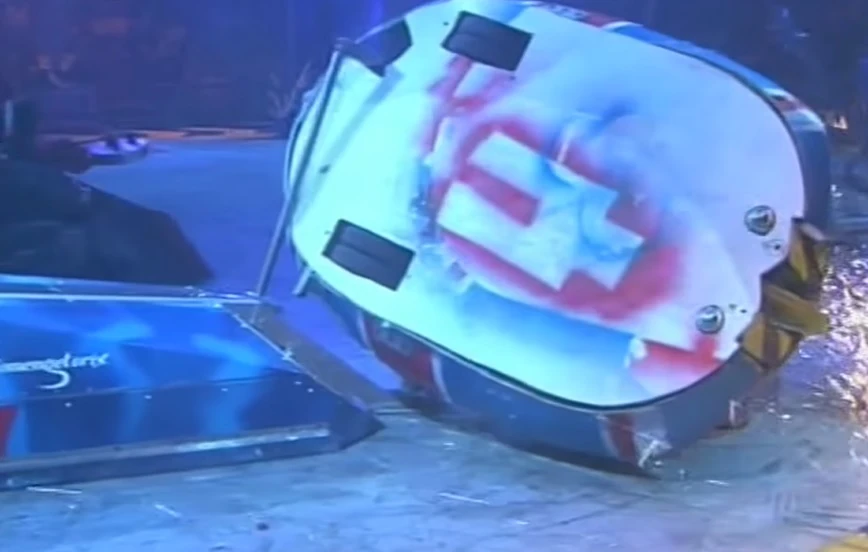
{{quote|The good-looking dodgem car!|''[[Robot Wars: The Ultimate Guide]]'' on the second version of Major Tom}} |
{{quote|The good-looking dodgem car!|''[[Robot Wars: The Ultimate Guide]]'' on the second version of Major Tom}} |
||
| − | [[File: |
+ | [[File:Major_tom_s5_arena.png|thumb|left|Major Tom in the arena during Series 5]] |
[[File:Major_Tom_Arena.jpg|thumb|Major Tom in the arena during Series 6]] |
[[File:Major_Tom_Arena.jpg|thumb|Major Tom in the arena during Series 6]] |
||
In Extreme 1, the robot became more box-shaped with a vertical spinning disc on the front, rotating at 35mph and the body was made from a cut-down 1977 bumper car body, found by team member Joe Brown, and a garden water barrel, the robot travelling at 10mph. |
In Extreme 1, the robot became more box-shaped with a vertical spinning disc on the front, rotating at 35mph and the body was made from a cut-down 1977 bumper car body, found by team member Joe Brown, and a garden water barrel, the robot travelling at 10mph. |
||
| Line 49: | Line 50: | ||
===Major Tom 3 (Series 7)=== |
===Major Tom 3 (Series 7)=== |
||
| − | [[File: |
+ | [[File:Major Tom 3.jpg|thumb|Front view of Major Tom 3]] |
In Series 7, a new design known as '''Major Tom 3''' was entered, which was an invertible two-wheel driven, box-wedge shaped robot with a double clamping spike on the front. It was much slower than its predecessor with only a top speed of 4mph, as a result of much stronger motors and low gearing, but had good pushing power, and a broad surface. |
In Series 7, a new design known as '''Major Tom 3''' was entered, which was an invertible two-wheel driven, box-wedge shaped robot with a double clamping spike on the front. It was much slower than its predecessor with only a top speed of 4mph, as a result of much stronger motors and low gearing, but had good pushing power, and a broad surface. |
||
| + | |||
| + | ====Etymology==== |
||
| ⚫ | The robot's name came from the astronaut in the David Bowie song [https://en.wikipedia.org/wiki/Space_Oddity "Space Oddity"], most pertinently the lyric "Ground Control to Major Tom", and Craig Charles and Jonathan Pearce frequently made jokes involving the song's lyrics. Additionally, the robot's title as a "Major" would allow it to, in Henry Ryan's own words, out-rank [[Sergeant Bash]]. |
||
==Qualification== |
==Qualification== |
||
| ⚫ | |||
| − | During the Series 3 qualifiers, Major Tom was able to navigate the assault course perfectly, but still was not chosen to compete in the main competition. |
||
| ⚫ | The Series 3 version of Major Tom was very different to all of its successors, mainly because it did not have its trademark head or Union Jack colours. It was white with blue, green and red triangle shapes painted on it. Its weapon was a lifting device that had a secondary usage as a split scoop. It was originally meant to be a tracked robot, but the rubber tracks were replaced with wheels for the qualifier. The robot was also 13kg overweight so the team had to replace the thick steel shell with aluminium. During the Series 3 qualifiers, Major Tom was able to navigate the assault course perfectly, but still was not chosen to compete in the main competition. |
||
| + | |||
[[File:Major_Tom2ndpaint.jpg|thumb|Major Tom in Series 4 at the qualifiers]] |
[[File:Major_Tom2ndpaint.jpg|thumb|Major Tom in Series 4 at the qualifiers]] |
||
| ⚫ | |||
| ⚫ | |||
| + | |||
| ⚫ | |||
| ⚫ | |||
| ⚫ | |||
| ⚫ | |||
[[File:Majortom_s6_qualifers.png|thumb|left|Major Tom during the Sixth Wars qualifiers]] |
[[File:Majortom_s6_qualifers.png|thumb|left|Major Tom during the Sixth Wars qualifiers]] |
||
In its Series 6 qualifier, Major Tom fought [[Roobarb]], [[Hell's Teeth]], and a robot with a spinner. Major Tom was immediately targeted by Roobarb due to it being the most experienced robot in the qualifier, but managed to roll over whenever it was flipped. Over the course of the battle, the unidentified spinner and Hell's Teeth became immobilised. Roobarb's flipper had also broken, so Major Tom was able to survive for almost the full battle, engaging in a pushing match until losing most of its power. Although Roobarb was declared the winner via Judges' decision, Major Tom was given a discretionary place in the Sixth Wars. |
In its Series 6 qualifier, Major Tom fought [[Roobarb]], [[Hell's Teeth]], and a robot with a spinner. Major Tom was immediately targeted by Roobarb due to it being the most experienced robot in the qualifier, but managed to roll over whenever it was flipped. Over the course of the battle, the unidentified spinner and Hell's Teeth became immobilised. Roobarb's flipper had also broken, so Major Tom was able to survive for almost the full battle, engaging in a pushing match until losing most of its power. Although Roobarb was declared the winner via Judges' decision, Major Tom was given a discretionary place in the Sixth Wars. |
||
{{quote|All this happened in around 2/3 mins and Major Tom was still going!!|Team Roobarb}} |
{{quote|All this happened in around 2/3 mins and Major Tom was still going!!|Team Roobarb}} |
||
| + | |||
| + | Major Tom 3 faced [[Armadrillo]] and [[Thor]] in its Series 7 qualifier. It would ultimately lose the battle to Thor, but successfully qualified for the Seventh Wars through a discretionary place. |
||
| + | {{Quote|I can only remember 7 qualifying. Major Tom and Armordrillo. Thor's pointed hammer head went all the way through Armordrillo and it caught fire|Jason Marston in 2019<ref>Correspondence with Wiki user [[User:SpaceManiac888|SpaceManiac888]]</ref>}} |
||
==Robot History== |
==Robot History== |
||
===Series 4=== |
===Series 4=== |
||
{{Quote|Certainly getting into the spirit of Robot Wars!|[[Julia Reed]] comments on the team}} |
{{Quote|Certainly getting into the spirit of Robot Wars!|[[Julia Reed]] comments on the team}} |
||
| + | In its first televised appearance, Major Tom was drawn up against the number 25 seeds [[Shadow of Napalm]] and fellow newcomers [[Disc-O-Inferno]] in its first round melee in Heat E of the Fourth Wars. |
||
| ⚫ | |||
| + | [[File:Major tom vs disc-o-inferno vs shadow of napalm.jpg|thumb|Major Tom clashes with Shadow of Napalm and Disc-O-Inferno]] |
||
| + | Major Tom paraded through this opening battle, first driving round the back of Shadow of Napalm before missing a charge against Disc-O-Inferno. It then turned on the reverse and drove over a flame jet, before ramming Shadow of Napalm from the side. Major Tom bumped into Shadow of Napalm again, this time from behind, but it failed to get underneath with its lifter effectively, which then became stuck open. |
||
| + | {{quote|Major Tom trundles with the Union Jack proud, aloof to the other robots it would seem.|Jonathan Pearce}} |
||
| + | After the three machines came together near the centre of the arena, Major Tom pushed Shadow of Napalm from the side again. It was then deflected away from Shadow of Napalm by Disc-O-Inferno, who broke down after the attack. |
||
| − | {{quote| |
+ | {{quote|Major Tom's lifting ram seems to be stuck in place...|Jonathan Pearce}} |
| ⚫ | |||
| ⚫ | Major Tom |
||
| ⚫ | Shadow of Napalm was wedged onto Disc-O-Inferno, and Major Tom shoved it away from the immobile spinner before pushing Disc-O-Inferno from behind briefly. While Disc-O-Inferno was flipped by the Floor Flipper, Major Tom had just enough time at the end of the battle to slam the limping Shadow of Napalm machine into the arena side wall, and used its now functioning lifting ramp to tilt the seeded robot sideways before cease was called. However, because of poor editing this attack wasn't properly demonstrated on screen. Both robots moved through to the next round nonetheless. |
||
| + | {{quote|Go on, Major Tom! Show 'em what you're made of!|An audience member enthusiastically supports Major Tom just before the fight against 101}} |
||
| + | Major Tom was then drawn up against the number 9 seeds [[101]] in the second round of the Heat. |
||
| ⚫ | |||
| ⚫ | |||
| ⚫ | In this battle, Major Tom initially chased after 101, who then turned and shoved Major Tom over a flame jet. Major Tom was able to withstand a push from the side by 101, before 101 ran up the ramp of Major Tom. 101 slid back off and then drove up Major Tom's ramp again, and along its body, pushing the bubblegum dispenser head askew. 101 then shoved Major Tom into the arena side wall from behind, crumpling the front ram of Major Tom. |
||
| + | {{quote|Major Tom in trouble now, against the arena wall. There's Captain Cosmic's head wobbling, and their whole future in Robot Wars a bit of a wobble too.|Jonathan Pearce}} |
||
| + | [[File:Matilda_major_tom_face_off.png|thumb|left|Matilda tears off Major Tom's face]] |
||
[[File:Death of major tom.JPG|thumb|Major Tom is decapitated]] |
[[File:Death of major tom.JPG|thumb|Major Tom is decapitated]] |
||
| − | Major Tom then slowed to a stop, and |
+ | Major Tom then slowed to a stop, with Matilda coming in and ripping Major Tom's face half-off with its chainsaw, before Shunt decapitated it completely, an axe blow shattering the bubblegum dispense head, although little damage was done to the actual body of Major Tom. |
| + | {{quote|Oh! There goes the head! Cleaved away - ooooh! And all around you are losing their head, can you keep yours? No, no, no, no.|Jonathan Pearce}} |
||
| ⚫ | |||
| + | [[File:Major tom series 4 pitted.jpg|thumb|Major Tom ends up in the Pit]] |
||
| + | Major Tom's body received a couple more hits from Shunt's axe, allowing the House Robot to drag and push it for a short period, and onto the Arena Floor Flipper, where it was thrown across the arena before being pitted by Matilda, eliminating it from the competition. |
||
{{quote|Ground control to Major Tom, goodness me, it's all gone wrong! The winner is 101!|Craig Charles describing the team's loss}} |
{{quote|Ground control to Major Tom, goodness me, it's all gone wrong! The winner is 101!|Craig Charles describing the team's loss}} |
||
===Extreme 1=== |
===Extreme 1=== |
||
| − | Major Tom's only appearance was in the Tag-Team Terror competition where it fought alongside [[Bigger Brother]], Major Tom was actually only brought into the competition at the last minute as a substitute for [[Plunderbird|Plunderbird 5]], which had broken down and damaged the entry gate going into the Arena for the first battle. |
+ | Major Tom's only appearance was in the Tag-Team Terror competition where it fought alongside [[Bigger Brother]], Major Tom was actually only brought into the competition at the last minute as a substitute for [[Plunderbird|Plunderbird 5]], which had broken down and damaged the entry gate going into the Arena for the first battle. In the first round, Major Tom and Bigger Brother fought [[Comengetorix]] and [[Spawn Again]], with Major Tom starting in the CPZ alongside Spawn Again. |
{{Quote|We're really looking forward to it!|Henry Ryan}} |
{{Quote|We're really looking forward to it!|Henry Ryan}} |
||
| + | [[File:Comengetorix & Spawn Again vs Bigger Brother & Major Tom (4).jpg|thumb|Major Tom in action with the other three robots]] |
||
[[File:Major Tom flipped.jpg|thumb|left|Major Tom is flipped by Spawn Again]] |
[[File:Major Tom flipped.jpg|thumb|left|Major Tom is flipped by Spawn Again]] |
||
| + | The fight started evenly with Bigger Brother and Comengetorix having a tug-of war contest, before Bigger Brother was pushed into Major Tom by Comengetorix. Major Tom decided to come out of the CPZ at this point, just as Spawn Again drove into it, but missing a flip on it. After being chased briefly, Major Tom was side swiped and flipped over by Spawn Again's only successful flip of the fight. |
||
| + | {{quote|That's Major Tom being flicked up and over! Henry Ryan and little Samantha Ryan in the team, and bang, they go over! Well that was a head-on collision, wasn't it, for Major Tom?|Jonathan Pearce}} |
||
| + | [[File:Comengetorix axes major tom.jpg|thumb|Major Tom's underbelly is damaged by Comengetorix]] |
||
| + | Bigger Brother attempted to right Major Tom, who was having its underbelly axed by Comengetorix, creating a large hole near one of the wheels. Major Tom was righted by its teammate, but it didn't move afterwards. Bigger Brother reversed into Major Tom while under pressure from Spawn Again, and it was nudged by Sir Killalot before being axed by Comengetorix. As it continued to sustain blows from Comengetorix, and suffering damage to the armour behind the head, Major Tom was counted out by Refbot. |
||
| + | {{quote|They were righted by Bigger Brother, but they were never quite... right, if you get what I mean.|Jonathan Pearce as Major Tom is counted out}} |
||
| + | [[File:Major tom floor flipper e1.jpg|thumb|left|Major Tom is thrown over by the Floor Flipper]] |
||
| + | After being dragged backwards by Comengetorix slightly, Dead Metal took over, shoving Major Tom into an angle grinder, before being pushed onto the Floor Flipper by the House Robot, where it was flung over and onto its head once more. |
||
| ⚫ | |||
[[File:BiggerBrotherMajorTomvsComengetorixSpawnAgain.jpg|thumb|Sir Killalot attempts to fit Major Tom down the pit]] |
[[File:BiggerBrotherMajorTomvsComengetorixSpawnAgain.jpg|thumb|Sir Killalot attempts to fit Major Tom down the pit]] |
||
| − | + | Major Tom was then shoved towards the pit by Dead Metal, before being righted and pushed onto it by Sir Killalot, but Major Tom didn't fall in because it was too big to fit. Cease was called and Major Tom and Bigger Brother were eliminated from the competition. |
|
| + | {{quote|Lose some weight, son!|Jonathan Pearce as Sir Killalot fails to pit Major Tom}} |
||
| ⚫ | |||
===Series 5=== |
===Series 5=== |
||
{{Quote|I can't remember a bumper car looking like that!|Jonathan Pearce}} |
{{Quote|I can't remember a bumper car looking like that!|Jonathan Pearce}} |
||
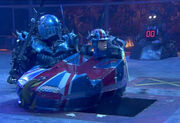
| + | In the first round of the Heat, Major Tom went up against newcomers [[Kliptonite]], another robot from the Isle of Sheppey. |
||
| ⚫ | |||
| − | [[File: |
+ | [[File:Major Tom vs Kliptonite.jpg|thumb|left|Major Tom uses its disc on Kliptonite]] |
| + | It evaded Kliptonite's first attack and cut into the side of its opponent with its disc, but not causing any real damage. It reversed and then bumped into the front of Kliptonite before absorbing a hit from the axe. Major Tom turned in a wide circle and attacked Kliptonite from the side again, but still couldn't cause any damage to the newcomers. After reversing away from its opponent, Major Tom was attacked head-on by Kliptonite, but Kliptonite broke down immediately afterwards with its axe downwards. Major Tom bumped into Kliptonite a couple more times before the latter was counted out by Refbot. |
||
| − | In the first round of the Heat, Major Tom went up against newcomers [[Kliptonite]], another robot from the Isle of Sheppey. Major Tom had a stroke of luck in this battle, as its opponents broke down quite early on after just a few bumps from Major Tom's spinning disc weapon. Kliptonite was counted out by Refbot, allowing Matilda and Sir Killalot to rip up and destroy the newcomers' robot, before finally dropping it in the pit. This put Major Tom through to the next round of the Heat. |
||
| + | [[File:Kliptonite_vs_Major_Tom.jpg|thumb|Major Tom is axed by Kliptonite]] |
||
| + | {{quote|Major Tom, a couple of bashes and-a crashes and Kliptonite not strong enough to survive.|Jonathan Pearce}} |
||
| + | Major Tom came in for another attack on its beaten opponent, but Matilda crashed into Kliptonite, knocking it away from Major Tom. While the House Robots toyed with Kliptonite, Major Tom activated the pit, and Kliptonite was thrown across the arena by Sir Killalot. Major Tom rammed into Kliptonite one last time, before its opponent was torched over the Flame Pit and dumped into the pit by Sir Killalot. This put Major Tom through to the next round of the Heat. |
||
{{quote|Our 'man of steel', Major Tom, to go through!|Jonathan Pearce}} |
{{quote|Our 'man of steel', Major Tom, to go through!|Jonathan Pearce}} |
||
| + | |||
| ⚫ | |||
| + | Major Tom then took on the experienced [[Kat 3]], new entry from [[Team KaterKiller]] in the second round. |
||
| ⚫ | |||
| + | [[File:Kat 3 vs Major Tom.jpg|thumb|left|Major Tom is axed by Kat 3]] |
||
| − | Major Tom then took on the more experienced [[Kat 3]] in the second round. In this battle, Major Tom had a strong start, as it was able to push [[Team KaterKiller]]'s machine around the arena floor with ease. However, Major Tom then slammed Kat 3 into the pit release button, and then reversed onto the descending pit and went down with it, eliminating Major Tom from the competition. Both teams were uncontrollably laughing in the post battle interview. This battle was also voted the funniest battle ever in Robot Wars for the book [[Robot Wars: The Ultimate Guide]]. |
||
| + | In this battle, Major Tom charged straight at Kat 3, who dodged away from the attack. Major Tom quickly turned and rammed into Kat 3's side, before Kat 3 turned and struck Major Tom with a glancing hit from the axe. Major Tom spun on the spot and avoided a hit from Kat 3, but it then drove head-on into its opponent and took a hit to the to armour. |
||
| + | [[File:Major Tom Kat 3 1.jpg|thumb|Major Tom splits the rear of Kat 3]] |
||
| + | {{quote|Now more dangerous with the flywheel at the front, and I think more potent than that axe of Kat 3.|Jonathan Pearce}} |
||
| + | After taking another hit from the axe, Major Tom spun away, before turning and slamming into the back of Kat 3. As Kat 3 went to activated the pit, Major Tom gave chase, smashing into the back of it and causing some damage to Kat 3's rear armour. However, Major Tom then reversed onto the descending pit and went down with it, eliminating it from the competition. |
||
| ⚫ | |||
| + | {{quote|The pit release button's been pressed - oh no! Major T..., can you hear me Major Tom, can you hear me?! What a dreadful piece of driving!|Jonathan Pearce as Major Tom reverses into the pit}} |
||
| + | Both teams were uncontrollably laughing in the post battle interview. This battle was also voted the funniest battle ever in Robot Wars for the book [[Robot Wars: The Ultimate Guide]]. |
||
{{quote|Ground control to Major Tom! The pit's open, and you are gone! Talk about unlucky...|[[Craig Charles]] describing the loss}} |
{{quote|Ground control to Major Tom! The pit's open, and you are gone! Talk about unlucky...|[[Craig Charles]] describing the loss}} |
||
===Series 6=== |
===Series 6=== |
||
| + | In the first round of its heat in the Sixth Wars, Major Tom was forced to fight old Tag Team partners and number 2 seeds [[Bigger Brother]], in addition to newcomers [[Riptilion]] and [[Killer Carrot 2]]. |
||
{{Dialogue a-b-c|Ian Watts|...Major Tom was our partners, in the Tag-Team, we can't fight them!|[[Philippa Forrester]]|Forget about the past! Forget about the past!|Joe Watts|They made us lose!|[[Team Big Brother]]'s pre-first round interview}} |
{{Dialogue a-b-c|Ian Watts|...Major Tom was our partners, in the Tag-Team, we can't fight them!|[[Philippa Forrester]]|Forget about the past! Forget about the past!|Joe Watts|They made us lose!|[[Team Big Brother]]'s pre-first round interview}} |
||
| − | [[File:Killer Carrot 2 Major Tom.JPG|thumb |
+ | [[File:Killer Carrot 2 Major Tom.JPG|thumb|Killer Carrot 2 lifts up Major Tom]] |
| + | In the battle, at first, Major Tom was attacked by Killer Carrot 2, who lifted it up very slightly over a flame jet. Major Tom was then lifted up again by Killer Carrot 2, before being flicked up twice more in succession, yet it did not tip over. |
||
| − | In the first round of its heat in the Sixth Wars, Major Tom was forced to fight old Tag Team partners and number 2 seeds [[Bigger Brother]], in addition to newcomers [[Riptilion]] and [[Killer Carrot 2]]. In the battle, at first, Major Tom was attacked by Killer Carrot 2. Despite four successive attacks, Killer Carrot 2 could only lift Major Tom, but could not flip it over. Bigger Brother seemingly came to its aid, flipping away Killer Carrot 2, but then went on to attack Major Tom itself, successfully flipping Major Tom into the CPZ, leaving it in Sir Killalot's hands, before Mr. Psycho came in. A severe blow from Mr. Psycho's hammer dented the rollcage. After its rollcage was ripped apart, it seemed that one of Major Tom's drives had stopped working. Major Tom was then counted out by the Refbot, as it could only drive in circles inside the CPZ. Major Tom was then left under the Drop Zone, where a shower of balls of various sizes fell. Cease was finally called, and Major Tom was eliminated from the competition, along with Riptilion, who drove into the pit earlier on in the battle. |
||
| + | {{quote|Major Tom under pressure from Killer Carrot, about to be flipped up and over; it has no srimech, Major Tom.|Jonathan Pearce}} |
||
| + | [[File:Bigger brother flips major tom.jpg|thumb|left|Major Tom is flipped by Bigger Brother]] |
||
| + | Killer Carrot 2 was flipped away from Major Tom by Bigger Brother, who then proceeded to flip Major Tom, causing it to roll over and then back onto its wheels. It was then pressured into the arena wall near a CPZ. After Bigger Brother activated the pit, it attacked Major Tom once more, lifting it up and right into the corner of the arena. Major Tom was then attacked from behind by Sir Killalot, before taking a glancing hit from Mr Psycho. Mr Psycho's second hammer blow then dented the rollcage. |
||
| + | [[File:PsychohammersMajorTom.jpg|thumb|Major Tom is hammered by Mr Psycho]] |
||
| + | {{quote|Ooh! Down comes the hammer on Major Tom, they're not gonna get out of there, I don't think. Henry, and Arthur, and John Morris, the Major Tom team, they're in a right pickle.|Jonathan Pearce}} |
||
| + | After its rollcage was ripped apart, Major Tom's spinner had stopped functioning and one of its drives had stopped working, and it sustained more damage from Mr Psycho's hammer as it spun round in circles, before being counted out by the Refbot, bumping into it as the countdown ended. |
||
| + | [[File:Major Tom drop zone balls.JPG|thumb|left|Major Tom is pelted by the Drop Zone]] |
||
| + | Major Tom was then pushed around the arena by Sir Killalot for a while, before being left under the Drop Zone, where a shower of balls of various sizes fell onto it. Cease was finally called, and Major Tom was eliminated from the competition, along with Riptilion, who drove into the pit earlier on in the battle. |
||
{{quote|Major Tom, stripped of its stripes and demoted to private...|Craig Charles at the end of the fight}} |
{{quote|Major Tom, stripped of its stripes and demoted to private...|Craig Charles at the end of the fight}} |
||
===Extreme 2=== |
===Extreme 2=== |
||
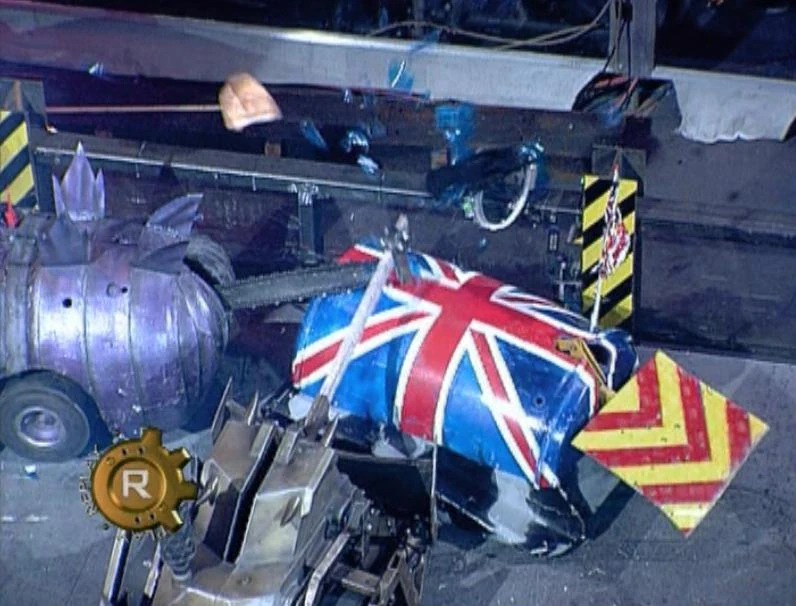
| + | Major Tom exclusively participated in the Annihilator in the second series of Extreme. At first, it was up against [[Kan-Opener]], [[Raging Reality]], [[Revenge of Trouble & Strife]], [[Typhoon 2]] and [[Thermidor 2]], and and went in as underdogs. |
||
{{Quote|Will it lose ground control?|Jonathan Pearce, as Major Tom enters the arena}} |
{{Quote|Will it lose ground control?|Jonathan Pearce, as Major Tom enters the arena}} |
||
| + | In the first round, Major Tom stayed out of the action early on, only being bumped by Kan-Opener, before charging at Thermidor 2, who was too quick for it. |
||
| − | Major Tom exclusively participated in the Annihilator in the second series of Extreme. At first, it was up against [[Typhoon 2]], [[Thermidor 2]], [[Kan-Opener]], [[Revenge of Trouble & Strife]] and [[Raging Reality]], and went in as underdogs. In the first round, Major Tom stayed out of most of the action, it drove into Raging Reality before being eyed up by Thermidor 2 and flipped into Typhoon 2's full-body spinner. Major Tom then reversed away but was intercepted by Revenge of Trouble & Strife and suffered several blows from their full-body spinner. After this, Major Tom could only spin in circles, but Typhoon 2 was already flipped over by Raging Reality and counted out by the Refbot, so Major Tom survived for the next round of the Annihilator. |
||
| + | [[File:Kan-opener typhoon 2 major tom thermidor 2.jpg|thumb|Major Tom is flicked into the path of Typhoon 2's spinner by Thermidor 2]] |
||
| + | {{quote|Major Tom has a think about things and moves away. Here he comes now, with the disc and the hammers on it.|Jonathan Pearce as Major Tom moves towards Typhoon 2}} |
||
| + | It then drove towards Typhoon 2, before being flicked into the path of the full-body spinner by Thermidor 2's flipper, disabling Major Tom's own weapon in the process, just moments before Typhoon 2's spinner was disabled by Kan-Opener. Major Tom then reversed away but was intercepted by Revenge of Trouble & Strife and suffered several blows from their full-body spinner, knocking it away and damaging its drive on one side. |
||
| + | [[File:Raging reality kan-opener major tom.jpg|thumb|left|Major Tom briefly lies motionless while Kan-Opener is flipped by Thermidor 2]] |
||
| + | After only being able to move in circles for a while, Major Tom stopped moving completely, just after Typhoon 2 was flipped over by Raging Reality. However, Major Tom then came back to life after taking another hit from Revenge of Trouble & Strife's spinner, and it was still mobile when Typhoon 2 was counted out and cease was called. |
||
| + | It turned out that Major Tom needed to be stripped down right to the innards in the pits as considerable damage had been caused in the first round, but they still managed to enter round two of the Annihilator. |
||
| ⚫ | |||
| + | {{Dialogue a-b|Philippa Forrester|And now you can see why this is called Annihilator, on damage cam there; damage sustained by Major Tom after just the first round! Talk us through it.|Henry Ryan|Well, we took quite a bit of damage to our weapon area, and we tackle technology different in our team. We've lost one of these very large, steel roller balls, so we're gonna replace it with a golf ball from Series 6... we should hopefully be back in action.|Interview between the first and second round of the Annihilator}} |
||
| − | It turned out that Major Tom needed to be stripped down right to the innards in the pits as considerable damage had been caused in the first round but they still managed to enter round two of the Annihilator. In the second round, Major Tom tried shunting Raging Reality again, but was then flipped over by Thermidor 2. Its rollcage self-righted it, but it was hit again by Thermidor 2, causing one of the front panels to fly off due to the impact. Revenge of Trouble & Strife then spun Major Tom, forcing it into the path of Sir Killalot, who then shoved Major Tom into an unoccupied CPZ. Major Tom tried to escape, but was then pushed back into the same CPZ by house robot Dead Metal. After looking like the hot favourite to go out next, Major Tom finally escaped from the CPZ and pressed the pit release button, but then Kan-Opener managed to immobilise Raging Reality with its jaws, Raging Reality was then later counted out by Refbot, flipped by the arena floor flipper and eliminated, meaning Major Tom survived for the third round. |
||
| + | [[File:Thermidor 2 major tom raging reality.jpg|thumb|Major Tom is flipped by Thermidor 2]] |
||
| + | In the second round, Major Tom immediately drove over the Pit, before turning and shunting Raging Reality, who was busy attacking Kan-Opener. However, it was then flipped over by Thermidor 2, and the disc stopped working once again. |
||
| + | {{quote|Major Tom takes a tumble!|Jonathan Pearce as Major Tom is flipped by Thermidor 2}} |
||
| + | [[File:Rotas major tom raging reality.jpg|thumb|left|Major Tom takes a hit from Revenge of Trouble & Strife]] |
||
| + | Major Tom's rollcage self-righted it, but it was quickly on the back foot again, with Raging Reality pushing it with a reverse shove, before it was hit again by Thermidor 2, causing one of the front panels to fly off due to the impact. Revenge of Trouble & Strife then spun Major Tom across the arena floor with its spinner, causing more damage and forcing it into the path of Sir Killalot, who then shoved Major Tom into an unoccupied CPZ. |
||
| ⚫ | |||
| + | {{quote|Major Tom sustaining more damage... They're all after Major Tom, it seems.|Jonathan Pearce}} |
||
| + | Major Tom tried to escape, but was then pushed back into the same CPZ by Dead Metal. It was then left alone to spin in circles in the CPZ for a while, but eventually escaped and pressed the pit release button. |
||
| + | {{quote|Major Tom's not rotating anywhere, but it did survive, it is active, and it has pressed the pit release button. Well, this is intriguing, I thought Major Tom were long gone, but no, so the fight is on to survive.|Jonathan Pearce}} |
||
| + | [[File:Major tom pit release.jpg|thumb|left|Maor Tom activates the pit release]] |
||
| + | Kan-Opener had managed to immobilise Raging Reality with its jaws earlier on in the battle, and it was then later counted out by Refbot, just as Major Tom was shoved into Dead Metal by Thermidor 2. Major Tom lost drive on one side yet again, whilst Raging Reality was flipped by the arena floor flipper and eliminated, meaning Major Tom survived to reach the third round. |
||
| − | Before |
+ | Before the third round, the team hesitated to whether they should just take the weapon off to make the robot quicker and more agile, but they eventually decided to keep the weapon on for the upcoming battle. |
{{Quote|Bruised and battered, but the weaponry is still there. They haven't gone for the lightweight option!|Major Tom's third introduction into the arena by Jonathan Pearce}} |
{{Quote|Bruised and battered, but the weaponry is still there. They haven't gone for the lightweight option!|Major Tom's third introduction into the arena by Jonathan Pearce}} |
||
| − | [[File: |
+ | [[File:Kan-Opener Major Tom Annihilator Round 3.jpg|thumb|Major Tom is attacked by Kan-Opener from behind]] |
| + | In this battle, Major Tom began by charging into the side of Kan-Opener, before slamming into Thermidor 2 while it engaged with Revenge of Trouble & Strife. It then reversed away and drove over the Flame Pit, before turning to attack Kan-Opener. However, Kan-Opener dodged it and pushed Major Tom across the arena from one side to the other, crashing it into Refbot before slamming it into the arena wall. |
||
| − | In the Round Three battle, Major Tom tried attacking both Thermidor 2 and Revenge of Trouble & Strife, trying to chase them down as they retreated from the arena side wall, but Major Tom was then intercepted and pushed across the arena from one side to the other by Kan-Opener. Thermidor 2 then flipped Revenge of Trouble & Strife over and Kan-Opener then pressed the pit release button for it to go down. Major Tom tried to then steer away from Thermidor 2 who still went on the attack of it. Kan-Opener then pitted Revenge of Trouble & Strife right before Major Tom lost control and drove backwards into the pit themselves. Major Tom was still through to the Fourth Round, it was also a bit of a clue for what was to come. |
||
| + | [[File:Thermidor 2, major tom and rotas.JPG|thumb|left|Major Tom and Thermidor 2 watch Revenge of Trouble and Strife on the edge of the pit]] |
||
| − | {{Quote|We think it will be the last farewell...|The Major Tom team's prophetic response to Philippa Forrester asking them about their feelings on the Fourth Round battle.}} |
||
| + | {{quote|Was it a deception in the pits? Were they trying to lull their opponents into a false sense of security? Well, no - hahaha! Not if that's anything to go by!|Jonathan Pearce as Major Tom gets shunted across the arena by Kan-Opener}} |
||
| ⚫ | |||
| + | Thermidor 2 then flipped Revenge of Trouble & Strife over, and Major Tom proceeded to attack Thermidor 2 while Kan-Opener grabbed the beaten Revenge of Trouble & Strife and left it on the lip of the pit. Major Tom nudged into Thermidor 2 near the pit before bashing it on the claw with its disc. As Kan-Opener pitted Revenge of Trouble & Strife, Major Tom rammed into its side, before turning around and reversing straight into the pit. |
||
| − | In the fourth round battle, it was pushed by Kan-Opener, before Thermidor 2 picked it up and flipped it into the arena side wall, onto its side. Major Tom's rollbars didn't work, but Kan-Opener righted it near a CPZ. Major Tom was then pushed into another arena side wall, and then one drive stopped, only one wheel was turning, but only enough to make the robot twitch. Mr. Psycho hammered its rollcage, knocking the crown of the head. Then Matilda came in and caused severe damage to its fibreglass shell, ripping it apart completely. [[Refbot]] then counted it out, before it was placed on the Drop Zone, where a cooker crushed it. |
||
| + | [[File:Major tom pits itself annihilator.jpg|thumb|Major Tom pits itself after Revenge of Trouble & Strife was eliminated]] |
||
| + | {{quote|I think Major Tom said "I've had enough, can I go too?" No you can't! That's the end of Revenge of Trouble & Strife; you're gonna have to wait a bit longer Major!|Jonathan Pearce}} |
||
| + | Major Tom was still through to the fourth round, although it was also a bit of a clue for what was to come, and the team were very pessimistic about their chances in the next fight. |
||
| + | {{dialogue a-b-a-b-a-b|Philippa Forrester|The Major Tom team have suffered a lot of damage, certainly in that first round. Have you recovered from it?|Arthur Robinson|Yes, certainly we have.|How are you feeling about this fight now?|The last farewell.|Oh dear! They're charged up, greased up, and ready for action!|Well we're ready for action as well, but we think it will be the last farewell...|The Major Tom team's prophetic response to Philippa Forrester asking them about their feelings on the next battle.}} |
||
| + | [[File:Major Tom Near OotA.png|thumb|left|Major Tom is almost thrown out of the arena by Thermidor 2]] |
||
| + | In the fourth round battle, it was immediately grabbed and pushed across the arena floor by Kan-Opener, before Thermidor 2 drove underneath it from behind and flipped it into the arena side wall, and onto its side. |
||
| + | {{quote|In the last bout, to be honest, Major Tom deserted in the line of fire - "Court-martial that Major, Sir!". Against the arena wall; they know the end is nigh...|Jonathan Pearce}} |
||
| + | [[File:Kan-opener vs major tom e2 annihilator round 4.jpg|thumb|Major Tom is rolled back onto its wheels by Kan-Opener]] |
||
| + | Major Tom's rollbars didn't work, but Kan-Opener grabbed it and dragged it away from the arena wall, before pushing it into the arena wall near Matilda's CPZ, and righting it in the process. Major Tom turned and went on the retreat while Thermidor 2 gave chase, before turning and evading an attack from Kan-Opener, causing it to crash into Thermidor 2 instead. |
||
| + | {{quote|There is no escape here for Major Tom, I fear.|Jonathan Pearce}} |
||
| + | [[File:Major tom kan-opener thermidor 2.jpg|thumb|left|Major Tom knocks Kan-Opener away from it with a hit]] |
||
| + | As Kan-Opener reversed, Major Tom then connected its disc against one of Kan-Opener's claws, knocking it away. Kan-Opener then went to press the pit release button, and Major Tom attacked it again, deflecting off its opponent's side into the pit release button. |
||
| + | {{quote|Valiant then, until the end, it would seem, Major Tom. Is it the end?|Jonathan Pearce}} |
||
| + | [[File:Kan opener damages major tom's drive.jpg|thumb|Major Tom loses drive on one side after another attack from Kan-Opener]] |
||
| + | Major Tom was then grabbed from behind by Kan-Opener, who sunk its claws into the armour and pushed into another arena side wall, damaging one side of its drive and leaving it turning on only one wheel, but only enough to make the robot twitch. Mr Psycho then came out of its CPZ and hammered its rollcage, denting it severely and knocking the crown off of the head. |
||
| + | [[File:Mr psycho major tom first hit.jpg|thumb|left|Mr Psycho's first attack on Major Tom]] |
||
| + | {{quote|Get away Major, get away Major - oooh! Right on top of the head! Look at that! The old rollcage didn't work there, the safety bar - how can you grin?!|Jonathan Pearce as the team urges the House Robots on to cause more damage}} |
||
| + | [[File:Matilda Major Tom.jpg|thumb|Matilda continues to destroy Major Tom]] |
||
| + | Major Tom spun round wildly on the spot, before Matilda came in and ripped through its fibreglass armour with the flywheel, immobilising it completely next to the pit release button. Major Tom was then struck again by Mr Psycho's hammer, damaging the rollcage further. Another Matilda attack sent bits and pieces of the rollcage flying, and particles of Major Tom were clearly visible in the air as Refbot finally came in to count it out. |
||
| + | {{quote|The dust settling on what was, once upon a time, proud Major... the thing is, he simply lost his head when the going got tough.|Jonathan Pearce}} |
||
| + | [[File:Mr Psycho Major Tom 1.jpg|thumb|left|Major Tom takes more damage from Mr Psycho]] |
||
| + | This didn't stop the House Robots from continuing their onslaught though, as Mr Psycho hammered it again, caving in part of the central armour, while Matilda tore into its front armour near the disc. Mr Psycho's fourth hammer blow almost completely knocked Major Tom's face off its head, and Matilda caused more damage to the armour, leaving a huge crevasse in its side and tearing apart the final part of the rollcage. Mr Psycho's fifth hit was quickly followed by it using its claw to try and grab Major Tom's head, ripping the face off completely. |
||
| + | {{quote|Ooooh! That's gruesome!|Jonathan Pearce as Mr Psycho attempts claws at Major Tom's head}} |
||
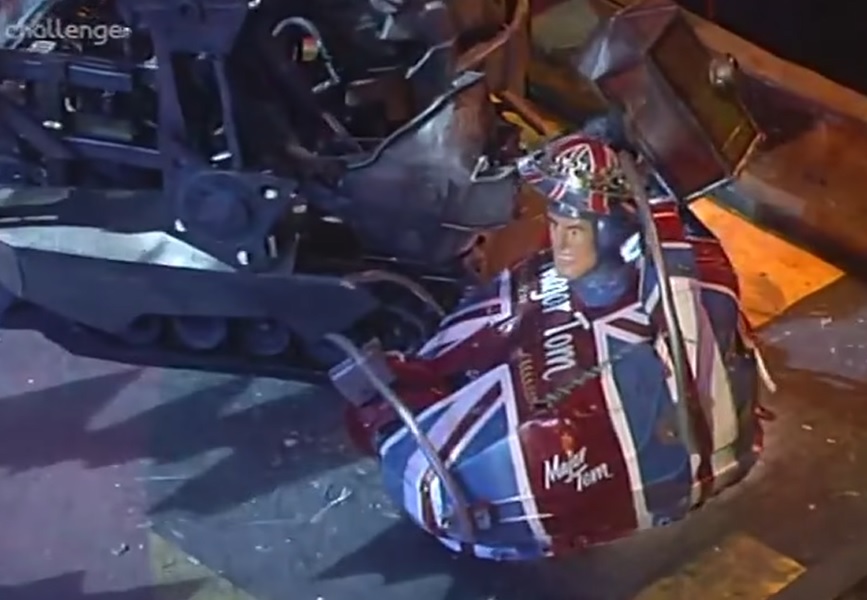
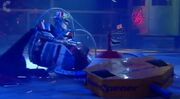
| + | [[File:Major tom cooker.jpg|thumb|A cooker is dropped on top of Major Tom]] |
||
| + | Matilda's next hit left Major Tom's disc almost completely exposed, its entire front armour now gone. Major Tom was then grabbed by Mr Psycho and carried over to the Drop Zone, its helmet falling off along the way, before a cooker was dropped onto it. After this impact, Major Tom took more damage from Matilda, its first hit knocking the cooker away from it, and the second ripped several pieces off and flipped Major Tom over onto its back, and sent it skittering across the arena floor towards a CPZ. |
||
| ⚫ | |||
| + | [[File:TatteredMajorTom.png|thumb|The end for Major Tom]] |
||
[[File:MajorTomdestroyed.png|thumb|left|The obliterated remains of Major Tom]] |
[[File:MajorTomdestroyed.png|thumb|left|The obliterated remains of Major Tom]] |
||
| ⚫ | |||
| ⚫ | |||
| ⚫ | |||
| − | Matilda then hit Major Tom with her flywheel one more time, which ripped several pieces off and flipped the machine over onto its back, before pushing the carcass of the robot into a CPZ, and cease was called. Major Tom was finally eliminated from the Annihilator. |
||
| ⚫ | |||
| ⚫ | |||
===Series 7=== |
===Series 7=== |
||
| − | {{Quote|Very slow at |
+ | {{Quote|Very slow at four miles an hour.|Jonathan Pearce's only criticism}} |
| + | Major Tom 3 was drawn up against the number eleven seeds [[X-Terminator]], German series runners-up [[Tsunami]], and [[Diabolus]] in the first round of the Seventh Wars. Going against Major Tom 3 created unmentioned revenge for Diabolus, not just because it was another robot from the Isle of Sheppey, but Major Tom defeated the team's previous robot, Kliptonite, in the Fifth Wars. |
||
| + | [[File:X-terminator vs major tom.jpg|thumb|left|Major Tom 3 is attacked by X-Terminator]] |
||
| + | In this battle, Major Tom 3 was immediately slammed from the side by Diabolus, causing its head to fall off seconds into the fight, although this would prove to be the only contact between the two Isle of Sheppey machines. |
||
| + | {{quote|Two robots survive this battle to go through to the second round. Major Tom's lost his head straight away!|Jonathan Pearce as Major Tom 3 gets hit by Diabolus and its head falls off}} |
||
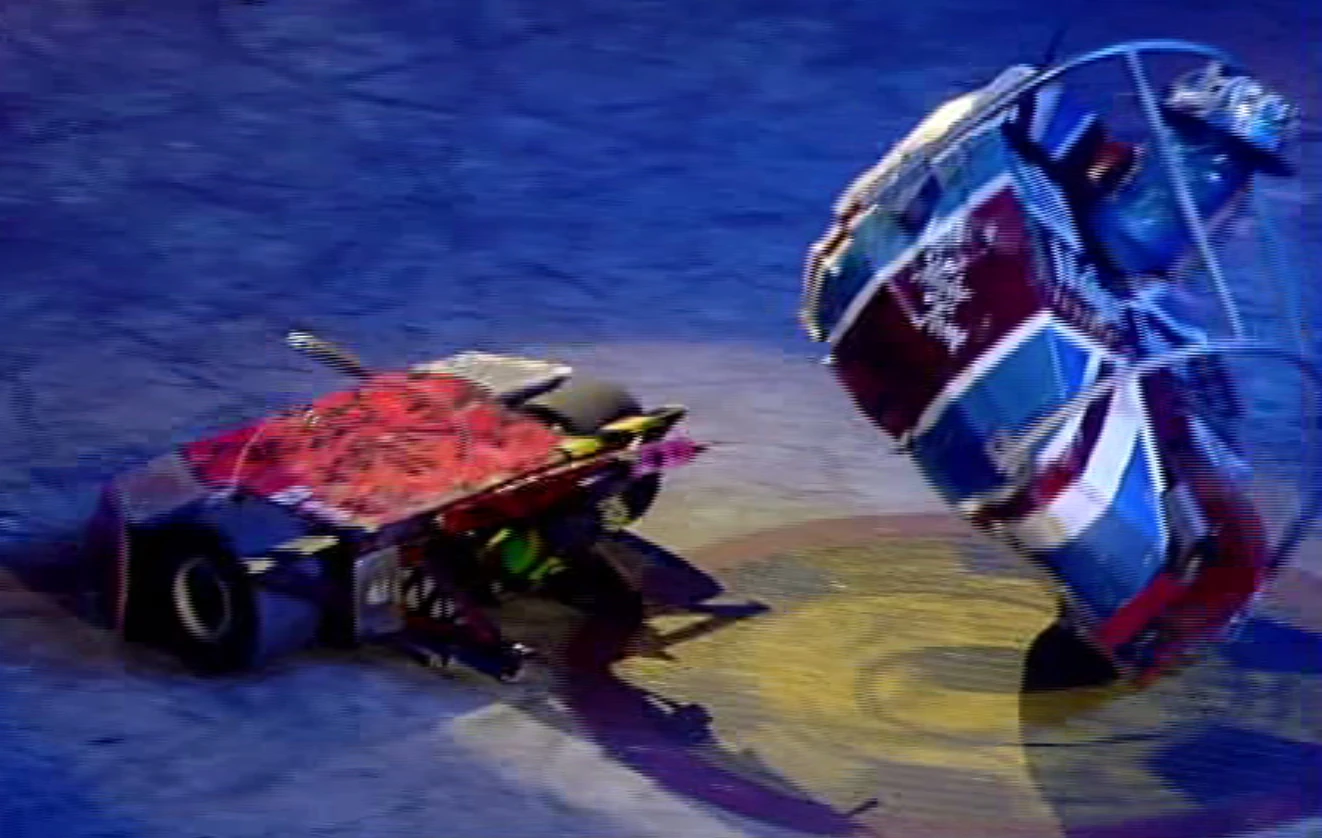
[[File:Tsunami vs X-Terminator vs Diabolus vs Major Tom 3.jpg|thumb|left|Tsunami prepares to throw Major Tom 3 out]] |
[[File:Tsunami vs X-Terminator vs Diabolus vs Major Tom 3.jpg|thumb|left|Tsunami prepares to throw Major Tom 3 out]] |
||
| + | [[File:Tsunami MajorTom3 OotA.jpg|thumb|Major Tom 3 is flung out of the arena by Tsunami]] |
||
| − | Major Tom 3 was drawn up against German runners-up [[Tsunami]], the number 11 seeds [[X-Terminator]] and [[Diabolus]] in the first round of the Seventh Wars. Going against Major Tom created unmentioned revenge for Diabolus, not just because it was another robot from the Isle of Sheppey, but Major Tom defeated the team's previous robot, Kliptonite, in the Fifth Wars. In this battle, Major Tom's first collision with Diabolus caused an immediate effect as the head fell straight off Major Tom 3. X-Terminator toppled Major Tom 3 over with its disc, causing the front of Major Tom's wedge to crumple a bit. Major Tom 3 did not last much longer as it tried to run to safety, but its top speed of 4mph proved to be its undoing, as Tsunami then eyed up the sluggish Major Tom 3, pushed it side on towards the flame pit and flipped it straight out of the arena, eliminating it from the competition. |
||
| + | X-Terminator then toppled Major Tom 3 over with its disc, where it was briefly side stranded due to its extended clamping spikes. Major Tom 3 was struck again by X-Terminator's disc, flipping it onto its other side and causing the front of Major Tom 3's wedge to crumple a bit. Major Tom 3 was then able to lower its clamping spikes back into its body, leaving it inverted. Major Tom 3 did not last much longer though; as it tried to run to safety, Tsunami pushed it side-on towards the flame pit and flipped it straight out of the arena, eliminating it from the competition. |
||
| ⚫ | |||
| + | [[File:Major tom oota.JPG|thumb|left|Major Tom 3, having been thrown out of the arena]] |
||
| + | [[File:Tsunami flips major tom 3 and diabolus.JPG|thumb|Tsunami throws Diabolus out to join Major Tom 3]] |
||
{{Quote|Carnage already in the warzone, and Major Tom out! Gone. Hit by the tidal wave - the Tsunami, and they went.|Jonathan Pearce}} |
{{Quote|Carnage already in the warzone, and Major Tom out! Gone. Hit by the tidal wave - the Tsunami, and they went.|Jonathan Pearce}} |
||
| − | Major Tom 3 was then soon followed out of the arena by Diabolus. |
+ | Major Tom 3 was then soon followed out of the arena by Diabolus, whilst Tsunami and X-Terminator advanced to the next round. This was Major Tom's last appearance on Robot Wars. |
{{Quote|Major Tom: Major Disappointment!|Craig Charles after the battle}} |
{{Quote|Major Tom: Major Disappointment!|Craig Charles after the battle}} |
||
| Line 146: | Line 248: | ||
{{Battle|[[Robot Wars: The Sixth Wars/Heat L|Heat L, Round 1]]|[[Bigger Brother]] ''(2)'', [[Killer Carrot 2]], [[Riptilion]]|Eliminated}} |
{{Battle|[[Robot Wars: The Sixth Wars/Heat L|Heat L, Round 1]]|[[Bigger Brother]] ''(2)'', [[Killer Carrot 2]], [[Riptilion]]|Eliminated}} |
||
{{Show|Extreme Series 2}} |
{{Show|Extreme Series 2}} |
||
| − | {{Competition|[[Robot Wars Extreme: Series 2/Annihilator|Annihilator]]|Third}} |
+ | {{Competition|[[Robot Wars Extreme: Series 2/Annihilator|Annihilator]]|Third Place}} |
{{Battle|[[Robot Wars Extreme: Series 2/Annihilator|Round 1]]|[[Kan-Opener]], [[Raging Reality]],<br>[[Revenge of Trouble & Strife]], [[Thermidor 2]], [[Typhoon 2]]|Qualified}} |
{{Battle|[[Robot Wars Extreme: Series 2/Annihilator|Round 1]]|[[Kan-Opener]], [[Raging Reality]],<br>[[Revenge of Trouble & Strife]], [[Thermidor 2]], [[Typhoon 2]]|Qualified}} |
||
{{Battle|[[Robot Wars Extreme: Series 2/Annihilator|Round 2]]|[[Kan-Opener]], [[Raging Reality]],<br>[[Revenge of Trouble & Strife]], [[Thermidor 2]]|Qualified}} |
{{Battle|[[Robot Wars Extreme: Series 2/Annihilator|Round 2]]|[[Kan-Opener]], [[Raging Reality]],<br>[[Revenge of Trouble & Strife]], [[Thermidor 2]]|Qualified}} |
||
| Line 155: | Line 257: | ||
{{Show|Series 7}} |
{{Show|Series 7}} |
||
{{Competition|The Seventh Wars - UK Championship|Heat, Round 1}} |
{{Competition|The Seventh Wars - UK Championship|Heat, Round 1}} |
||
| − | {{Battle|[[Robot Wars: The Seventh Wars/Heat F|Heat F, Round 1]]|[[Diabolus]], [[Tsunami]] [[X-Terminator]] ''(11)''|Eliminated}} |
+ | {{Battle|[[Robot Wars: The Seventh Wars/Heat F|Heat F, Round 1]]|[[Diabolus]], [[Tsunami]], [[X-Terminator]] ''(11)''|Eliminated}} |
|} |
|} |
||
| Line 162: | Line 264: | ||
*Losses: 6 |
*Losses: 6 |
||
| ⚫ | |||
| − | <gallery type="slideshow |
+ | <gallery type="slideshow"> |
Major tom2.jpg|Major Tom, between Series 3 and 4 |
Major tom2.jpg|Major Tom, between Series 3 and 4 |
||
Majorteam.jpg|The team with the Series 5 incarnation of Major Tom |
Majorteam.jpg|The team with the Series 5 incarnation of Major Tom |
||
| + | Majortomdamage.jpg|Major Tom 3, damaged after its encounter with X-Terminator |
||
| − | Mtomseries6.png|Major Tom getting worked on behind the scenes during Series 6 |
||
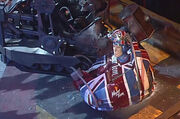
| + | Majortom3 afteramth.jpg|Major Tom 3 in the pits after its Series 7 battle |
||
</gallery> |
</gallery> |
||
| − | |||
| ⚫ | |||
{{Series Record EX|Major Tom|Did not enter|Did not enter|''Not selected''|'''Heat, Round 2'''|'''Heat, Round 2'''|'''Heat, Round 1'''|'''Heat, Round 1'''|Did not enter|Did not enter|Did not enter|'''Entered'''|'''Entered'''}} |
{{Series Record EX|Major Tom|Did not enter|Did not enter|''Not selected''|'''Heat, Round 2'''|'''Heat, Round 2'''|'''Heat, Round 1'''|'''Heat, Round 1'''|Did not enter|Did not enter|Did not enter|'''Entered'''|'''Entered'''}} |
||
==Trivia== |
==Trivia== |
||
| + | [[File:Major Tom 3 S7.png|thumb|Official Series 7 photo]] |
||
| − | *At |
+ | *At thirty-six seconds, Major Tom 3's battle against [[Tsunami]], [[X-Terminator]] and [[Diabolus]] is the shortest battle in UK Robot Wars to require two immobilisations. However, it did not make the [[Shortest Battles in UK Robot Wars|top 30 list]]. |
*The Major Tom team has a member called Henry, and [[Henry]] has a team member called Tom. |
*The Major Tom team has a member called Henry, and [[Henry]] has a team member called Tom. |
||
*Major Tom was twice in the same Heat as Killer Carrot 2, Disc-O-Inferno, and Team Demon (Diabolus and Kliptonite). |
*Major Tom was twice in the same Heat as Killer Carrot 2, Disc-O-Inferno, and Team Demon (Diabolus and Kliptonite). |
||
| + | **In addition, it was twice in the same episode as Behemoth, Thermidor 2, X-Terminator and Bigger Brother. |
||
**Both times Major Tom was in the same Heat as Killer Carrot 2, it was knocked out in the first round of the competition. |
**Both times Major Tom was in the same Heat as Killer Carrot 2, it was knocked out in the first round of the competition. |
||
| + | *Only one of Major Tom's losses did not involve a robot that reached a semi-final or grand final. |
||
| + | **By contrast, all of Major Tom's losses involved a robot that had or would compete in a Tag Team Terror. Ironically, Major Tom itself also appeared in a Tag Team Terror. |
||
| + | *Major Tom is one of three machines to fight axe-wielding robots twice in a row in a main series heat, the other two being [[S.M.I.D.S.Y.]] and [[Inshredable]]. |
||
| + | *In Major Tom's first two appearances, it appeared in the fifth episode and was thrown by the floor flipper. |
||
| + | *Major Tom 3 was thrown out of the arena faster than any other robot in a melee, when Tsunami flipped it out in the first round of Series 7 after just twenty seconds. |
||
| + | *Throughout the series that it appeared in, Major Tom never shared the arena with [[Growler]] or [[Cassius Chrome]]. |
||
| + | *Major Tom 3 was the only version of Major Tom not to fall into the pit, rather it was thrown out of the arena instead. |
||
| + | |||
| + | ==References== |
||
| + | <references/> |
||
| + | ==External Links== |
||
| + | *[http://web.archive.org/web/20050218030852/http://members.lycos.co.uk:80/majortom2k/index.htm Major Tom website (archived)] |
||
{{Series 4 Competitors}} |
{{Series 4 Competitors}} |
||
{{Series 5 Competitors}} |
{{Series 5 Competitors}} |
||
| Line 208: | Line 324: | ||
[[Category:Robots which outlasted two others in a 3-way melee]] |
[[Category:Robots which outlasted two others in a 3-way melee]] |
||
[[Category:Robots with cameo appearences in Nickelodeon Robot Wars]] |
[[Category:Robots with cameo appearences in Nickelodeon Robot Wars]] |
||
| + | [[Category:Robots with cameo appearances in Extreme Warriors Season 1]] |
||
Revision as of 19:50, 7 April 2020
- "The idea for Major Tom was originally to out-rank Sergeant Bash."
- — Henry Ryan
Major Tom was a robot from the Isle of Sheppey that competed in Series 4 to 7 of Robot Wars, also entering in both series of Extreme. Despite competing in four separate series of Robot Wars, Major Tom never enjoyed great success, having only reached the second round in Series 4 and 5, while it was eliminated in the first round of Series 6 and 7. Its best performance was in the Annihilator during the second series of Extreme, where it finished third.
Versions of Major Tom
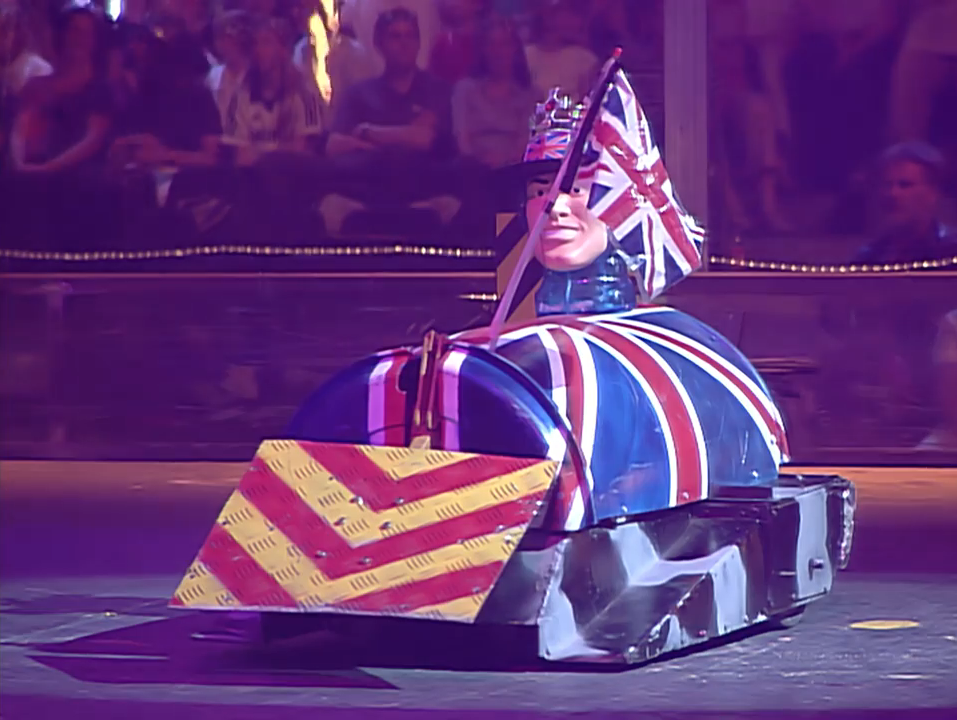
Despite taking on many different forms, every version of Major Tom (except for Series 3) was always painted in the colours of the Union flag. Major Tom was also famous for its plastic bubble-gum dispenser head which was present on every machine that featured on the televised show. The head itself was either knocked off or destroyed easily, as shown during Major Tom's most infamous moment after its loss to 101. The head also sported different head gear throughout Major Tom's appearances; a cap in Series 4, a helmet and crown in Series 5, 6 and both Extremes, and just a crown in Series 7.
Major Tom (Series 4)
- "Ground control for Major Tom from two golf caddy motors as well as the garden barrel, old bicycles and lawnmowers also used. A ramp weapon. Captain Cosmic's head atop."
- — Jonathan Pearce introduces Major Tom in its first appearance

Series 4 appearance
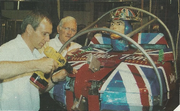
For Series 4, the split scoop of the Series 3 machine was taken off and half of a garden water barrel was added to the top armour along with parts from bicycles and lawnmowers. The robot itself was powered by two golf buggy motors, and the weapon was converted into a lifting ramp, also powered by a golf buggy motor, and was capable of lifting 12 stone.
- "Firstly, changes were made to the weapon. The splitting wedge was dropped from the robot in favour of the lifting arm. To this was added a hefty plate, turning it into a kind of wedge. Because of its weight and size, a much faster revving motor was used to achieve a quicker lifting action"
- — On the team's website
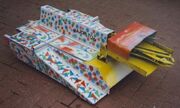
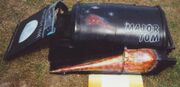
The new weapon was capable of lifting Henry Ryan's car and also caused quite a large dent in one of the doors. This version is referred to as Major Tom Mark 1 in Robot Wars Extreme: The Official Guide. The Series 4 version was originally painted black with meteors down the sides, but this was repainted with the Union Jack for its appearance in the main series.
Major Tom (Extreme 1-2, Series 5-6)
- "The good-looking dodgem car!"
- — Robot Wars: The Ultimate Guide on the second version of Major Tom


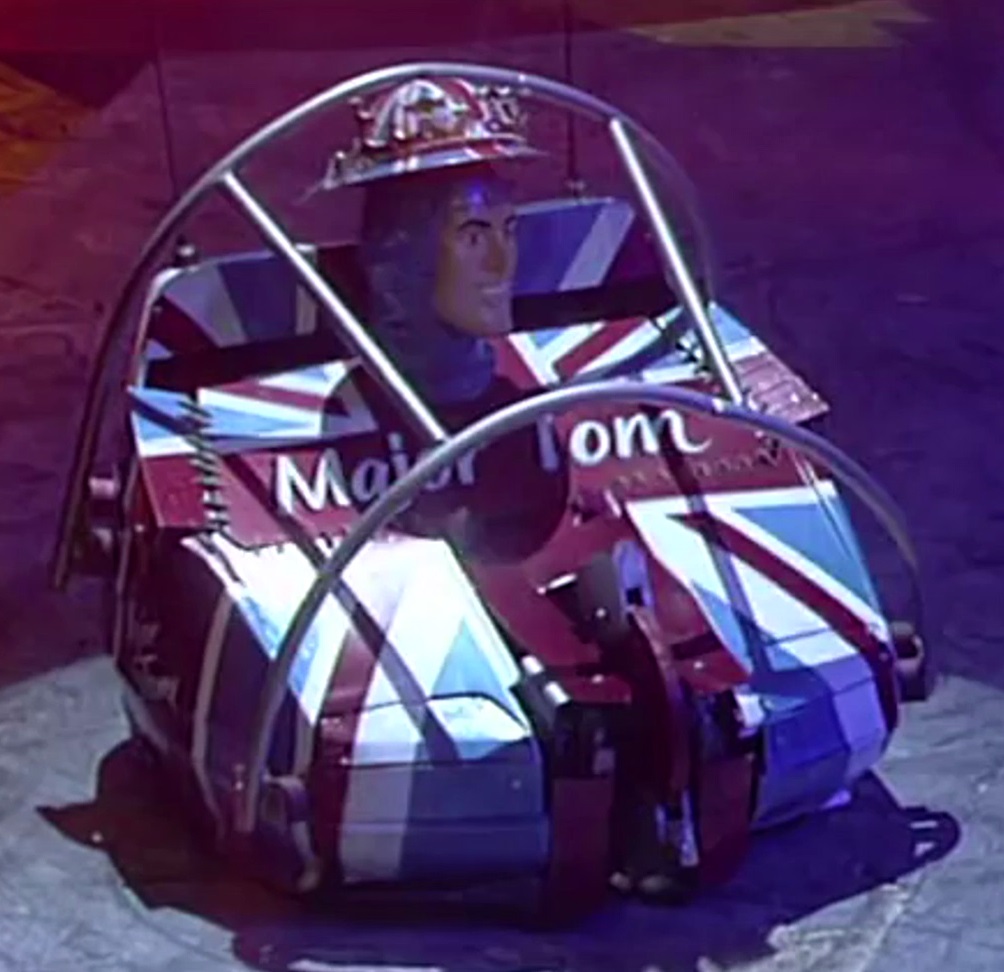
Major Tom in the arena during Series 5

Major Tom in the arena during Series 6
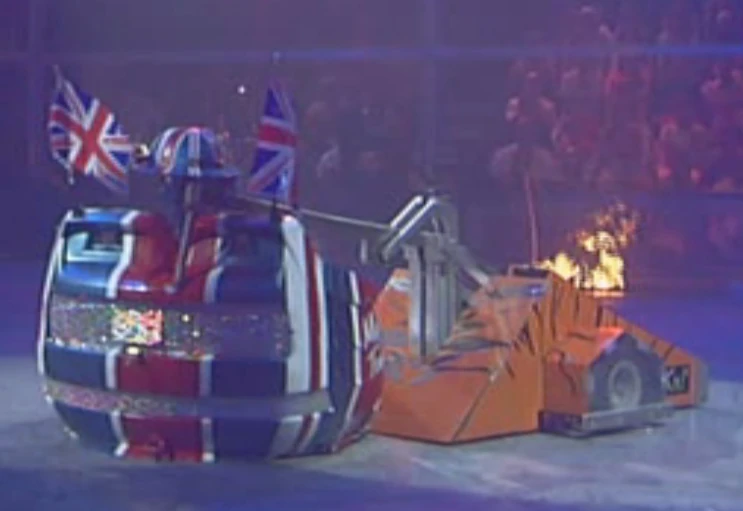
In Extreme 1, the robot became more box-shaped with a vertical spinning disc on the front, rotating at 35mph and the body was made from a cut-down 1977 bumper car body, found by team member Joe Brown, and a garden water barrel, the robot travelling at 10mph.
In Series 5, the chassis was shortened from the front to reduce weight and fit in larger motors. A roll-bar was added to the top of the machine for Series 6 and Extreme 2 to act as a srimech (though its weakness is labelled as not having one), and the blades on the disc were also enlarged to cause more damage.
Major Tom 3 (Series 7)
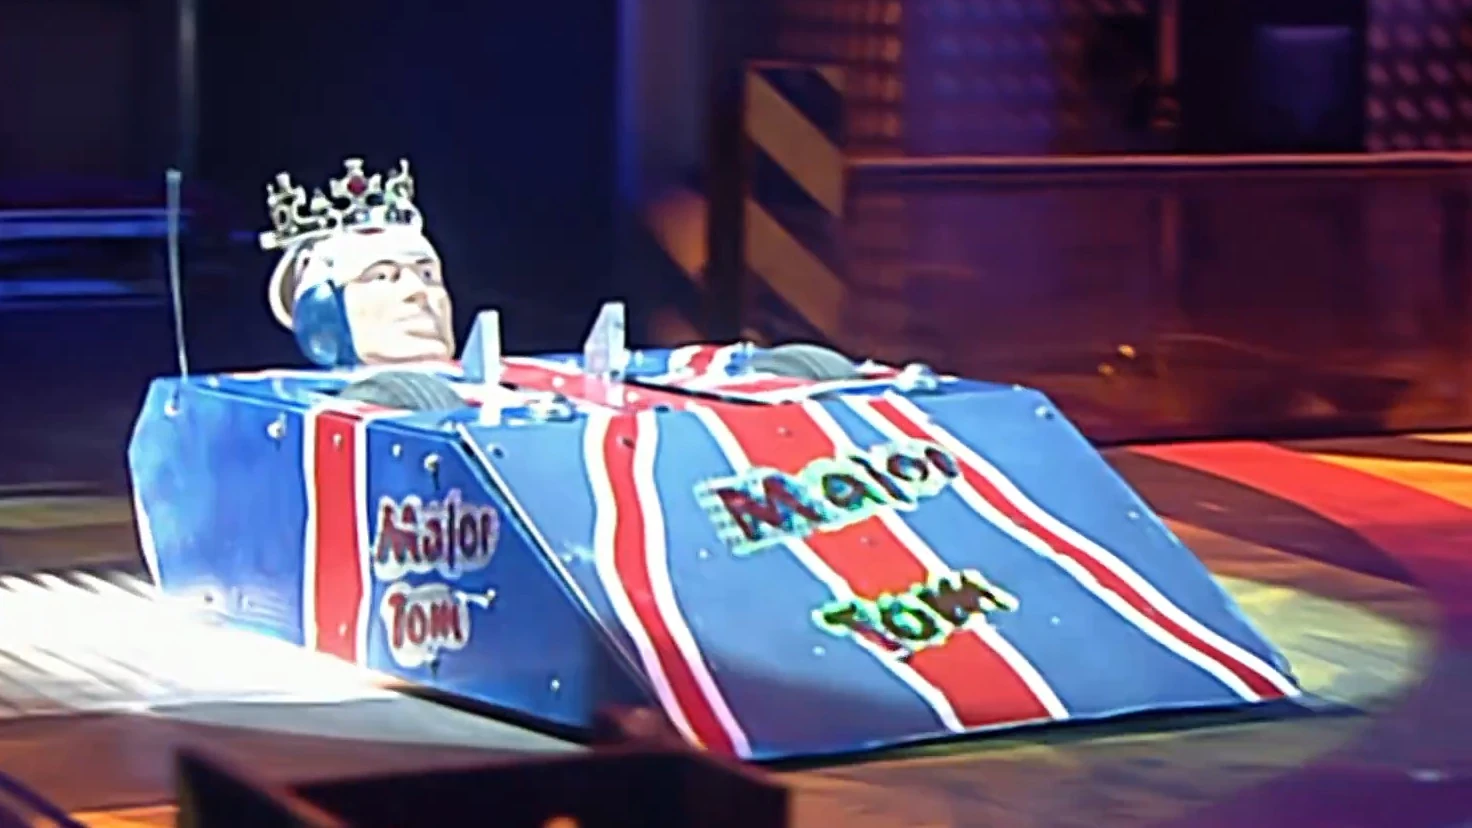
Front view of Major Tom 3
In Series 7, a new design known as Major Tom 3 was entered, which was an invertible two-wheel driven, box-wedge shaped robot with a double clamping spike on the front. It was much slower than its predecessor with only a top speed of 4mph, as a result of much stronger motors and low gearing, but had good pushing power, and a broad surface.
Etymology
The robot's name came from the astronaut in the David Bowie song "Space Oddity", most pertinently the lyric "Ground Control to Major Tom", and Craig Charles and Jonathan Pearce frequently made jokes involving the song's lyrics. Additionally, the robot's title as a "Major" would allow it to, in Henry Ryan's own words, out-rank Sergeant Bash.
Qualification

The version of Major Tom that failed to qualify for Series 3
The Series 3 version of Major Tom was very different to all of its successors, mainly because it did not have its trademark head or Union Jack colours. It was white with blue, green and red triangle shapes painted on it. Its weapon was a lifting device that had a secondary usage as a split scoop. It was originally meant to be a tracked robot, but the rubber tracks were replaced with wheels for the qualifier. The robot was also 13kg overweight so the team had to replace the thick steel shell with aluminium. During the Series 3 qualifiers, Major Tom was able to navigate the assault course perfectly, but still was not chosen to compete in the main competition.

Major Tom in Series 4 at the qualifiers
At the Series 4 qualifiers, Major Tom faced the returning Killertron. Both robots fought an even contest for the full five minutes of the bout, with the win eventually being given to Killertron based on damage.
- "Major Tom performed really well, far better than expected. The contest was as good as even, until about the final 10 seconds when Killertron's axe came down and got stuck in Major Tom's body shell. The judges scored the win for Killertron."
- — From the team's website
Although Major Tom lost the battle, it received a discretionary place in the Fourth Wars, and also qualified for the Fifth Wars in the following year.

Major Tom during the Sixth Wars qualifiers
In its Series 6 qualifier, Major Tom fought Roobarb, Hell's Teeth, and a robot with a spinner. Major Tom was immediately targeted by Roobarb due to it being the most experienced robot in the qualifier, but managed to roll over whenever it was flipped. Over the course of the battle, the unidentified spinner and Hell's Teeth became immobilised. Roobarb's flipper had also broken, so Major Tom was able to survive for almost the full battle, engaging in a pushing match until losing most of its power. Although Roobarb was declared the winner via Judges' decision, Major Tom was given a discretionary place in the Sixth Wars.
- "All this happened in around 2/3 mins and Major Tom was still going!!"
- — Team Roobarb
Major Tom 3 faced Armadrillo and Thor in its Series 7 qualifier. It would ultimately lose the battle to Thor, but successfully qualified for the Seventh Wars through a discretionary place.
- "I can only remember 7 qualifying. Major Tom and Armordrillo. Thor's pointed hammer head went all the way through Armordrillo and it caught fire"
- — Jason Marston in 2019[1]
Robot History
Series 4
- "Certainly getting into the spirit of Robot Wars!"
- — Julia Reed comments on the team
In its first televised appearance, Major Tom was drawn up against the number 25 seeds Shadow of Napalm and fellow newcomers Disc-O-Inferno in its first round melee in Heat E of the Fourth Wars.


Major Tom clashes with Shadow of Napalm and Disc-O-Inferno
Major Tom paraded through this opening battle, first driving round the back of Shadow of Napalm before missing a charge against Disc-O-Inferno. It then turned on the reverse and drove over a flame jet, before ramming Shadow of Napalm from the side. Major Tom bumped into Shadow of Napalm again, this time from behind, but it failed to get underneath with its lifter effectively, which then became stuck open.
- "Major Tom trundles with the Union Jack proud, aloof to the other robots it would seem."
- — Jonathan Pearce
After the three machines came together near the centre of the arena, Major Tom pushed Shadow of Napalm from the side again. It was then deflected away from Shadow of Napalm by Disc-O-Inferno, who broke down after the attack.
- "Major Tom's lifting ram seems to be stuck in place..."
- — Jonathan Pearce


Major Tom attacks Shadow of Napalm from the side
Shadow of Napalm was wedged onto Disc-O-Inferno, and Major Tom shoved it away from the immobile spinner before pushing Disc-O-Inferno from behind briefly. While Disc-O-Inferno was flipped by the Floor Flipper, Major Tom had just enough time at the end of the battle to slam the limping Shadow of Napalm machine into the arena side wall, and used its now functioning lifting ramp to tilt the seeded robot sideways before cease was called. However, because of poor editing this attack wasn't properly demonstrated on screen. Both robots moved through to the next round nonetheless.
- "Go on, Major Tom! Show 'em what you're made of!"
- — An audience member enthusiastically supports Major Tom just before the fight against 101
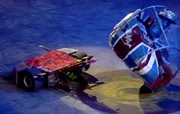
Major Tom was then drawn up against the number 9 seeds 101 in the second round of the Heat.
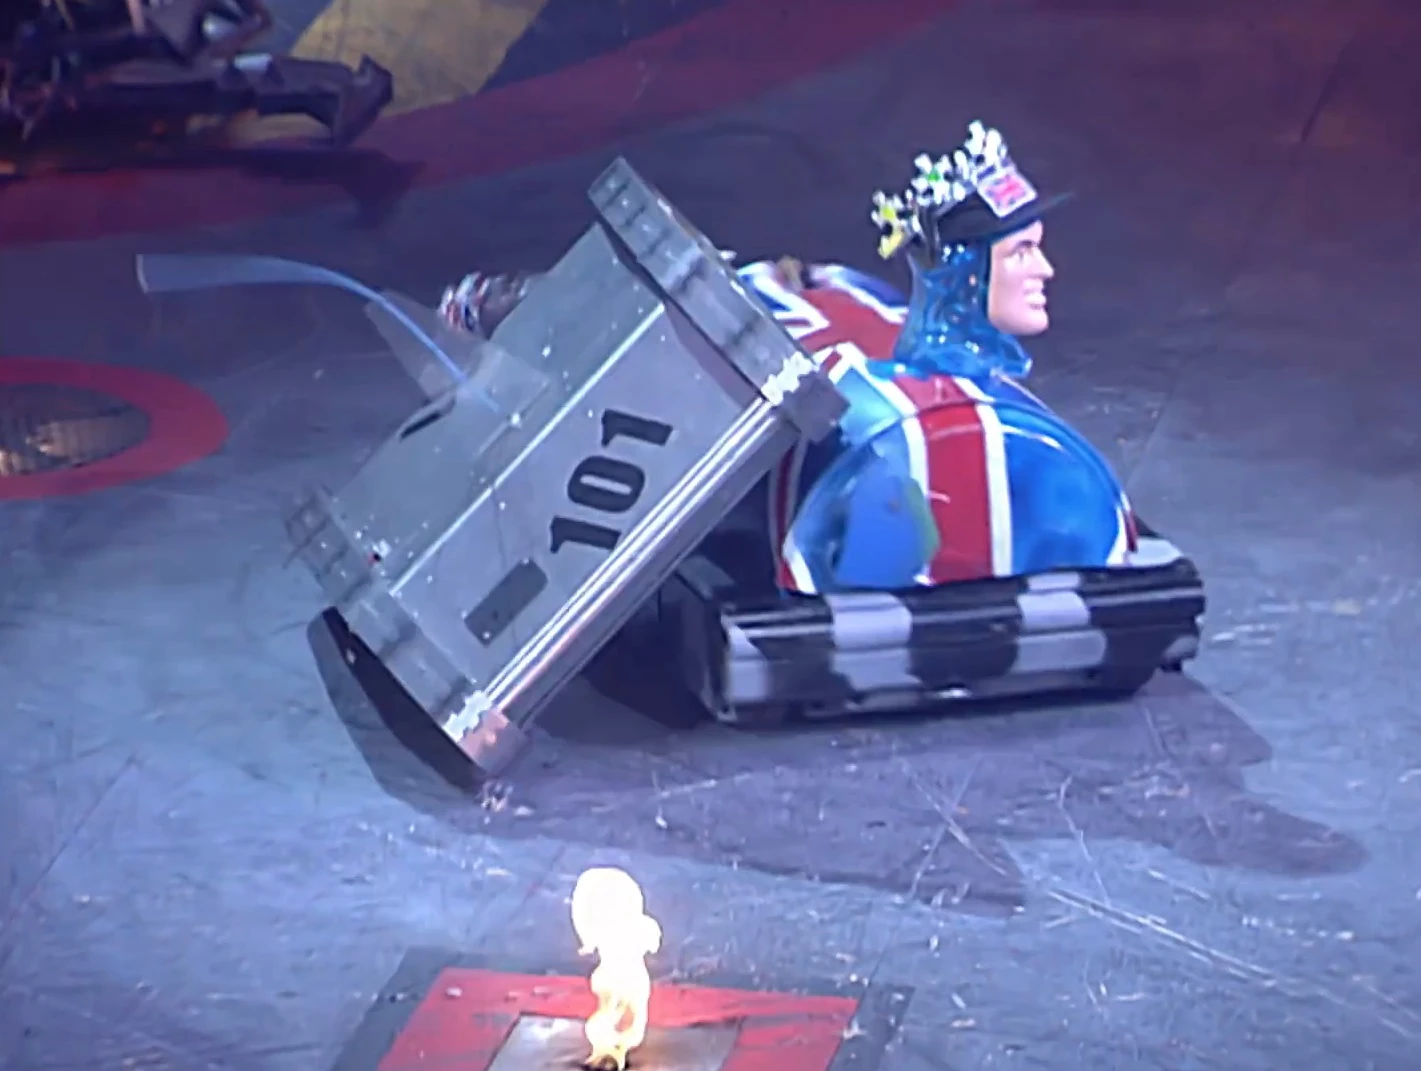

Major Tom's head is dislodged by a 101 attack
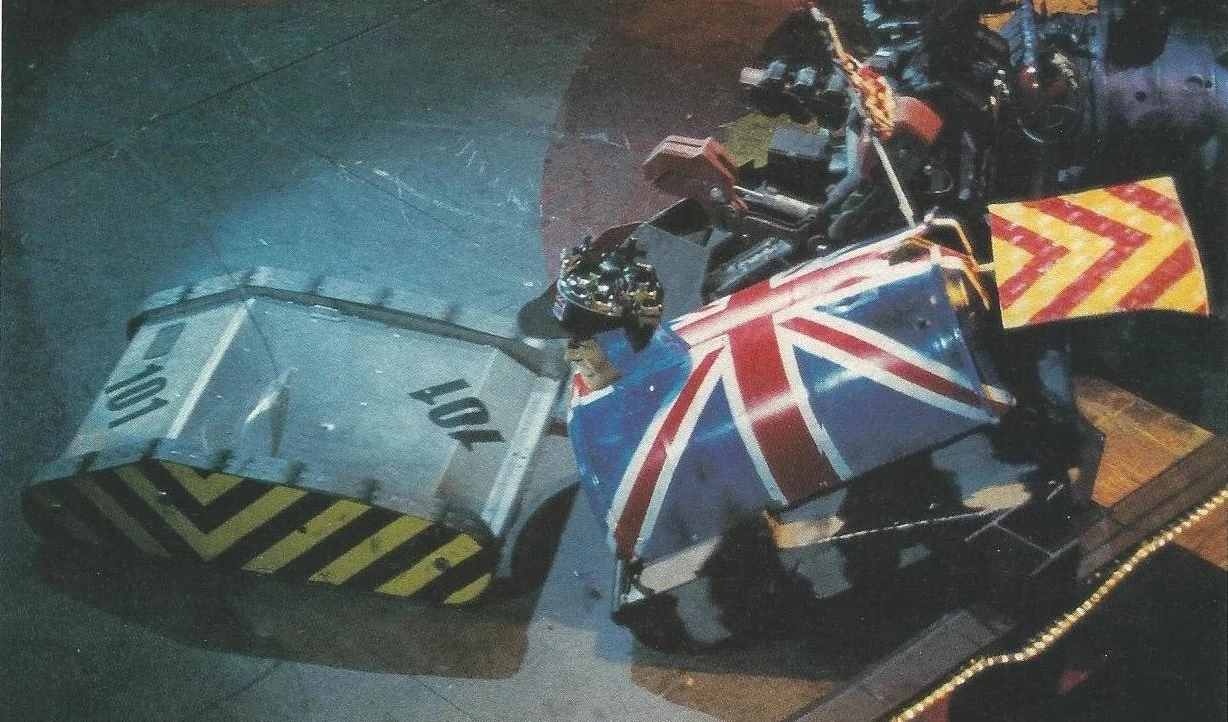
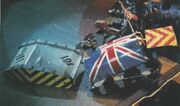
Major Tom is slammed into the arena wall by 101
In this battle, Major Tom initially chased after 101, who then turned and shoved Major Tom over a flame jet. Major Tom was able to withstand a push from the side by 101, before 101 ran up the ramp of Major Tom. 101 slid back off and then drove up Major Tom's ramp again, and along its body, pushing the bubblegum dispenser head askew. 101 then shoved Major Tom into the arena side wall from behind, crumpling the front ram of Major Tom.
- "Major Tom in trouble now, against the arena wall. There's Captain Cosmic's head wobbling, and their whole future in Robot Wars a bit of a wobble too."
- — Jonathan Pearce

Matilda tears off Major Tom's face

Major Tom is decapitated
Major Tom then slowed to a stop, with Matilda coming in and ripping Major Tom's face half-off with its chainsaw, before Shunt decapitated it completely, an axe blow shattering the bubblegum dispense head, although little damage was done to the actual body of Major Tom.
- "Oh! There goes the head! Cleaved away - ooooh! And all around you are losing their head, can you keep yours? No, no, no, no."
- — Jonathan Pearce

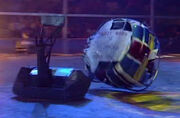
Major Tom gets put on the Floor Flipper

Major Tom ends up in the Pit
Major Tom's body received a couple more hits from Shunt's axe, allowing the House Robot to drag and push it for a short period, and onto the Arena Floor Flipper, where it was thrown across the arena before being pitted by Matilda, eliminating it from the competition.
- "Ground control to Major Tom, goodness me, it's all gone wrong! The winner is 101!"
- — Craig Charles describing the team's loss
Extreme 1
Major Tom's only appearance was in the Tag-Team Terror competition where it fought alongside Bigger Brother, Major Tom was actually only brought into the competition at the last minute as a substitute for Plunderbird 5, which had broken down and damaged the entry gate going into the Arena for the first battle. In the first round, Major Tom and Bigger Brother fought Comengetorix and Spawn Again, with Major Tom starting in the CPZ alongside Spawn Again.
- "We're really looking forward to it!"
- — Henry Ryan


Major Tom in action with the other three robots


Major Tom is flipped by Spawn Again
The fight started evenly with Bigger Brother and Comengetorix having a tug-of war contest, before Bigger Brother was pushed into Major Tom by Comengetorix. Major Tom decided to come out of the CPZ at this point, just as Spawn Again drove into it, but missing a flip on it. After being chased briefly, Major Tom was side swiped and flipped over by Spawn Again's only successful flip of the fight.
- "That's Major Tom being flicked up and over! Henry Ryan and little Samantha Ryan in the team, and bang, they go over! Well that was a head-on collision, wasn't it, for Major Tom?"
- — Jonathan Pearce

Major Tom's underbelly is damaged by Comengetorix
Bigger Brother attempted to right Major Tom, who was having its underbelly axed by Comengetorix, creating a large hole near one of the wheels. Major Tom was righted by its teammate, but it didn't move afterwards. Bigger Brother reversed into Major Tom while under pressure from Spawn Again, and it was nudged by Sir Killalot before being axed by Comengetorix. As it continued to sustain blows from Comengetorix, and suffering damage to the armour behind the head, Major Tom was counted out by Refbot.
- "They were righted by Bigger Brother, but they were never quite... right, if you get what I mean."
- — Jonathan Pearce as Major Tom is counted out


Major Tom is thrown over by the Floor Flipper
After being dragged backwards by Comengetorix slightly, Dead Metal took over, shoving Major Tom into an angle grinder, before being pushed onto the Floor Flipper by the House Robot, where it was flung over and onto its head once more.
- "...and the Italian dodgem car failed to dodgem...er...just about anything really."
- — Jonathan Pearce after Major Tom was flipped by the Arena Floor Flipper
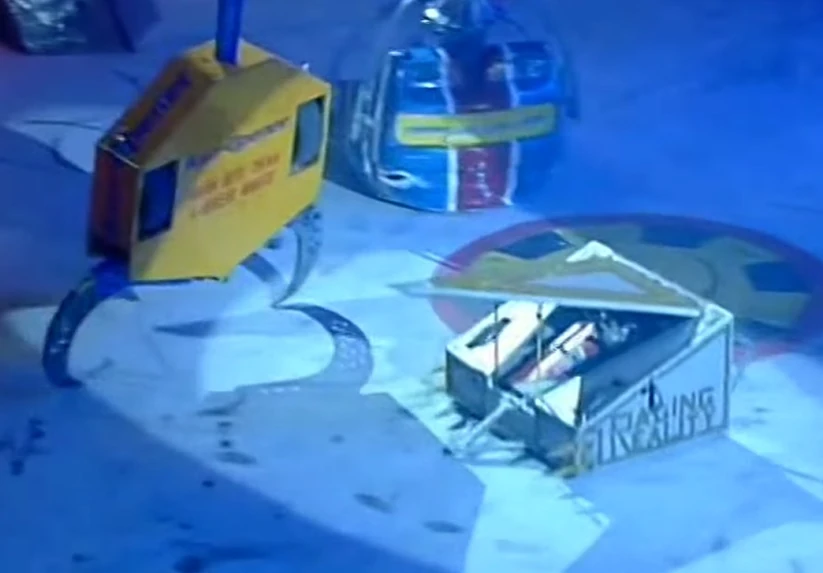
Sir Killalot attempts to fit Major Tom down the pit
Major Tom was then shoved towards the pit by Dead Metal, before being righted and pushed onto it by Sir Killalot, but Major Tom didn't fall in because it was too big to fit. Cease was called and Major Tom and Bigger Brother were eliminated from the competition.
- "Lose some weight, son!"
- — Jonathan Pearce as Sir Killalot fails to pit Major Tom
Series 5
- "I can't remember a bumper car looking like that!"
- — Jonathan Pearce
In the first round of the Heat, Major Tom went up against newcomers Kliptonite, another robot from the Isle of Sheppey.
Major Tom uses its disc on Kliptonite
It evaded Kliptonite's first attack and cut into the side of its opponent with its disc, but not causing any real damage. It reversed and then bumped into the front of Kliptonite before absorbing a hit from the axe. Major Tom turned in a wide circle and attacked Kliptonite from the side again, but still couldn't cause any damage to the newcomers. After reversing away from its opponent, Major Tom was attacked head-on by Kliptonite, but Kliptonite broke down immediately afterwards with its axe downwards. Major Tom bumped into Kliptonite a couple more times before the latter was counted out by Refbot.

Major Tom is axed by Kliptonite
- "Major Tom, a couple of bashes and-a crashes and Kliptonite not strong enough to survive."
- — Jonathan Pearce
Major Tom came in for another attack on its beaten opponent, but Matilda crashed into Kliptonite, knocking it away from Major Tom. While the House Robots toyed with Kliptonite, Major Tom activated the pit, and Kliptonite was thrown across the arena by Sir Killalot. Major Tom rammed into Kliptonite one last time, before its opponent was torched over the Flame Pit and dumped into the pit by Sir Killalot. This put Major Tom through to the next round of the Heat.
- "Our 'man of steel', Major Tom, to go through!"
- — Jonathan Pearce
Major Tom then took on the experienced Kat 3, new entry from Team KaterKiller in the second round.

Major Tom is axed by Kat 3
In this battle, Major Tom charged straight at Kat 3, who dodged away from the attack. Major Tom quickly turned and rammed into Kat 3's side, before Kat 3 turned and struck Major Tom with a glancing hit from the axe. Major Tom spun on the spot and avoided a hit from Kat 3, but it then drove head-on into its opponent and took a hit to the to armour.

Major Tom splits the rear of Kat 3
- "Now more dangerous with the flywheel at the front, and I think more potent than that axe of Kat 3."
- — Jonathan Pearce
After taking another hit from the axe, Major Tom spun away, before turning and slamming into the back of Kat 3. As Kat 3 went to activated the pit, Major Tom gave chase, smashing into the back of it and causing some damage to Kat 3's rear armour. However, Major Tom then reversed onto the descending pit and went down with it, eliminating it from the competition.

Major Tom reverses into the descending pit
- "The pit release button's been pressed - oh no! Major T..., can you hear me Major Tom, can you hear me?! What a dreadful piece of driving!"
- — Jonathan Pearce as Major Tom reverses into the pit
Both teams were uncontrollably laughing in the post battle interview. This battle was also voted the funniest battle ever in Robot Wars for the book Robot Wars: The Ultimate Guide.
- "Ground control to Major Tom! The pit's open, and you are gone! Talk about unlucky..."
- — Craig Charles describing the loss
Series 6
In the first round of its heat in the Sixth Wars, Major Tom was forced to fight old Tag Team partners and number 2 seeds Bigger Brother, in addition to newcomers Riptilion and Killer Carrot 2.
- Ian Watts: "...Major Tom was our partners, in the Tag-Team, we can't fight them!"
- Philippa Forrester: "Forget about the past! Forget about the past!"
- Joe Watts: "They made us lose!"
- — Team Big Brother's pre-first round interview
Killer Carrot 2 lifts up Major Tom
In the battle, at first, Major Tom was attacked by Killer Carrot 2, who lifted it up very slightly over a flame jet. Major Tom was then lifted up again by Killer Carrot 2, before being flicked up twice more in succession, yet it did not tip over.
- "Major Tom under pressure from Killer Carrot, about to be flipped up and over; it has no srimech, Major Tom."
- — Jonathan Pearce

Major Tom is flipped by Bigger Brother
Killer Carrot 2 was flipped away from Major Tom by Bigger Brother, who then proceeded to flip Major Tom, causing it to roll over and then back onto its wheels. It was then pressured into the arena wall near a CPZ. After Bigger Brother activated the pit, it attacked Major Tom once more, lifting it up and right into the corner of the arena. Major Tom was then attacked from behind by Sir Killalot, before taking a glancing hit from Mr Psycho. Mr Psycho's second hammer blow then dented the rollcage.
Major Tom is hammered by Mr Psycho
- "Ooh! Down comes the hammer on Major Tom, they're not gonna get out of there, I don't think. Henry, and Arthur, and John Morris, the Major Tom team, they're in a right pickle."
- — Jonathan Pearce
After its rollcage was ripped apart, Major Tom's spinner had stopped functioning and one of its drives had stopped working, and it sustained more damage from Mr Psycho's hammer as it spun round in circles, before being counted out by the Refbot, bumping into it as the countdown ended.

Major Tom is pelted by the Drop Zone
Major Tom was then pushed around the arena by Sir Killalot for a while, before being left under the Drop Zone, where a shower of balls of various sizes fell onto it. Cease was finally called, and Major Tom was eliminated from the competition, along with Riptilion, who drove into the pit earlier on in the battle.
- "Major Tom, stripped of its stripes and demoted to private..."
- — Craig Charles at the end of the fight
Extreme 2
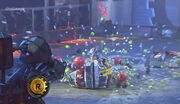
Major Tom exclusively participated in the Annihilator in the second series of Extreme. At first, it was up against Kan-Opener, Raging Reality, Revenge of Trouble & Strife, Typhoon 2 and Thermidor 2, and and went in as underdogs.
- "Will it lose ground control?"
- — Jonathan Pearce, as Major Tom enters the arena
In the first round, Major Tom stayed out of the action early on, only being bumped by Kan-Opener, before charging at Thermidor 2, who was too quick for it.

Major Tom is flicked into the path of Typhoon 2's spinner by Thermidor 2
- "Major Tom has a think about things and moves away. Here he comes now, with the disc and the hammers on it."
- — Jonathan Pearce as Major Tom moves towards Typhoon 2
It then drove towards Typhoon 2, before being flicked into the path of the full-body spinner by Thermidor 2's flipper, disabling Major Tom's own weapon in the process, just moments before Typhoon 2's spinner was disabled by Kan-Opener. Major Tom then reversed away but was intercepted by Revenge of Trouble & Strife and suffered several blows from their full-body spinner, knocking it away and damaging its drive on one side.

Major Tom briefly lies motionless while Kan-Opener is flipped by Thermidor 2
After only being able to move in circles for a while, Major Tom stopped moving completely, just after Typhoon 2 was flipped over by Raging Reality. However, Major Tom then came back to life after taking another hit from Revenge of Trouble & Strife's spinner, and it was still mobile when Typhoon 2 was counted out and cease was called.
It turned out that Major Tom needed to be stripped down right to the innards in the pits as considerable damage had been caused in the first round, but they still managed to enter round two of the Annihilator.
- Philippa Forrester: "And now you can see why this is called Annihilator, on damage cam there; damage sustained by Major Tom after just the first round! Talk us through it."
- Henry Ryan: "Well, we took quite a bit of damage to our weapon area, and we tackle technology different in our team. We've lost one of these very large, steel roller balls, so we're gonna replace it with a golf ball from Series 6... we should hopefully be back in action."
- — Interview between the first and second round of the Annihilator

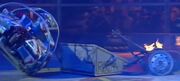
Major Tom is flipped by Thermidor 2
In the second round, Major Tom immediately drove over the Pit, before turning and shunting Raging Reality, who was busy attacking Kan-Opener. However, it was then flipped over by Thermidor 2, and the disc stopped working once again.
- "Major Tom takes a tumble!"
- — Jonathan Pearce as Major Tom is flipped by Thermidor 2


Major Tom takes a hit from Revenge of Trouble & Strife
Major Tom's rollcage self-righted it, but it was quickly on the back foot again, with Raging Reality pushing it with a reverse shove, before it was hit again by Thermidor 2, causing one of the front panels to fly off due to the impact. Revenge of Trouble & Strife then spun Major Tom across the arena floor with its spinner, causing more damage and forcing it into the path of Sir Killalot, who then shoved Major Tom into an unoccupied CPZ.
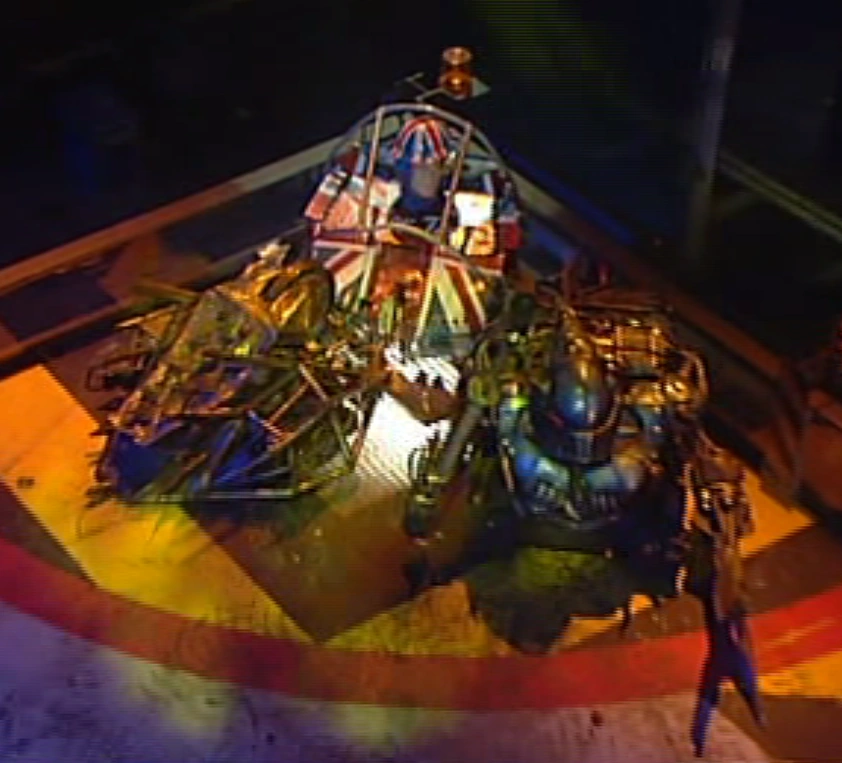

Major Tom is trapped by Dead Metal and Sir Killalot in the CPZ
- "Major Tom sustaining more damage... They're all after Major Tom, it seems."
- — Jonathan Pearce
Major Tom tried to escape, but was then pushed back into the same CPZ by Dead Metal. It was then left alone to spin in circles in the CPZ for a while, but eventually escaped and pressed the pit release button.
- "Major Tom's not rotating anywhere, but it did survive, it is active, and it has pressed the pit release button. Well, this is intriguing, I thought Major Tom were long gone, but no, so the fight is on to survive."
- — Jonathan Pearce
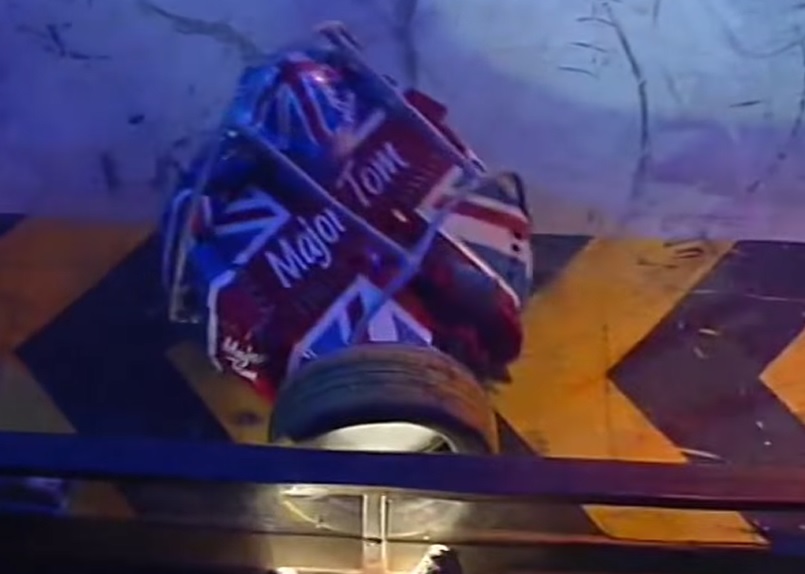

Maor Tom activates the pit release
Kan-Opener had managed to immobilise Raging Reality with its jaws earlier on in the battle, and it was then later counted out by Refbot, just as Major Tom was shoved into Dead Metal by Thermidor 2. Major Tom lost drive on one side yet again, whilst Raging Reality was flipped by the arena floor flipper and eliminated, meaning Major Tom survived to reach the third round.
Before the third round, the team hesitated to whether they should just take the weapon off to make the robot quicker and more agile, but they eventually decided to keep the weapon on for the upcoming battle.
- "Bruised and battered, but the weaponry is still there. They haven't gone for the lightweight option!"
- — Major Tom's third introduction into the arena by Jonathan Pearce

Major Tom is attacked by Kan-Opener from behind
In this battle, Major Tom began by charging into the side of Kan-Opener, before slamming into Thermidor 2 while it engaged with Revenge of Trouble & Strife. It then reversed away and drove over the Flame Pit, before turning to attack Kan-Opener. However, Kan-Opener dodged it and pushed Major Tom across the arena from one side to the other, crashing it into Refbot before slamming it into the arena wall.
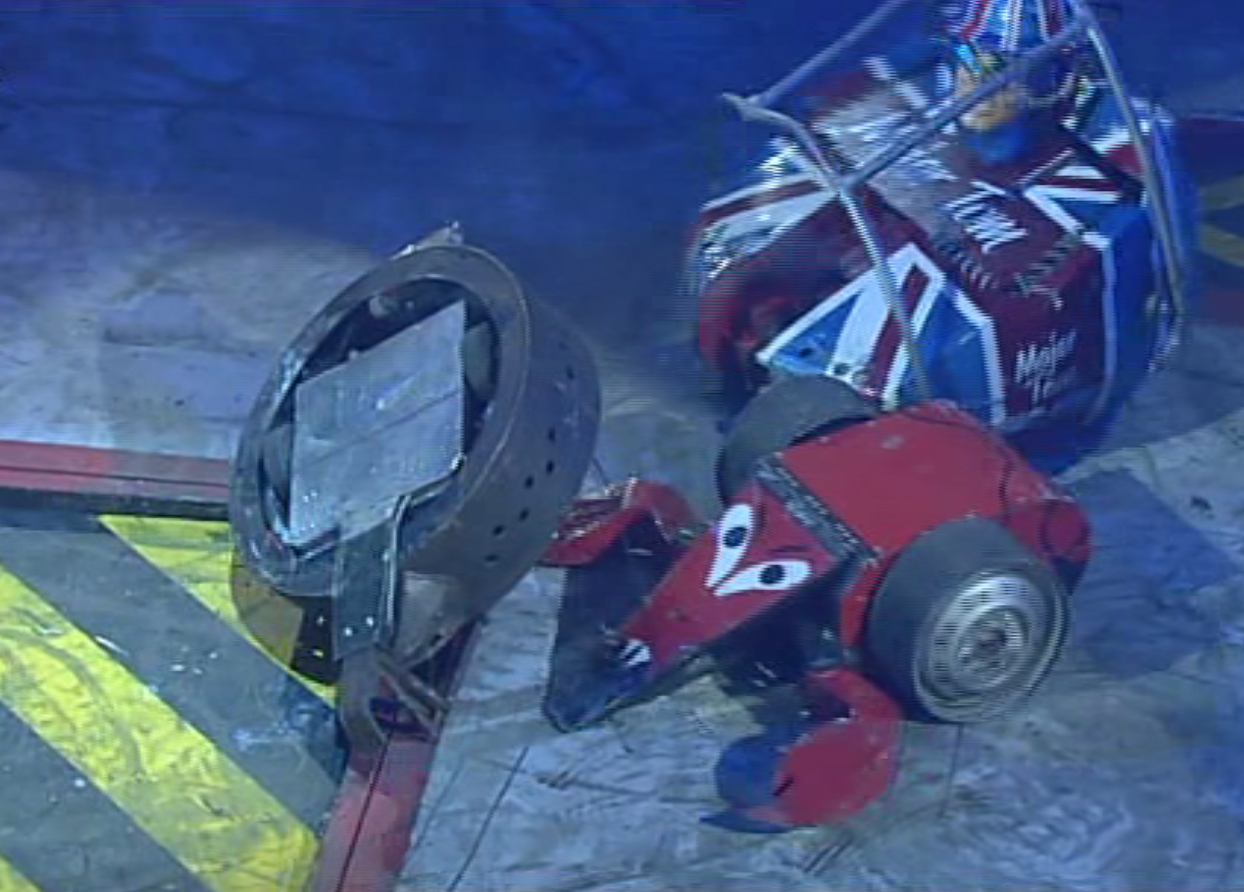

Major Tom and Thermidor 2 watch Revenge of Trouble and Strife on the edge of the pit
- "Was it a deception in the pits? Were they trying to lull their opponents into a false sense of security? Well, no - hahaha! Not if that's anything to go by!"
- — Jonathan Pearce as Major Tom gets shunted across the arena by Kan-Opener
Thermidor 2 then flipped Revenge of Trouble & Strife over, and Major Tom proceeded to attack Thermidor 2 while Kan-Opener grabbed the beaten Revenge of Trouble & Strife and left it on the lip of the pit. Major Tom nudged into Thermidor 2 near the pit before bashing it on the claw with its disc. As Kan-Opener pitted Revenge of Trouble & Strife, Major Tom rammed into its side, before turning around and reversing straight into the pit.
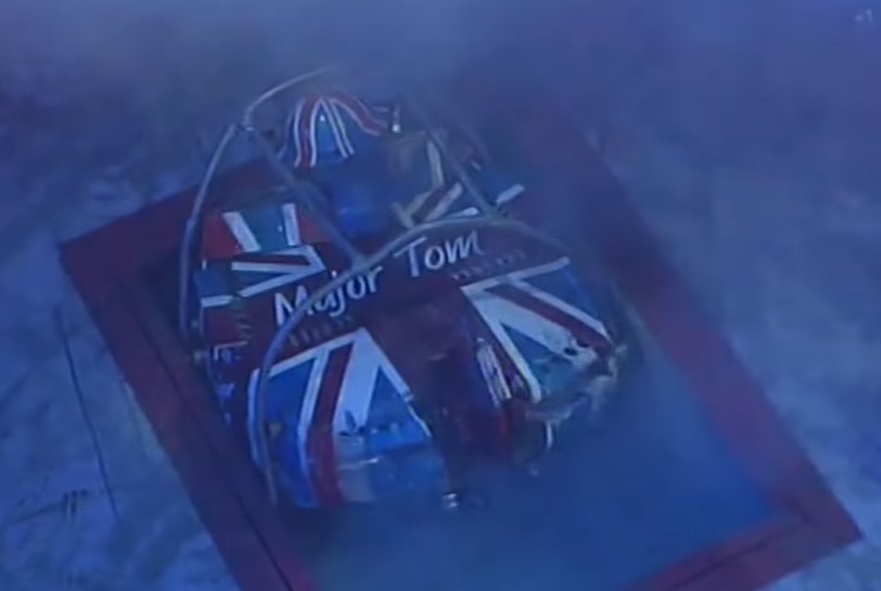

Major Tom pits itself after Revenge of Trouble & Strife was eliminated
- "I think Major Tom said "I've had enough, can I go too?" No you can't! That's the end of Revenge of Trouble & Strife; you're gonna have to wait a bit longer Major!"
- — Jonathan Pearce
Major Tom was still through to the fourth round, although it was also a bit of a clue for what was to come, and the team were very pessimistic about their chances in the next fight.
- Philippa Forrester: "The Major Tom team have suffered a lot of damage, certainly in that first round. Have you recovered from it?"
- Arthur Robinson: "Yes, certainly we have."
- Philippa Forrester: "How are you feeling about this fight now?"
- Arthur Robinson: "The last farewell."
- Philippa Forrester: "Oh dear! They're charged up, greased up, and ready for action!"
- Arthur Robinson: "Well we're ready for action as well, but we think it will be the last farewell..."
- — The Major Tom team's prophetic response to Philippa Forrester asking them about their feelings on the next battle.


Major Tom is almost thrown out of the arena by Thermidor 2
In the fourth round battle, it was immediately grabbed and pushed across the arena floor by Kan-Opener, before Thermidor 2 drove underneath it from behind and flipped it into the arena side wall, and onto its side.
- "In the last bout, to be honest, Major Tom deserted in the line of fire - "Court-martial that Major, Sir!". Against the arena wall; they know the end is nigh..."
- — Jonathan Pearce

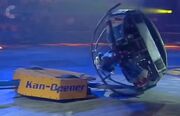
Major Tom is rolled back onto its wheels by Kan-Opener
Major Tom's rollbars didn't work, but Kan-Opener grabbed it and dragged it away from the arena wall, before pushing it into the arena wall near Matilda's CPZ, and righting it in the process. Major Tom turned and went on the retreat while Thermidor 2 gave chase, before turning and evading an attack from Kan-Opener, causing it to crash into Thermidor 2 instead.
- "There is no escape here for Major Tom, I fear."
- — Jonathan Pearce
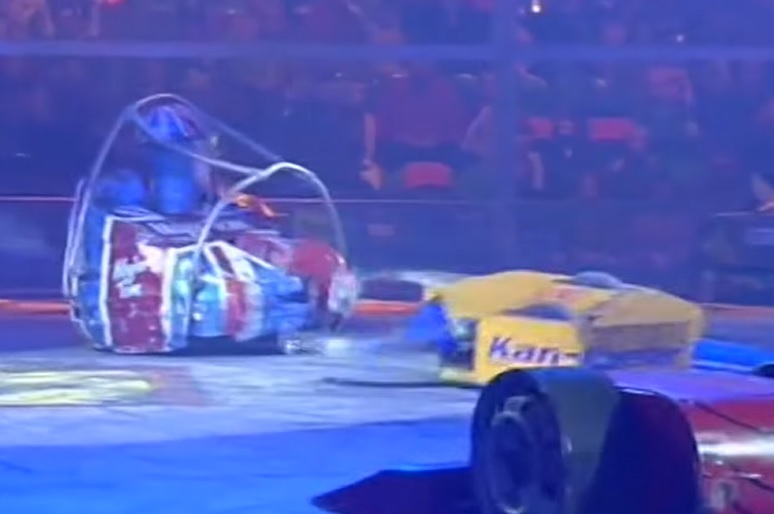

Major Tom knocks Kan-Opener away from it with a hit
As Kan-Opener reversed, Major Tom then connected its disc against one of Kan-Opener's claws, knocking it away. Kan-Opener then went to press the pit release button, and Major Tom attacked it again, deflecting off its opponent's side into the pit release button.
- "Valiant then, until the end, it would seem, Major Tom. Is it the end?"
- — Jonathan Pearce

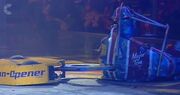
Major Tom loses drive on one side after another attack from Kan-Opener
Major Tom was then grabbed from behind by Kan-Opener, who sunk its claws into the armour and pushed into another arena side wall, damaging one side of its drive and leaving it turning on only one wheel, but only enough to make the robot twitch. Mr Psycho then came out of its CPZ and hammered its rollcage, denting it severely and knocking the crown off of the head.

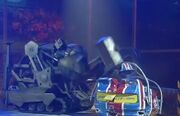
Mr Psycho's first attack on Major Tom
- "Get away Major, get away Major - oooh! Right on top of the head! Look at that! The old rollcage didn't work there, the safety bar - how can you grin?!"
- — Jonathan Pearce as the team urges the House Robots on to cause more damage
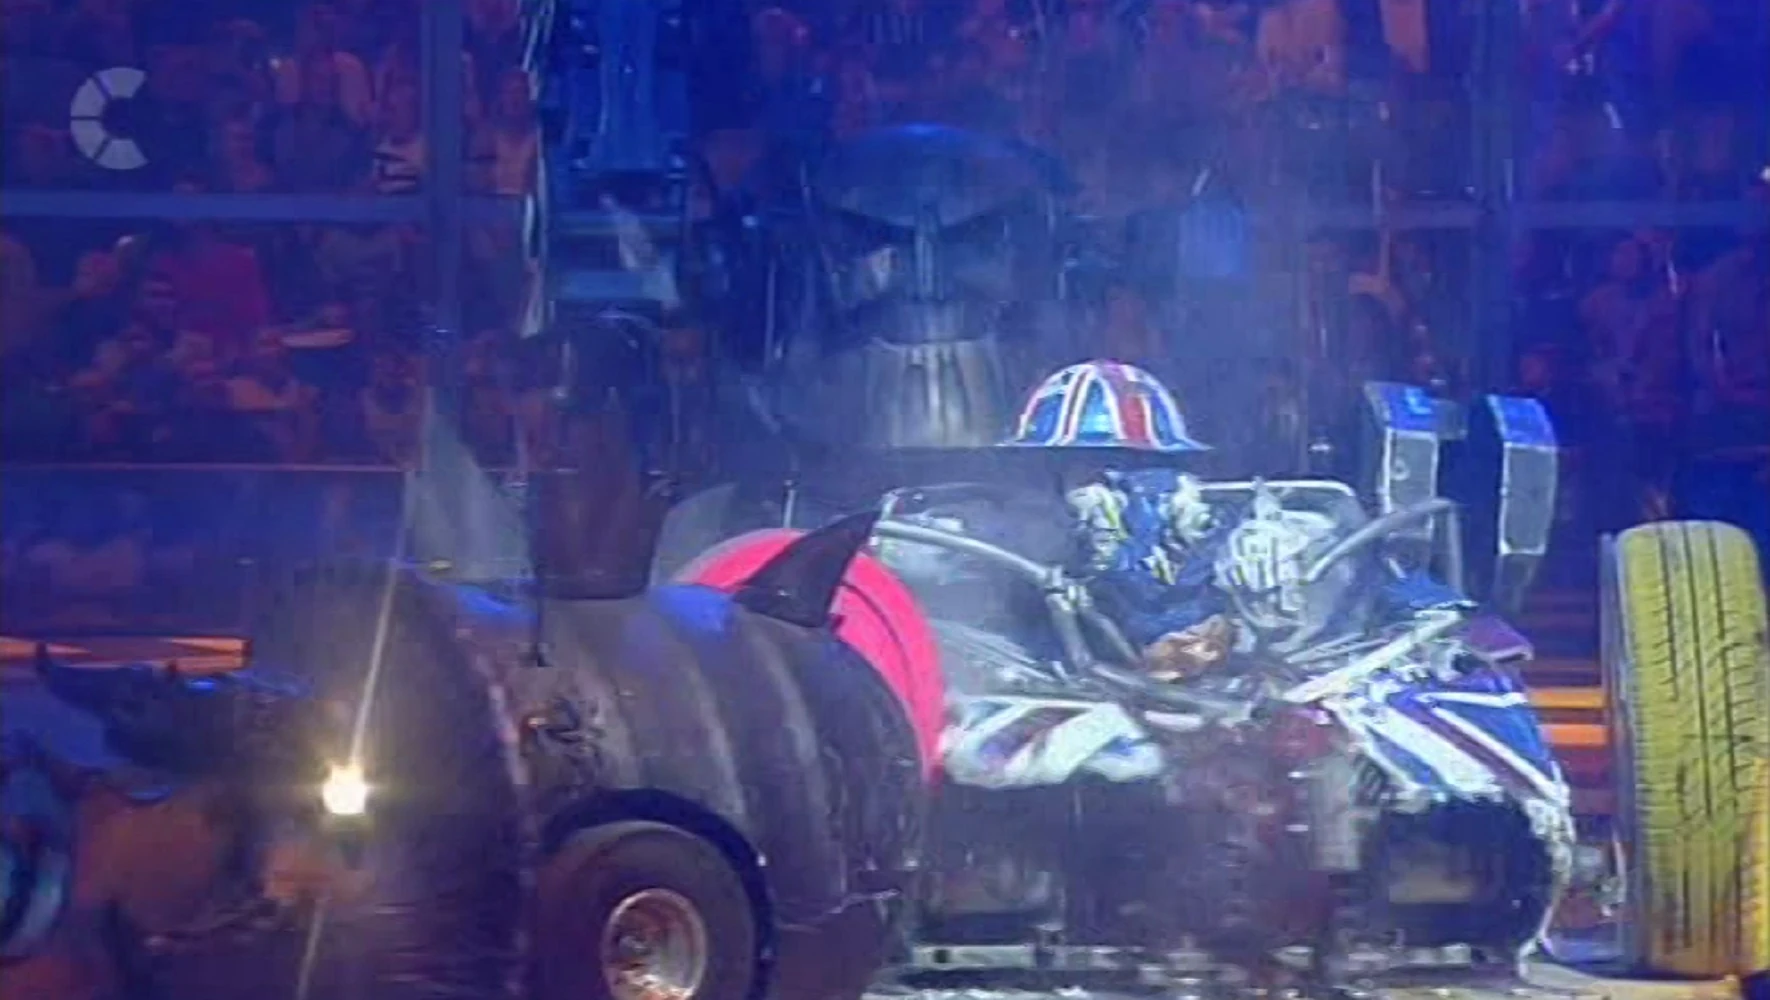
Matilda continues to destroy Major Tom
Major Tom spun round wildly on the spot, before Matilda came in and ripped through its fibreglass armour with the flywheel, immobilising it completely next to the pit release button. Major Tom was then struck again by Mr Psycho's hammer, damaging the rollcage further. Another Matilda attack sent bits and pieces of the rollcage flying, and particles of Major Tom were clearly visible in the air as Refbot finally came in to count it out.
- "The dust settling on what was, once upon a time, proud Major... the thing is, he simply lost his head when the going got tough."
- — Jonathan Pearce
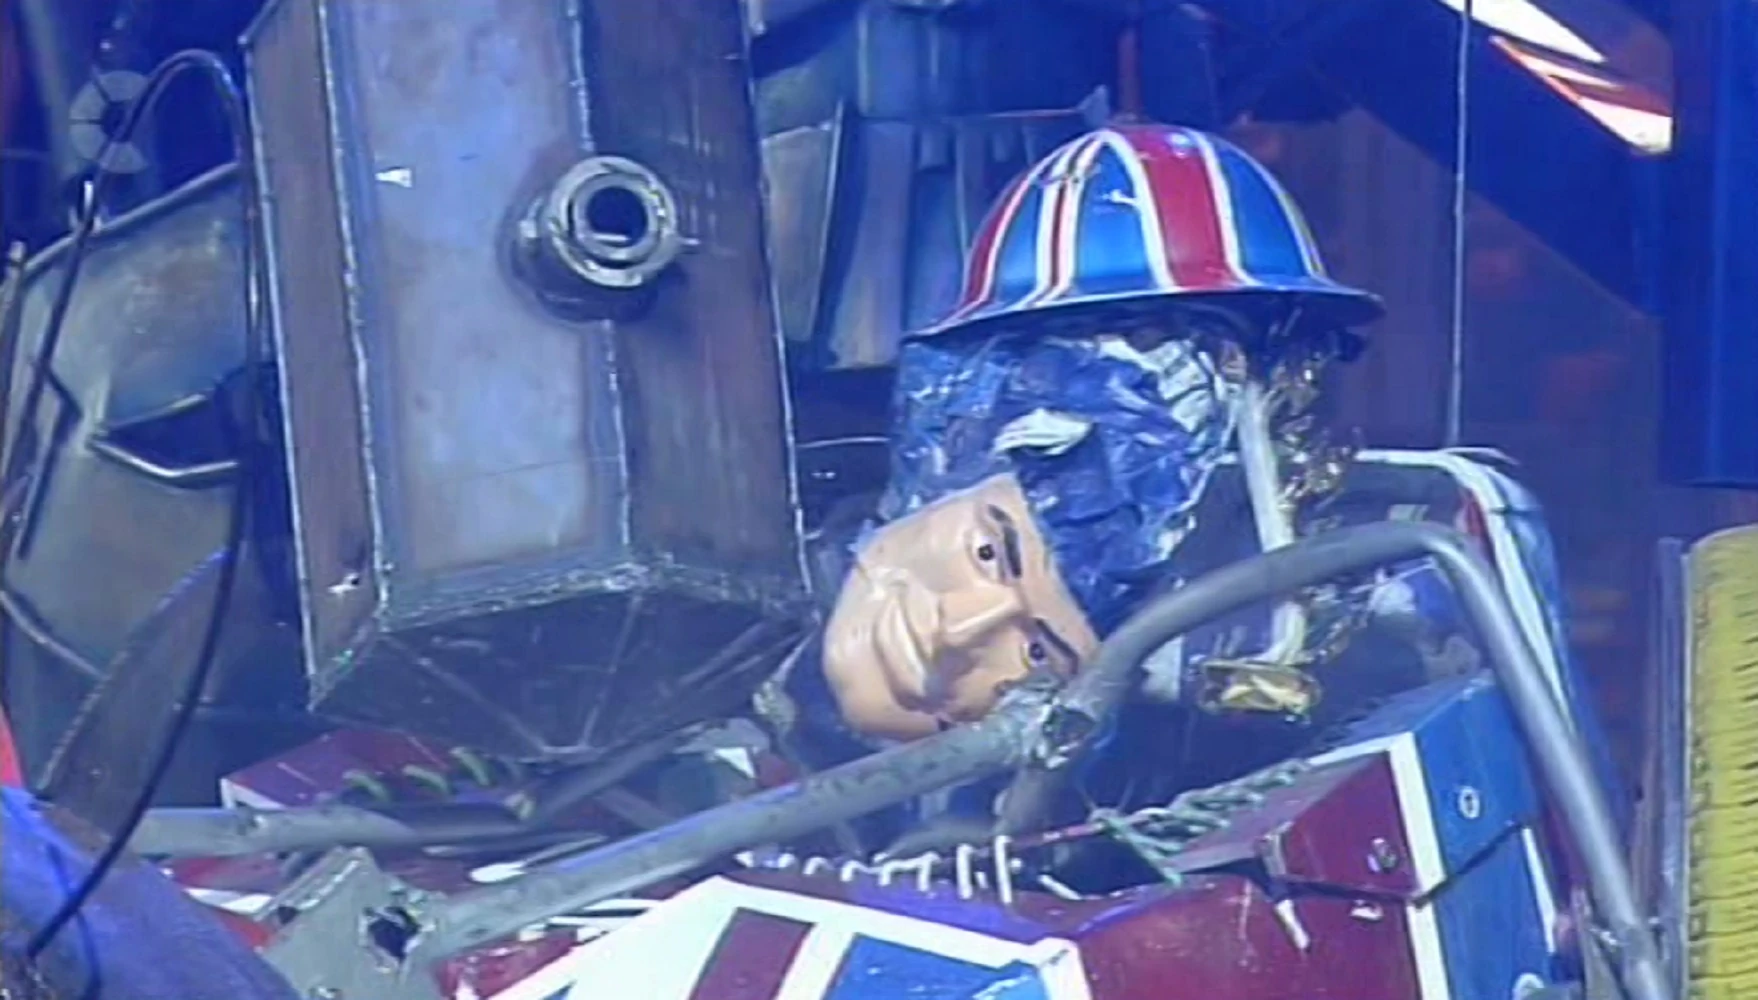

Major Tom takes more damage from Mr Psycho
This didn't stop the House Robots from continuing their onslaught though, as Mr Psycho hammered it again, caving in part of the central armour, while Matilda tore into its front armour near the disc. Mr Psycho's fourth hammer blow almost completely knocked Major Tom's face off its head, and Matilda caused more damage to the armour, leaving a huge crevasse in its side and tearing apart the final part of the rollcage. Mr Psycho's fifth hit was quickly followed by it using its claw to try and grab Major Tom's head, ripping the face off completely.
- "Ooooh! That's gruesome!"
- — Jonathan Pearce as Mr Psycho attempts claws at Major Tom's head

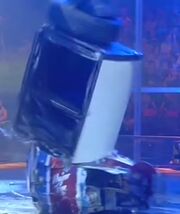
A cooker is dropped on top of Major Tom
Matilda's next hit left Major Tom's disc almost completely exposed, its entire front armour now gone. Major Tom was then grabbed by Mr Psycho and carried over to the Drop Zone, its helmet falling off along the way, before a cooker was dropped onto it. After this impact, Major Tom took more damage from Matilda, its first hit knocking the cooker away from it, and the second ripped several pieces off and flipped Major Tom over onto its back, and sent it skittering across the arena floor towards a CPZ.
- "And the tune we are singing tonight is in the chord of A. Flat Major! The team have take it in good spirit, and all that's left is the spirit of a fine competitor: Major Tom."
- — Jonathan Pearce


The end for Major Tom

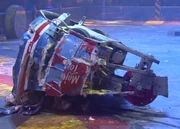
The obliterated remains of Major Tom
Cease was eventually called, and Major Tom was finally eliminated from the Annihilator, leaving Kan-Opener and Thermidor 2 to head through to the final. After being completely destroyed, this bumper car version of Major Tom was retired to make way for Major Tom 3.
- "The words to the song are "Here I am, floating in a tin can", not "Turned into a tin can"."
- — Craig Charles to the Major Tom team at the end of the fight
Series 7
- "Very slow at four miles an hour."
- — Jonathan Pearce's only criticism
Major Tom 3 was drawn up against the number eleven seeds X-Terminator, German series runners-up Tsunami, and Diabolus in the first round of the Seventh Wars. Going against Major Tom 3 created unmentioned revenge for Diabolus, not just because it was another robot from the Isle of Sheppey, but Major Tom defeated the team's previous robot, Kliptonite, in the Fifth Wars.
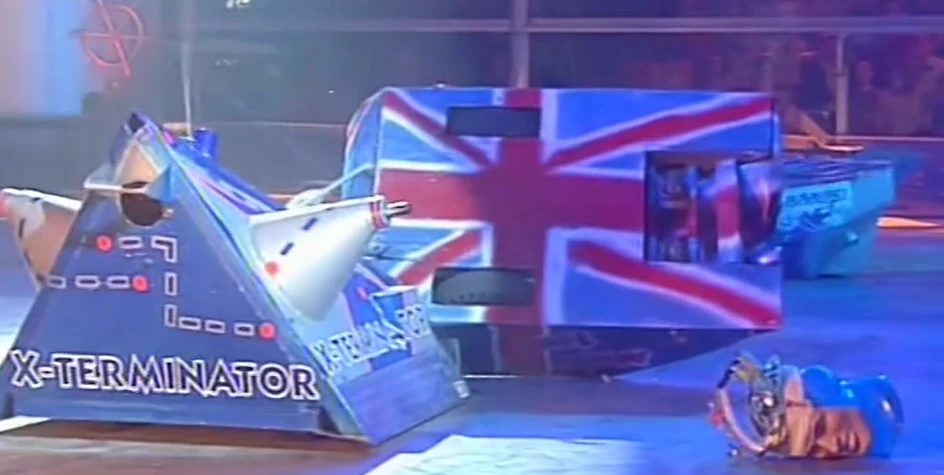

Major Tom 3 is attacked by X-Terminator
In this battle, Major Tom 3 was immediately slammed from the side by Diabolus, causing its head to fall off seconds into the fight, although this would prove to be the only contact between the two Isle of Sheppey machines.
- "Two robots survive this battle to go through to the second round. Major Tom's lost his head straight away!"
- — Jonathan Pearce as Major Tom 3 gets hit by Diabolus and its head falls off

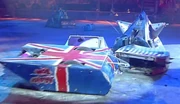
Tsunami prepares to throw Major Tom 3 out
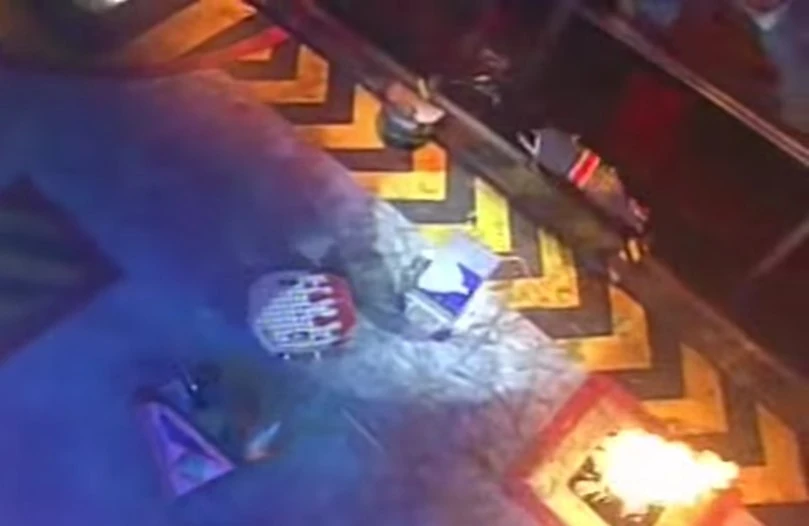
Major Tom 3 is flung out of the arena by Tsunami
X-Terminator then toppled Major Tom 3 over with its disc, where it was briefly side stranded due to its extended clamping spikes. Major Tom 3 was struck again by X-Terminator's disc, flipping it onto its other side and causing the front of Major Tom 3's wedge to crumple a bit. Major Tom 3 was then able to lower its clamping spikes back into its body, leaving it inverted. Major Tom 3 did not last much longer though; as it tried to run to safety, Tsunami pushed it side-on towards the flame pit and flipped it straight out of the arena, eliminating it from the competition.
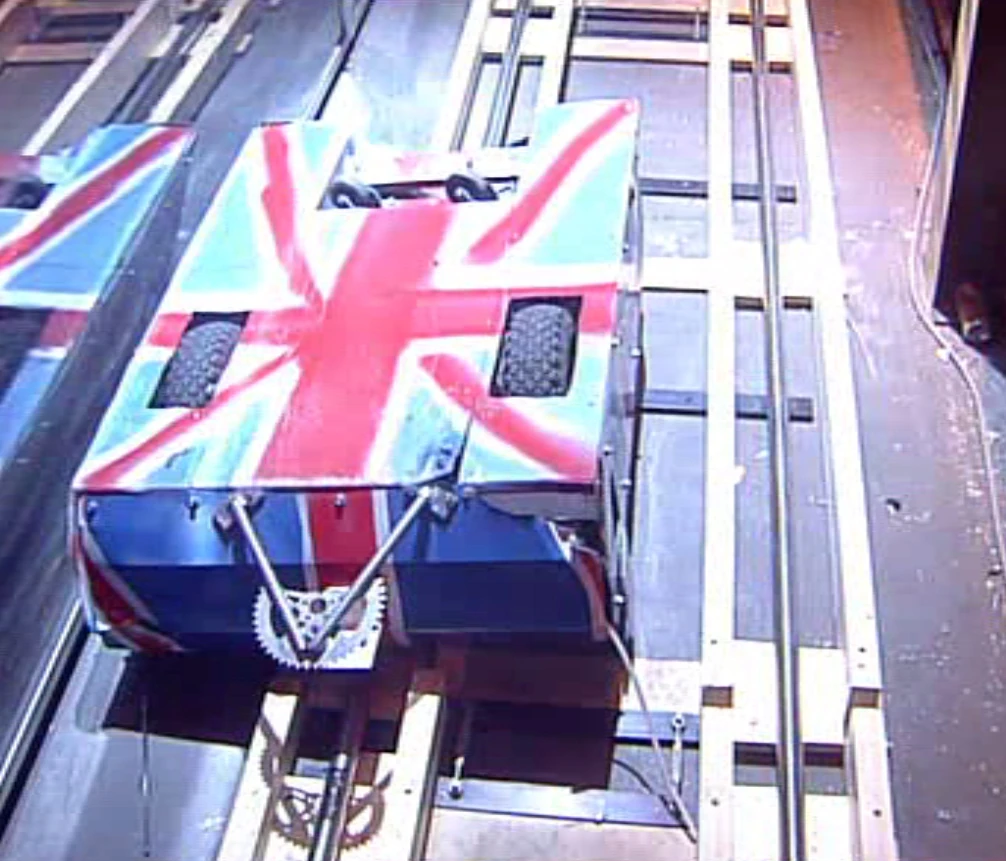
Major Tom 3, having been thrown out of the arena
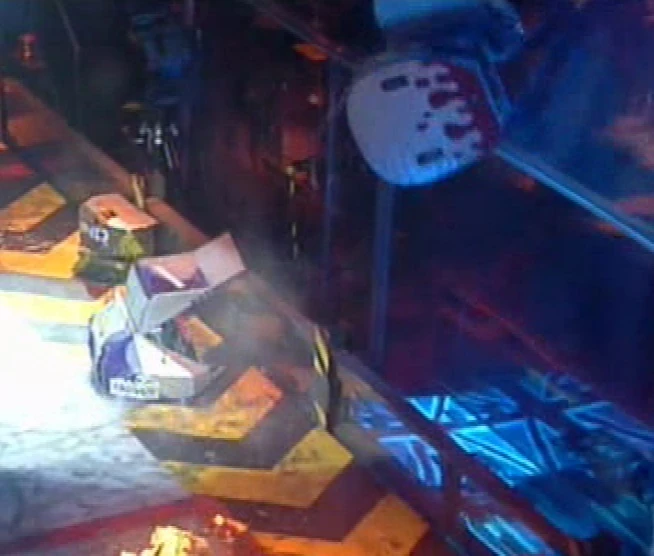

Tsunami throws Diabolus out to join Major Tom 3
- "Carnage already in the warzone, and Major Tom out! Gone. Hit by the tidal wave - the Tsunami, and they went."
- — Jonathan Pearce
Major Tom 3 was then soon followed out of the arena by Diabolus, whilst Tsunami and X-Terminator advanced to the next round. This was Major Tom's last appearance on Robot Wars.
- "Major Tom: Major Disappointment!"
- — Craig Charles after the battle
Results
| MAJOR TOM - RESULTS | ||
| Series 4 | ||
| The Fourth Wars - UK Championship Heat, Round 2 | ||
| Heat E, Eliminator | vs. Disc-O-Inferno, Shadow of Napalm (25) | Qualified |
| Heat E, Semi-Final | vs. 101 (9) | Lost |
| Extreme Series 1 | ||
| Tag Team Terror with Bigger Brother, Round 1 | ||
| Round 1 | vs. Comengetorix & Spawn Again | Lost |
| Series 5 | ||
| The Fifth Wars - UK Championship Heat, Round 2 | ||
| Heat J, Eliminator | vs. Kliptonite | Won |
| Heat J, Semi-Final | vs. Kat 3 | Lost |
| Series 6 | ||
| The Sixth Wars - UK Championship Heat, Round 1 | ||
| Heat L, Round 1 | vs. Bigger Brother (2), Killer Carrot 2, Riptilion | Eliminated |
| Extreme Series 2 | ||
| Annihilator Third Place | ||
| Round 1 | vs. Kan-Opener, Raging Reality, Revenge of Trouble & Strife, Thermidor 2, Typhoon 2 |
Qualified |
| Round 2 | vs. Kan-Opener, Raging Reality, Revenge of Trouble & Strife, Thermidor 2 |
Qualified |
| Round 3 | vs. Kan-Opener, Revenge of Trouble & Strife, Thermidor 2 | Qualified |
| Round 4 | vs. Kan-Opener, Thermidor 2 | Eliminated |
| MAJOR TOM 3 - RESULTS | ||
| Series 7 | ||
| The Seventh Wars - UK Championship Heat, Round 1 | ||
| Heat F, Round 1 | vs. Diabolus, Tsunami, X-Terminator (11) | Eliminated |
Wins/Losses
- Wins: 5
- Losses: 6
Series Record


.jpg)
| Main Series | Major Tom Series Record |
|---|---|
| The First Wars | Did not enter |
| The Second Wars | Did not enter |
| The Third Wars | Not selected |
| The Fourth Wars | Heat, Round 2 |
| The Fifth Wars | Heat, Round 2 |
| The Sixth Wars | Heat, Round 1 |
| The Seventh Wars | Heat, Round 1 |
| Series 8 | Did not enter |
| Series 9 | Did not enter |
| Series 10 | Did not enter |
| Robot Wars Extreme | Appearances |
| Series 1 | Entered |
| Series 2 | Entered |
Trivia
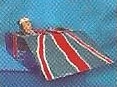
Official Series 7 photo
- At thirty-six seconds, Major Tom 3's battle against Tsunami, X-Terminator and Diabolus is the shortest battle in UK Robot Wars to require two immobilisations. However, it did not make the top 30 list.
- The Major Tom team has a member called Henry, and Henry has a team member called Tom.
- Major Tom was twice in the same Heat as Killer Carrot 2, Disc-O-Inferno, and Team Demon (Diabolus and Kliptonite).
- In addition, it was twice in the same episode as Behemoth, Thermidor 2, X-Terminator and Bigger Brother.
- Both times Major Tom was in the same Heat as Killer Carrot 2, it was knocked out in the first round of the competition.
- Only one of Major Tom's losses did not involve a robot that reached a semi-final or grand final.
- By contrast, all of Major Tom's losses involved a robot that had or would compete in a Tag Team Terror. Ironically, Major Tom itself also appeared in a Tag Team Terror.
- Major Tom is one of three machines to fight axe-wielding robots twice in a row in a main series heat, the other two being S.M.I.D.S.Y. and Inshredable.
- In Major Tom's first two appearances, it appeared in the fifth episode and was thrown by the floor flipper.
- Major Tom 3 was thrown out of the arena faster than any other robot in a melee, when Tsunami flipped it out in the first round of Series 7 after just twenty seconds.
- Throughout the series that it appeared in, Major Tom never shared the arena with Growler or Cassius Chrome.
- Major Tom 3 was the only version of Major Tom not to fall into the pit, rather it was thrown out of the arena instead.
References
- ↑ Correspondence with Wiki user SpaceManiac888
External Links
| ||||||||||||||||||||||||||
| |||||||||||||||||||||||||||||||||||
| ||||||||||||||||||||||||||||||||
| ||||||||||||||||||||||||||||||||||||||||||||
| ||||||||||||||||||||||||||||||||||||||