The 1996 Championship, also known as the Third Annual Robot Wars, was an event during the USA Robot Wars which was heavily highlighted during the First Wars of Robot Wars and was the main feature of the VHS releases American Robot Wars 1996 and American Robot Wars Final 1996
Robots Competing
NOTE: This only includes the robots who were featured in the Official release of the 1996 Championship and does not contain the full roster
Heavyweights
 | ||
|---|---|---|
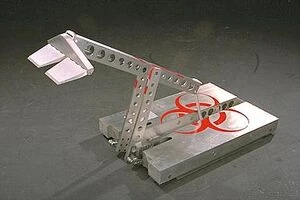
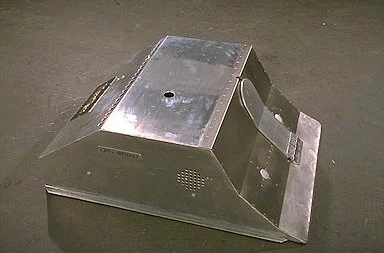
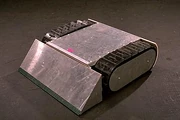
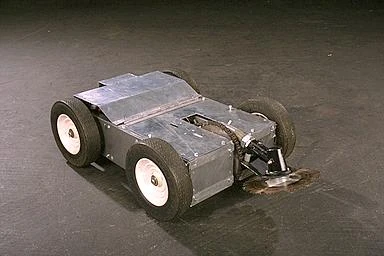
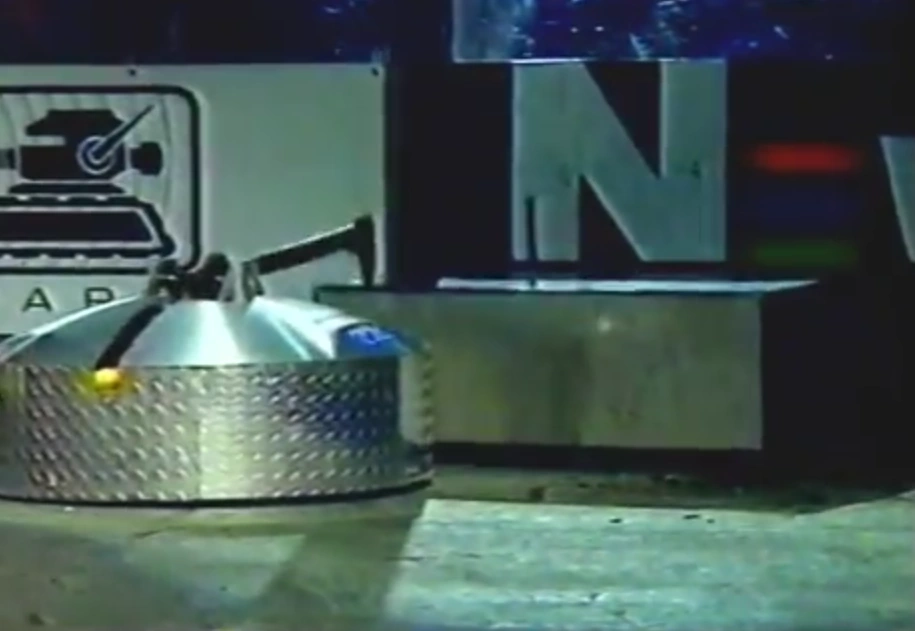
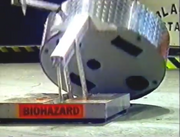
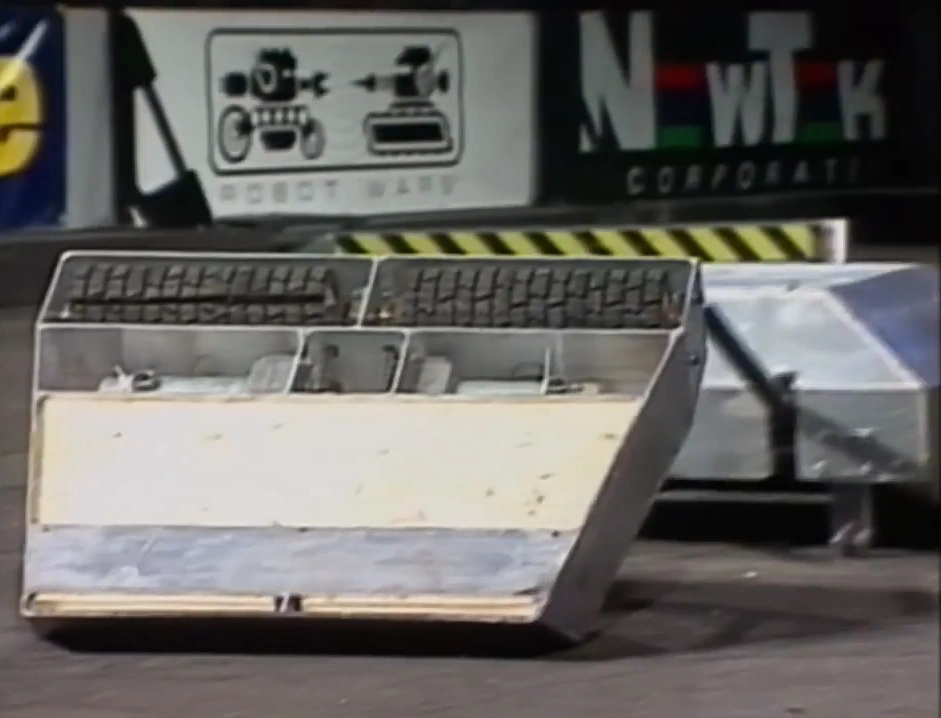
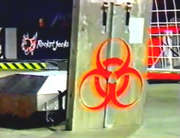
| BioHazard | ||
| Weight | 220lbs | |
| Weapons | Lifting Arm | |
| Defence | Anti Intrusion device | |
| From | California | |
| Team: Carlo Bertocchini, David Andres, Rick Slagle & Carol Bertocchini | ||
 | ||
|---|---|---|
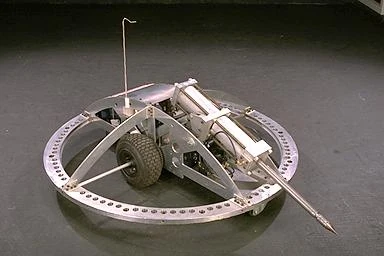
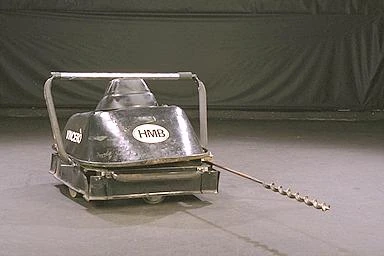
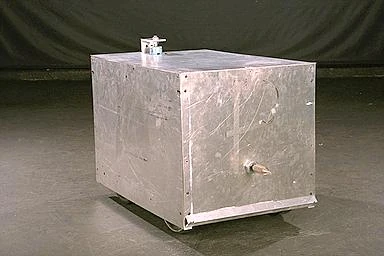
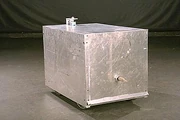
| DooMore | ||
| Weight | Unknown | |
| Weapons | Pneumatic Spear | |
| Defence | Aluminium Ring | |
| From | California | |
| Team: Scott La Valley | ||
 | ||
|---|---|---|
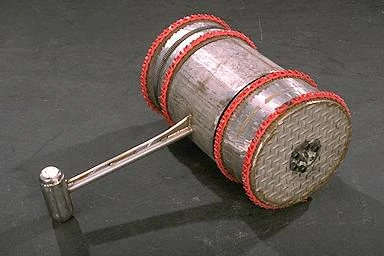
| Frank | ||
| Weight | Unknown | |
| Weapons | Swinging Hammer | |
| Defence | Unknown | |
| From | California | |
| Team: Kua Patten | ||
 | ||
|---|---|---|
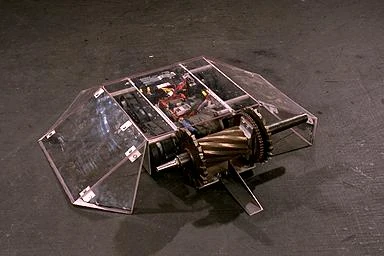
| Gutrip | ||
| Weight | Unknown | |
| Weapons | Vertical Milling Cutters | |
| Defence | Polycarbonate and aluminium | |
| From | California | |
| Team: Bob Schneeveis | ||
 | ||
|---|---|---|
| Killbborg | ||
| Weight | Unknown | |
| Weapons | Pneumatic spears | |
| Defence | Unknown | |
| From | Colorado | |
| Team: Ken Atkinson | ||
 | ||
|---|---|---|
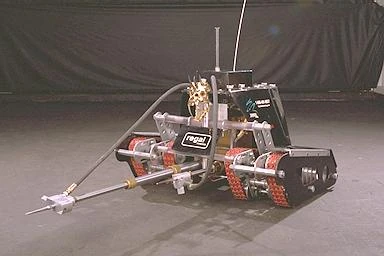
| La Machine | ||
| Weight | Unknown | |
| Weapons | Ramming Scoop Blade | |
| Defence | Steel | |
| From | California | |
| Team: Gage Cauchois, Trey Roski & Greg Munson | ||
 | ||
|---|---|---|
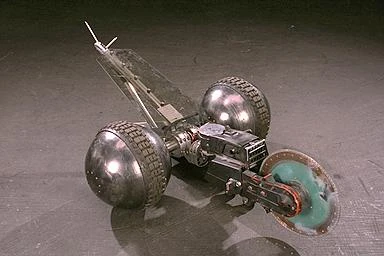
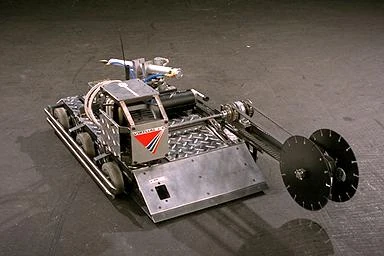
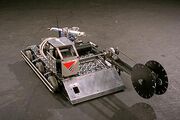
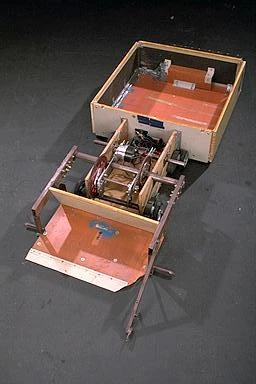
| The Master | ||
| Weight | Unknown | |
| Weapons | Interchangeable, including circular saw & lifting panel | |
| Defence | Interchangeable weaponry | |
| From | California | |
| Team: Mark Setrakian | ||
 | ||
|---|---|---|
| Marvin | ||
| Weight | Unknown | |
| Weapons | Lifting Arm & Pneumatic Spear | |
| Defence | Unknown | |
| From | California | |
| Team: Willis Wong | ||
 | ||
|---|---|---|
| Merrimac | ||
| Weight | Unknown | |
| Weapons | Flippers | |
| Defence | Low Ground Clearance | |
| From | California | |
| Team: Unknown | ||
 | ||
|---|---|---|
| Namreko 3000 | ||
| Weight | Unknown | |
| Weapons | Lifting Arm | |
| Defence | Unknown | |
| From | California | |
| Team: Mike Okerman Curtis Nemeth | ||
  | ||
|---|---|---|
| Nemesis | ||
| Weight | Unknown | |
| Weapons | Spear | |
| Defence | Unknown | |
| From | Arizona | |
| Team: Chris Harriman | ||
 | ||
|---|---|---|
| Punjar | ||
| Weight | Unknown | |
| Weapons | Spinning Chain | |
| Defence | Steel | |
| From | California | |
| Team: Ramiro Mallari | ||
 | ||
|---|---|---|
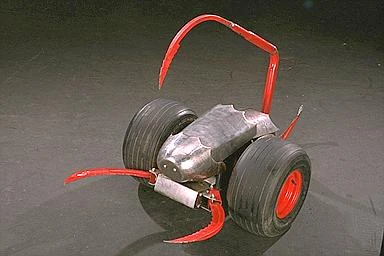
| Red Scorpion | ||
| Weight | Unknown | |
| Weapons | Stabbing Tail and claws | |
| Defence | Unknown | |
| From | California | |
| Team: Ray Washburn | ||
  | ||
|---|---|---|
| Robert Redford Jr. | ||
| Weight | Unknown | |
| Weapons | Drill | |
| Defence | Unknown | |
| From | California | |
| Team: William Bakleinikoff | ||
 | ||
|---|---|---|
| South Bay Mauler | ||
| Weight | Unknown | |
| Weapons | Spinning Flails and Chisels | |
| Defence | Unknown | |
| From | California | |
| Team: Charles Tilford, Morgan Tilford, Henry Tilford, Alan Vermette | ||
 | ||
|---|---|---|
| Steel At Work | ||
| Weight | 73kg | |
| Weapons | Wedge | |
| Defence | Steel | |
| From | Paris, France | |
| Team: Jean-Denis LeFeuvre | ||
  | ||
|---|---|---|
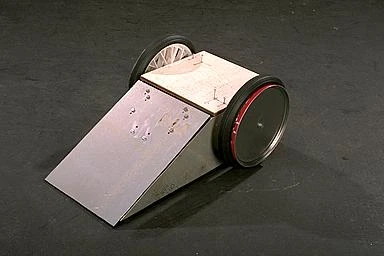
| Tazz | ||
| Weight | Unknown | |
| Weapons | 360° Lifting arm | |
| Defence | Aluminum | |
| From | California | |
| Team: Donald Hutson | ||
  | ||
|---|---|---|
| TerMinal frenZy | ||
| Weight | Unknown | |
| Weapons | Powerful Hammer | |
| Defence | Unknown | |
| From | Los Angeles, California | |
| Team: Patrick Campbell, George Melero & Emile DeMillo | ||
  | ||
|---|---|---|
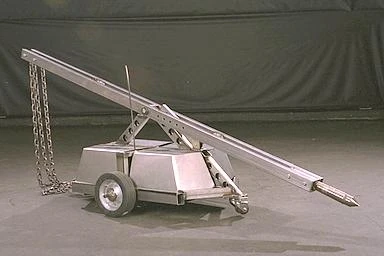
| Vlad the Impaler | ||
| Weight | Unknown | |
| Weapons | Lifting Forks | |
| Defence | Unknown | |
| From | California | |
| Team: Gage Cauchois | ||
Middleweights
  | ||
|---|---|---|
| Agamemnon | ||
| Weight | 100 lb | |
| Weapons | Saw Blade arm, Retracting Spike and Wedge | |
| Defence | Aluminum plate | |
| From | Los Angeles, California | |
| Team: Dan Danknick, Greg Willingham, Dave Johnson & Mike Bell | ||
  | ||
|---|---|---|
| Pokey | ||
| Weight | Unknown | |
| Weapons | Lifter and spike | |
| Defence | Unknown | |
| From | California | |
| Team: Curt Meyers | ||
  | ||
|---|---|---|
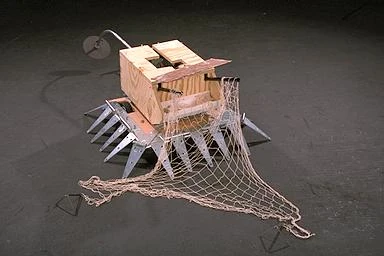
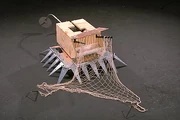
| Satoru Special 3 | ||
| Weight | Unknown | |
| Weapons | Grinding disc | |
| Defence | Wood armour and snagging net | |
| From | California | |
| Team: James Straus | ||
  | ||
|---|---|---|
| Scorpion | ||
| Weight | Unknown | |
| Weapons | Spiked Axe | |
| Defence | Unknown | |
| From | California | |
| Team: Jerry Burton | ||
  | ||
|---|---|---|
| Scrappy | ||
| Weight | Unknown | |
| Weapons | Wedges | |
| Defence | Scrap Metal | |
| From | California | |
| Team: Jim Clark | ||
  | ||
|---|---|---|
| Traxx | ||
| Weight | Unknown | |
| Weapons | Scoop | |
| Defence | Unknown | |
| From | California | |
| Team: Daniel Goff | ||
  | ||
|---|---|---|
| Up & Over | ||
| Weight | Unknown | |
| Weapons | Flipping Scoop and box trap | |
| Defence | Wooden Armour | |
| From | California | |
| Team: Bob Schneeveis | ||
Lightweights
 | ||
|---|---|---|
| Attiller (the Hun) | ||
| Weight | Unknown | |
| Weapons | Cutting Discs | |
| Defence | Unknown | |
| From | Wisconsin | |
| Team: Jim Sellers | ||
 | ||
|---|---|---|
| Bite Me | ||
| Weight | Unknown | |
| Weapons | Spikes | |
| Defence | Unknown | |
| From | Montana | |
| Team: Brian Foote | ||
 | ||
|---|---|---|
| The Enforcer | ||
| Weight | Unknown | |
| Weapons | Interchangeable saw blade and lifting arm | |
| Defence | Unknown | |
| From | New Jersey | |
| Team: Al Kindle | ||
 | ||
|---|---|---|
| Flipper | ||
| Weight | Unknown | |
| Weapons | Rear hinged flipper | |
| Defence | Unknown | |
| From | California | |
| Team: Jesse Escobedo | ||
 | ||
|---|---|---|
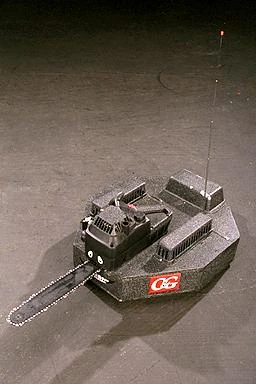
| Happy Fun Bot | ||
| Weight | Unknown | |
| Weapons | Chainsaw and Saw Blade wheels | |
| Defence | Kevlar, polycarbonate, titanium and "depleted uranium" | |
| From | California | |
| Team: John Calhoun | ||
 | ||
|---|---|---|
| Lorena | ||
| Weight | Unknown | |
| Weapons | Ramming Blade | |
| Defence | Unknown | |
| From | California | |
| Team: Bob Schneeveis | ||
 | ||
|---|---|---|
| SPS3 | ||
| Weight | Unknown | |
| Weapons | Entanglement Devices | |
| Defence | Unknown | |
| From | California | |
| Team: J.D. Street | ||
Featherweights
 | ||
|---|---|---|
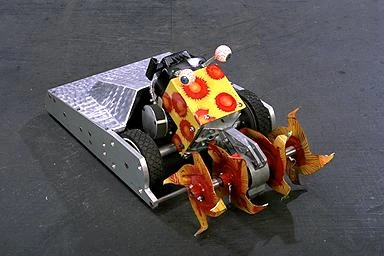
| Arsenic | ||
| Weight | Unknown | |
| Weapons | Lifting Scoop | |
| Defence | Carbon fibre armour | |
| From | California | |
| Team: Steven J. Winter | ||
  | ||
|---|---|---|
| Dragon Wagon | ||
| Weight | Unknown | |
| Weapons | Lifter | |
| Defence | Polycarbonate shell | |
| From | California | |
| Team: Sandor Nagyszalangzy | ||
  | ||
|---|---|---|
| P.A.T. | ||
| Weight | Unknown | |
| Weapons | Wedge | |
| Defence | Unknown | |
| From | California | |
| Team: Mike Li-Ter | ||
  | ||
|---|---|---|
| Red 2 | ||
| Weight | Unknown | |
| Weapons | Spikes and wedge | |
| Defence | Unknown | |
| From | California | |
| Team: John Knoll | ||
  | ||
|---|---|---|
| Snickers | ||
| Weight | Unknown | |
| Weapons | Entanglement Devices | |
| Defence | Unknown | |
| From | California | |
| Team: Anthony Duraine | ||
  | ||
|---|---|---|
| Spiny Norman | ||
| Weight | Unknown | |
| Weapons | Spikes | |
| Defence | Unknown | |
| From | California | |
| Team: Will Wright | ||
  | ||
|---|---|---|
| Triple Redundancy | ||
| Weight | Unknown | |
| Weapons | Tape | |
| Defence | Clusterbot | |
| From | California | |
| Team: Cassidy Wright | ||
  | ||
|---|---|---|
| Wedge of Doom | ||
| Weight | Unknown | |
| Weapons | Ramming Blade and Spikes | |
| Defence | Unknown | |
| From | California | |
| Team: Tony Buchignani | ||
  | ||
|---|---|---|
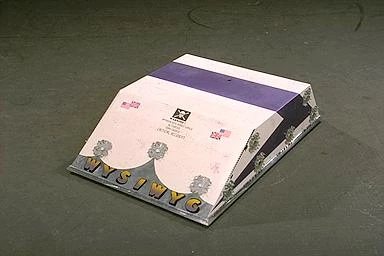
| WYSIWYG | ||
| Weight | 10.8kg | |
| Weapons | Wedge and Pneumatic spikes | |
| Defence | Wood | |
| From | Edmonton, UK | |
| Team: Eric Dickinson | ||
  | ||
|---|---|---|
| The X-2 | ||
| Weight | Unknown | |
| Weapons | Wedge | |
| Defence | Unknown | |
| From | Unknown | |
| Team: Mike Winter, Dennis Adams, Jim Sellers, Dave Hamel, Clark Hochgraf | ||
Battles
NOTE: This only contains battles that were featured in the Official release of the 1996 Championship and does not contain the full list of events.
Heavyweight Championship
Round 1
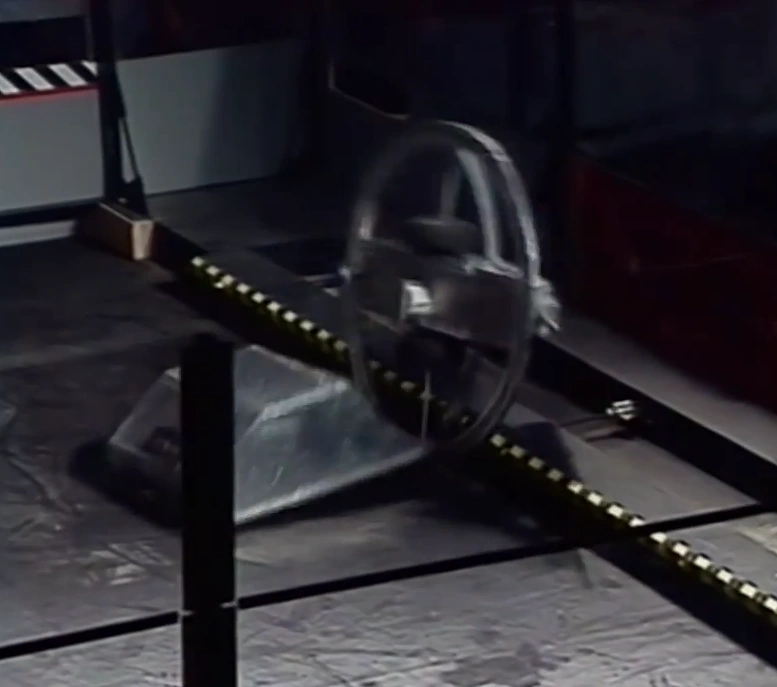
The Master vs. Tazz

The Master attempts to slice through the wheel of Tazz

Tazz pins The Master down
The battle started tentatively with The Master slowly edging closer towards Tazz before swinging down with its saw blade aiming towards the tires of Tazz. Tazz swung its arm around, smashing into the saw blade of The Master which retaliated by smashing down with its saw blade arm. The Master caused some minor damage to the top of Tazz with this attack.
- "Here again, The Master's saw has broken down and Tazz using its massive breaking power just to pin him (The Master) for thirty seconds and knocks The Master out in the first round!"
- — Paul Vallis
At some point in the match, The Master lost all functionality in the saw and was put on the defensive as a result. Tazz took advantage of this by getting underneath The Master and using its lifting arm to pin The Master down. Tazz did this successfully for thirty seconds, and thus sealed a shock defeat for the reigning heavyweight champions.
Winner: Tazz
BioHazard vs. Robert Redford Jnr

BioHazard lifts Robert Redford Jnr onto its back
At the start, Robert Redford Jnr slowly spun around in what was to be a short battle. BioHazard then came charging in and slammed into Robert Redford Jnr, lifting it before dropping it back down. Robert Redford Jnr lingered once again, which allowed BioHazard to come in on another charge, where it lifted Robert Redford Jnr up and over for good.
- "Robert Redford Jnr's weaponry was no help here. The BioHazard lift arm made sure of that!"
- — Paul Vallis
Winner: BioHazard
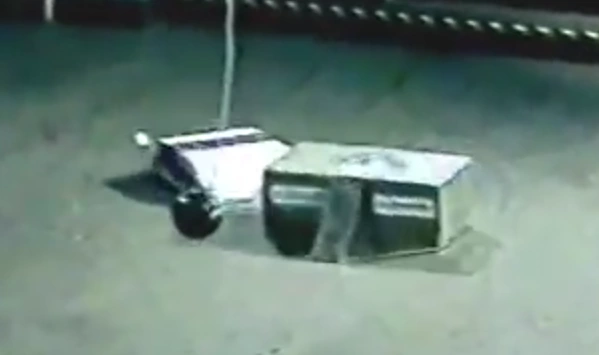
Punjar vs. Red Scorpion
The battle started slowly, with Red Scorpion appearing to have drive problems. Red Scorpion only spun on the spot while Punjar tentatively moved forward.
- "The betting was for Red Scorpion to easily win this fight, but his tail wasn't operating as planned."
- — Paul Vallis

Red Scorpion is pressured by Punjar
Punjar circled around Red Scorpion before getting underneath it a few times, but Red Scorpion continued to slip away. Punjar then managed to slowly push Red Scorpion towards a mousetrap. Red Scorpion used its front claws to grab hold of Punjar as its main tail axe had problems. Punjar used its flail in response against Red Scorpion - smashing the wheels. Later on in the match, Punjar got underneath Red Scorpion again but this time Red Scorpion's tail was working and was able to smash down onto Punjar. However, Punjar got underneath and trapped Red Scorpion, immobilising it as the tail flailed away.
Winner: Punjar
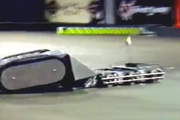
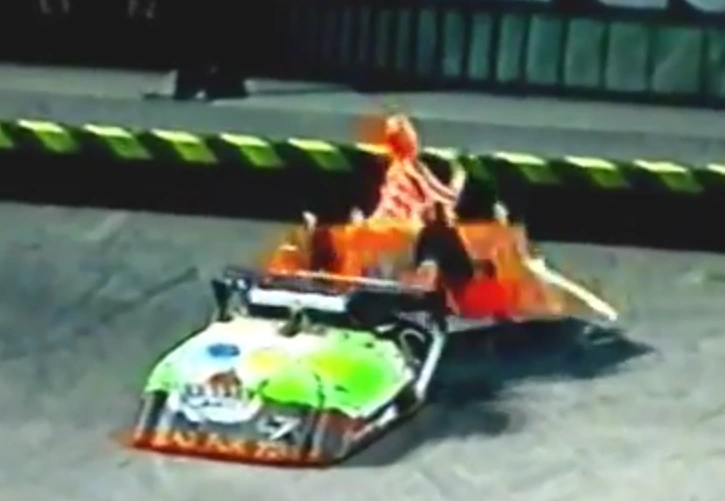
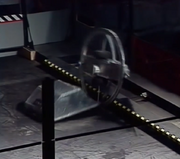
Nemesis vs. TerMinal frenZy

TerMinal frenZy smashes down on Nemesis
Before the match, Nemesis attached a triangular wedge to deal with TerMinal frenZy specifically. The battle started tentatively as TerMinal frenZy spun in circles while Nemesis slowly approached TerMinal frenZy. Eventually, Nemesis charged into TerMinal frenZy which responded by smashing down with its axe. Nemesis then rammed TerMinal frenZy into the side wall, with the latter moving away quickly before any damage could be sustained. As TerMinal frenZy smashed down with the axe, it tore chunks of concrete out of the arena floor.
- "Watch TerMinal frenZy's axe smash chunks out of the concrete floor as well as giving Nemesis a bad head ache!"
- — Paul Vallis
TerMinal frenZy then managed to get up a head of steam on Nemesis - penetrating the corner of the top armour and buckling the armour out of shape. By this point it was clear that Nemesis had lost all mobility, leaving the victorious TerMinal frenZy to go on through.
Winner: TerMinal frenZy
Gutrip vs. Frank
Gutrip tears the tire tracks on Frank
Frank began the battle by spinning on the spot, awaiting Gutrip's attack. Gutrip charged in but the weapon did not spin, allowing Frank to smash down on the top of Gutrip with its hammer. Gutrip's weapon soon started to work and Frank sped away to avoid the deadly drum spinner. However, in its retreat, Frank ended up charging into the side wall. This allowed Gutrip to slam in and slice into the wheels of Frank. Frank attempted to move away again but Gutrip caused more damage, tearing off the tire tracks around it. With Frank now immobile, Gutrip turned and attacked one of the arena flippers in celebration - tearing chunks from it.
- "Frank and his hammer did well last year but met his match against Gutrip...and So did the Arena wall!"
- — Paul Vallis
Winner: Gutrip
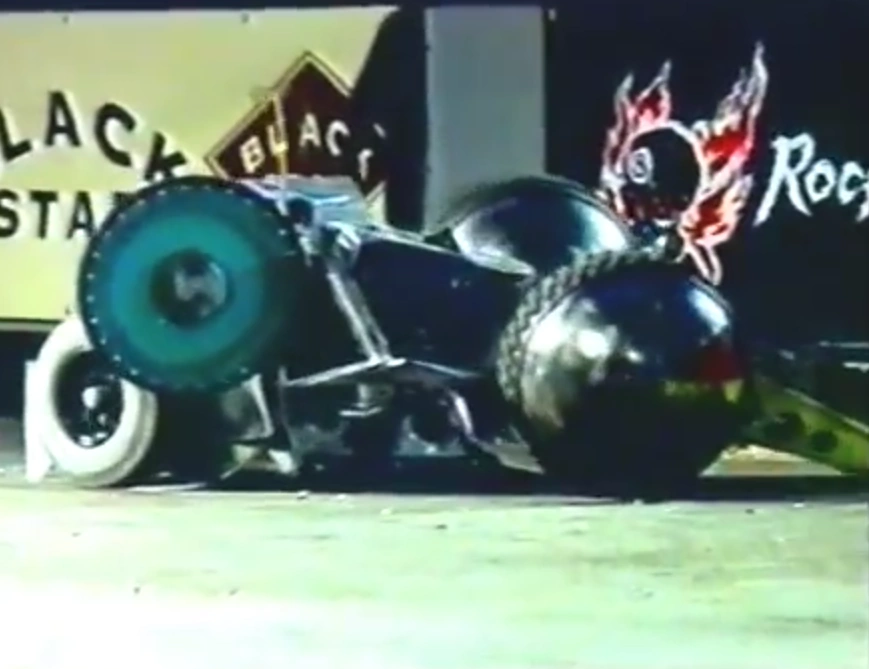
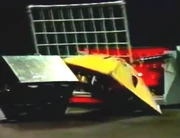
La Machine vs. South Bay Mauler

South Bay Mauler is bulldozed by La Machine
- "South Bay Mauler was easily over powered by La Machine"
- — Paul Vallis
As the match began, South Bay Mauler spun up to speed but was quickly bashed into by La Machine. La Machine then back into space to line up another charge which propped South Bay Mauler up at an angle. South Bay Mauler was continually pressured by La Machine's ramming attacks and was then slammed against the arena wall. South Bay Mauler showed little movement after the consistent pressure from its opponent, which left La Machine as the winner of the battle.
Winner: La Machine
Round 2
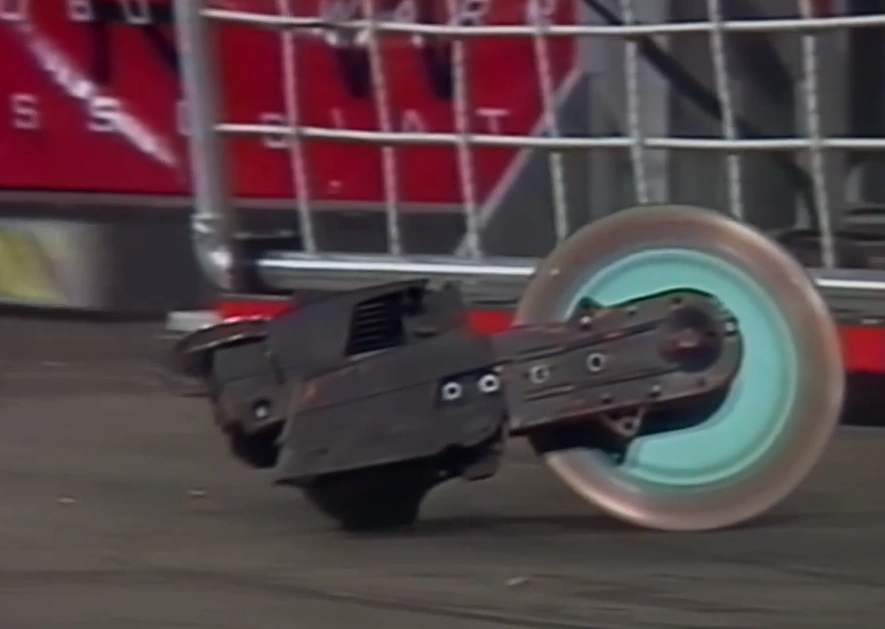
Tazz vs. La Machine
- "Tazz was reduced to scrap metal by La Machine"
- — Paul Vallis

Tazz's top armour comes off after a slam from La Machine
Tazz dodged away from La Machine which quickly turned and got underneath Tazz. La Machine then rammed Tazz into a side wall before backing away. The two robots lingered about, driving in circles away from each other before La Machine came in on a second attack and slammed Tazz in by the "mousetraps" - where the top armour of Tazz flew off. La Machine then came in for a final attack, toppling Tazz onto its back, where it was unable to self right.
Winner: La Machine
TerMinal frenZy vs. BioHazard

BioHazard lifts TerMinal frenZy over
BioHazard quickly sped forward as TerMinal frenZy attempted to position itself for an attack. TerMinal frenZy attempted to damage BioHazard with its axe, but BioHazard blocked these attacks by positioning its lifting arm at a high angle. BioHazard then proceeded to lower the lifting arm to get underneath TerMinal frenZy before lifting it up and over.
- "Unfortunately TerMinal frenZy's hammer just bounced off of BioHazard who made short work by flipping him over."
- — Paul Vallis
TerMinal frenZy tried to self right but its axe didn't have sufficient strength to complete the action. Repeated self-righting attempts then saw TerMinal frenZy begin to smoke. TerMinal frenZy was soon counted out, eliminating it from the competition.
Winner: BioHazard
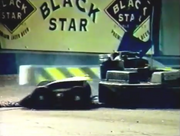
Gutrip vs. Killbborg

Gutrip smashes into the side of Killbborg lifting it into the air
Killbborg traps Gutrip against a mousetrap
Both robots charged out from their starting positions, before Killbborg quickly diverted off course and accidentally drove into a mouse trap. Killbborg turned and fired its pneumatic spears into the back end of Gutrip before turning away. Gutrip charged up its weapon - attacking the spears that were sticking out. Gutrip then charged into the side of Killbborg, and the attack from the drum lifted Killbborg into the air slightly. Gutrip drove underneath Killbborg, damaging the underbelly of Killbborg and slicing off one of the tracks. Gutrip continued its dominant spell by battering the side of Killbborg but it then ended up driving towards the side wall. Killbborg took opportunity by ramming Gutrip behind the mousetrap, trapping Gutrip and rendering it immobile.
- "Although Gutrip inflicted some serious damage on Killbborg -and the Arena- he got pinned by Killbborg and lost"
- — Paul Vallis
Winner: Killbborg
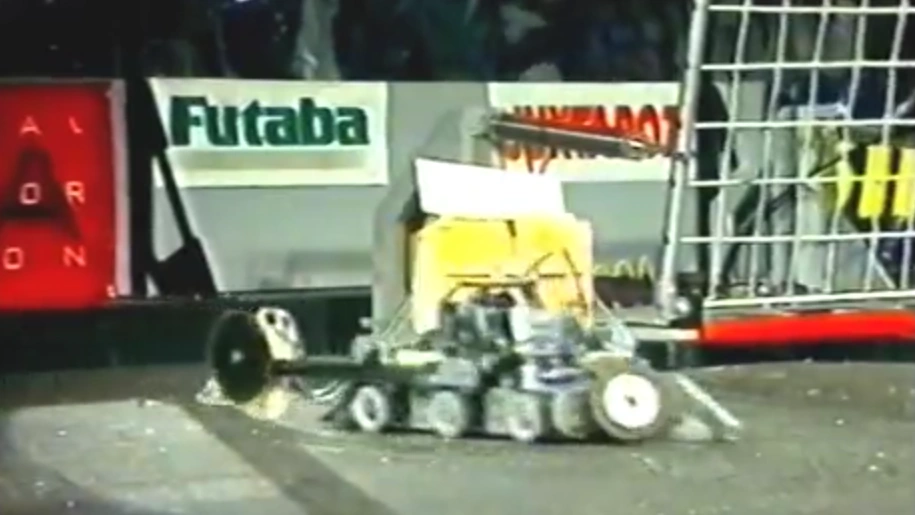
Round 3
Killbborg vs. BioHazard
- "This was a highly anticipated battle between two of the best engineered robots in the competition but BioHazard's arm proved too effective."
- — Paul Vallis

BioHazard throws Killbborg over
The two machines began tentatively as BioHazard awaited for Killbborg to make the first move. Killbborg erroneously drove itself into one of the mousetrap hazards allowing BioHazard to drive in and attack Killbborg. Killbborg wriggled free though, and rammed BioHazard against the arena wall. BioHazard then drove around Killbborg and attempted to lift it but failed to do so. Both robots continued to circle each other until BioHazard managed to work its way to the side of Killbborg where it lifted it over to clinch victory.
Winner: BioHazard
DooMore vs. La Machine
- "DooMore has met La Machine in battle many times, especially during the 1996 Robot Wars European tour, but up till now they have never won and today is no different"
- — Paul Vallis

DooMore is trapped by the mousetrap
La Machine started quickly - ramming into DooMore which disabled its weapon. La Machine then circled around DooMore and shunted it against one of the "mousetraps" - almost toppling it over. DooMore attempted drive away but La Machine was too quick for it. La Machine drove underneath DooMore and toppled it onto its side where it became trapped on one of the "mousetraps". This left DooMore knocked out, resulting in La Machine progressing on through.
Winner: La Machine
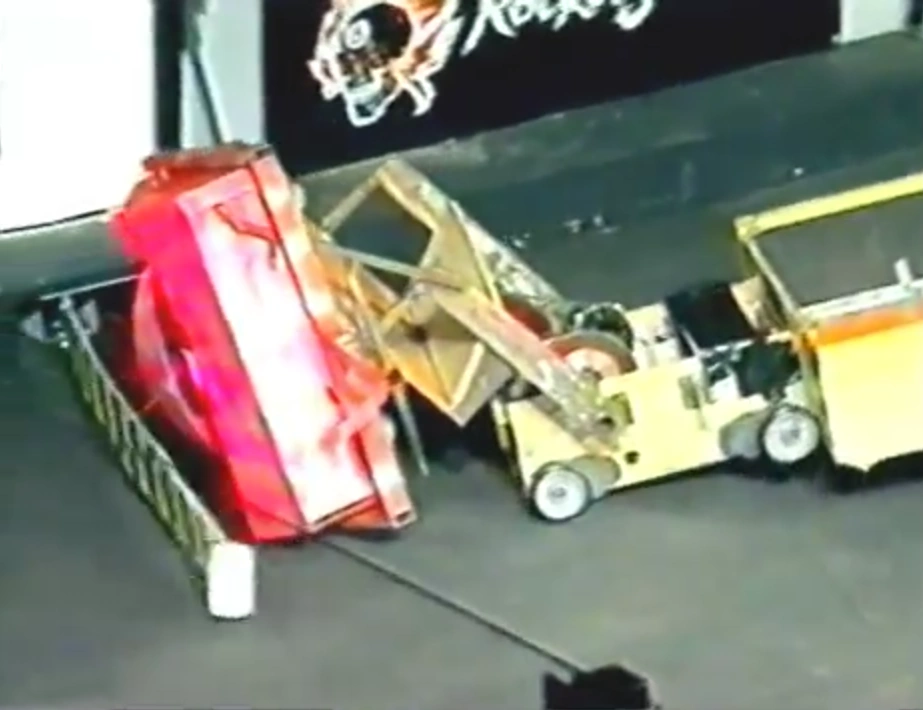
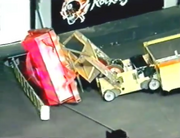
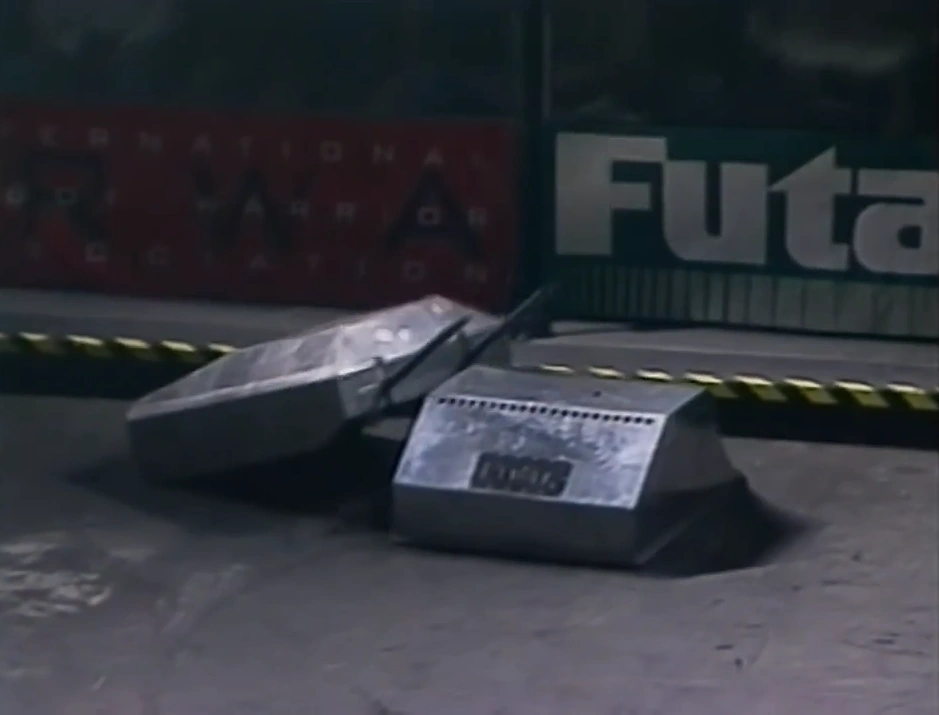
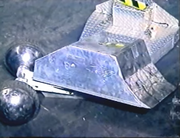
Punjar vs. Vlad the Impaler

Punjar is thrown over completely
This battle between Vlad the Impaler and Punjar was over very quickly - lasting just 3.96 seconds in total. Vlad the Impaler and Punjar both met in the centre of the centre, where the lifting forks of Vlad the Impaler got underneath Punjar and immediately lifted it onto its back. Vlad the Impaler then carried out a small victory spin before flipping Punjar completely over in another attack.
- "This was probably the quickest fight of the whole competition."
- — Paul Vallis's description of the whole battle
Winner: Vlad the Impaler
Round 4
BioHazard vs. Vlad the Impaler
- "The smart money was on BioHazard to win but Vlad wasn't going to make that easy for him."
- — Paul Vallis, comments at the beginning of the match


Vlad the Impaler lifts BioHazard up
Vlad the Impaler flips BioHazard after the latter is declared the winner
Both robots held their distance early on, until Vlad the Impaler rammed BioHazard and lifted it up off the arena floor. BioHazard managed to slip loose and spun around the arena in an attempt to come onto the offensive, but it failed to gain suitable purchase with any of the subsequent lifts it attempted. Vlad the Impaler then rammed itself one of the mousetraps, which allowed BioHazard to come in and attempt to lift Vlad into the air. Here, Vlad dropped on top of BioHazard and was left stuck on BioHazard's lifting arm.
- "BioHazard was able to lift the heavier Vlad high enough to prevent Vlad's wheels from having any traction, before Vlad got stuck on BioHazard's arm"
- — Paul Vallis.
The two machines remained stuck for a while, and in an attempt to find a solution to the deadlock, the arena announcer declared that BioHazard would automatically win the match if it could back away. BioHazard managed to wriggle itself free, but as the announcer declared BioHazard's victory, Vlad the Impaler, in an attempt to get revenge, came in and threw BioHazard over, earning the derision of the crowd. After a tense few seconds, BioHazard spectacularly self righted to the crowd's delight.
- "Vlad the Impaler's frustrated act of revenge came to nothing as BioHazard righted itself to take the winners bow."
- — Paul Vallis midway through the fight
Vlad the Impaler continued to attack BioHazard after its self right but this was to no effect as BioHazard thwarted each attack with its lifting arm.
Winner: BioHazard
Final
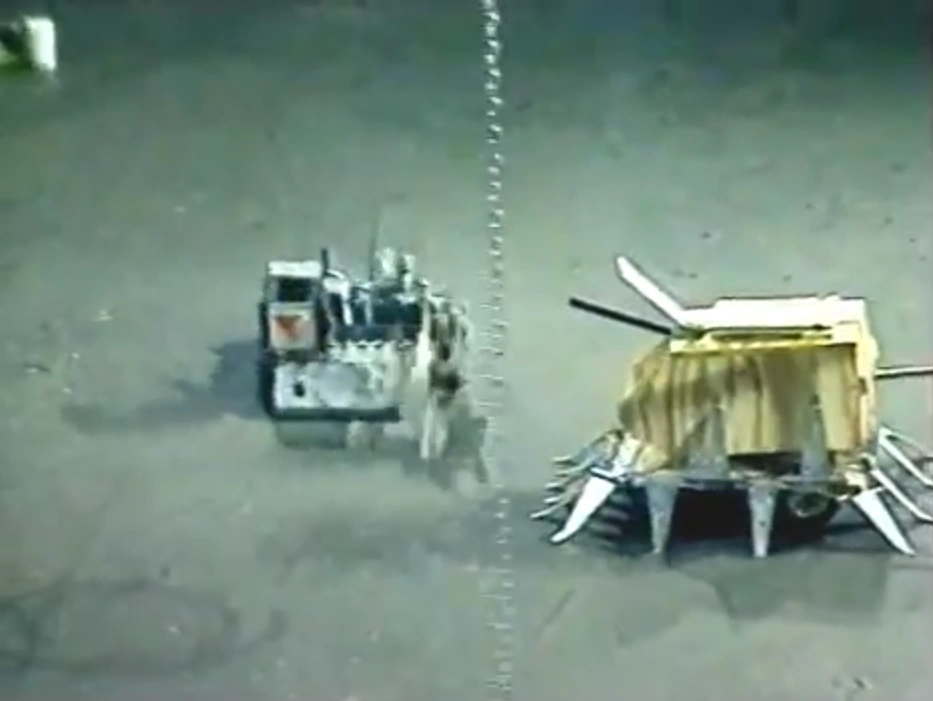
BioHazard vs. La Machine
- "The Face off Final was meant to be a cake walk for La Machine in many people's view"
- — Paul Vallis

La Machine is lifted by BioHazard
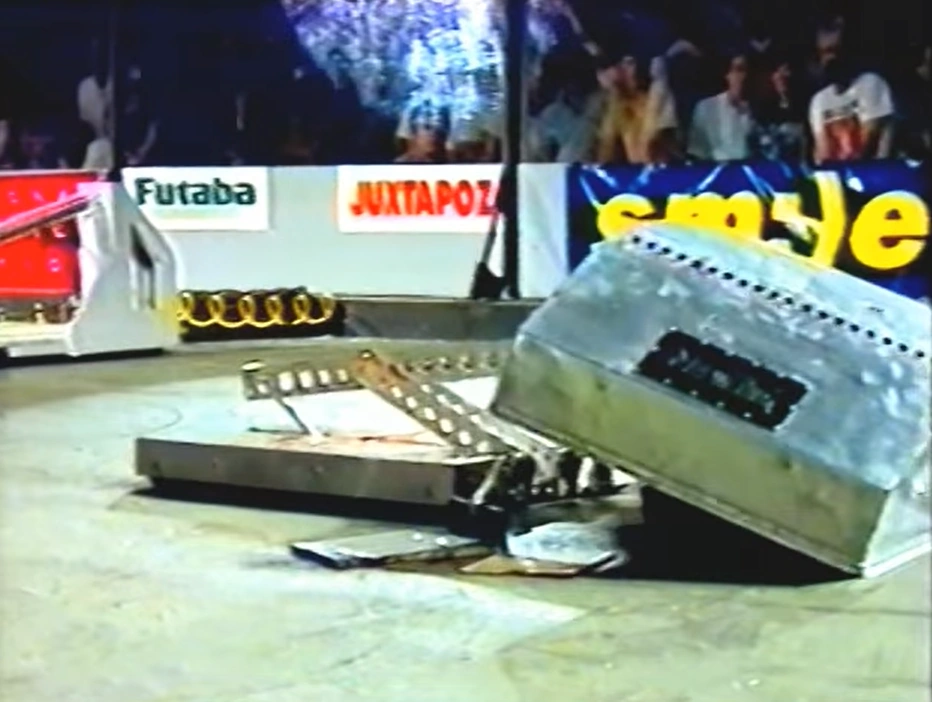
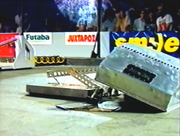
La Machine loses all mobility
Both robot circled each other with La Machine then attempting to get underneath BioHazard, however, BioHazard's hidden skirts prevented this. La Machine backed away and then accidentally drove into a "mousetrap". La Machine attempted to attack BioHazard a second time but was lifted from the front by its opponent. After La Machine dropped back down, BioHazard reversed into it. Soon, it became a game of cat and mouse as both robots darted across the arena before attempting to get underneath one another. BioHazard managed to get a lift on La Machine soon after. La Machine managed to avoid a lift over, only for its battery casing to suddenly break. La Machine soon became stuck on top of the debris, leaving it immobile. BioHazard then attempted to lift La Machine to celebrate its victory in the final.
Winner: BioHazard
Middleweight Championship
Agamemnon vs. Satoru Special 3

Agamemnon's weapon is snapped by Satoru Special 3's net

Satoru Special 3 loses its circular saw as Agamemnon rams it against the side wall
At first Agamemnon struggled to make much of an impact due to the prong like anti-wedge skirt around Satoru Special 3. Agamemnon then turned away in order to begin another charge, while Satoru Special 3 stopped moving briefly. Suddenly, Satoru Special 3 deployed a net which shot out from the front of the robot. Agamemnon backed away, but in doing so its blade was snagged by the netting. Despite the loss of the weapon, Agamemnon proceeded to shunt Satoru Special 3 across the arena. Satoru Special 3 attempted to use its circular saw to damage Agamemnon but lost use of its weaponry in the process. Agamemnon backed away once again before ramming Satoru Special 3 - pinning it and winning the battle.
After this particular battle, "fibre weapons" like netting and tape were outlawed for future events.
- "The organisers have banned nets from future competitions, which should make Agamemnon happy."
- — Paul Vallis on the aftermath of the battle
Winner: Agamemnon
Up & Over vs Scorpion
Up & Over lifts Scorpion
Scorpion attempted to attack side on, but was quickly caught by the scoop of Up & Over which lifted it against an arena flipper. Its first attempted lift was unsuccessful as the floor flipper got in the way - thwacking both Scorpion and Up & Over. Scorpion was then lowered down, but it had no escape as Up & Over flipped Scorpion on its back at the second time of asking.
- "Again, the money was on Scorpion trashing Up & Over, but in Robot Wars, anything can happen!"
- — Paul Vallis
Winner: Up & Over
Pokey vs Scrappy

Pokey is upended by the mousetrap
- "Scrappy, which was made from err scraps, did not have an easy time against Pokey, which looks more like a converted food trolley."
- — Paul Vallis on the opening of the fight
Both robots charged into one another with Scrappy getting lifted up by Pokey. Pokey proceeded to bully Scrappy across the arena, lifting it at any given chance. Scrappy attempted to get away but was caught by an arena flipper. Scrappy reversed again, but bumped into Pokey which trapped Scrappy against a mousetrap. Pokey managed to get its lifting arm wedged through the armour of Scrappy, tearing the armour from the chassis. However, the mousetrap hazard sprung into action and lifted both Scrappy and Pokey, with Pokey falling to its side unable to self right.
Winner: Scrappy
Agamemnon vs. Traxx

Traxx is knocked out by a single attack from Agamemnon
In the Middleweight Final, Agamemnon had replaced its saw blades with a wedge to deal with Traxx. Traxx got off the faster robot and charged towards Agamemnon which dodged out the way. Agamemnon turned as Traxx backed up and turned to face Agamemnon. The robots then clashed as Agamemnon rammed the front of Traxx, pushing it back before backing away. This single attack had knocked Traxx out giving Agamemnon an easy win in the championship battle.
- "Agamemnon had been adapted to take on Traxx, but Traxx was having a bad day and died very quickly."
- — Paul Vallis on Traxx's quick immobilisation
Winner: Agamemnon
Lightweight Championship
SPS3 vs. Happy Fun Bot
- "SPS3 was the robot from Hell as far as Happy Fun Bot was concerned. He [SPS3] wasn't just fast and low-built, he had a net!"
- — Paul Vallis

Happy Fun Bot uses its chainsaw against SPS3

Happy Fun Bot is pinned
From the start Happy Fun Bot seemed to have control problems, this was made worse by SPS3 deploying a entanglement net across the arena floor which jammed up its drive. SPS3 charged in, ramming Happy Fun Bot, which could only turn on one of its saw blade wheels, and in doing so SPS3 was sliced by the chainsaw of Happy Fun Bot. SPS3 circled around Happy Fun Bot, all while the chainsaw caused more damage to the top of it. Happy Fun Bot eventually stopped all movement allowing SPS3 to push Happy Fun Bot across the arena and towards the mousetrap where it was pinned.
Winner: SPS3
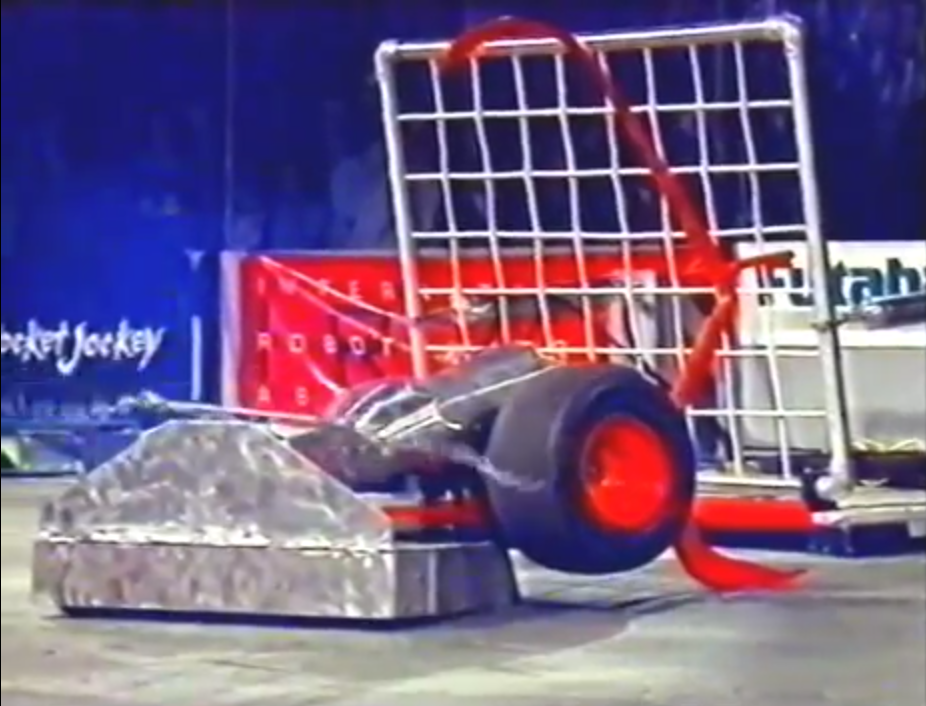
Attiller (The Hun) vs. The Enforcer

Attillier smashes The Enforcer into the side wall

The Enforcer is entangled by Attiller and both robots become stuck
The battle started off aggressively as Attiller rammed The Enforcer into the side wall, using its large cutting discs to smash The Enforcer - which lifted it upwards a few times. The Enforcer was stuck by the arena flipper as Attiller continued to smash it into the side wall. The Enforcer eventually got away and a chase soon ensues. The Enforcer fought back ramming Attiller repeatedly and lifting it with its lifter on some occasions. Attiller attacked The Enforcer during one of its drives, flipping The Enforcer over. Just before the match ended The Enforcer attempted to attack Attiller but got its lifting arm stuck between the cutting discs of Attiller. Both robots were stuck but it was declared that Attiller was the robot that initiated the "pin" The Enforcer - thus taking the win.
- "Attiller and The Enforcer were heading for a draw but Attiller snagged and pinned The Enforcer just as time was up."
- — Paul Vallis
Winner: Attiller (The Hun)
Attiller (The Hun) vs. SPS3

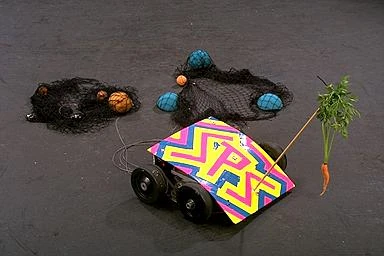
Attiller the Hun rams the immobile SPS3
- "SPS3 used a carrot to tempt Attiller into the net, but it didn't work."
- — Paul Vallis
For this fight, SPS3 had placed a large fishing net on a rod with a carrot on the end to snag Attiller's cutting disc. The snag failed to tangle up Attiller's weapons - although the latter's weapon didn't seem to be working anyway. SPS3 rammed Attiller but quickly smashed itself into the side wall afterwards. This clumsy piece of driving knocked SPS3 out allowing the mobile Attiller to push it backwards against the arena wall, where it claimed victory as Lightweight Champion.
Winner: Attiller (The Hum)
Featherweight Championship
Dragon Wagon vs. P.A.T.


P.A.T. rams Dragon Wagon into the side wall
The fight started off slow, with both robot nervously circling each other. Then, Dragon Wagon attempted to "snap" with its jaws against P.A.T., however, P.A.T. scuttled away, before circling around Dragon Wagon and ramming it into the side wall. This attack immobilised Dragon Wagon, but P.A.T. still managed to put itself in danger after getting caught by an arena flipper. The flipper ended up sending P.A.T. underneath the arena doors and outside of the permitted fighting space - into one of the control booths. This caused one of the roboteers to push P.A.T. back into the arena. This brief incident almost resulted in P.A.T. suffering a self-disqualification, but luckily for it, P.A.T. still moved on to the next round.
- "P.A.T. used its superior speed to up end Dragon Wagon, but nearly disqualified himself after being spun under the arena doors by a flipper."
- — Paul Vallis
Winners: P.A.T.
Wedge of Doom vs. Red 2

Wedge of Doom defeats Red 2 quickly
Immediately, Wedge of Doom slammed into Red 2, ramming Red 2 across the arena. Wedge of Doom continued on, and knocked Red 2 behind a mousetrap where Red 2 was unable to recover. This attack quickly won the Featherweight Championship for Wedge of Doom.
- "Wedge of Doom made short work of Red 2 to win the Featherweight finals"
- — Paul Vallis
Winner: Wedge of Doom
Side Events
Grudge Matches
- "This year, there were numerous Grudge Matches, to settle old scores or to make a point."
- — Paul Vallis summarising the Grudge Match concept during the battle with WYSISYG and Steel at Work
The 1996 championship featured several "Grudge Match" battles, similar to the Grudge Match Special and the Vengeance battles in Extreme.
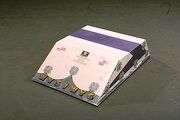
WYSIWYG vs. Steel at Work
- "The English robot hadn't travelled all this way to be denied to be taking on the French robot, Steel at Work."
- — Paul Vallis entire commentary of the fight
WYSIWYG knocks out Steel at Work
The Grudge Match, described by the announcer as a "continuation of the Hundred Years War", was a quick one, with WYSIWYG quickly slamming into the slower moving Steel at Work in an immediate attack. WYSIWYG circled around Steel at Work, which was only turning in circles, before delivering a second blow, knocking out the drive chain. Steel at Work began to smoke as WYSIWYG darted around the arena - celebrating its victory in joy.
Winner: WYSIWYG
Red Scorpion vs. The Master

Red Scorpion grabs hold of The Master
The Master later fought in a Grudge Match against Red Scorpion, both of whom felt they wanted to show off their might after losing in the first round.
- "The Master and the Red Scorpion, after being humiliated in the opening rounds, wanted to prove they're made of tougher stuff!"
- — Paul Vallis
At first Red Scorpion didn't move allowing for The Master to come smashing in with its saw blade. Eventually, Red Scorpion moved and dodged follow-up attacks from The Master. Red Scorpion then used its front red claws to grab hold of one of the wheels of The Master, pinning it and using its tail to rain down hits. Red Scorpion proceeded to push The Master towards the arena side wall, which completed its victory over The Master.
Winner: Red Scorpion
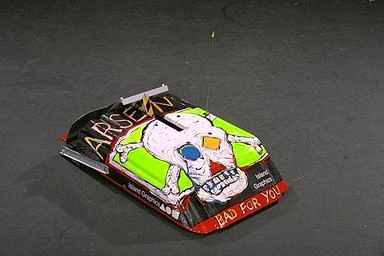
Arsenic vs. Spunky Munkey

Arsenic lifts Spunky Munkey
The battle started slowly with Spunky Munkey circling around the arena while Arsenic made minimal movements. Both robots stopped facing each other before Spunky Munkey sped forward and bashed the front corner of Arsenic. Spunky Munkey then bashed into the wall while attempting move away. This stopped all movement inside Spunky Monkey, and allowed Arsenic to lift it up. Arsenic continued to lift Spunky Munkey into the air before dropping it back down. Here, Spunky Munkey came back to life and moved away. However, Spunky Monkey was then caught by Arsenic's lifter again and was stuck and immobilised.
- "Despite winning the Best Odd Directed Robot award, Spunky Munkey wasn't quite the fighter his owners hoped he would be."
- — Paul Vallis
Winner: Arsenic
Melees
- "The number of competitors in Melees is limited by the radio frequencies available as each robot needs its own frequency."
- — Paul Vallis on the Melee as The Master enters the Arena.
Melee competitions were also held, the number of competitors being limited by as many radio frequencies being available. In these fights, the number of robots competing either fight to death or a winner is decided based on who's still mobile after time is up.
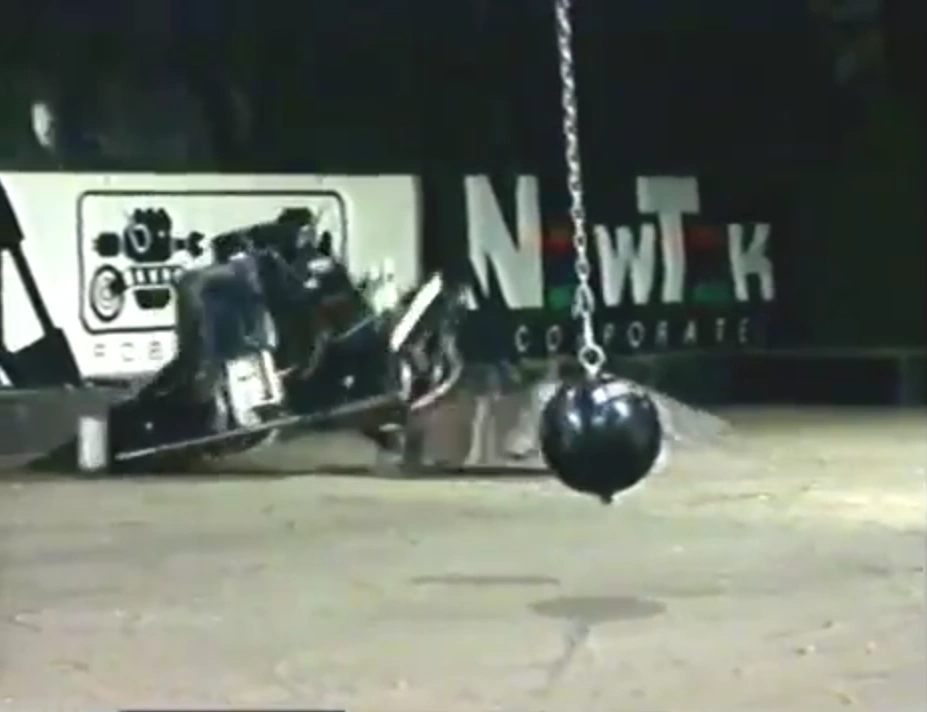
Heavyweight Melee

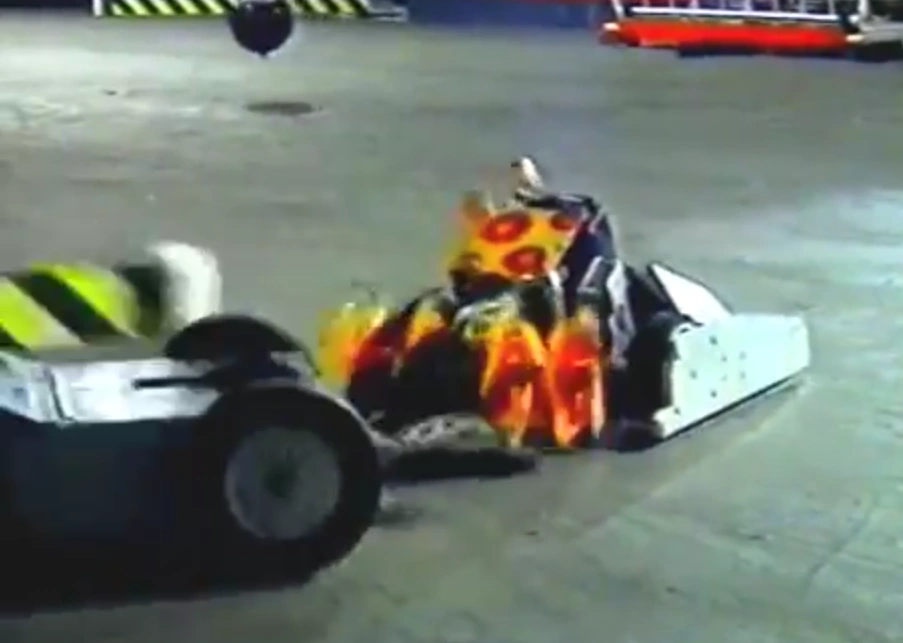
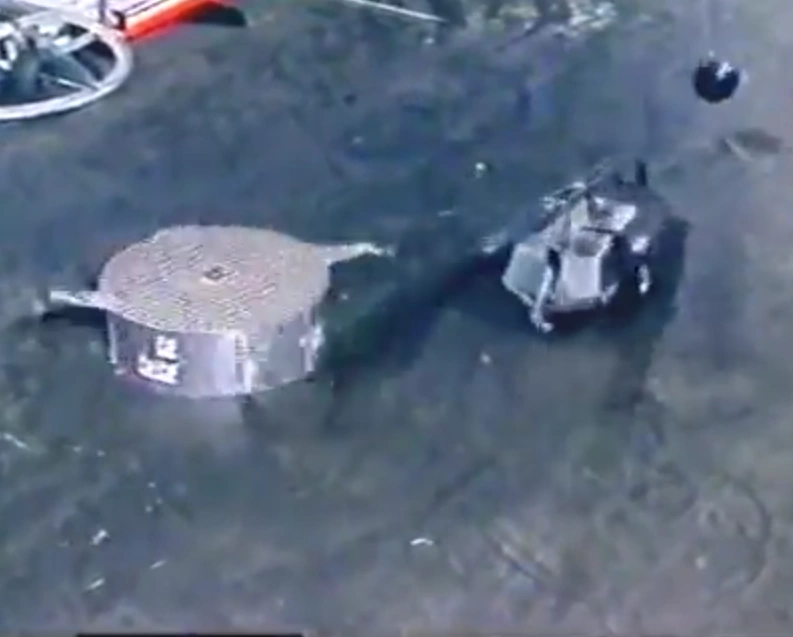
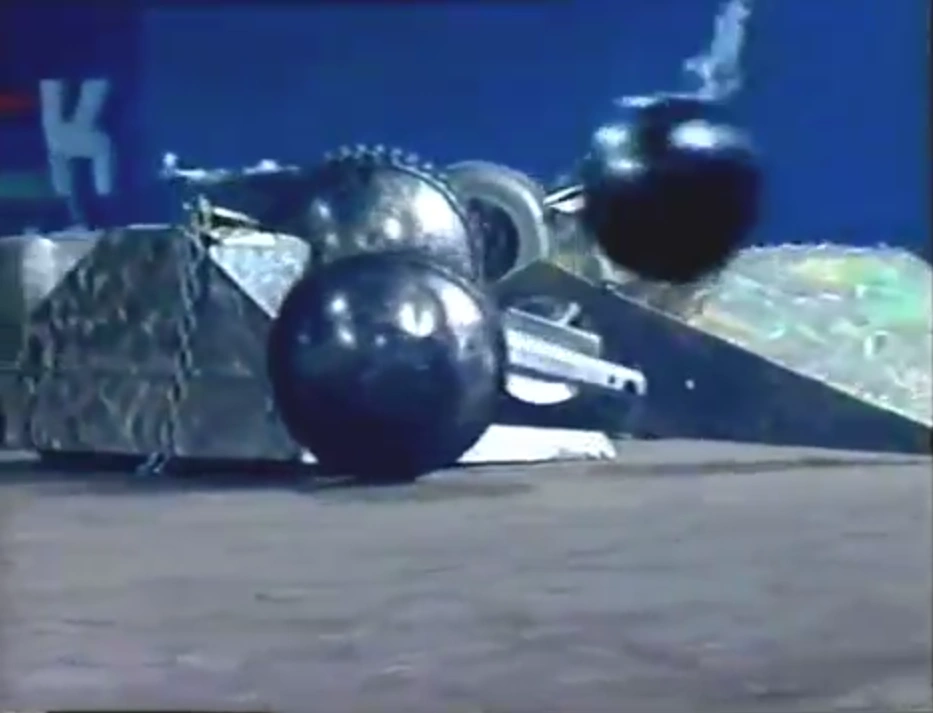
La Machine gets underneath Vlad the Impaler
The Master's weapon rolls around the arena
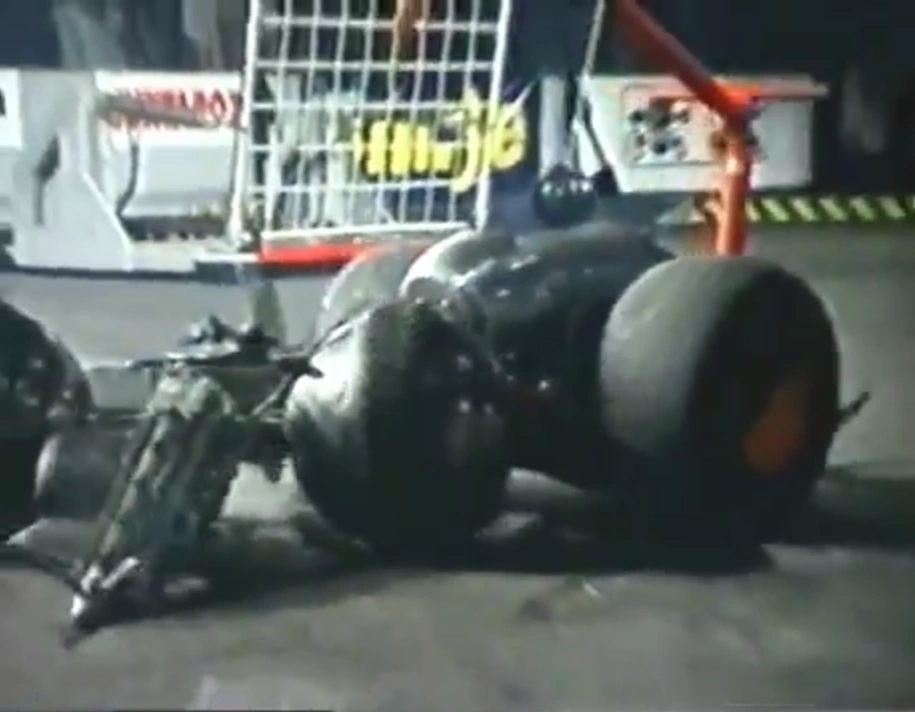
For this rumble, The Master, DooMore, Vlad the Impaler, La Machine and BioHazard were the chosen competitors. During the first few seconds of the match, the competitors strayed away from The Master - which was the most feared robot - which had a lot to prove after its previous defeats. La Machine then rammed Vlad the Impaler into the side wall, before BioHazard intercepted and lifted up Vlad the Impaler itself. Meanwhile, The Master swung down with the bladed arm against DooMore and Vlad the Impaler. BioHazard then stayed away from most of the action until it was attacked by La Machine which attempted to feed it into the saw of The Master. However at one point in the battle, as The Master swung down to attack Vlad the Impaler, La Machine suddenly slammed into The Master - tearing off its saw blade arm entirely, and causing the severed arm to dart across the arena.
- "With The Master crippled, the melee came down to a game of tag between La Machine and BioHazard."
- — Paul Vallis

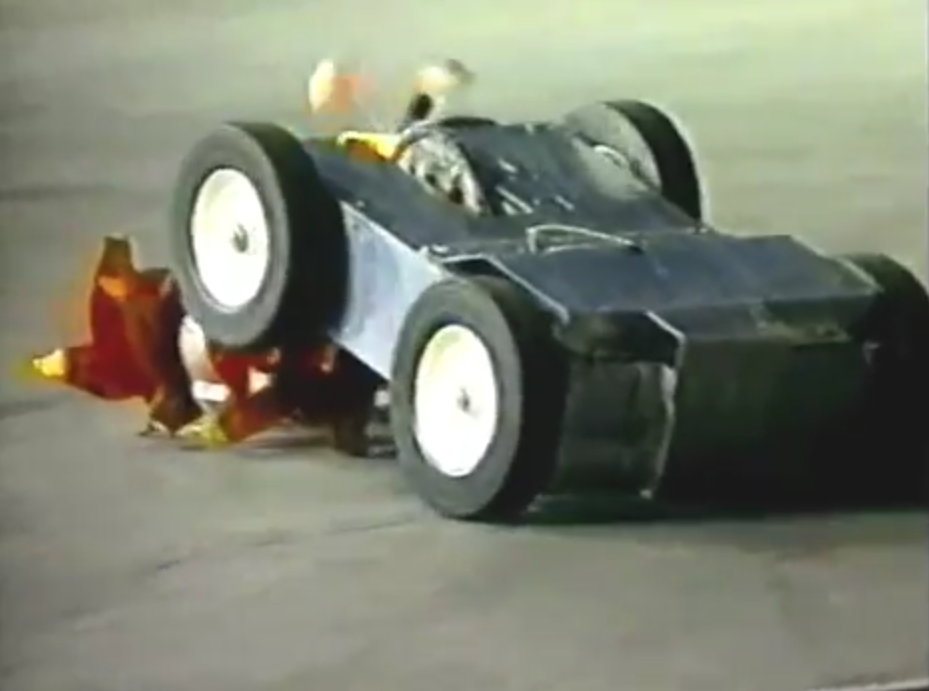
BioHazard is toppled as every other opponent gang up on it
La Machine throws DooMore out of the arena
BioHazard targeted The Master and DooMore for a while, knocking a weaponless The Master about before assisting La Machine in taking down Vlad the Impaler. As BioHazard turned away, La Machine drove into it and slammed it into the arena corner, toppling BioHazard, where it was unable to self-right due to damage to its arm sustained moments earlier. DooMore used its pneumatic spike to cause damage to the underbelly of BioHazard as The Master and Vlad the Impaler drove on top of it while La Machine continued to pressure it. Vlad the Impaler then ended up being flipped over after backing into La Machine's wedge. La Machine then carried out another KO blow as it rammed DooMore forcefully out of the arena.
- "The ultimate winner here, La Machine, dumping that one (DooMore) over the edge."
- — Jonathan Pearce, on DooMore's out of the arena

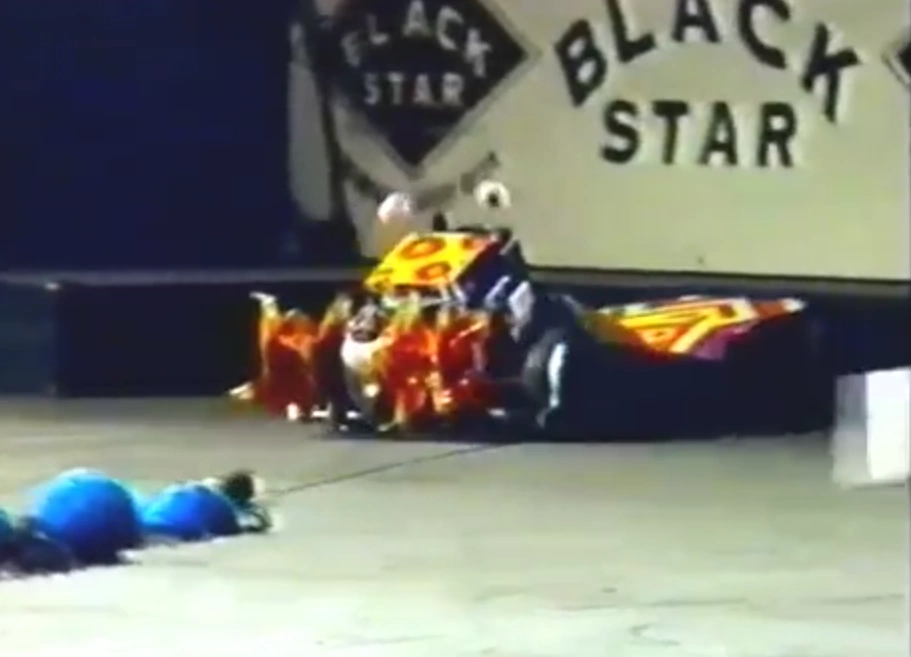
BioHazard is attacked one final time by La Machine
The Master, which was weaponless, was bulldozed by La Machine, but remain mobile. After all the other opponents were defeated, La Machine - after spinning in victory - smashed into BioHazard one final time, toppling BioHazard onto its wheels again.
- "With the victory spin outta the way, La Machine gives BioHazard a health check just to show who's boss!"
- — Paul Vallis
Winner: La Machine
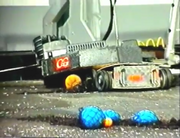
Featherweight Melee
The Featherweight melee consisted of six featherweight robots Red 2, Triple Redundancy, Spiny Norman, Arsenic, X2 and Snickers.
- "It doesn't take long for Triple Redundancy to tape things up. It splits three ways and causing chaos."
- — Paul Vallis on the beginning of the fight

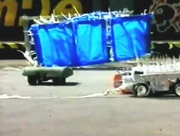
Spiny Norman is caught by Triple Redundancy's tape

Arsenic attempts to lift Red 2
The battle began with the clusterbot Triple Redundancy splitting apart with tape attached to all three robots while the large but lightweight Snickers was immobile from the start. Triple Redundancy swarmed the arena catching Arsenic and Spiny Norman at some points while X2 sped around the arena attacking Red 2. Red 2 and X2 attacked Spiny Norman, dislodging one of the front wheels and pushing Spiny Norman onto some of the tape - which became wrapped around its wheels. Red 2 was eventually cornered from all sides by Triple Redundancy before Arsenic slammed into the back of Red 2 attempting to lift it up as it was clear that Red 2 had lost all mobility from the tape. Arsenic backed away but was chase relentlessly by Triple Redundancy. It is unknown what happened throughout the rest of the battle but X2 managed to dodge and weave through the chaotic clusterbots. Triple Redundancy then began to catch itself up in its own tape, and X2 pushed through to clinch victory.
A consequence of the melee was that tape would be banned from future competitions.
Winner: X2
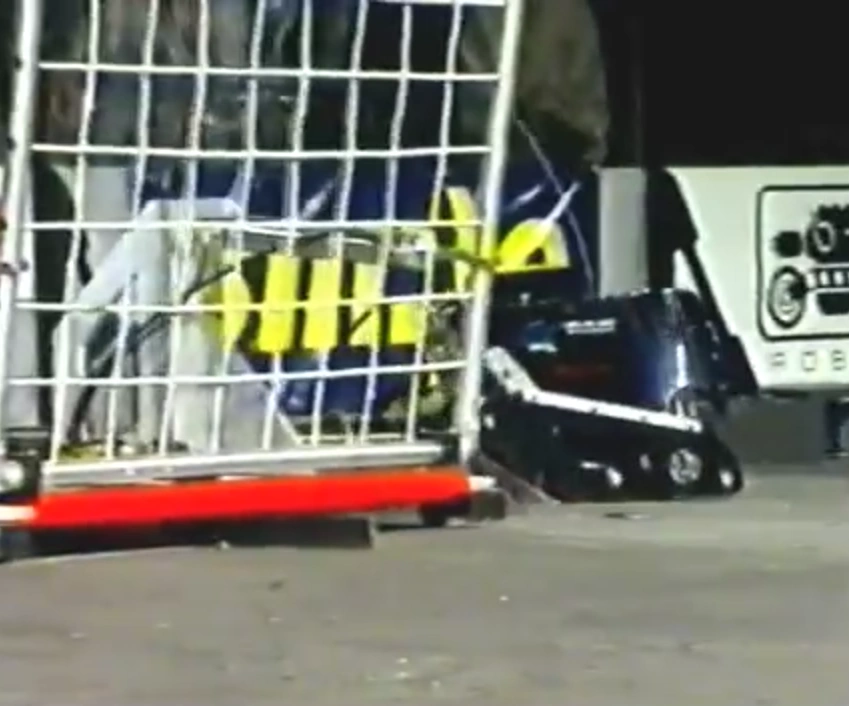
Lightweight Melee
The lightweight melee consisted of seven robots: joke entry Lorena, Attiller (the Hun), Bite Me, Happy Fun Bot, SPS3, The Enforcer and Flipper.
- "Attiller the Hun got into a bad start, it got locked into Bite Me, while Happy Fun Bot again got caught in SPS3's nets."
- — Paul Vallis on the start of the melee

Attiller becomes stuck on Bite Me

The Enforcer attempts to attack Lorena
The start of the melee was ponderous for most of the machines. Bite Me was the first to fall as it had some drive problems which caused it to drive into side wall and stop. Attiller, which was the most feared robot in the melee, spun up to speed and attempted to batter Bite Me into submission but became stuck upon impact. Happy Fun Bot targeted SPS3 and used the chainsaw nose to attack the exposed wheels of SPS3 but the snagging nets got caught up in the chainsaw of Happy Fun Bot - immobilising any method of offence. The Enforcer and Flipper then performed a pincer movement on Lorena. It successfully dodged out the way, only to be hit by the mousetrap. The attempted attack on Lorena had caused problems for The Enforcer which backed away and was immobile. Lorena was then almost flipped by Flipper but survived, before being attacked by the mousetrap once again. Thankfully for Lorena though, Flipper was immobile on one side, which meant that once Lorena managed to escape it became the surprise winner of the melee.
Winner: Lorena
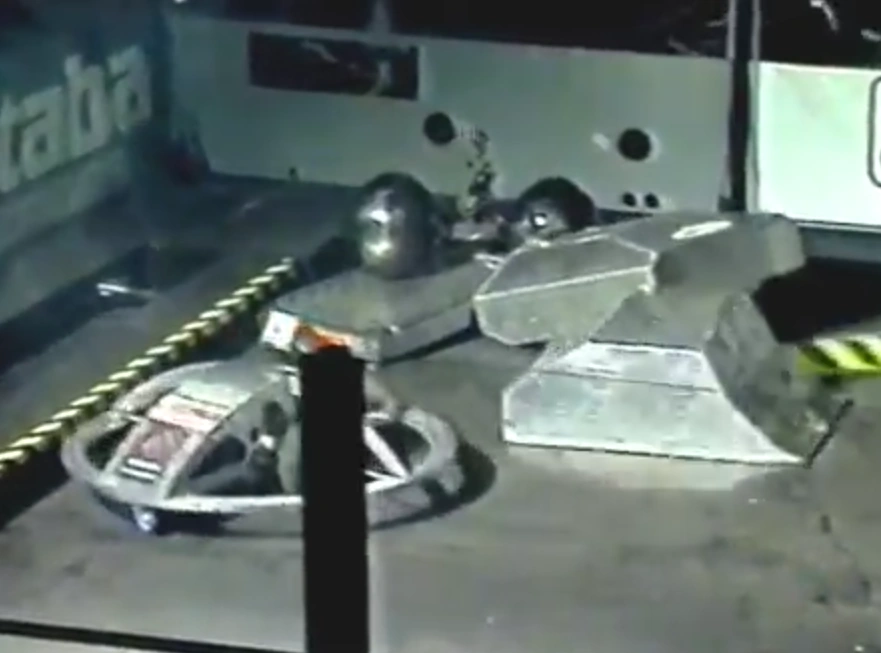
Heavyweight Melee Final
- "The Master is back with a new weapon. A blade!"
- — Paul Vallis on The Master as the beginning of the rumble goes underway

South Bay Mauler (middle left) is thwacked by The Master as DooMore, Punjar and Merrimac slam right into it

South Bay Mauler is attacked by Marvin
The Heavyweight melee Final consisted of thirteen different robots: La Machine, South Bay Mauler, The Master, DooMore, Tazz, Punjar, Nemesis, Killbborg, Red Scorpion, Merrimac, Namreko, Gut Rip and Marvin. Immediately, The Master charged into South Bay Mauler, getting underneath but failing to topple it. Soon after, a pile up occured in the centre of the arena as The Master rained down blows on South Bay Mauler while DooMore, Punjar and Merrimac all slammed into it too. South Bay Mauler was eventually freed and then hit Marvin with its flail. However, South Bay Mauler's attacks proved ineffective, with its weapon halting upon each impact. In the meantime, La Machine was attacked by Merrimac.

The Master lifts La Machine while Punjar pushes

Punjar attacks the immobile The Master
Later on in the fight, Punjar and The Master teamed up. The Master slipped its blade underneath La Machine before Punjar pushed La Machine against an arena flipper. South Bay Mauler joined in on the group attack against La Machine only to be attacked itself by Nemesis. After attempting to pin La Machine, The Master was attacked by DooMore and became trapped. Once DooMore was freed, The Master lost all mobility and was attacked by La Machine and Punjar. La Machine then drove off of the flipper and attacked DooMore by getting underneath it. Merrimac attempted to flip South Bay Mauler, but it was quickly intercepted by La Machine which got underneath and slammed it out of the way. La Machine then turned its attention to South Bay Mauler ramming it against a side wall multiple times. Although South Bay Mauler's weapon was still spinning, it had lost mobility - which allowed Punjar to use its own flail on South Bay Mauler. South Bay Mauler remained immobile with its weapon spinning, hitting any opponent that went too near it. Eventually, it came down to an audience cheer for the remaining mobile machines, with La Machine getting the victory.
Winner: La Machine
| ||||||||||||||||||||||||||