- "Y'know, there’s many unexplained phenomena in the World. Like poltergeists; they’re the ones who throw crockery across the room. In fact, I think I married one! Or there’s the Bermuda triangle, the only place you can wear big brightly coloured shorts and not look like an idiot. But, most bizarre of all is Robot Wars. Why do so many people tune in to watch six remote controlled wheely things senselessly bash each other out? Maybe because it’s bloomin’ good fun! "
- — Craig Charles' introduction
Heat O of Robot Wars: The Fourth Wars was the fifteenth of sixteen heats which determined the semi-finalists of Robot Wars: The Fourth Wars. The episode featuring Heat O was originally broadcast on January 19, 2001 on BBC Two. The broadcast managed to attract 4.9 million viewers, an increase of 120,000 viewers when compared with the previous episode. According to BARB, this meant it ranked first in the top thirty highest rated BBC 2 broadcasts during 15-21 January 2001.
Competing Robots
Newcomers
 | ||
|---|---|---|
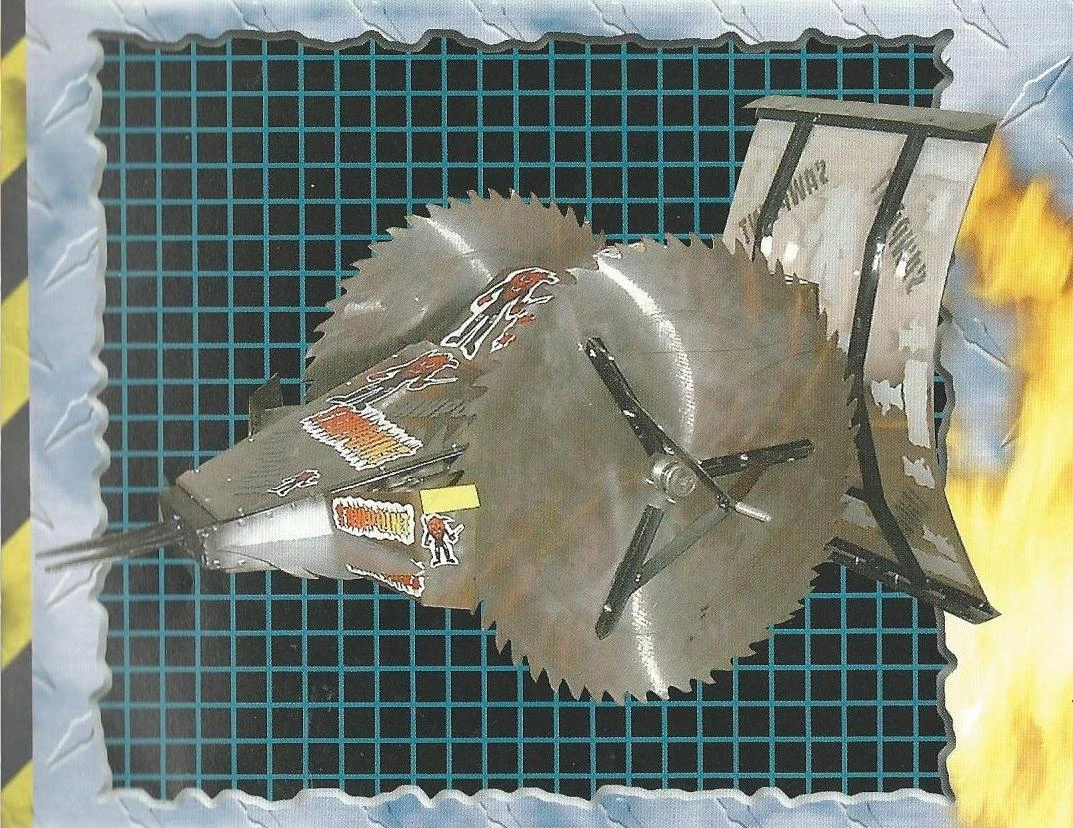
| Saw Point | ||
| Weight | 79.3kg | |
| Dimensions | 0.60 x 1.20 x 0.45m | |
| Clearance | 0.01m | |
| Power | Wheelchair motors | |
| Weapons | Ramming spike and saw blades | |
| Notes | Prototype made from Meccano | |
| From: Burnham-on-Crouch in Essex | ||
| Team Members: Stephen Thomas & Damian Smith | ||
Veterans
 | ||
|---|---|---|
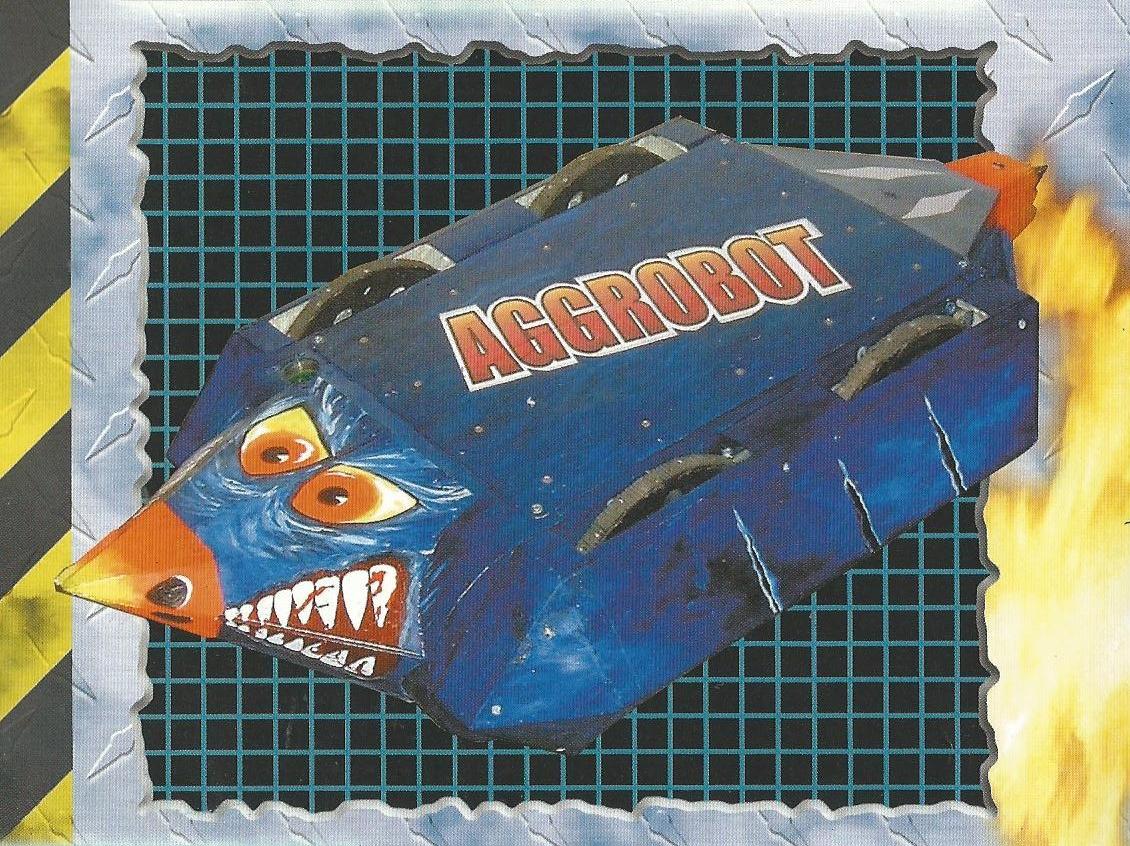
| Aggrobot 2 (seeded 20th) | ||
| Weight | 79.7kg | |
| Dimensions | 0.35 x 1.70 x 0.87m | |
| Clearance | 0.40m | |
| Power | 2 x Wheelchair motors | |
| Weapons | Hydraulic crossbow | |
| Notes | Shell obtained from a skip | |
| From: Dorking | ||
| Team Members: Peter Leach, Bob Leach & John Leach | ||
 | ||
|---|---|---|
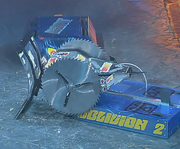
| Oblivion 2 | ||
| Weight | 79.5kg | |
| Dimensions | 0.20 x 1.00 x 0.75m | |
| Clearance | 0.02m | |
| Power | Electric motors | |
| Weapons | Electric axe | |
| Notes | Titanium/polycarbonate shell | |
| From: London | ||
| Team Members: Suren Balendran, Thuvaaragan Balendran & Suppiah Balendran | ||
 | ||
|---|---|---|
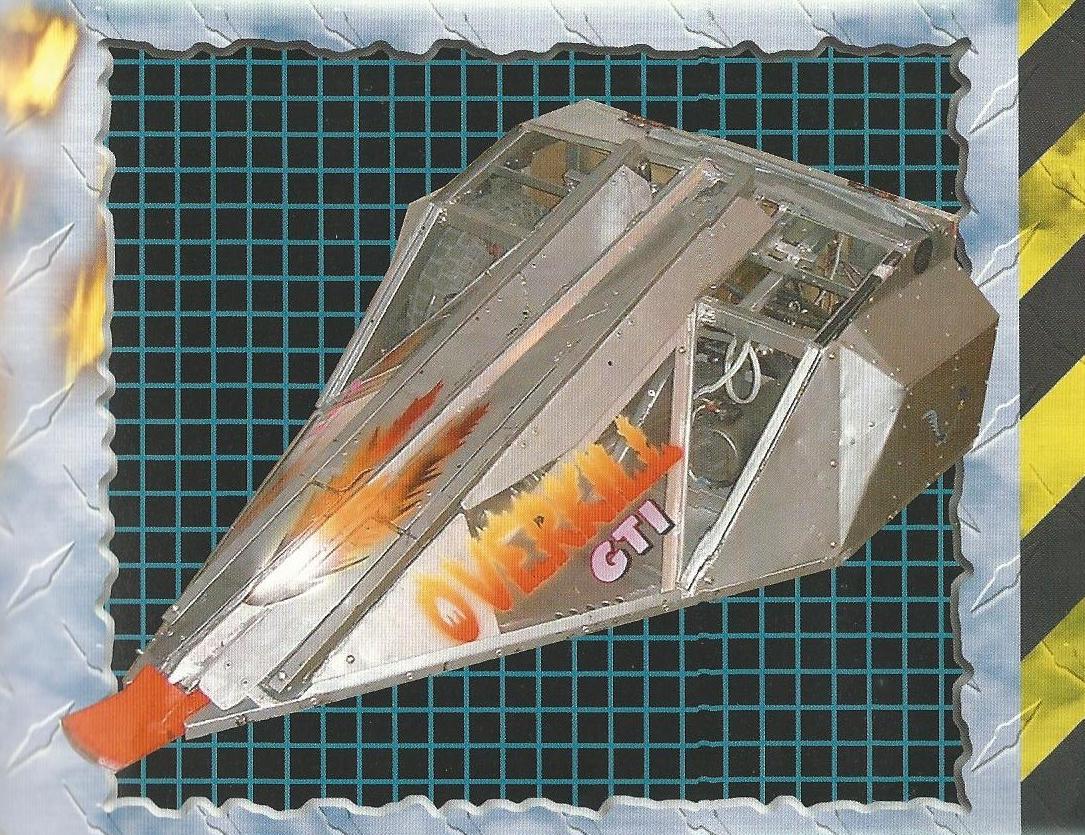
| Overkill GTI | ||
| Weight | 77.8kg | |
| Dimensions | 0.40 x 1.20 x 0.55m | |
| Clearance | Adjustable | |
| Power | 2 x Caravan winch motors | |
| Weapons | 2 Flipper arms | |
| Notes | Motors are fireproofed | |
| From: Weston-super-Mare | ||
| Team Members: Lawrence Burke, Laurie Burke & James Yule | ||
 | ||
|---|---|---|
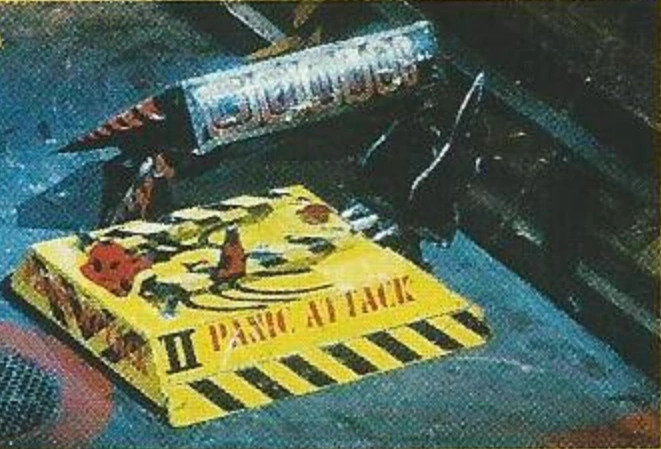
| Panic Attack (seeded 4th) | ||
| Weight | 80.6kg | |
| Dimensions | 0.16 x 1.00 x 0.70m | |
| Clearance | 0.01m | |
| Power | 2 x Windscreen wiper motors | |
| Weapons | Electric lifting forks | |
| Notes | Shell is bullet proof | |
| From: Cwmbran | ||
| Team Members: Kim Davies, Michael Davies & Christian Bridge | ||
 | ||
|---|---|---|
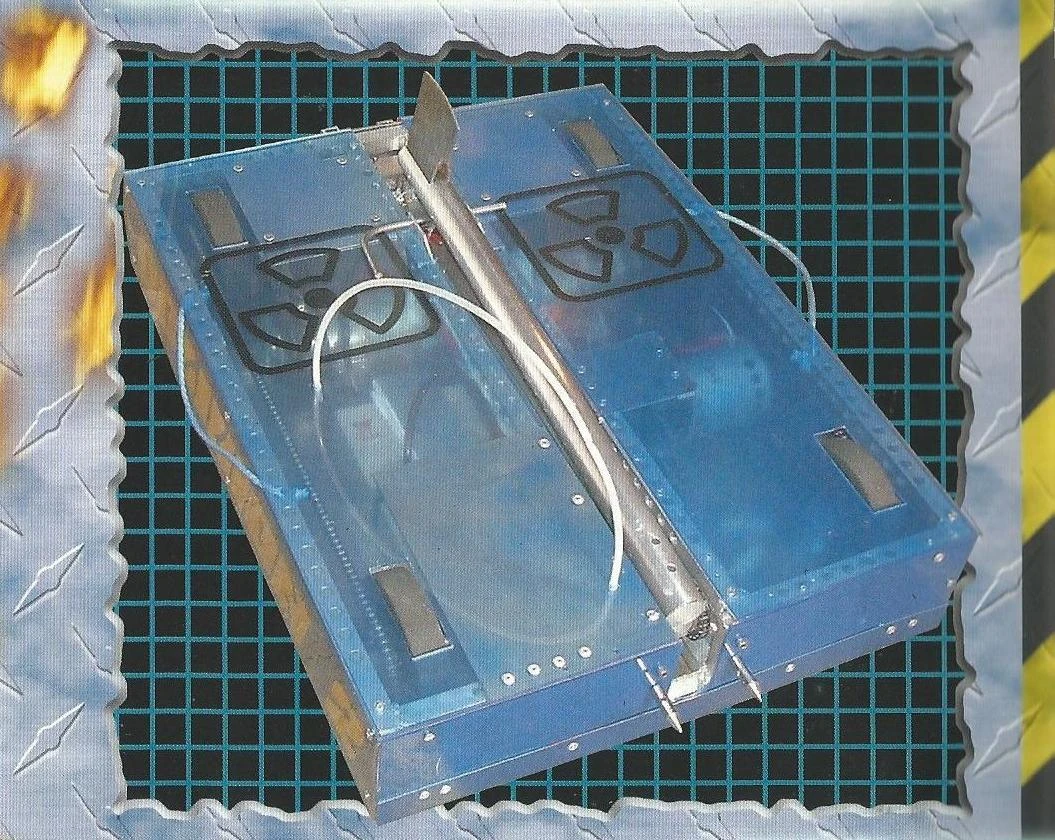
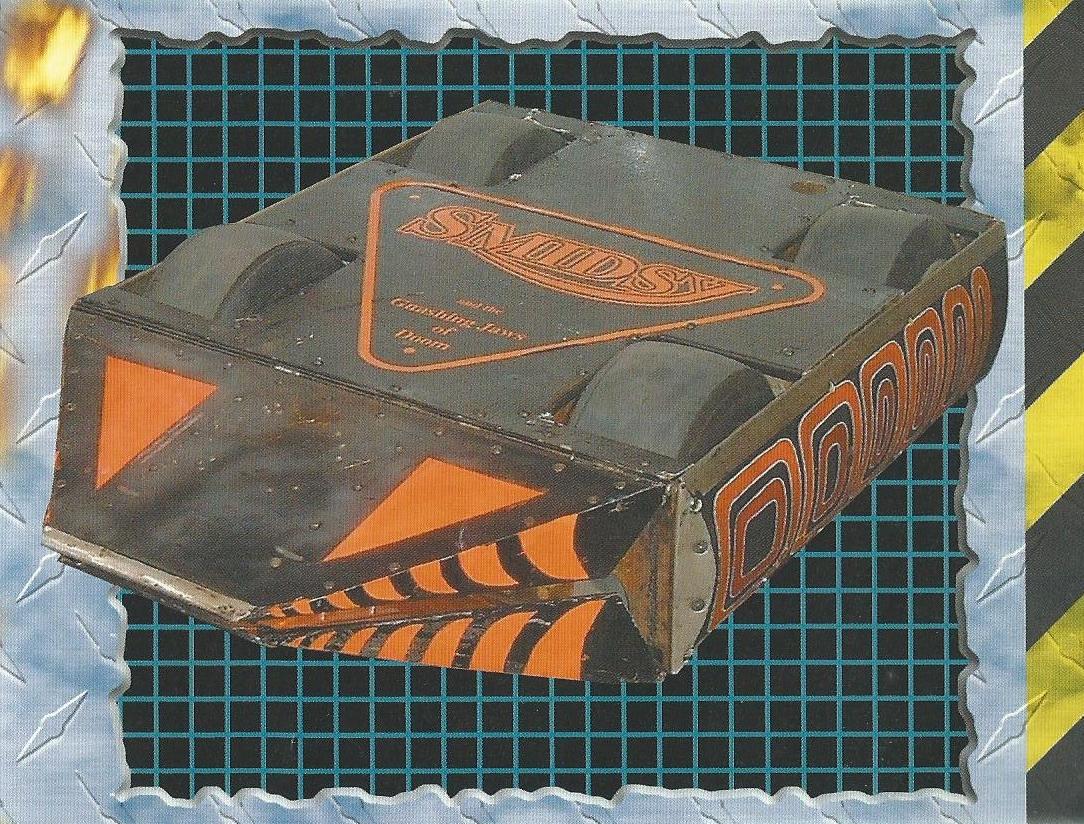
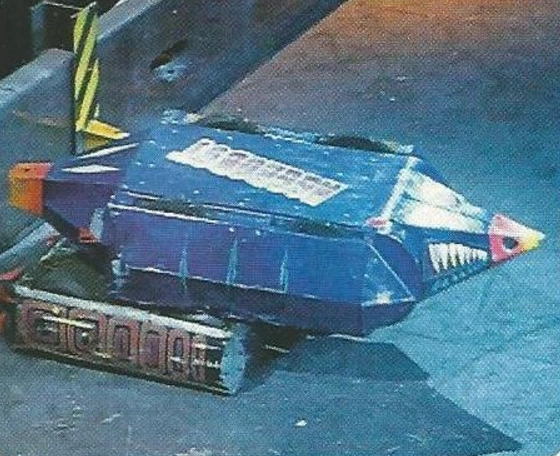
| S.M.I.D.S.Y. | ||
| Weight | 78kg | |
| Dimensions | 0.30 x 1.20 x 0.60m | |
| Clearance | 0.02m | |
| Power | 2 x 750Watt industrial motors | |
| Weapons | Spikes and jaws | |
| Notes | Runs upside down | |
| From: Maidstone in Kent | ||
| Team Members: Mik Reed, Robin Bennett & Andy Pugh | ||
Eliminators
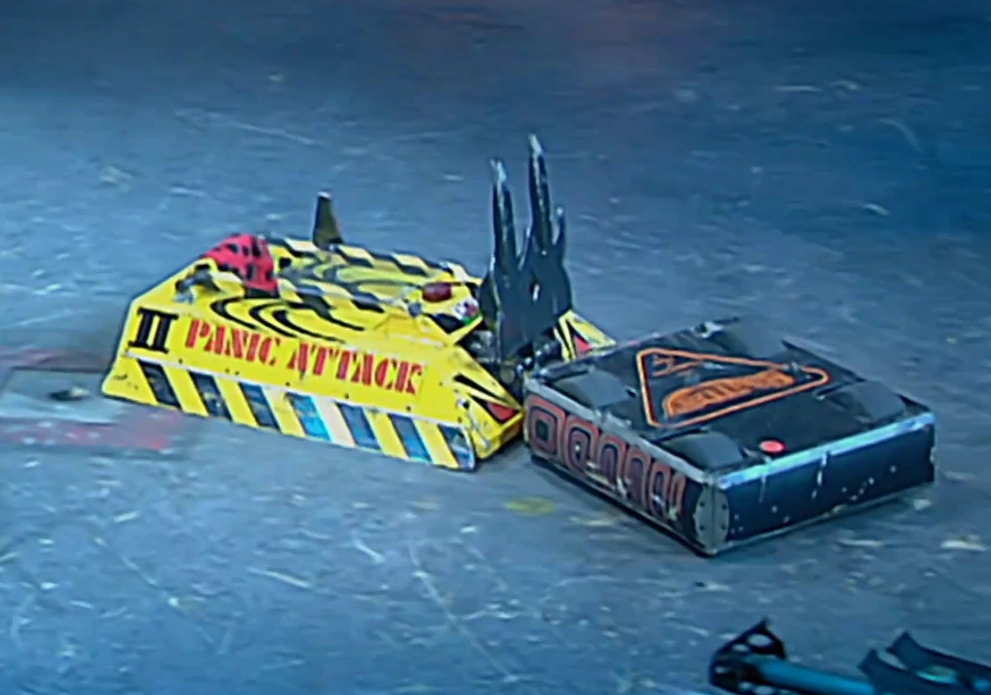
Panic Attack (4) vs Overkill GTI vs S.M.I.D.S.Y.

Overkill GTI uproots part of the arena floor while being pushed by S.M.I.D.S.Y.

Overkill flips S.M.I.D.S.Y.
From the off, both Panic Attack and S.M.I.D.S.Y. moved towards Overkill GTI. S.M.I.D.S.Y. got underneath Overkill GTI's high ground clearance and pushed it over the flame pit, with Overkill GTI tearing up the arena floor in the process with its wedge digging into the floor while being pushed.
- "And look at the damage caused here to the arena floor! A great chunk taken out!"
- — Jonathan Pearce
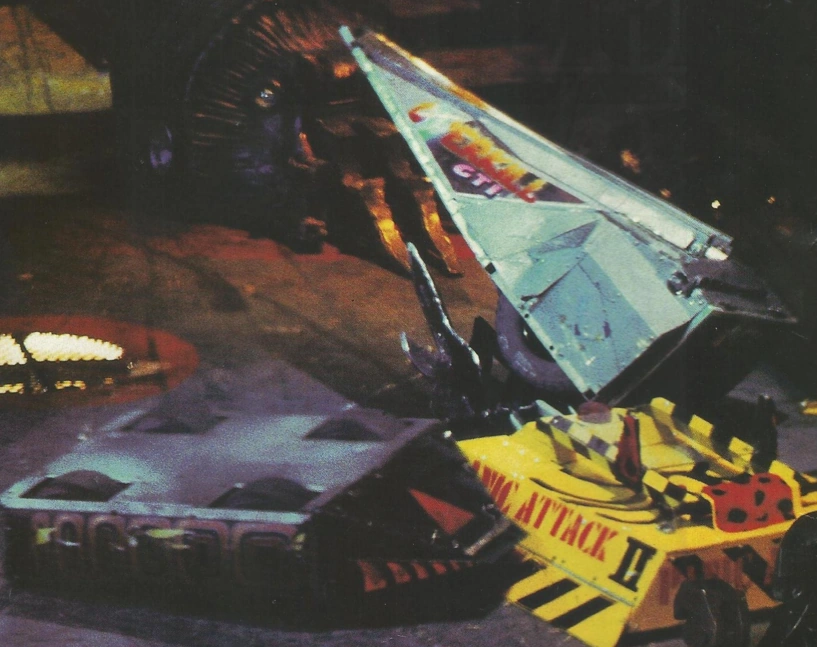
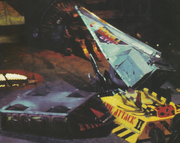
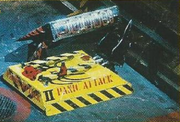
Panic Attack lifts Overkill GTI onto the arena sidewall spike
Overkill GTI lifted by Panic Attack
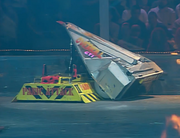
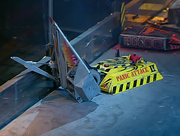
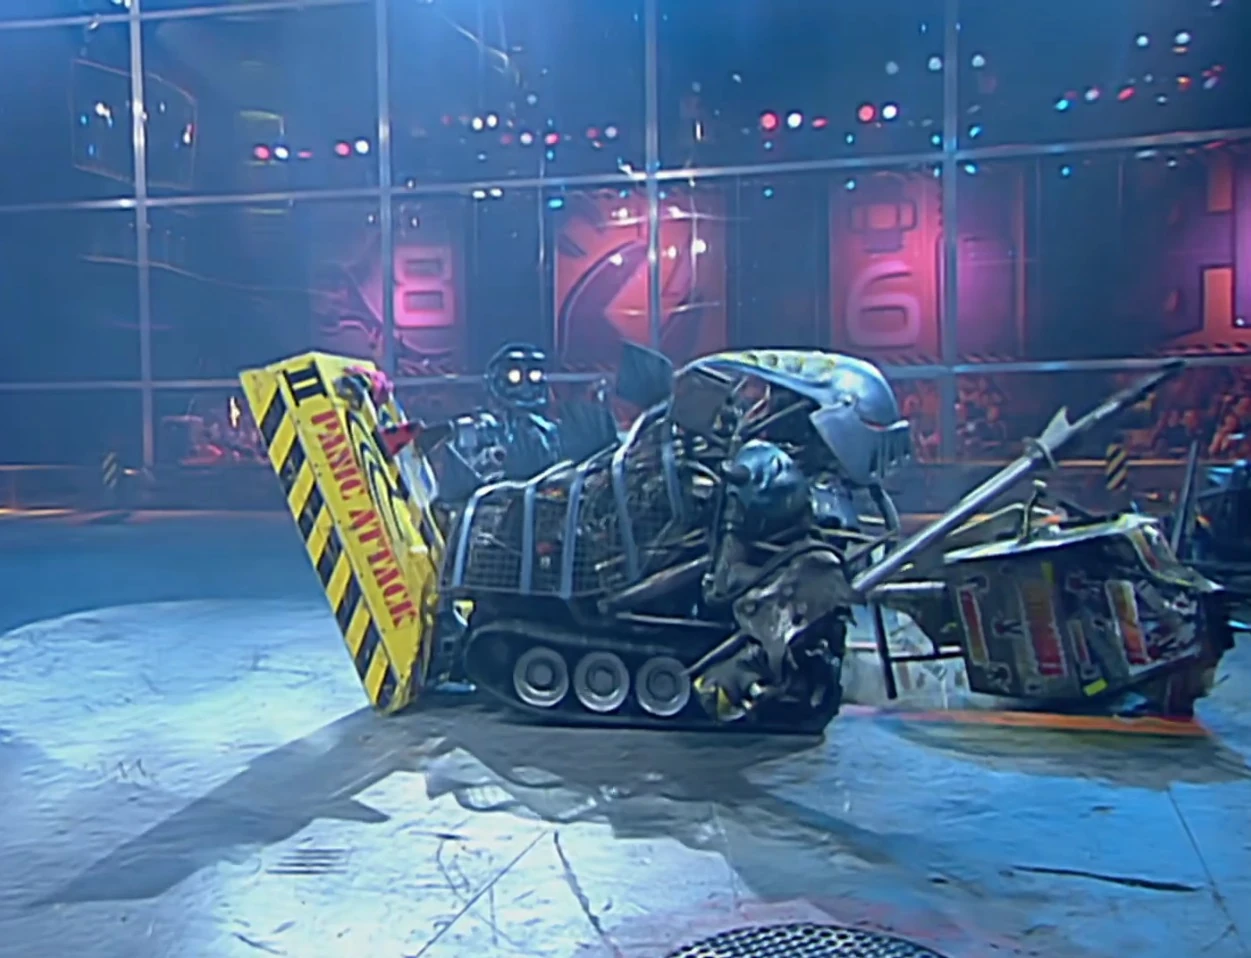
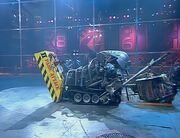
S.M.I.D.S.Y. then charged at the seeded Panic Attack, before it ran up the front of Overkill GTI and was flipped over. Panic Attack got underneath the front of Overkill GTI, and pushed it into an arena wall, before lifting it up and placing it on a wall spike. Panic Attack then took Overkill GTI off the spike and lifted it up by one of Overkill GTI's tyres. Panic Attack continued to carry it until a ram from S.M.I.D.S.Y. caused Panic Attack to drop Overkill GTI. S.M.I.D.S.Y. then drove over the front of Overkill GTI, and it was flipped over again. S.M.I.D.S.Y. pushed Overkill GTI towards the arena side wall, where Panic Attack came in to lift Overkill GTI again - this time balancing it upright against the arena wall. One of Overkill GTI's flipping arms collapsed against the arena side wall, before firing the other arm in an unsuccessful attempt to self-right.
- "Overkill trying to use its srimech on the arena side wall to get away - I'm not too sure they can."
- — Jonathan Pearce

Panic Attack strands Overkill GTI onto its back as S.M.I.D.Y. is attacked by Dead Metal

S.M.I.D.S.Y. rams Overkill GTI into Dead Metal
In the meantime, S.M.I.D.S.Y. had strayed into Dead Metal's CPZ, where sparks flew upon S.M.I.D.S.Y.'s contact with Dead Metal's circular saw. Dead Metal tried to grasp S.M.I.D.S.Y. in its claws, but S.M.I.D.S.Y. was beneath them. Panic Attack lifted the troubled Overkill GTI and it crashed back down onto the arena floor, only for S.M.I.D.S.Y. to reverse into it and push it into Dead Metal's CPZ. Dead Metal grasped Overkill GTI and brought its circular saw onto Overkill GTI's armour, while Panic Attack overturned S.M.I.D.S.Y. next to the arena wall, before it retreated towards the centre of the arena.
- "If you had to pick the most troubled robot of these three, I'd go for Overkill."
- — Jonathan Pearce
Panic Attack pushes against S.M.I.D.S.Y.

S.M.I.D.S.Y. lifts Overkill GTI in the dying seconds of the battle while Panic Attack intercepts
At this point, Overkill GTI looked to have a flat tyre, and was driving at a much lower speed. Panic Attack and S.M.I.D.S.Y. then worked in conjunction, with Panic Attack reversing and S.M.I.D.S.Y. driving forwards, pushing Overkill GTI onto the edge of Sir Killalot's CPZ. While trying to attack Overkill GTI, S.M.I.D.S.Y. strayed into Sir Killalot's CPZ, but it was able to escape, only for Panic Attack to ram it into an arena spike. Panic Attack reversed into Overkill GTI once again, pushing it into an arena wall, before a pushing match between Panic Attack and S.M.I.D.S.Y. occurred.
- "Panic Attack - little bit of a tug of war with S.M.I.D.S.Y."
- — Jonathan Pearce
Panic Attack then pushed S.M.I.D.S.Y. all the way across the arena, near to Sergeant Bash's CPZ. In the closing seconds of the battle, both S.M.I.D.S.Y. and Panic Attack took turns at raising Overkill GTI. The battle ended with S.M.I.D.S.Y. holding Overkill GTI up.
- "And it goes to the judges - very close for all three teams."
- — Jonathan Pearce
The Judges put Panic Attack and S.M.I.D.S.Y. through to the next round.
Qualified: Panic Attack & S.M.I.D.S.Y.
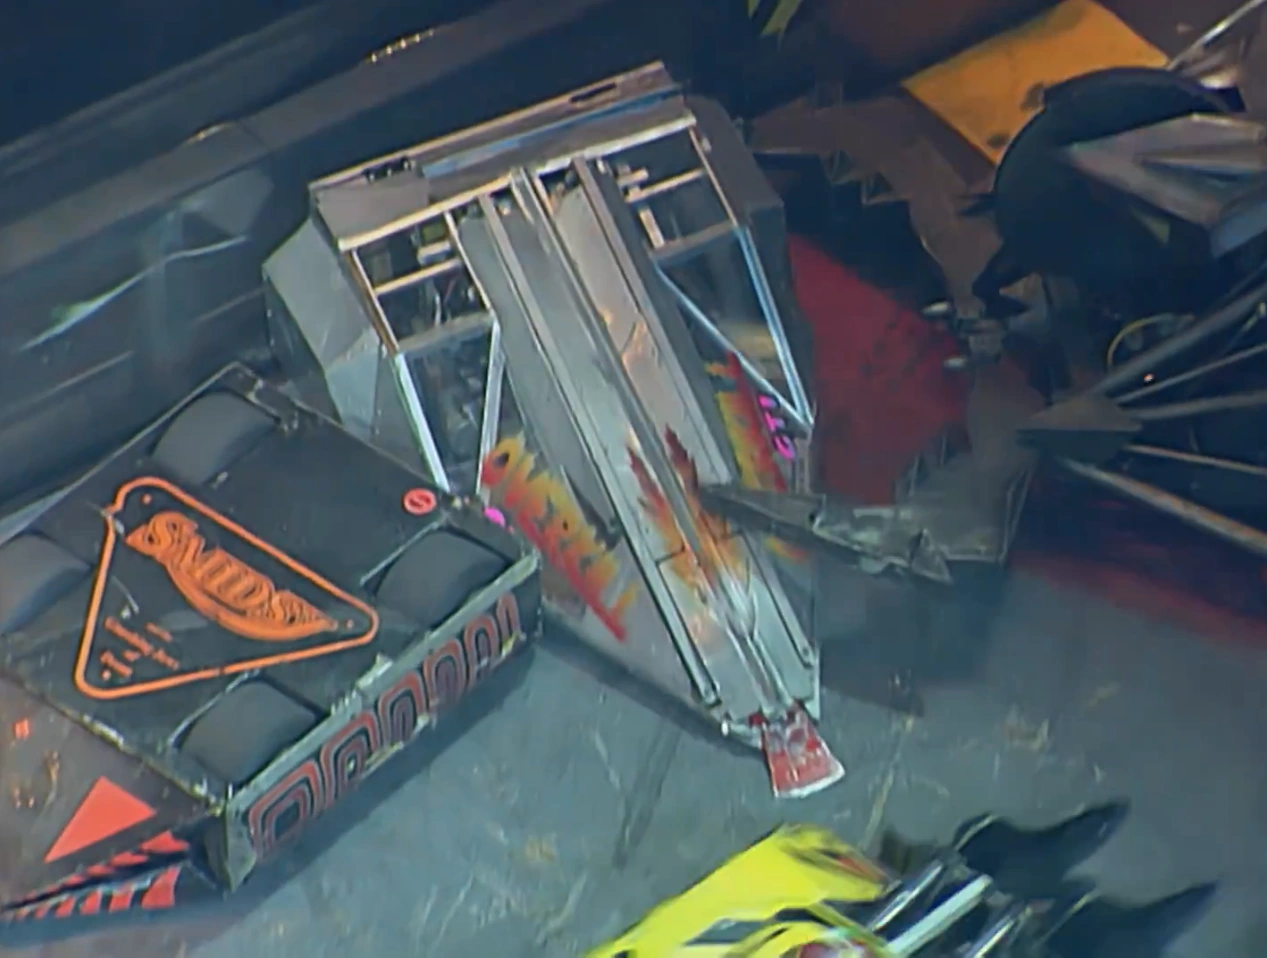
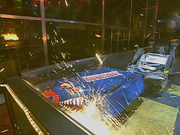
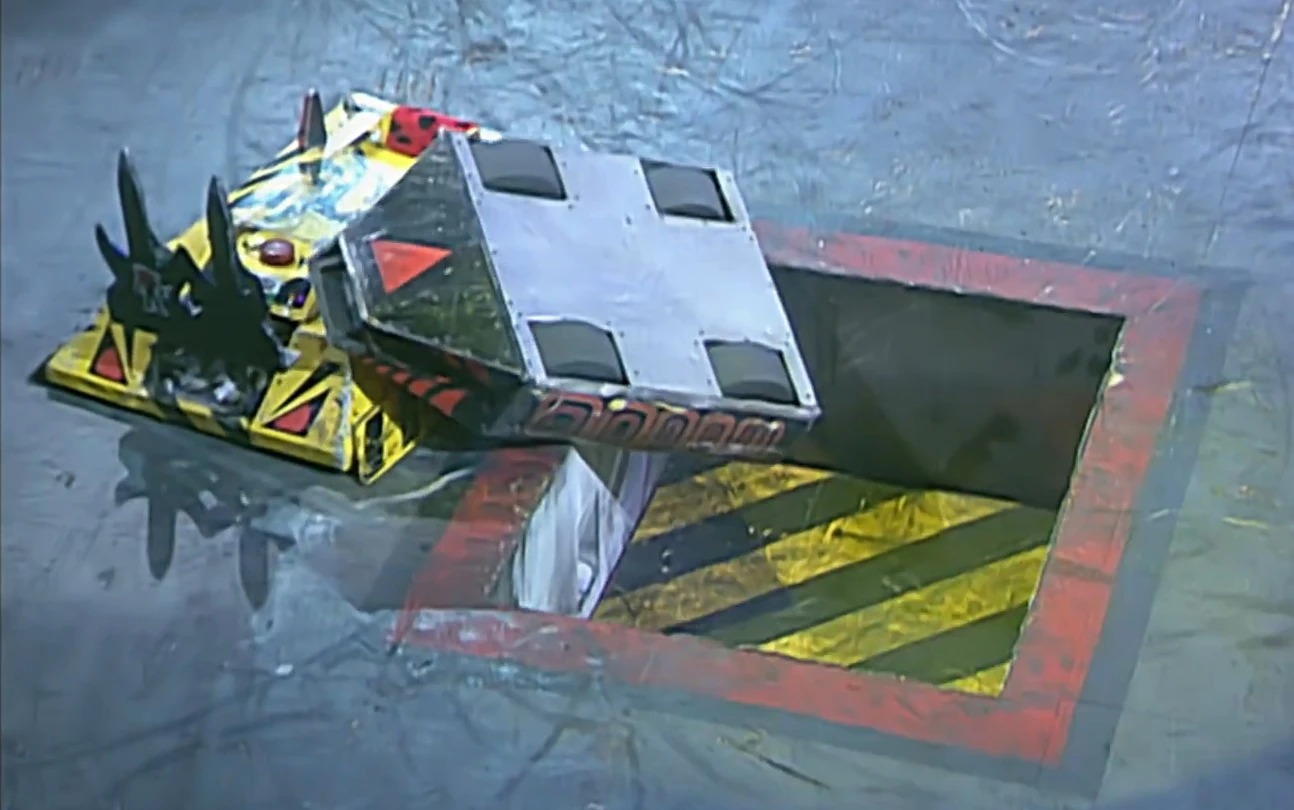
Aggrobot 2 (20) vs Oblivion 2 vs Saw Point

Saw Point drives over Oblivion 2
Sir Killalot removes Matilda's wheel
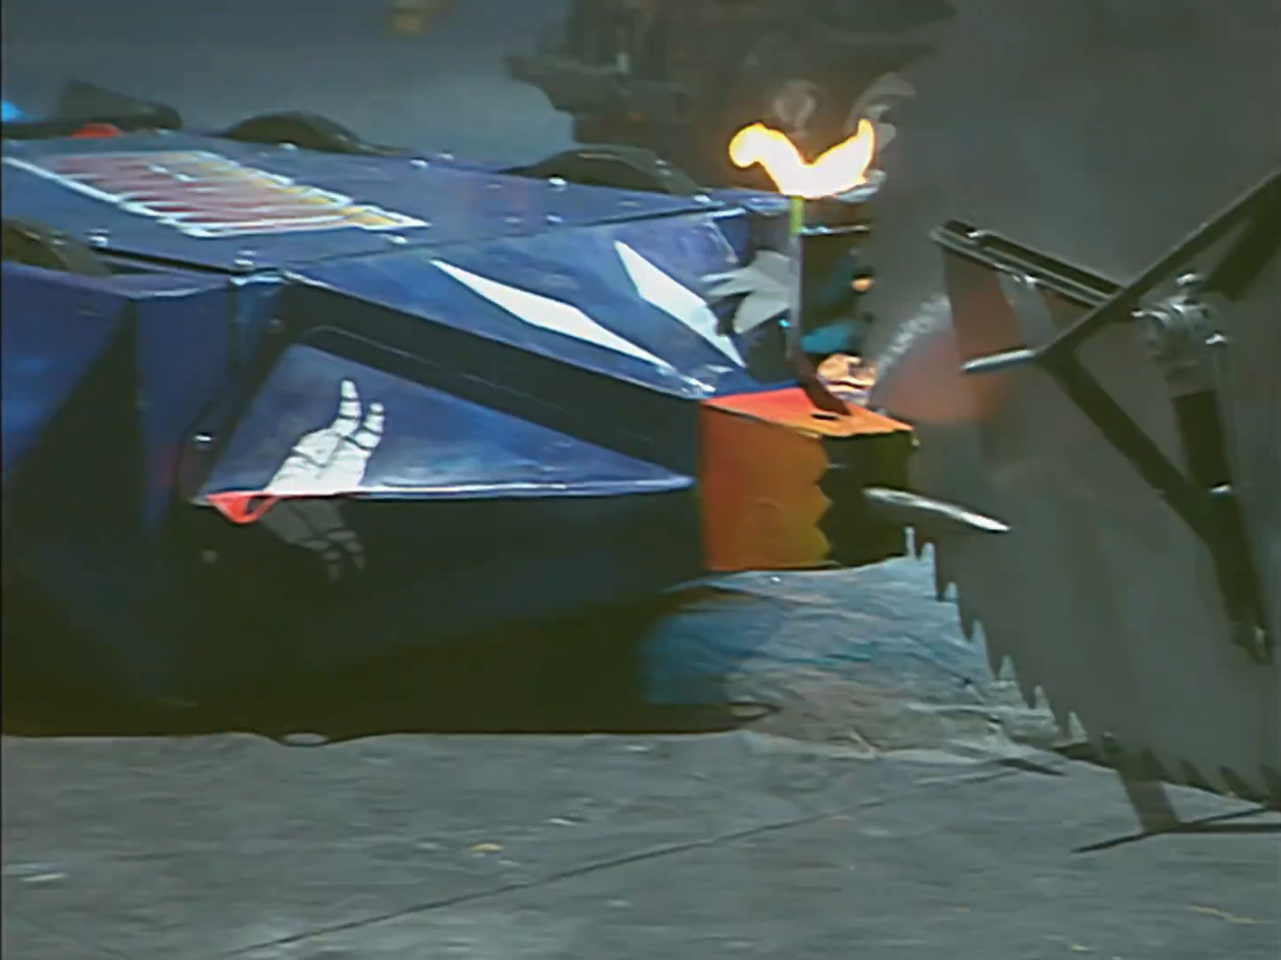
Oblivion 2 made the first move by driving into and under Saw Point. Oblivion 2 tried to use its axe, but it could not fire due to Saw Point being on top of it. Aggrobot 2 drove into the side of Saw Point, placing it on its side, where it could do nothing but spin on the spot.
- "Saw Point - what are they doing on those blades? They're all over the place!"
- — Jonathan Pearce as Saw Point spins on one of its wheels
However, by this point, Oblivion 2 had already stopped moving after having Saw Point run over it, and was only firing its axe to show signs of life. Sergeant Bash flickered its flamethrower at Oblivion 2, while the now righted Saw Point drove over the corner of it. Oblivion 2's axe was on the arena floor, so Saw Point drove over the top of it. Aggrobot 2 pushed Saw Point into Dead Metal's CPZ, where Dead Metal made contact with Saw Point's wheel with its circular saw, sending a few sparks flying.

Aggrobot attempts to stab Saw Point

Saw Point rams Aggrobot into the angle grinder
- "Oblivion 2 seems to be immobilised right from the start, here. The Balendran team - Suren and Thuvaaragan, and Suppiah, their Dad - a business stationer, and they're rather stationary, aren't they, Oblivion."
- — Jonathan Pearce
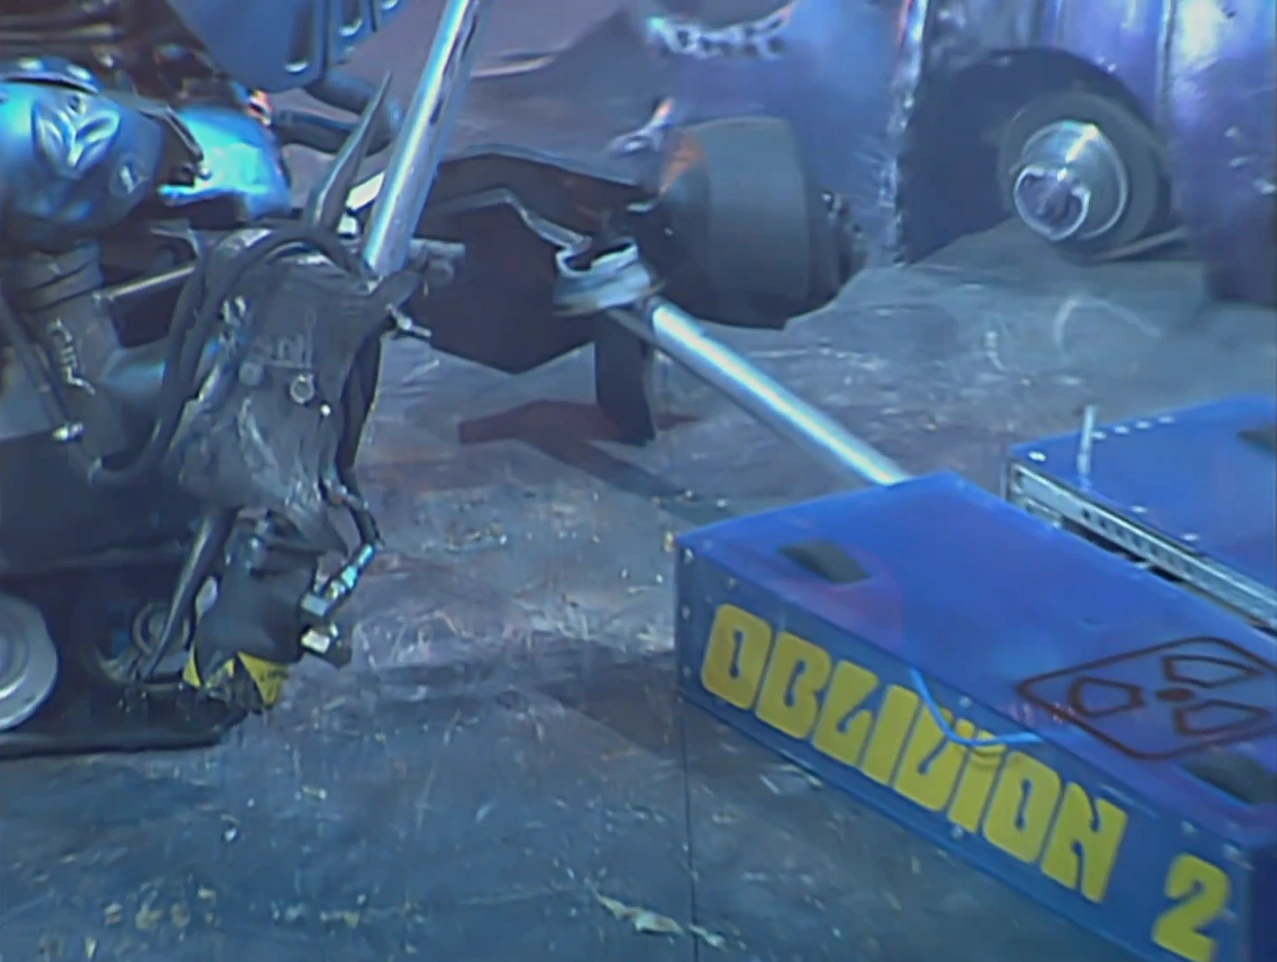
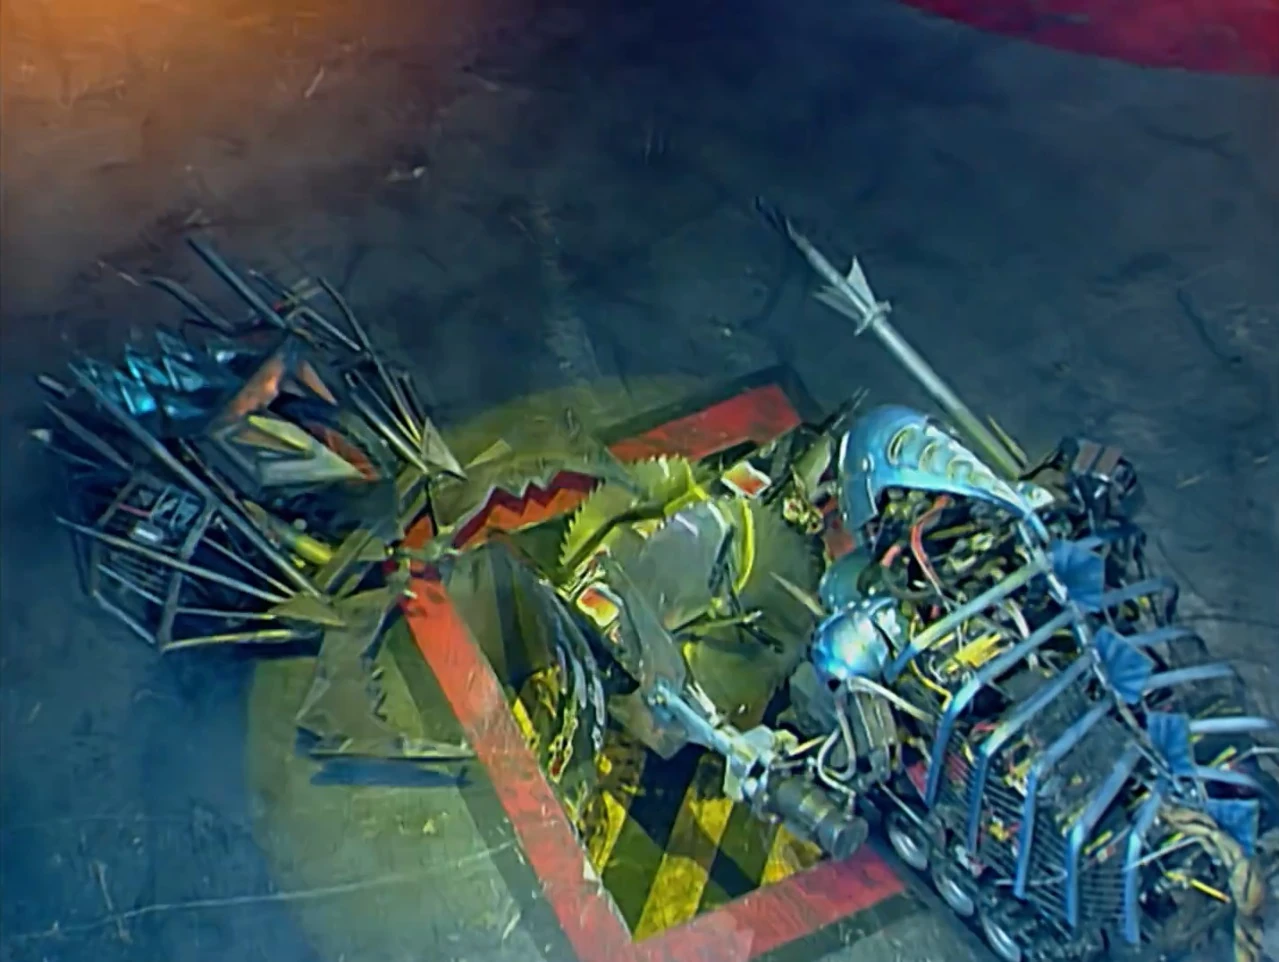
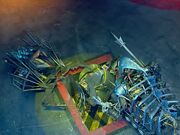
Aggrobot 2 and Saw Point continued to attack each other while the house robots closed in on Oblivion 2. Matilda used her chainsaw to damage Oblivion 2, possibly trying to cut its aerial off, but Sir Killalot grabbed hold of Matilda's left wheel, and pulled the tyre clean off. While Saw Point and Aggrobot 2 continued to duel, Sir Killalot attempted to cut Oblivion 2's axe off using its Jaws of Life, but it only managed to flatten part of it. Sir Killalot then held Oblivion 2 aloft, and spun on the spot before throwing Oblivion 2 towards the flame pit.
- "Killalot has it at its mercy; flings, it discards it across the arena floor."
- — Jonathan Pearce as Sir Killalot toys with Oblivion 2


Oblivion 2 is pitted

Saw Point pressures Aggrobot
The pit began to descend while Dead Metal grabbed Oblivion 2 and cut through its armour using its circular saw. Saw Point pushed Aggrobot 2 into an empty CPZ, against a spark jet. Sergeant Bash had grabbed the axe of Oblivion 2 using its pincers, which held it over a flame jet, and then towards the pit in conjunction with Dead Metal. As Aggrobot 2 pushed back on Saw Point, Matilda nudged Oblivion 2 closer to the pit, still only mobile on one wheel. Aggrobot 2 raised its lifting head up and down to celebrate while Sergeant Bash and Sir Killalot finally put Oblivion 2 in the pit.
- "There's the axe of Oblivion 2 which never came into play and they are sent to oblivion, too."
- — Jonathan Pearce
The post battle interview revealed that when Saw Point drove over Oblivion 2, it bent the chassis down, negating its famed low ground clearance, and immobilising it.
Qualified: Aggrobot 2 & Saw Point
Semi-Finals
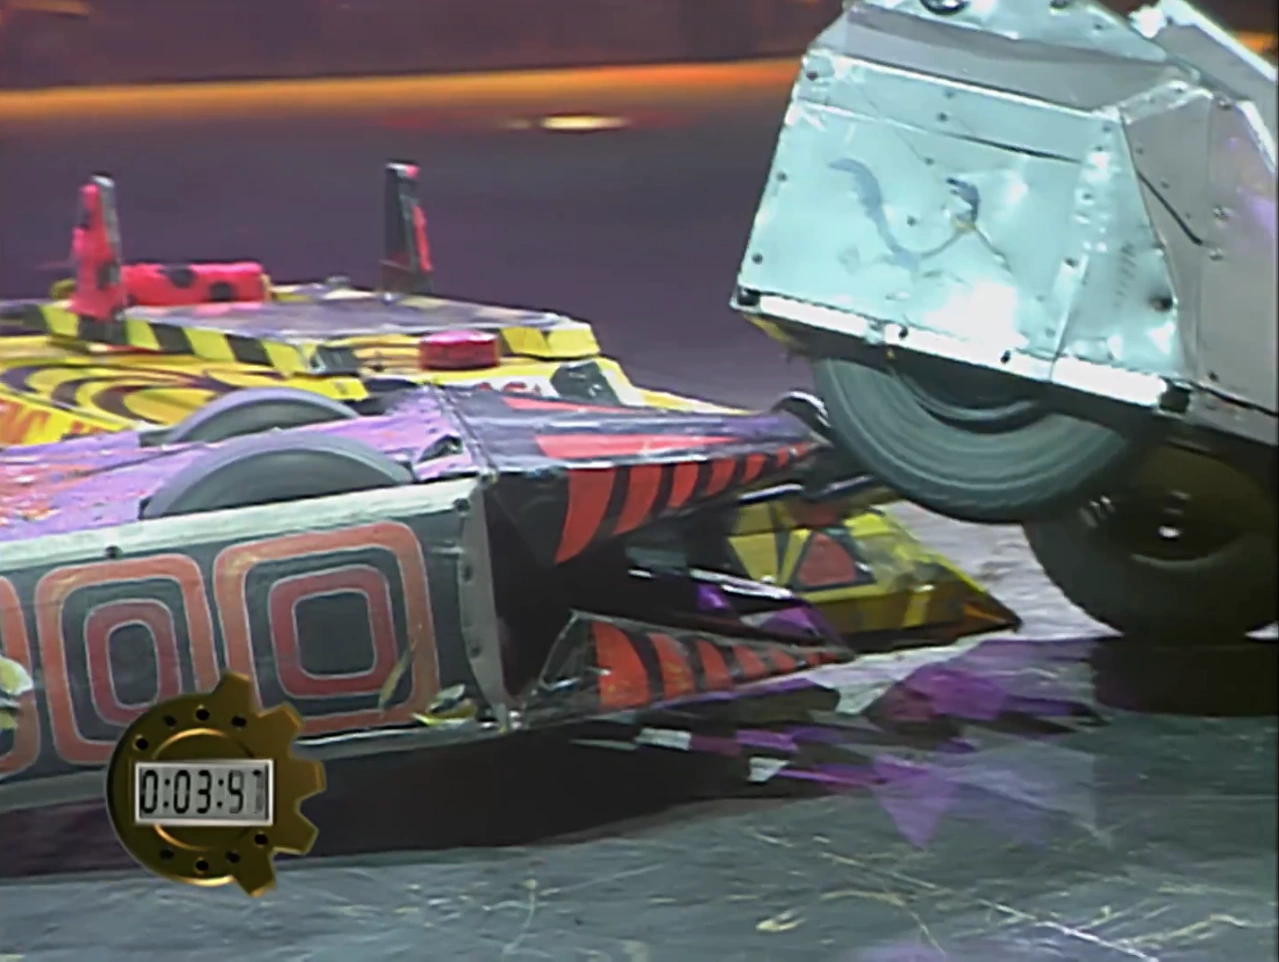
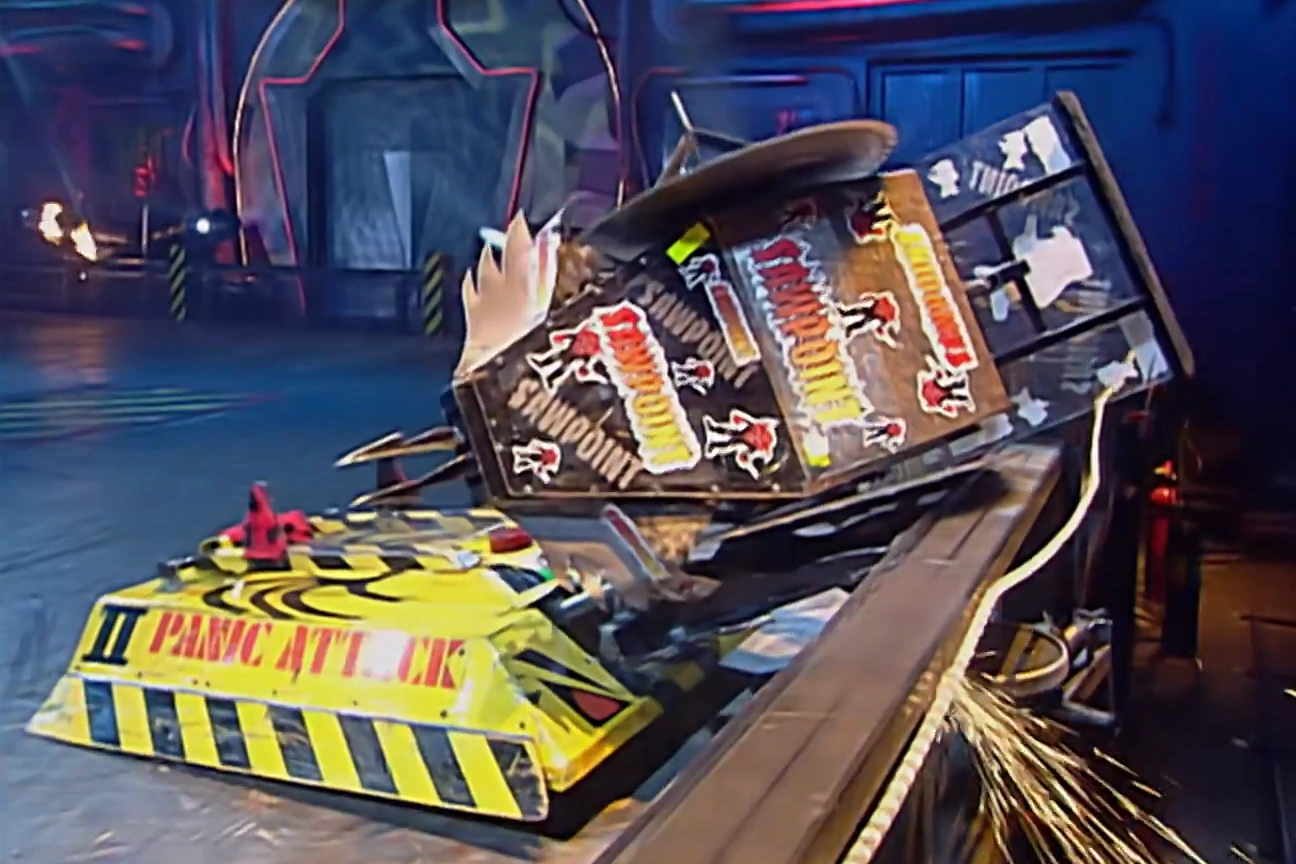
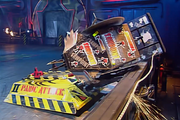
Panic Attack (4) vs Saw Point
At the start of the match, both robots slowly drove towards each other, making contact, allowing Panic Attack to get its lifting forks underneath Saw Point. In the first attack, Panic Attack's rear end started to lift off the ground as it raised Saw Point. Saw Point backed away once it was released. Panic Attack caught up to Saw Point again, and this time managed to lift Saw Point onto its side, where Saw Point was unable to right itself.
Panic Attack comes close to lifting Saw Point out of the arena.
Panic Attack rushed at Saw Point, getting its lifting forks hooked around Saw Point's protruding spike on the side of its wheel. Holding Saw Point aloft, Panic Attack brought Saw Point to the arena wall, where it then tried to force Saw Point out of the arena.
- "Sawpoint - up, up, heave-ho, here we go, weep and woe, for Saw Point, surely."
- — Jonathan Pearce
Unable to fully force Saw Point out of bounds, Kim Davies was eventually forced to make Panic Attack retreat. Panic Attack paraded Saw Point around the arena, even colliding with Sergeant Bash, which was mysteriously out of its CPZ. After rotating itself, Saw Point was able to land on the arena floor, but only for Panic Attack to lift it again.
- "Panic Attack, very much under control here. They've glued themselves onto Saw Point; they will not let go now."
- — Jonathan Pearce
Panic Attack slammed Saw Point into the arena wall, before leaving it on a gas-exerting grid in front of Shunt's CPZ, after which Shunt axed Saw Point's wheels. Panic Attack swept underneath Saw Point again, but Shunt brought it away by dragging Saw Point's scoop with its axe. The spike on Saw Point's wheel had slipped through the gas grid, causing it to become stuck there. Panic Attack was able to lift it out, while Shunt removed the grid itself from the floor. Panic Attack, after a long while, eventually knocked Saw Point back onto its wheels, but Saw Point was immobile. Panic Attack lifted Saw Point and pushed it into the centre of the arena, where Sir Killalot could hold Saw Point in place for Dead Metal to use its circular saw to attack Saw Point's wheel, with Sir Killalot raising Saw Point from the ground in the process.
- "Dead Metal on the right and Killalot on the left, and Saw Point being tugged and twisted between the two."
- — Jonathan Pearce
Panic Attack tries unsuccessfully to lift Sir Killalot.
While Sir Killalot held Saw Point aloft, Panic Attack snuck around the back of Sir Killalot and put its lifting prongs underneath Sir Killalot. Sir Killalot was able to drive towards the pit, holding Saw Point above it, but Panic Attack caught up again, and this time attempted to lift Sir Killalot. Panic Atack raised Sir Killalot slightly, before merely lifting itself off the ground.
- "Panic Attack on the attack on Killalot! And Killalot will remember that, Kim Davies, you can be sure!"
- — Jonathan Pearce
Panic Attack actually raised itself very high, pressing itself against the back of Sir Killalot, but it backed away, allowing Sir Killalot to place Saw Point into the pit.
Saw Point is placed in the pit.
After Saw Point was pitted, Panic Attack got underneath Shunt, and pushed it around the arena, with cease being called while Panic Attack was still holding Shunt aloft. As the winner of the battle, Panic Attack progressed to the Heat Final.
Winner: Panic Attack
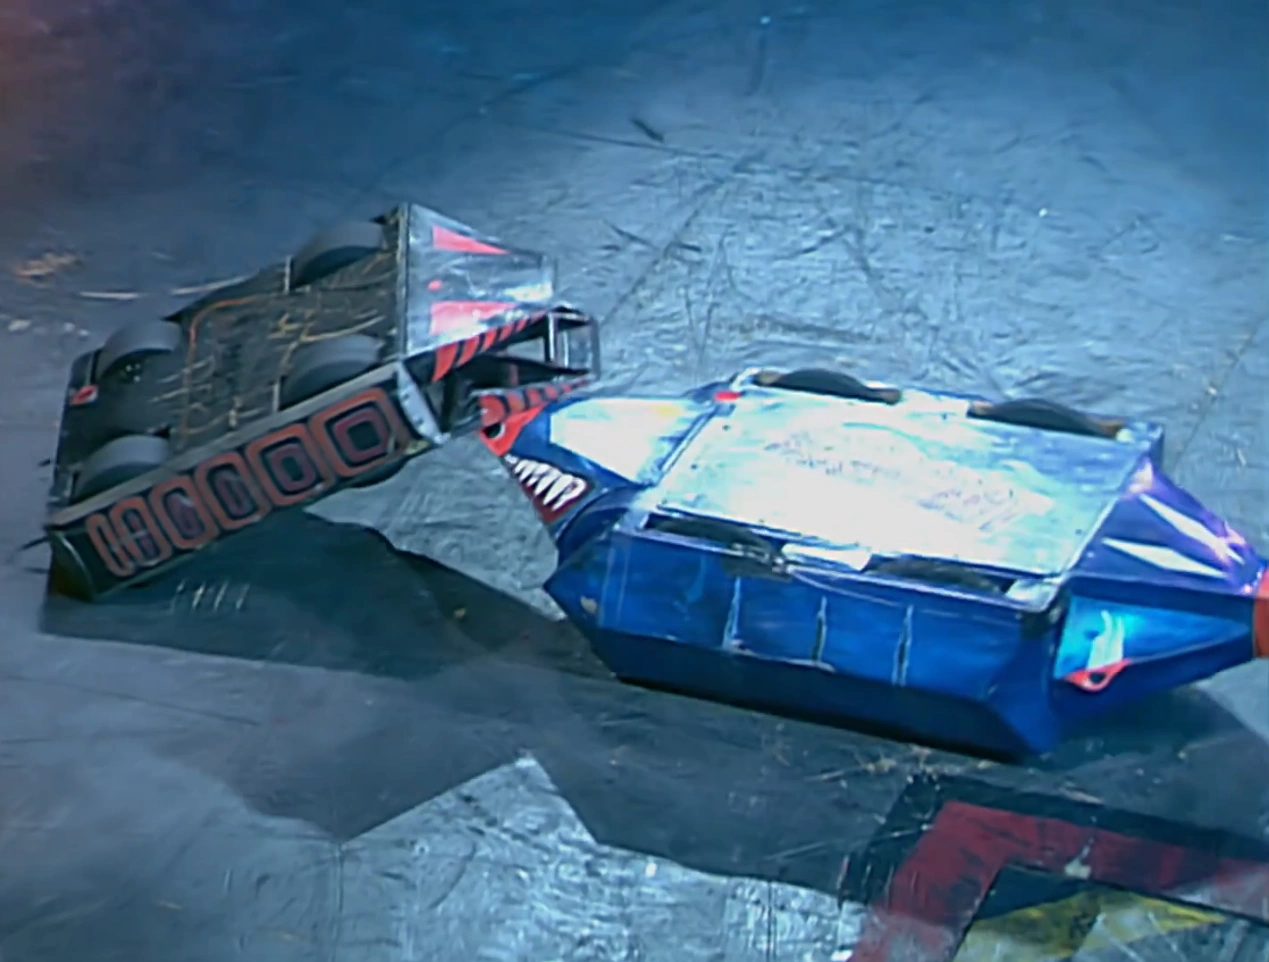
Aggrobot 2 (20) vs S.M.I.D.S.Y.
S.M.I.D.S.Y. started the match by making two attempts to get underneath the seeded Aggrobot 2's sides using its own jaws. With the second attempt, S.M.I.D.S.Y. was able to gradually push Aggrobot 2 towards Shunt, but Aggrobot 2 escaped, while S.M.I.D.S.Y. remained statuesque underneath a flamethrower, where the leather top of S.M.I.D.S.Y. caught fire, before the fire extinguished itself while S.M.I.D.S.Y. pushed Aggrobot 2 back across the arena floor.
- "Ooh, a lick of flame to the top there; burning paint, and graphics - charcoaled effect now on the top of S.M.I.D.S.Y."
- — Jonathan Pearce
S.M.I.D.S.Y. turned around, and got underneath the front of Aggrobot 2, where S.M.I.D.S.Y. was able to push Aggrobot 2 further across the arena. Aggrobot 2 appeared to make evasive measures, while S.M.I.D.S.Y. attempted to attack the sides of Aggrobot 2 again, with little effect until S.M.I.D.S.Y. finally got underneath Aggrobot 2 again, after which, S.M.I.D.S.Y. made another pushing attack.

Aggrobot 2 lifts S.M.I.D.S.Y.
Aggrobot 2 used its lifting head to get underneath the jaws of S.M.I.D.S.Y., but S.M.I.D.S.Y. escaped, before slamming into Aggrobot 2 into the arena wall at high speed.
- "It's S.M.I.D.S.Y. here, doing all the work."
- — Jonathan Pearce
Like S.M.I.D.S.Y. earlier on in the match, Aggrobot 2 remained temporarily statuesque underneath a flamethrower, where Aggrobot 2's wheels were visibly smouldering.
Aggrobot 2 mounts S.M.I.D.S.Y.
S.M.I.D.S.Y. pushed Aggrobot 2 away from the arena side wall and then got underneath Aggrobot 2 with another drive. With Aggrobot 2 now on top of S.M.I.D.S.Y., it was able to shunt Aggrobot 2 towards the flame pit on the other side of the arena.
- "That's good style and control and aggression from S.M.I.D.S.Y. - they're on top should this go to the judges, I'm sure of that."
- — Jonathan Pearce
Aggrobot 2 was now making minimal movement as S.M.I.D.S.Y. nudged it towards Sergeant Bash, who used his pincer to crumple Aggrobot 2.

Aggrobot 2's wheels catch fire.
With yet another slam, S.M.I.D.S.Y. drove Aggrobot 2 across the arena and into the arena wall. Aggrobot 2 was left to smoulder underneath the flamethrowers, where its two front wheels caught fire again. The House Robots then treated Aggrobot 2 as immobile, as Sergeant Bash crumpled Aggrobot 2's armour, while Shunt axed the top of it. Sir Killalot tore apart Aggrobot 2's armour using his jaws of life. Aggrobot 2 was situated on the floor flipper, but Dead Metal curiously rammed it off.
- "It's tattered and torn. Sliced, diced, no luck with the throw of the dice either, for Aggrobot today."
- — Jonathan Pearce
Sir Killalot picked up Aggrobot 2 once again, span on the spot before tipping over. Cease was called once Sir Killalot held Aggrobot 2 aloft again, and S.M.I.D.S.Y. went through to the heat final.
Winner: S.M.I.D.S.Y.
Final
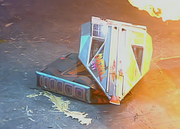
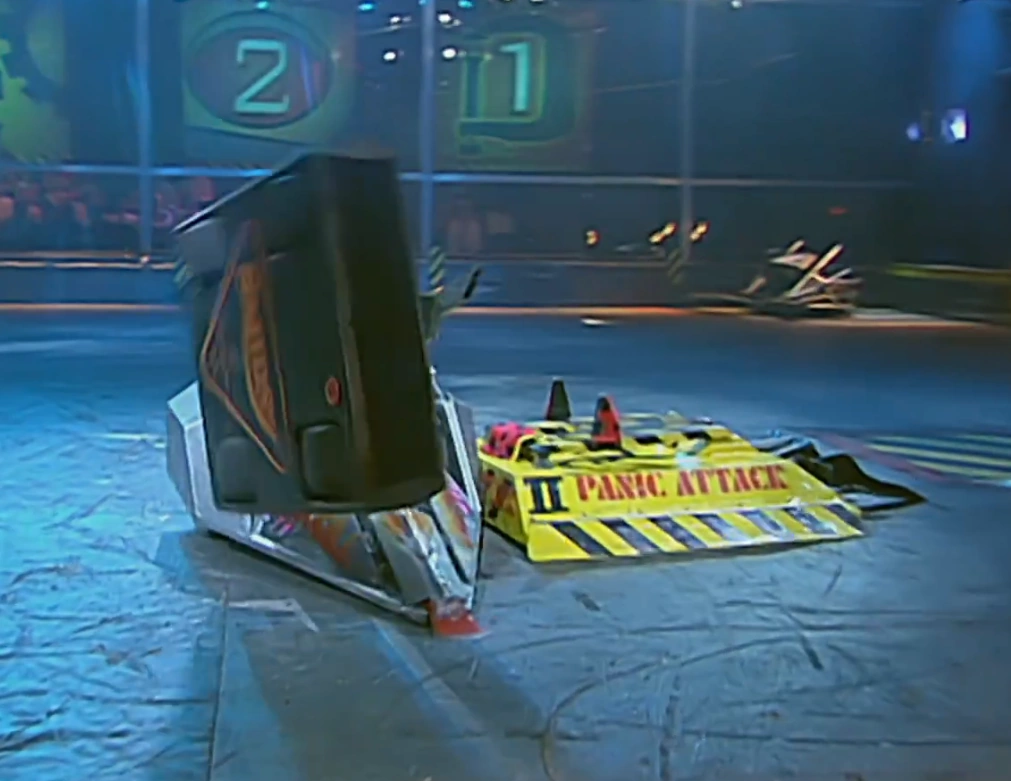
Panic Attack (4) vs S.M.I.D.S.Y.
The battle opened with the two robots colliding with each other, after which S.M.I.D.S.Y. pushed Panic Attack over a flame jet and around the arena. S.M.I.D.S.Y. then drove onto the top of Panic Attack, but was able to drive away before Panic Attack could launch a significant attack.
Panic Attack's lifting mechanism slots into S.M.I.D.S.Y.'s wheel arch.
S.M.I.D.S.Y. pushed Panic Attack backwards again, but retreated so it could launch a faster ram at the front of Panic Attack. S.M.I.D.S.Y. drove straight up Panic Attack's forks by doing this, falling off the side of the machine, and then attacking again. S.M.I.D.S.Y. drove onto Panic Attack, but Panic Attack could not capitalise, allowing S.M.I.D.S.Y. to push Panic Attack again.
- "At the moment, Panic Attack just holding the arena centre. I think they're trying to draw S.M.I.D.S.Y. in here."
- — Jonathan Pearce
Panic Attack made its first retaliation by pushing S.M.I.D.S.Y. towards Shunt, but Shunt did not attack. S.M.I.D.S.Y. drove over Panic Attack's forks once more, before attempting a different method of offense, by reversing into Panic Attack.
- "Quite even at the moment; S.M.I.D.S.Y. the more aggressive. Perhaps, Panic Attack the more controlled."
- — Jonathan Pearce
This moved Panic Attack, and after the two robots made more minor attacks, Panic Attack drove into the claws of Dead Metal. Dead Metal clutched Panic Attack, but did not use its circular saw. When Panic Attack drove away, S.M.I.D.S.Y. drove into the claws of Dead Metal, though Dead Metal could only grab a corner of S.M.I.D.S.Y., which promptly escaped and rammed the rear of Panic Attack. With S.M.I.D.S.Y. in this position, Panic Attack was able to reverse, and push S.M.I.D.S.Y. across the arena.

Panic Attack drops S.M.I.D.S.Y. into the pit.
Once S.M.I.D.S.Y. had driven away, Panic Attack pursued, getting underneath S.M.I.D.S.Y. with its lifting forks, and raising S.M.I.D.S.Y. from the arena floor. Panic Attack's forks fit into S.M.I.D.S.Y.'s wheel arch, so Panic Attack could push and pull S.M.I.D.S.Y. around the arena, holding the leather-coated robot over a flame jet.
- "The wheels, from go-karts - little bit of a gap around them, and Panic Attack and Kim Davies have found that gap, and now, that could be the single most decisive moment of this entire heat."
- — Jonathan Pearce
S.M.I.D.S.Y. did not catch fire, but was subject to being pressed against an arena spike, and held over the closed pit. S.M.I.D.S.Y. opened its jaws to try and escape, which eventually succeeded, with the Pit descending shortly afterwards. Panic Attack then lifted S.M.I.D.S.Y. onto its top, carried it towards the open pit, and then dropping S.M.I.D.S.Y. into it.
- "Oh, they looked so promising!"
- — Jonathan Pearce, regarding S.M.I.D.S.Y.
Heat Winner: Panic Attack
- "If you look in a teepee, you'll find Indian squaws, wishing they had a telly, to watch Robot Wars!"
- — Craig Charles' sign-off
Trials

Inverterbrat is attacked by Matilda.
During the Fourth Wars, alongside the main competition, a Pinball Warrior Tournament and Sumo Basho Competition were also held. Unlike the similar competitions of the Third Wars, these trials featured successful qualifiers for Series 4. In between the first and second rounds of each heat, a Pinball run took place, and two sumo attempts took place in between Round 2 and the Heat Final in each of the first eight heats. For Heat O, the Pinball featured Inverterbrat.
Pinball Warrior Tournament - Inverterbrat
Score: 95 points
Trivia
- This was the first and only main competition appearance of Oblivion 2, having only contested the Pinball Competition in Series 3, although its predecessor had fought in Series 2.
- Interestingly, in this heat, the names of the two robots to go out in Round 1 both began with an O.
| ||||||||||||||