(→Newcomers: Corrected location) |
(→Trivia) Tag: Visual edit |
||
| (24 intermediate revisions by 13 users not shown) | |||
| Line 1: | Line 1: | ||
{{episode |
{{episode |
||
| − | |episode_name= |
+ | |episode_name=Heat J |
|image=[[File:Series 5-7 Logo.jpg|200px]] |
|image=[[File:Series 5-7 Logo.jpg|200px]] |
||
|caption=The Robot Wars logo from the introduction titles |
|caption=The Robot Wars logo from the introduction titles |
||
| Line 6: | Line 6: | ||
|winner=[[Dominator 2]] |
|winner=[[Dominator 2]] |
||
|broadcast=September 27th 2002<br><small>(BBC Choice)</small><br>January 24th 2003<br><small>(BBC Two)</small> |
|broadcast=September 27th 2002<br><small>(BBC Choice)</small><br>January 24th 2003<br><small>(BBC Two)</small> |
||
| − | |channel=BBC Choice |
+ | |channel=[[BBC|BBC Choice]]<br>[[BBC|BBC Two]] |
|preceded= [[Robot Wars: The Sixth Wars/Heat I|Heat I]] |
|preceded= [[Robot Wars: The Sixth Wars/Heat I|Heat I]] |
||
|suceeded= [[Robot Wars: The Sixth Wars/Heat K|Heat K]] |
|suceeded= [[Robot Wars: The Sixth Wars/Heat K|Heat K]] |
||
| Line 12: | Line 12: | ||
'''Heat J of Robot Wars: The Sixth Wars''' was the tenth of twelve heats which determined the Semi-Finalists of [[Robot Wars: The Sixth Wars]]. The episode featuring Heat J was originally broadcast on September 27, 2002 on BBC Choice and repeated on January 24, 2003 on BBC Two. |
'''Heat J of Robot Wars: The Sixth Wars''' was the tenth of twelve heats which determined the Semi-Finalists of [[Robot Wars: The Sixth Wars]]. The episode featuring Heat J was originally broadcast on September 27, 2002 on BBC Choice and repeated on January 24, 2003 on BBC Two. |
||
| ⚫ | |||
| ⚫ | |||
==Competing Robots== |
==Competing Robots== |
||
| Line 20: | Line 18: | ||
{{Stats |
{{Stats |
||
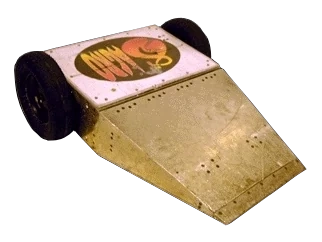
|name=[[St. Agro]] |
|name=[[St. Agro]] |
||
| − | |image=[[File:St |
+ | |image=[[File:St Agro.png|200px|center]] |
|weight=100kg |
|weight=100kg |
||
|dimensions=0.38 x 1.07 x 0.85m |
|dimensions=0.38 x 1.07 x 0.85m |
||
| Line 27: | Line 25: | ||
|strengths=Manoeuvrability |
|strengths=Manoeuvrability |
||
|weaknesses=Exposed wheels |
|weaknesses=Exposed wheels |
||
| − | |from= |
+ | |from=Goonbell, St Agnes |
|team=Terry Carlin, Michael Carlin & Andru Blewitt |
|team=Terry Carlin, Michael Carlin & Andru Blewitt |
||
}} |
}} |
||
| Line 35: | Line 33: | ||
{{Stats |
{{Stats |
||
|name=[[Axe-C-Dent|Axe-C-Dent 2]] |
|name=[[Axe-C-Dent|Axe-C-Dent 2]] |
||
| − | |image=[[File: |
+ | |image=[[File:Axe-C-Dent 2.png|200px|center]] |
|weight=100kg |
|weight=100kg |
||
|dimensions=0.80 x 0.74 x 0.65m |
|dimensions=0.80 x 0.74 x 0.65m |
||
| Line 42: | Line 40: | ||
|strengths=Destructive weaponry |
|strengths=Destructive weaponry |
||
|weaknesses=No srimech |
|weaknesses=No srimech |
||
| − | |from= |
+ | |from=Gislingham, Suffolk |
|team=Mel Easton |
|team=Mel Easton |
||
}} |
}} |
||
| Line 48: | Line 46: | ||
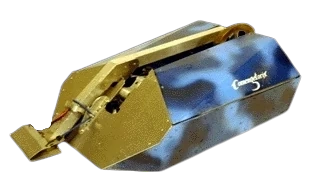
{{Stats |
{{Stats |
||
|name=[[Comengetorix]] |
|name=[[Comengetorix]] |
||
| − | |image=[[File:Comengetorix. |
+ | |image=[[File:Comengetorix.png|200px|center]] |
|weight=100kg |
|weight=100kg |
||
|dimensions=0.93 x 1.33 x 0.82m |
|dimensions=0.93 x 1.33 x 0.82m |
||
| Line 55: | Line 53: | ||
|strengths=Powerful srimech |
|strengths=Powerful srimech |
||
|weaknesses=Reliability |
|weaknesses=Reliability |
||
| − | |from= |
+ | |from=Wootton, Isle of Wight |
|team=Ian Gear, Adam Radestock & Bradley Jennings |
|team=Ian Gear, Adam Radestock & Bradley Jennings |
||
}} |
}} |
||
| Line 61: | Line 59: | ||
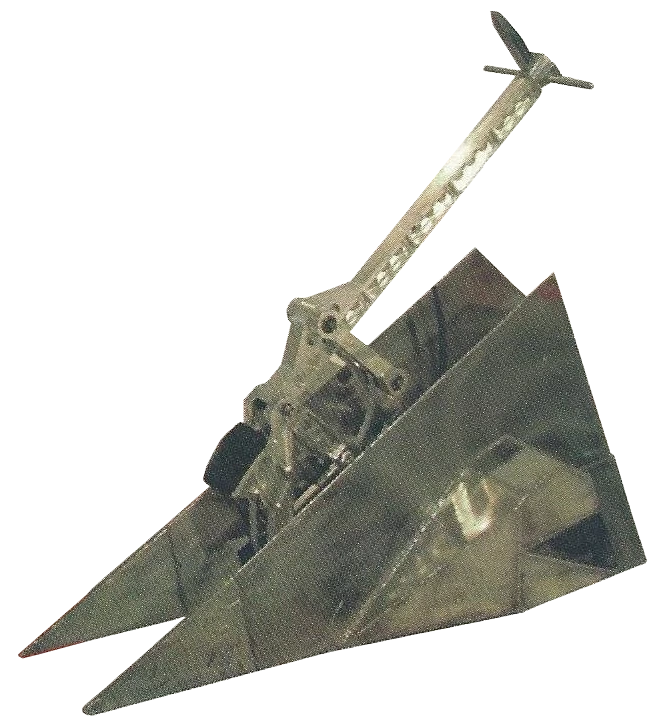
{{Stats |
{{Stats |
||
|name=[[Dominator 2]] <small>(seeded 6th)</small> |
|name=[[Dominator 2]] <small>(seeded 6th)</small> |
||
| − | |image=[[File: |
+ | |image=[[File:Dominator II.png|200px|center]] |
|weight=100kg |
|weight=100kg |
||
|dimensions=0.60 x 1.30 x 0.80m |
|dimensions=0.60 x 1.30 x 0.80m |
||
| Line 68: | Line 66: | ||
|strengths=Powerful axe |
|strengths=Powerful axe |
||
|weaknesses=Uni-directional weaponry |
|weaknesses=Uni-directional weaponry |
||
| − | |from= |
+ | |from=Deal, Kent |
|team=Elliot Smart, Chris Hall & Paul Tolliday |
|team=Elliot Smart, Chris Hall & Paul Tolliday |
||
}} |
}} |
||
| Line 74: | Line 72: | ||
{{Stats |
{{Stats |
||
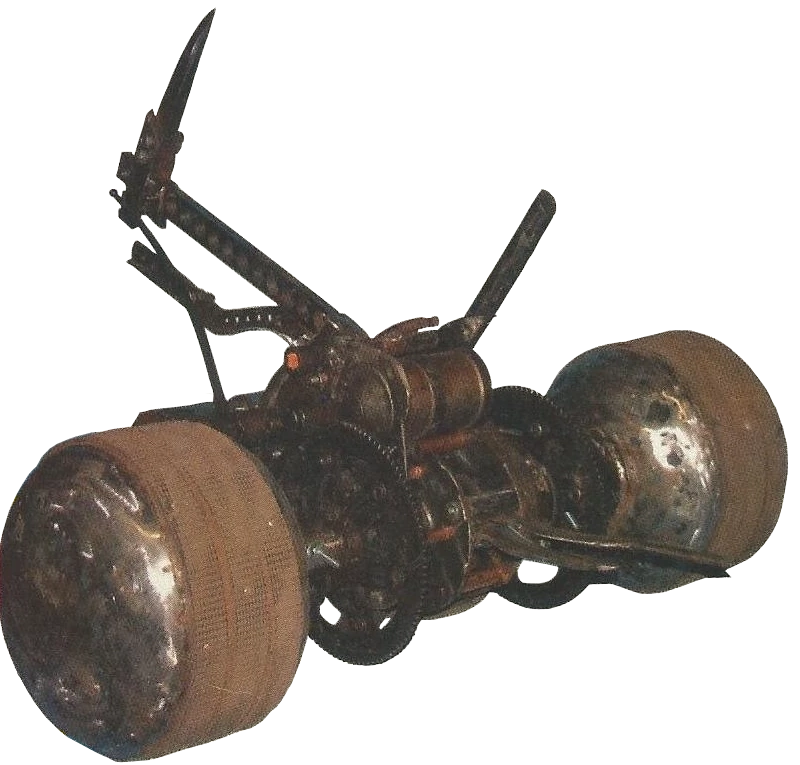
|name=[[Hydra]] |
|name=[[Hydra]] |
||
| − | |image=[[File:Hydra. |
+ | |image=[[File:Hydra S6.png|200px|center]] |
|weight=99kg |
|weight=99kg |
||
|dimensions=0.50 x 1.20 x 0.81m |
|dimensions=0.50 x 1.20 x 0.81m |
||
| Line 81: | Line 79: | ||
|strengths=Fast & agile |
|strengths=Fast & agile |
||
|weaknesses=Light armour |
|weaknesses=Light armour |
||
| − | |from= |
+ | |from=East Hagbourne, Oxfordshire |
|team=Dennis Leadbeater & Andrew Leadbeater |
|team=Dennis Leadbeater & Andrew Leadbeater |
||
}} |
}} |
||
| Line 87: | Line 85: | ||
{{Stats |
{{Stats |
||
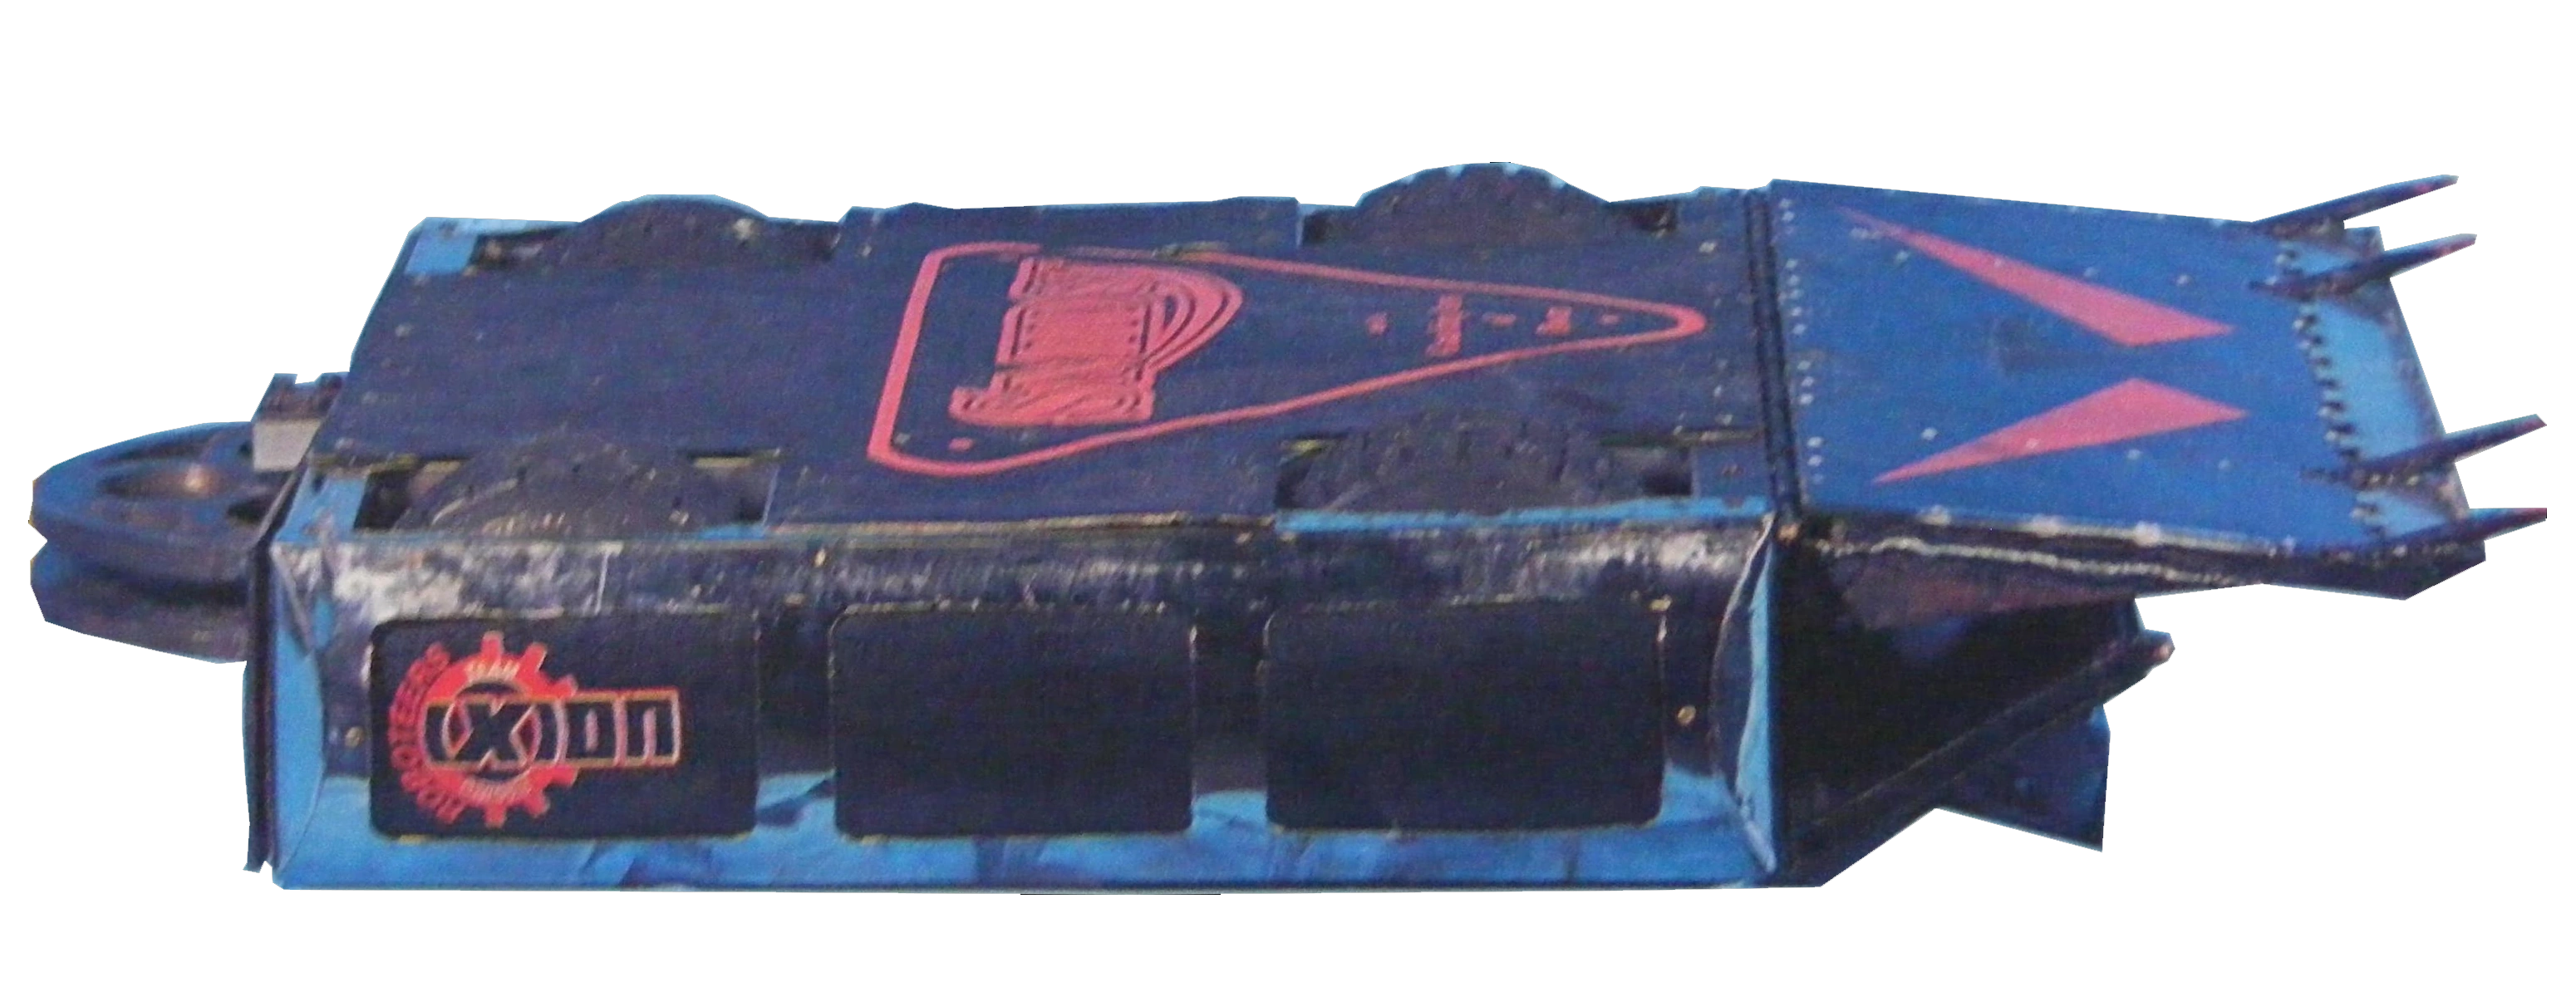
|name=[[S.M.I.D.S.Y.]] |
|name=[[S.M.I.D.S.Y.]] |
||
| − | |image=[[File: |
+ | |image=[[File:S.M.I.D.S.Y. S6.png|200px|center]] |
|weight=100kg |
|weight=100kg |
||
|dimensions=0.25 x 1.28 x 0.80m |
|dimensions=0.25 x 1.28 x 0.80m |
||
| Line 94: | Line 92: | ||
|strengths=Strong & agile |
|strengths=Strong & agile |
||
|weaknesses=Reliability |
|weaknesses=Reliability |
||
| − | |from= |
+ | |from=Maidstone, Kent |
|team=Robin Bennett, Mik Reed & Andy Pugh |
|team=Robin Bennett, Mik Reed & Andy Pugh |
||
}} |
}} |
||
| Line 100: | Line 98: | ||
{{Stats |
{{Stats |
||
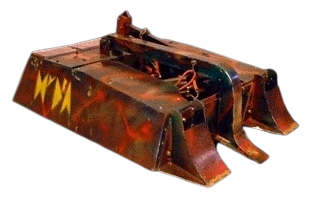
|name=[[Sumpthing]] |
|name=[[Sumpthing]] |
||
| − | |image=[[File:Sumpthing. |
+ | |image=[[File:Sumpthing.png|200px|center]] |
|weight=95kg |
|weight=95kg |
||
|dimensions=0.77 x 0.90 x 0.98m |
|dimensions=0.77 x 0.90 x 0.98m |
||
| Line 107: | Line 105: | ||
|strengths=Strong armour |
|strengths=Strong armour |
||
|weaknesses=Unreliable srimech |
|weaknesses=Unreliable srimech |
||
| − | |from=Leicester |
+ | |from=Leicester, Leicestershire |
|team=Mr. Dig, Paul Bacon & Geoff Germaney |
|team=Mr. Dig, Paul Bacon & Geoff Germaney |
||
}} |
}} |
||
| Line 113: | Line 111: | ||
{{Stats |
{{Stats |
||
|name=[[Warhog]] |
|name=[[Warhog]] |
||
| − | |image=[[File:Warhog. |
+ | |image=[[File:Warhog S6.png|200px|center]] |
|weight=100kg |
|weight=100kg |
||
|dimensions=0.55 x 0.95 x 0.95m |
|dimensions=0.55 x 0.95 x 0.95m |
||
| Line 120: | Line 118: | ||
|strengths=Lethal weapon |
|strengths=Lethal weapon |
||
|weaknesses=High ground clearance |
|weaknesses=High ground clearance |
||
| − | |from= |
+ | |from=Brough, East Yorkshire |
| − | |team=Dave Marritt, |
+ | |team=Dave Marritt, Mark Chalmers & Paul Stevenson |
}} |
}} |
||
{{clr}} |
{{clr}} |
||
| Line 127: | Line 125: | ||
==Round 1== |
==Round 1== |
||
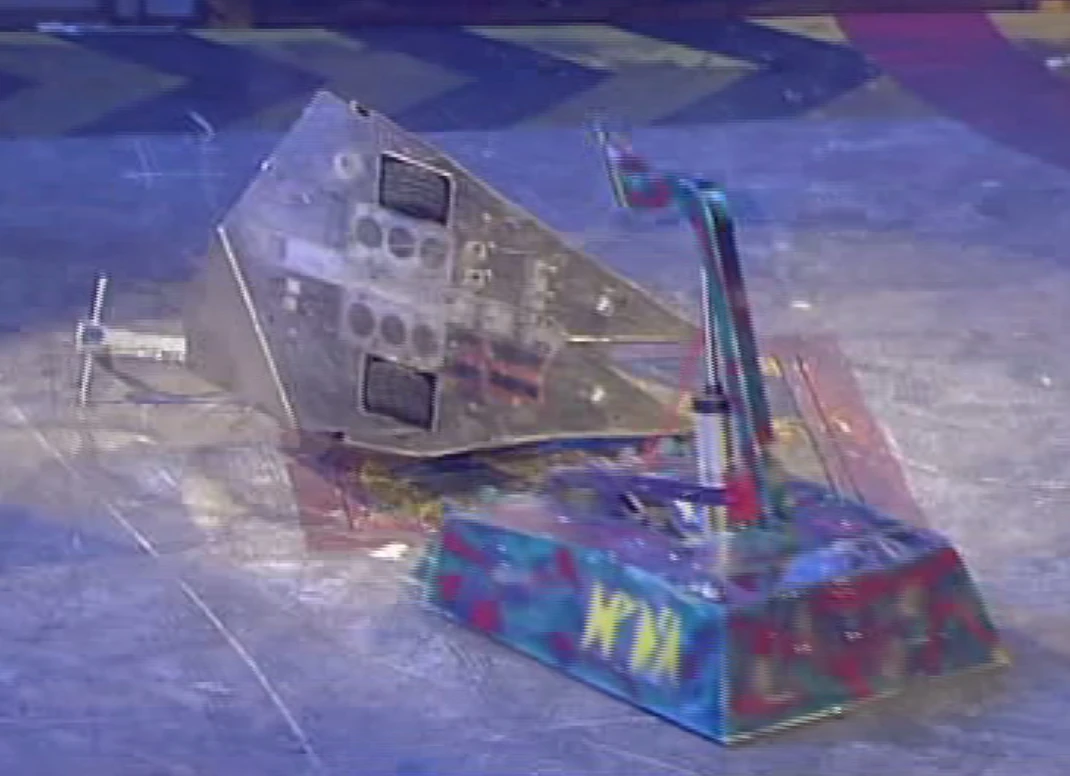
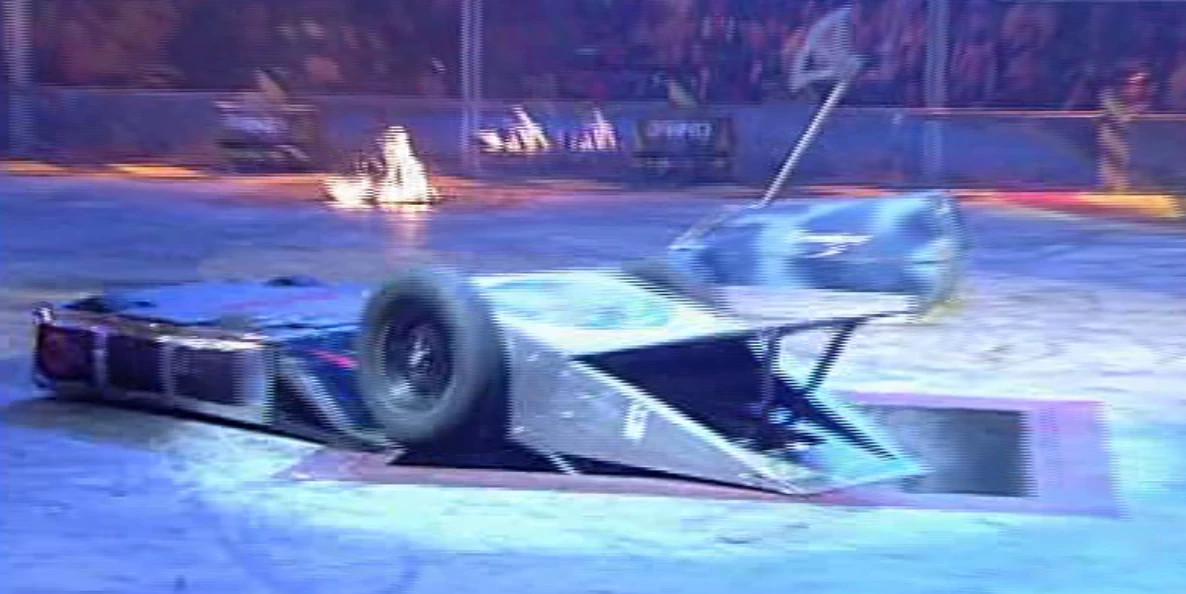
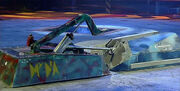
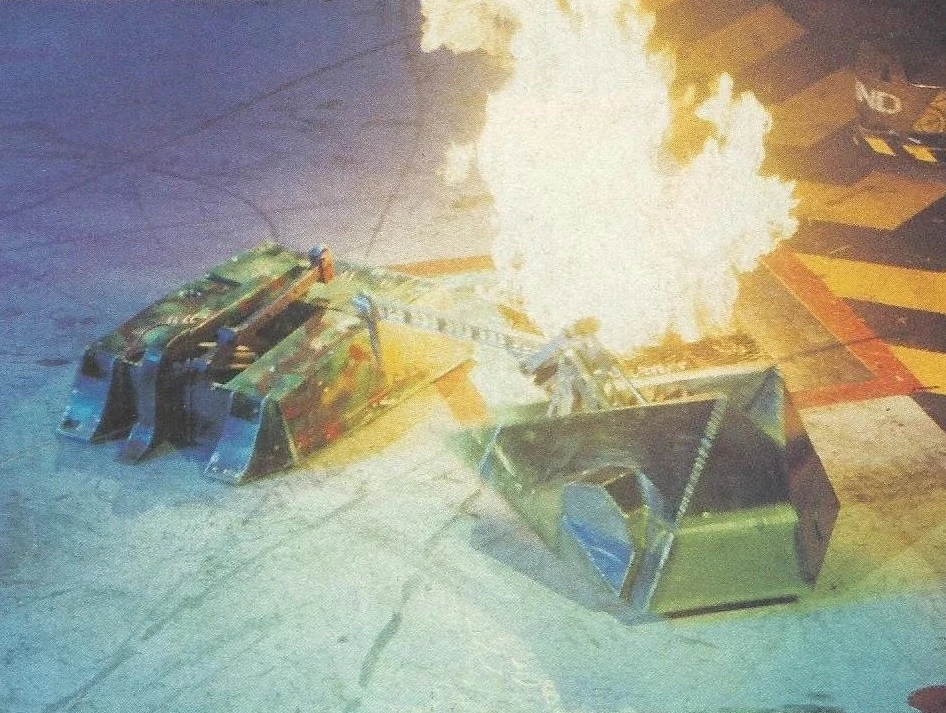
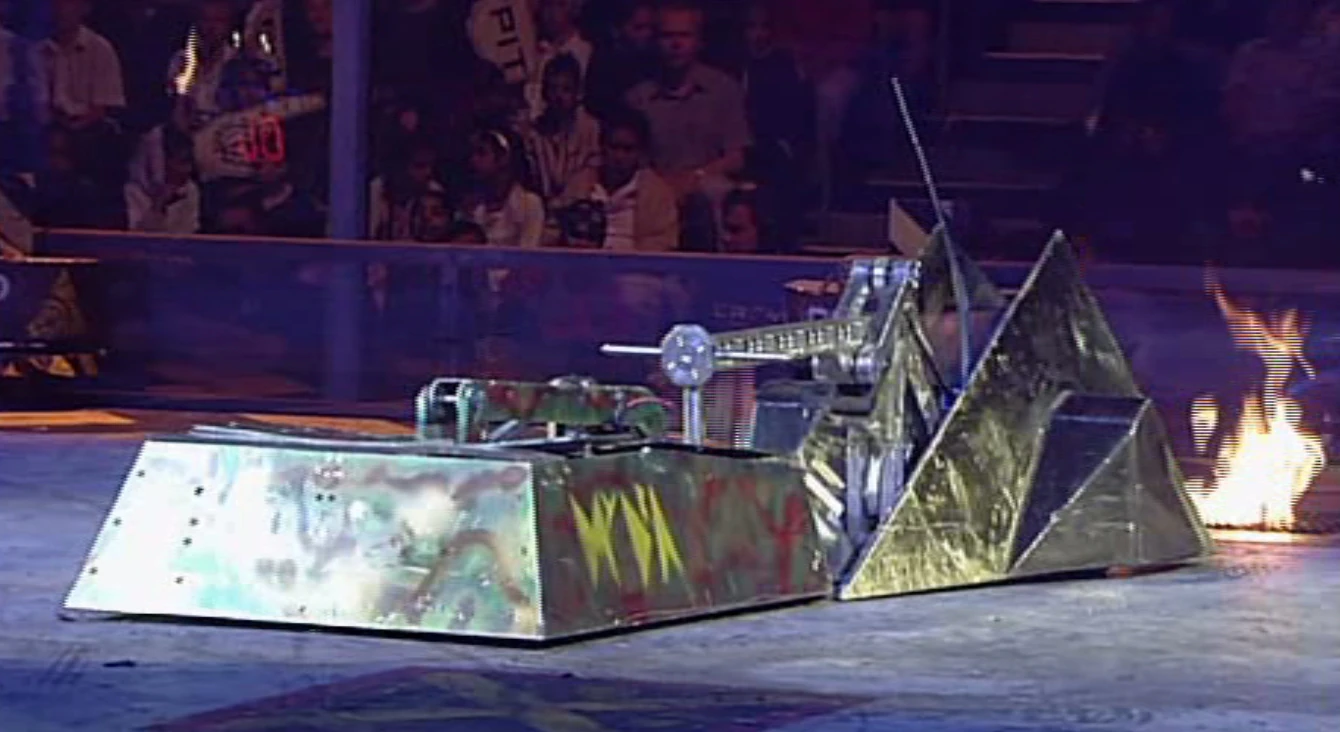
===Dominator 2 (6) vs Hydra vs Axe-C-Dent 2 vs Sumpthing=== |
===Dominator 2 (6) vs Hydra vs Axe-C-Dent 2 vs Sumpthing=== |
||
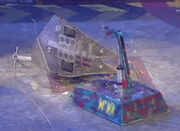
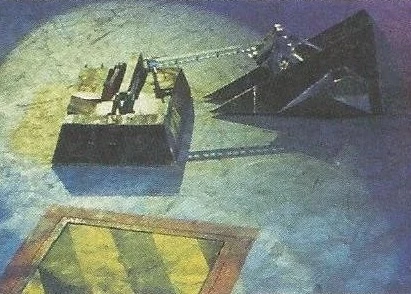
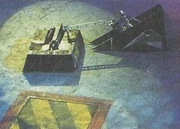
| − | [[File: |
+ | [[File:Dominator 2 vs Hydra.jpg|thumb|left|Dominator 2 is overturned by Hydra]] |
[[File:Sumpthing pushes Dominator 2.png|thumb|Sumpthing pushing Dominator 2]] |
[[File:Sumpthing pushes Dominator 2.png|thumb|Sumpthing pushing Dominator 2]] |
||
This first battle started very quickly with Hydra immediately flipping Axe-C-Dent over. Hydra then went on to flip Dominator 2 over, but unlike Axe-C-Dent, Dominator 2 self-righted. |
This first battle started very quickly with Hydra immediately flipping Axe-C-Dent over. Hydra then went on to flip Dominator 2 over, but unlike Axe-C-Dent, Dominator 2 self-righted. |
||
| + | |||
| ⚫ | |||
| + | {{quote|It has no srimech, remember, and I think Axe-C-Dent has been immobilised right from the start.|Jonathan Pearce}} |
||
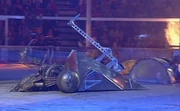
| + | [[File:Hydra vs Dominator II.jpg|thumb|left|Hydra lifts Dominator 2 in the CPZ]] |
||
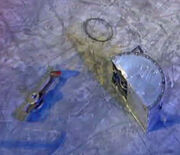
| + | [[File:Axe-C-Dent 2 destroyed.jpg|thumb|Axe-C-Dent 2 after being thrown by the floor flipper]] |
||
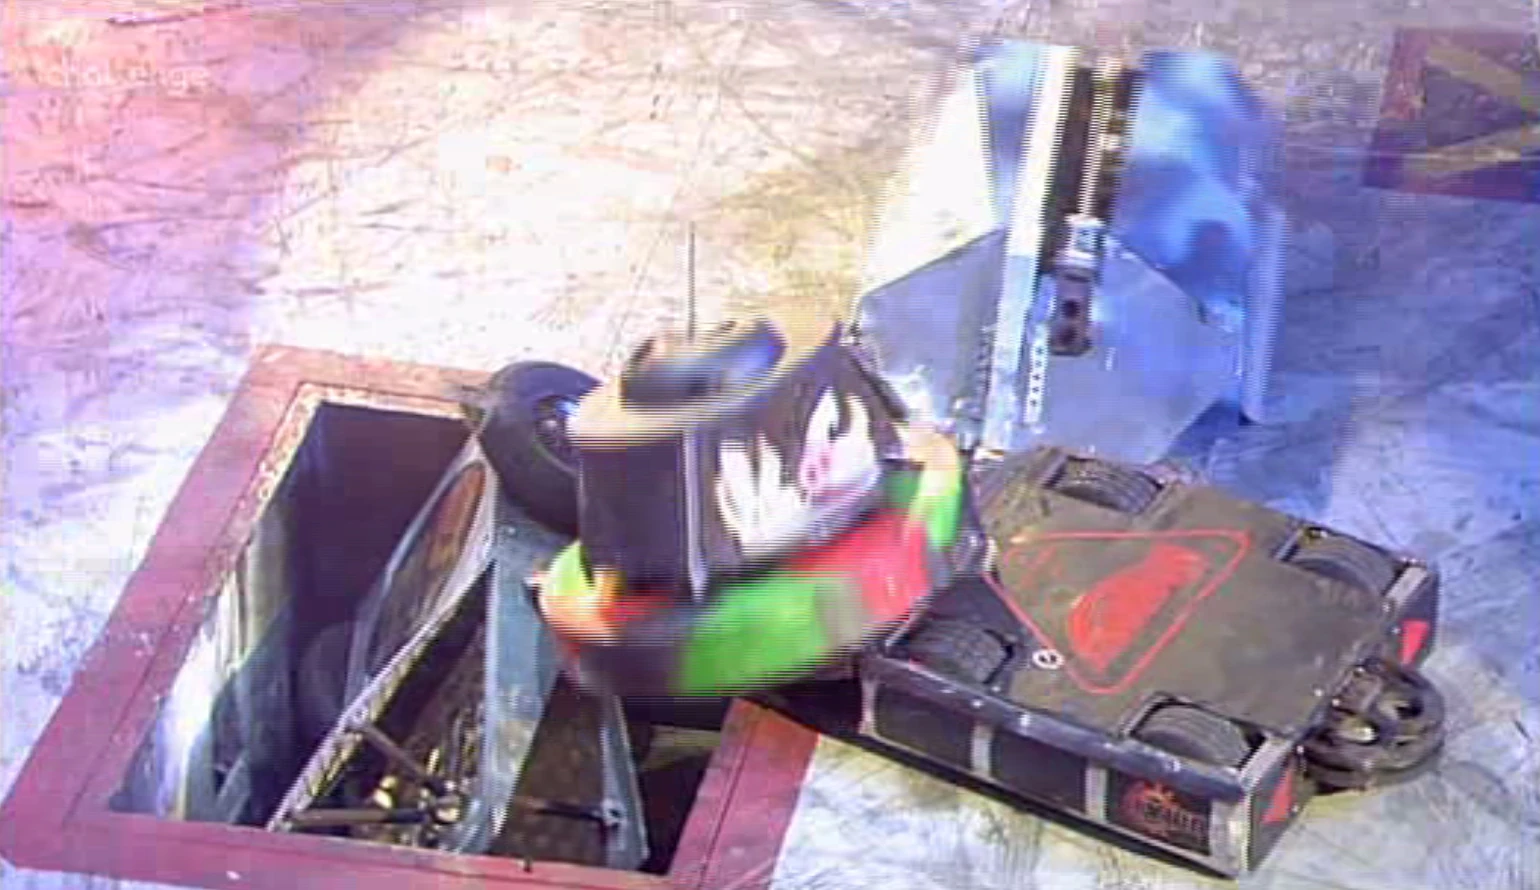
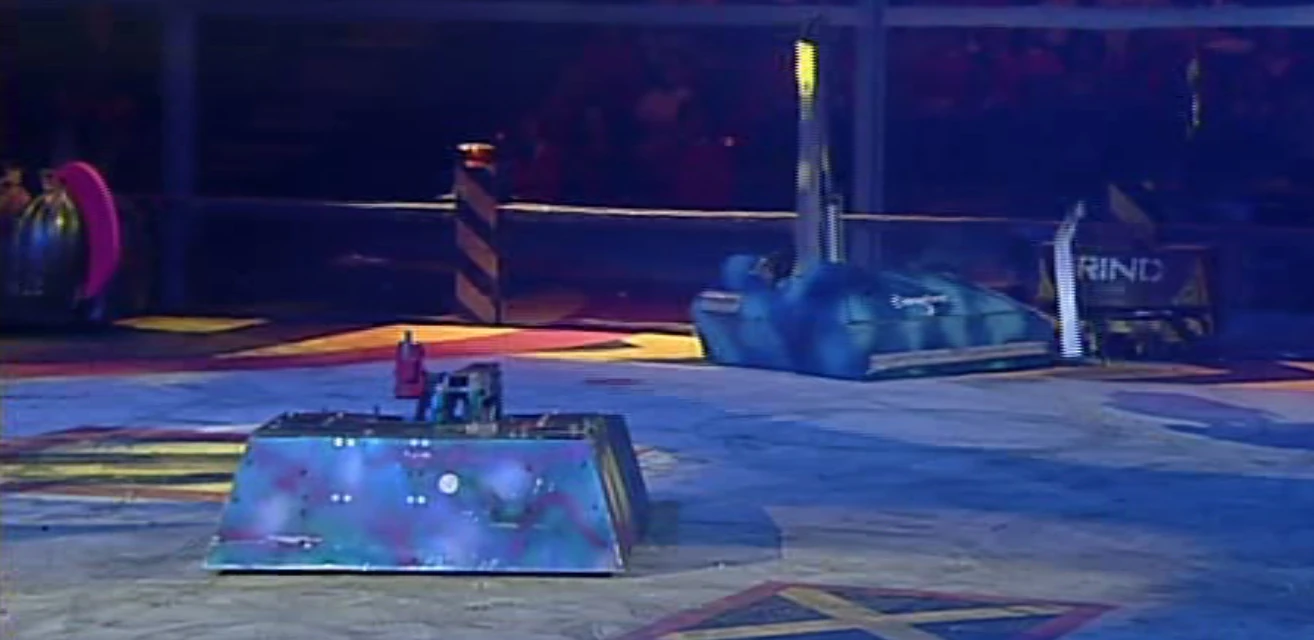
| ⚫ | The three remaining robots came together trying to use their axes, but Sumpthing drove into a CPZ and was axed by Shunt. Meanwhile, Dominator 2 was being dominated by Hydra, as Hydra flipped Dominator 2 over again and pushed it into a CPZ, but Dominator 2 escaped. Axe-C-Dent had been righted and was used as target practice for Hydra and Dominator 2's axes. It then appeared that Hydra and Sumpthing had teamed up on Dominator 2 and it was pushed onto the flame pit, but then Sumpthing lost drive in one of its wheels and was counted out, thus putting Dominator 2 and Hydra through to the second round. |
||
Qualified: '''Dominator 2 & Hydra''' |
Qualified: '''Dominator 2 & Hydra''' |
||
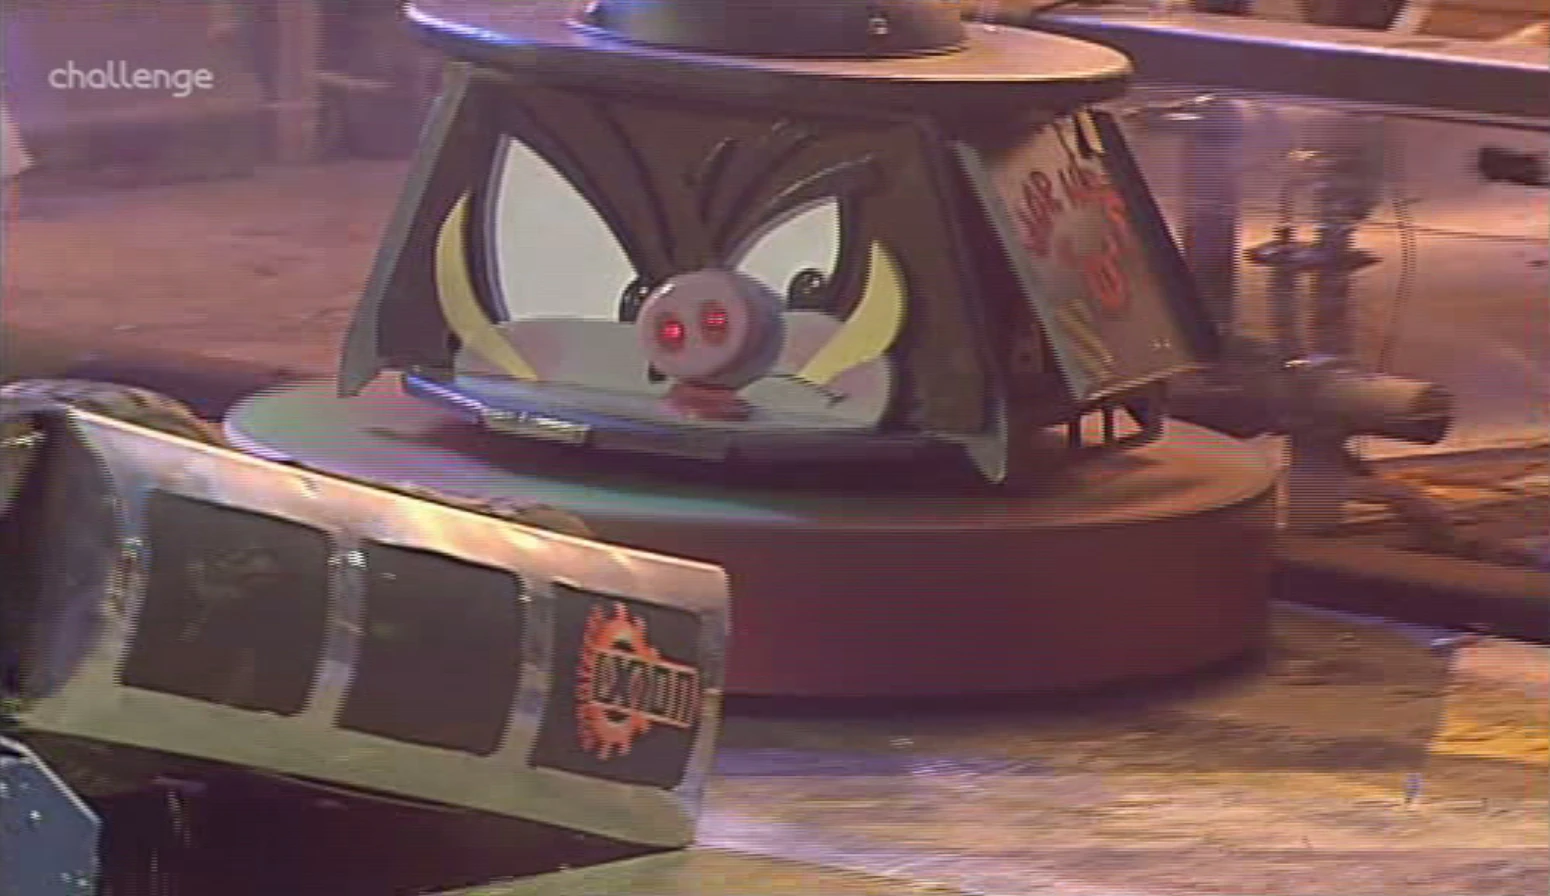
===S.M.I.D.S.Y. vs Comengetorix vs Warhog vs St. Agro=== |
===S.M.I.D.S.Y. vs Comengetorix vs Warhog vs St. Agro=== |
||
| − | [[File: |
+ | [[File:Smidsys6.jpg|thumb|left|Comengetorix axes S.M.I.D.S.Y.]] |
| + | [[File:War Hog vs SMIDSY.jpg|thumb|Warhog about to destroy the arena wall]] |
||
| − | Comengetorix clashed with S.M.I.D.S.Y., lifting the Cyberspace robot, but failing to flip it. It rained axe blows down on S.M.I.D.S.Y., pushing it and Warhog into the arena wall, destroying it. It was bumped by Warhog, before speeding across the arena and impaling itself on the arena wall with its axe. Growler tried to rip it free, but failed. |
||
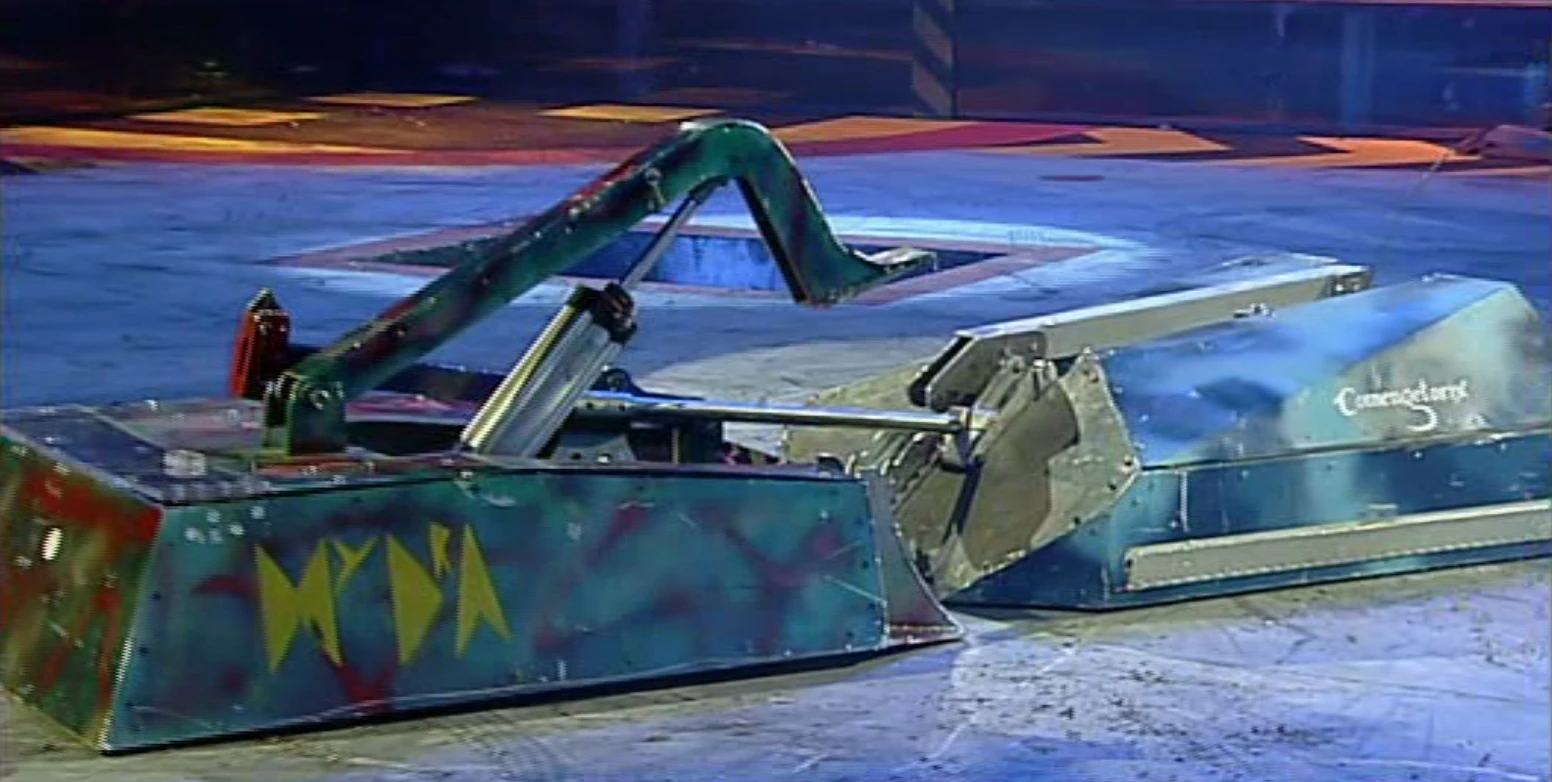
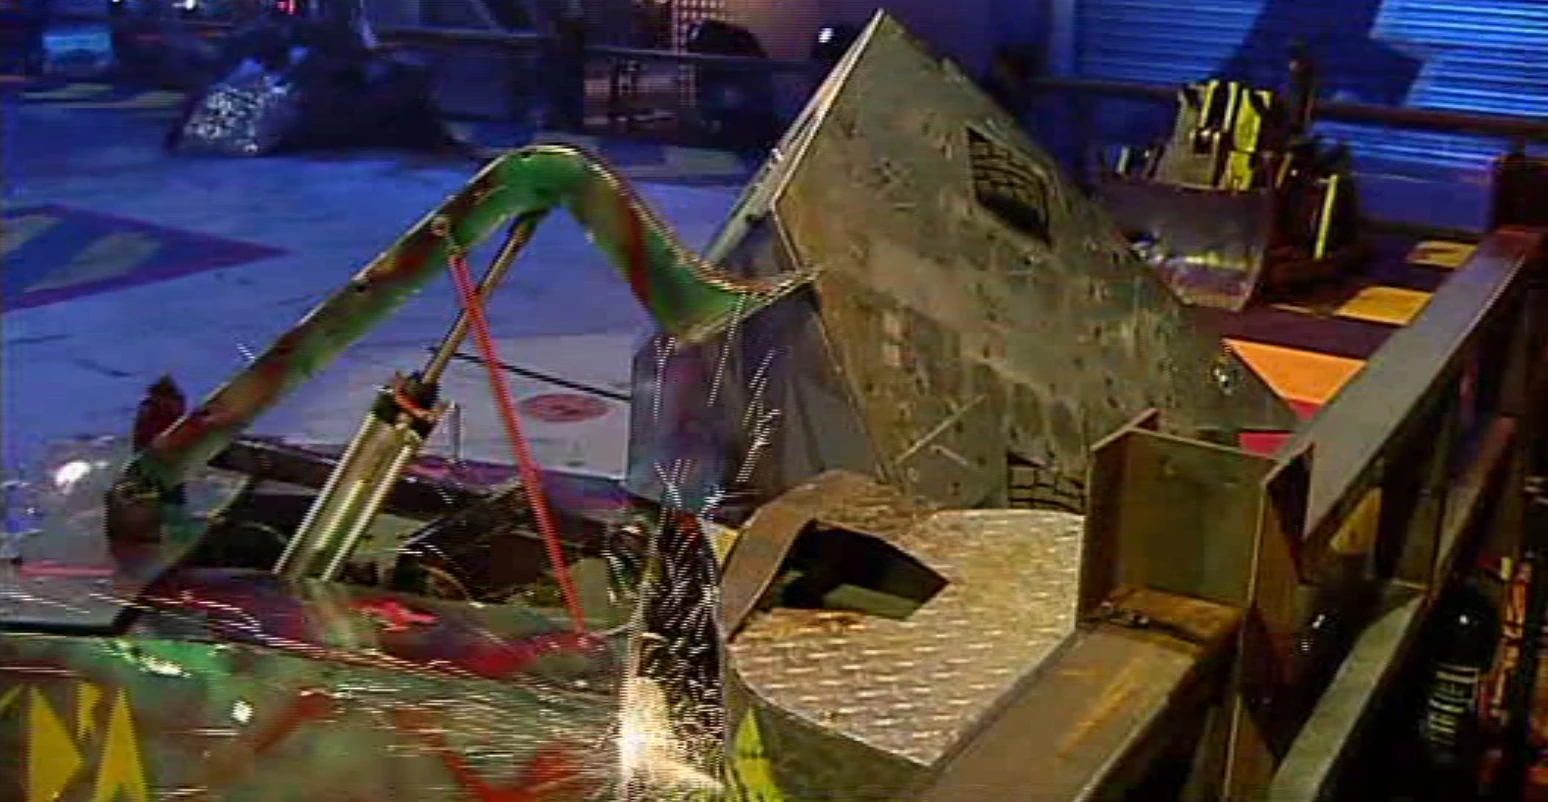
| + | Comengetorix clashed with S.M.I.D.S.Y., lifting the Cyberspace robot, but failed to flip it, while Warhog got up to full spinning speed. It rained axe blows down on S.M.I.D.S.Y., pushing it backwards. St. Agro attempted to flip its opponent, but missed, seemingly locking its own flippers open in the process. Comengetorix, still pushing S.M.I.D.S.Y., pushed Warhog into the arena wall. The arena wall was smashed by Warhog's spinning body when pushed into it. S.M.I.D.S.Y. pushes Warhog into [[Shunt]], which lifted the full-body spinner onto the body of S.M.I.D.S.Y., which briefly offered it a "piggy-back". Warhog fought back against Comengetorix, but the robot from the Isle of Wight sped across the arena, slamming into a CPZ, before impaling itself on the arena wall with its axe. [[Growler]] tried to rip it free, but failed, bending Comengetorix's axe sideways. After sustaining this damage, Comengetorix finally retrieved its axe and escaped, very nearly driving into the pit in the process, while even Warhog skirted around the edge of the pit for the second time in the melee. |
||
| − | [[File:Comengetorix melee.jpg|thumb|left|Comengetorix nearly backs into the pit.]] Comengetorix pulled free, and drove very nearly into the pit. Meanwhile, S.M.I.D.S.Y. shoved St. Agro into the pit, while Comengetorix fled the House Robots. Finally, after a prolonged piggyback, S.M.I.D.S.Y. pitted Warhog, putting itself and Comengetorix through to the next round. |
||
| + | [[File:Comengetorix melee.jpg|thumb|left|Comengetorix attaches itself to the arena wall.]] |
||
| + | [[File:SMIDSY vs Comengetorix vs Warhog vs St Agro.jpg|thumb|S.M.I.D.S.Y. pushes St. Agro into the pit.]] |
||
| + | Meanwhile, S.M.I.D.S.Y. shoved the defenseless St. Agro into the pit, finally ending the streak of near-misses with the pit, while Comengetorix avoided the House Robots. S.M.I.D.S.Y. pushed Warhog back towards Shunt, which thrust its axe the wok on top of Warhog, and dragged it around. |
||
| + | {{quote|It's now free, and it's gone in the pit? No! Very nearly, ooh, and the crowd! Dear, dear, Warhog's almost gone in, and now finally St. Agro's bitten the dust and they've gone in! Dear, oh dear, oh dear.|Jonathan Pearce struggles to keep up as St. Agro finally goes into the pit after close shaves for both Comengetorix and Warhog}} |
||
| + | [[File:Warhog Pitted.jpg|thumb|S.M.I.D.S.Y. puts Warhog in the pit.]] |
||
| + | Comengetorix was pushed into Shunt's CPZ by S.M.I.D.S.Y., but the house robot was still attacking Warhog, so Comengetorix attacked the vulnerable machine as well. S.M.I.D.S.Y. pushed Warhog across the arena, over the flame pit, and into an empty CPZ, and began to lift it. [[Growler]] came slamming in, knocking Warhog onto the top of S.M.I.D.S.Y. for a second time, which once again, paraded Warhog around the arena, carrying it all the way to the pit, and dropped it in. |
||
| − | Jonathan Pearce was very animated during this high-action battle, and declared that it must be one of the greatest fights ever in Robot Wars. |
+ | Jonathan Pearce was very animated during this high-action battle, and declared that it must be one of the greatest fights ever in Robot Wars, one that would send S.M.I.D.S.Y. and Comengetorix through to the second round. |
Qualified: '''S.M.I.D.S.Y. & Comengetorix''' |
Qualified: '''S.M.I.D.S.Y. & Comengetorix''' |
||
| Line 146: | Line 154: | ||
===Dominator 2 (6) vs S.M.I.D.S.Y.=== |
===Dominator 2 (6) vs S.M.I.D.S.Y.=== |
||
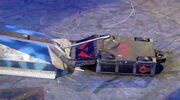
[[File:Dominator 2 vs SMIDSY.jpg|thumb|Sparks fly as S.M.I.D.S.Y. attacks Dominator.]] |
[[File:Dominator 2 vs SMIDSY.jpg|thumb|Sparks fly as S.M.I.D.S.Y. attacks Dominator.]] |
||
| − | The battle started quickly with Dominator 2 trying to axe S.M.I.D.S.Y., but |
+ | The battle started quickly with Dominator 2 trying to axe S.M.I.D.S.Y., but S.M.I.D.S.Y. used its greater agility to dodge the axe. Dominator 2 was then pushed into an arena wall by S.M.I.D.S.Y., but Dominator 2 escaped and used its axe again and almost punctured one of S.M.I.D.S.Y.'s tyres. More pushing ensued until Dominator 2 almost punctured one of S.M.I.D.S.Y.'s tyres with its axe again. S.M.I.D.S.Y. used its flywheel, but it had little effect on Dominator 2, although this generated many sparks. Both robots then entered a CPZ due to a push from Dominator, and [[Growler]] came smashing into both robots and attempted to pin S.M.I.D.S.Y. |
| − | [[File: |
+ | [[File:SMIDSY vs Dominator 2.jpg|thumb|left|Dominator punctures one of S.M.I.D.S.Y.'s wheels.]] |
| + | {{quote|Oh Growler! Look at that, both went into the CPZ and Growler came in with a right, roar ripping shunt.|Jonathan Pearce on Growler's ferocious drive}} |
||
| + | This huge attack completely split Dominator 2's baseplate in half, and caused major internal damage to S.M.I.D.S.Y. |
||
| + | |||
| + | Dominator 2 finally managed to puncture one of S.M.I.D.S.Y.'s tyres, but by this time S.M.I.D.S.Y. had slowed down and appeared to have lost drive in one side. It then caught fire from the flame pit just as cease was called, and the Judges chose Dominator 2 to go through. |
||
Winner: '''Dominator 2''' |
Winner: '''Dominator 2''' |
||
===Comengetorix vs Hydra=== |
===Comengetorix vs Hydra=== |
||
| + | [[File:Hydra vs Comengetorix S6.jpg|thumb|left|Hydra pushes Comengetorix back]] |
||
[[File:Comengetorix vs Hydra.jpg|thumb|Comengetorix loses its flipper]] |
[[File:Comengetorix vs Hydra.jpg|thumb|Comengetorix loses its flipper]] |
||
| − | Hydra dominated the battle, pushing Comengetorix around the arena and due to the floor being slippery with hydraulic fluid, Comengetorix couldn't get any traction. Hydra overturned Comengetorix |
+ | Hydra dominated the battle, pushing Comengetorix around the arena and due to the floor being slippery with hydraulic fluid, Comengetorix couldn't get any traction. Hydra overturned Comengetorix several times, getting it on the arena wall at one stage. Comengetorix recovered, but its flipping arm broke off in the process. |
| − | [[File:Hydra vs Comengetorix.jpg|thumb |
+ | [[File:Hydra vs Comengetorix.jpg|thumb|Comengetorix grapples onto the insides of Hydra.]] |
| + | {{quote|And Hydra, with Dennis and Andrew at the controls, have been very effective, and they have driven Comengetorix almost in submission.|Jonathan Pearce}} |
||
| + | In the last 10 seconds of the bout, Comengetorix managed to get its axe into Hydra's inner workings and had a tug-of war towards the flames but the fight ended. The judges decided that Hydra had won the fight due to it being more aggressive. |
||
Winner: '''Hydra''' |
Winner: '''Hydra''' |
||
| Line 160: | Line 175: | ||
==Final== |
==Final== |
||
===Dominator 2 (6) vs Hydra=== |
===Dominator 2 (6) vs Hydra=== |
||
| − | [[File:Dominator flipped.jpg|thumb|Dominator 2 flipped by Hydra |
+ | [[File:Dominator flipped.jpg|thumb|left|Dominator 2 is flipped by Hydra]] |
| + | [[File:Dominator II vs Hydra.jpg|thumb|Dominator 2 spikes the top of Hydra]] |
||
The battle started quickly as both robots crashed into each other, but Hydra then flipped Dominator 2 over and pushed it towards the arena wall. The fight slowed down a bit with both robots circling each other until Hydra flipped Dominator 2 again. However Dominator 2 self-righted and went on the attack, peppering Hydra with many axe blows, Hydra then pressed the pit release button. |
The battle started quickly as both robots crashed into each other, but Hydra then flipped Dominator 2 over and pushed it towards the arena wall. The fight slowed down a bit with both robots circling each other until Hydra flipped Dominator 2 again. However Dominator 2 self-righted and went on the attack, peppering Hydra with many axe blows, Hydra then pressed the pit release button. |
||
| + | |||
| ⚫ | |||
| + | {{quote|Hydra, all of a sudden, does look a little battle weary.|Jonathan Pearce as Dominator 2 starts to assert itself for the first time}} |
||
| + | [[File:Hydra vs Dominator 2.jpg|thumb|left|Dominator 2 comes back into the battle]] |
||
| + | [[File:Dominator vs Hydra.jpg|thumb|Dominator 2 collects more damage points]] |
||
| ⚫ | |||
Heat Winner: '''Dominator 2''' |
Heat Winner: '''Dominator 2''' |
||
{{quote|You don't need spots, or boils, or sores, and you can't wear an anorak, on Robot Wars!|Craig Charles' sign-off}} |
{{quote|You don't need spots, or boils, or sores, and you can't wear an anorak, on Robot Wars!|Craig Charles' sign-off}} |
||
| + | |||
| + | == Trivia == |
||
| ⚫ | |||
| ⚫ | |||
| + | *[[St. Agro]] fell in Round 1, making this the only time a robot from Cornwall fought in the main competition without winning its heat. |
||
| + | *This was the last appearance of Team Comengetorix & Team Warhog. |
||
| + | *For the second series in a row, [[Axe-C-Dent]] and [[Sumpthing]] were in the same heat. |
||
{{The Sixth Wars Heats}} |
{{The Sixth Wars Heats}} |
||
[[Category:The Sixth Wars]] |
[[Category:The Sixth Wars]] |
||
[[Category:Episodes in which two robots fought twice]] |
[[Category:Episodes in which two robots fought twice]] |
||
| + | [[Category:Episodes in which the Arena is damaged]] |
||
| + | [[Category:Episodes containing a Quick Immobilisation]] |
||
Revision as of 14:25, 14 February 2020
Heat J of Robot Wars: The Sixth Wars was the tenth of twelve heats which determined the Semi-Finalists of Robot Wars: The Sixth Wars. The episode featuring Heat J was originally broadcast on September 27, 2002 on BBC Choice and repeated on January 24, 2003 on BBC Two.
Competing Robots
Newcomers
 | ||
|---|---|---|
| St. Agro | ||
| Weight | 100kg | |
| Dimensions | 0.38 x 1.07 x 0.85m | |
| Power | 1 x 800W motor | |
| Weapons | Double flipper | |
| Strengths | Manoeuvrability | |
| Weaknesses | Exposed wheels | |
| From: Goonbell, St Agnes | ||
| Team Members: Terry Carlin, Michael Carlin & Andru Blewitt | ||
Veterans
 | ||
|---|---|---|
| Axe-C-Dent 2 | ||
| Weight | 100kg | |
| Dimensions | 0.80 x 0.74 x 0.65m | |
| Power | 2 x 52AMP motors | |
| Weapons | Rotating axe | |
| Strengths | Destructive weaponry | |
| Weaknesses | No srimech | |
| From: Gislingham, Suffolk | ||
| Team Members: Mel Easton | ||
 | ||
|---|---|---|
| Comengetorix | ||
| Weight | 100kg | |
| Dimensions | 0.93 x 1.33 x 0.82m | |
| Power | 2 x 24V motors | |
| Weapons | Axe & lifter | |
| Strengths | Powerful srimech | |
| Weaknesses | Reliability | |
| From: Wootton, Isle of Wight | ||
| Team Members: Ian Gear, Adam Radestock & Bradley Jennings | ||
 | ||
|---|---|---|
| Dominator 2 (seeded 6th) | ||
| Weight | 100kg | |
| Dimensions | 0.60 x 1.30 x 0.80m | |
| Power | 2 x 750W motors | |
| Weapons | Axe | |
| Strengths | Powerful axe | |
| Weaknesses | Uni-directional weaponry | |
| From: Deal, Kent | ||
| Team Members: Elliot Smart, Chris Hall & Paul Tolliday | ||
 | ||
|---|---|---|
| Hydra | ||
| Weight | 99kg | |
| Dimensions | 0.50 x 1.20 x 0.81m | |
| Power | 2 x 750W electric motors | |
| Weapons | Flipper & sledgehammer | |
| Strengths | Fast & agile | |
| Weaknesses | Light armour | |
| From: East Hagbourne, Oxfordshire | ||
| Team Members: Dennis Leadbeater & Andrew Leadbeater | ||
 | ||
|---|---|---|
| S.M.I.D.S.Y. | ||
| Weight | 100kg | |
| Dimensions | 0.25 x 1.28 x 0.80m | |
| Power | 2 x 750W motors | |
| Weapons | Lifter & spinning disc | |
| Strengths | Strong & agile | |
| Weaknesses | Reliability | |
| From: Maidstone, Kent | ||
| Team Members: Robin Bennett, Mik Reed & Andy Pugh | ||
 | ||
|---|---|---|
| Sumpthing | ||
| Weight | 95kg | |
| Dimensions | 0.77 x 0.90 x 0.98m | |
| Power | 4 x 800W motors | |
| Weapons | Axe | |
| Strengths | Strong armour | |
| Weaknesses | Unreliable srimech | |
| From: Leicester, Leicestershire | ||
| Team Members: Mr. Dig, Paul Bacon & Geoff Germaney | ||
 | ||
|---|---|---|
| Warhog | ||
| Weight | 100kg | |
| Dimensions | 0.55 x 0.95 x 0.95m | |
| Power | 550W motor | |
| Weapons | Spinning disc | |
| Strengths | Lethal weapon | |
| Weaknesses | High ground clearance | |
| From: Brough, East Yorkshire | ||
| Team Members: Dave Marritt, Mark Chalmers & Paul Stevenson | ||
Round 1
Dominator 2 (6) vs Hydra vs Axe-C-Dent 2 vs Sumpthing
Dominator 2 is overturned by Hydra

Sumpthing pushing Dominator 2
This first battle started very quickly with Hydra immediately flipping Axe-C-Dent over. Hydra then went on to flip Dominator 2 over, but unlike Axe-C-Dent, Dominator 2 self-righted.
- "It has no srimech, remember, and I think Axe-C-Dent has been immobilised right from the start."
- — Jonathan Pearce


Hydra lifts Dominator 2 in the CPZ

Axe-C-Dent 2 after being thrown by the floor flipper
The three remaining robots came together trying to use their axes, but Sumpthing drove into a CPZ and was axed by Shunt. Meanwhile, Dominator 2 was being dominated by Hydra, as Hydra flipped Dominator 2 over again and pushed it into a CPZ, but Dominator 2 escaped. Axe-C-Dent had been righted and was used as target practice for Hydra and Dominator 2's axes. It then appeared that Hydra and Sumpthing had teamed up on Dominator 2 and it was pushed onto the flame pit, but then Sumpthing lost drive in one of its wheels and was counted out, thus putting Dominator 2 and Hydra through to the second round.
Qualified: Dominator 2 & Hydra
S.M.I.D.S.Y. vs Comengetorix vs Warhog vs St. Agro

Comengetorix axes S.M.I.D.S.Y.

Warhog about to destroy the arena wall
Comengetorix clashed with S.M.I.D.S.Y., lifting the Cyberspace robot, but failed to flip it, while Warhog got up to full spinning speed. It rained axe blows down on S.M.I.D.S.Y., pushing it backwards. St. Agro attempted to flip its opponent, but missed, seemingly locking its own flippers open in the process. Comengetorix, still pushing S.M.I.D.S.Y., pushed Warhog into the arena wall. The arena wall was smashed by Warhog's spinning body when pushed into it. S.M.I.D.S.Y. pushes Warhog into Shunt, which lifted the full-body spinner onto the body of S.M.I.D.S.Y., which briefly offered it a "piggy-back". Warhog fought back against Comengetorix, but the robot from the Isle of Wight sped across the arena, slamming into a CPZ, before impaling itself on the arena wall with its axe. Growler tried to rip it free, but failed, bending Comengetorix's axe sideways. After sustaining this damage, Comengetorix finally retrieved its axe and escaped, very nearly driving into the pit in the process, while even Warhog skirted around the edge of the pit for the second time in the melee.


Comengetorix attaches itself to the arena wall.
S.M.I.D.S.Y. pushes St. Agro into the pit.
Meanwhile, S.M.I.D.S.Y. shoved the defenseless St. Agro into the pit, finally ending the streak of near-misses with the pit, while Comengetorix avoided the House Robots. S.M.I.D.S.Y. pushed Warhog back towards Shunt, which thrust its axe the wok on top of Warhog, and dragged it around.
- "It's now free, and it's gone in the pit? No! Very nearly, ooh, and the crowd! Dear, dear, Warhog's almost gone in, and now finally St. Agro's bitten the dust and they've gone in! Dear, oh dear, oh dear."
- — Jonathan Pearce struggles to keep up as St. Agro finally goes into the pit after close shaves for both Comengetorix and Warhog
S.M.I.D.S.Y. puts Warhog in the pit.
Comengetorix was pushed into Shunt's CPZ by S.M.I.D.S.Y., but the house robot was still attacking Warhog, so Comengetorix attacked the vulnerable machine as well. S.M.I.D.S.Y. pushed Warhog across the arena, over the flame pit, and into an empty CPZ, and began to lift it. Growler came slamming in, knocking Warhog onto the top of S.M.I.D.S.Y. for a second time, which once again, paraded Warhog around the arena, carrying it all the way to the pit, and dropped it in.
Jonathan Pearce was very animated during this high-action battle, and declared that it must be one of the greatest fights ever in Robot Wars, one that would send S.M.I.D.S.Y. and Comengetorix through to the second round.
Qualified: S.M.I.D.S.Y. & Comengetorix
Round 2
Dominator 2 (6) vs S.M.I.D.S.Y.

Sparks fly as S.M.I.D.S.Y. attacks Dominator.
The battle started quickly with Dominator 2 trying to axe S.M.I.D.S.Y., but S.M.I.D.S.Y. used its greater agility to dodge the axe. Dominator 2 was then pushed into an arena wall by S.M.I.D.S.Y., but Dominator 2 escaped and used its axe again and almost punctured one of S.M.I.D.S.Y.'s tyres. More pushing ensued until Dominator 2 almost punctured one of S.M.I.D.S.Y.'s tyres with its axe again. S.M.I.D.S.Y. used its flywheel, but it had little effect on Dominator 2, although this generated many sparks. Both robots then entered a CPZ due to a push from Dominator, and Growler came smashing into both robots and attempted to pin S.M.I.D.S.Y.

Dominator punctures one of S.M.I.D.S.Y.'s wheels.
- "Oh Growler! Look at that, both went into the CPZ and Growler came in with a right, roar ripping shunt."
- — Jonathan Pearce on Growler's ferocious drive
This huge attack completely split Dominator 2's baseplate in half, and caused major internal damage to S.M.I.D.S.Y.
Dominator 2 finally managed to puncture one of S.M.I.D.S.Y.'s tyres, but by this time S.M.I.D.S.Y. had slowed down and appeared to have lost drive in one side. It then caught fire from the flame pit just as cease was called, and the Judges chose Dominator 2 to go through.
Winner: Dominator 2
Comengetorix vs Hydra
Hydra pushes Comengetorix back
Comengetorix loses its flipper
Hydra dominated the battle, pushing Comengetorix around the arena and due to the floor being slippery with hydraulic fluid, Comengetorix couldn't get any traction. Hydra overturned Comengetorix several times, getting it on the arena wall at one stage. Comengetorix recovered, but its flipping arm broke off in the process.
Comengetorix grapples onto the insides of Hydra.
- "And Hydra, with Dennis and Andrew at the controls, have been very effective, and they have driven Comengetorix almost in submission."
- — Jonathan Pearce
In the last 10 seconds of the bout, Comengetorix managed to get its axe into Hydra's inner workings and had a tug-of war towards the flames but the fight ended. The judges decided that Hydra had won the fight due to it being more aggressive.
Winner: Hydra
Final
Dominator 2 (6) vs Hydra

Dominator 2 is flipped by Hydra

Dominator 2 spikes the top of Hydra
The battle started quickly as both robots crashed into each other, but Hydra then flipped Dominator 2 over and pushed it towards the arena wall. The fight slowed down a bit with both robots circling each other until Hydra flipped Dominator 2 again. However Dominator 2 self-righted and went on the attack, peppering Hydra with many axe blows, Hydra then pressed the pit release button.
- "Hydra, all of a sudden, does look a little battle weary."
- — Jonathan Pearce as Dominator 2 starts to assert itself for the first time

Dominator 2 comes back into the battle
Dominator 2 collects more damage points
Dominator 2's axe then got stuck and Hydra attempted to use its own axe, but it only bounced over Dominator 2's armour. Both robots became unstuck and Hydra seemed to slow right down to a crawl, the battle ended and the judges chose Dominator 2 to go through to the semi-finals.
Heat Winner: Dominator 2
- "You don't need spots, or boils, or sores, and you can't wear an anorak, on Robot Wars!"
- — Craig Charles' sign-off
Trivia
- This episode was the only occasion in three attempts at the UK championship that Hydra made it past the first round and one of only two occasions that S.M.I.D.S.Y failed to reach the heat final.
- Both heat semi-finals and the heat final went to the judges, something not seen since Heat K of Series 2.
- St. Agro fell in Round 1, making this the only time a robot from Cornwall fought in the main competition without winning its heat.
- This was the last appearance of Team Comengetorix & Team Warhog.
- For the second series in a row, Axe-C-Dent and Sumpthing were in the same heat.
| |||||||||||