StormProof (talk | contribs) |
Snowdog140 (talk | contribs) |
||
| Line 24: | Line 24: | ||
!'''Specifications''' |
!'''Specifications''' |
||
|+ |
|+ |
||
| − | |rowspan=" |
+ | |rowspan="6"|[[File:Brimhur.JPG|200px|center]] |
|'''Weight:''' 77.9kg |
|'''Weight:''' 77.9kg |
||
|- |
|- |
||
| Line 37: | Line 37: | ||
|'''Notes:''' Can operate upside-down |
|'''Notes:''' Can operate upside-down |
||
|- |
|- |
||
| − | |colspan="2"|'''From:''' Oldham<br/> |
+ | |colspan="2"|'''From:''' Oldham<br/>'''Team Members:''' Mike Mackenzie, Paul Mainwaring & Daniel Hudson |
| − | |- |
||
| − | |'''Team Members:''' Mike Mackenzie, Paul Mainwaring & Daniel Hudson |
||
|} |
|} |
||
| Line 46: | Line 44: | ||
!'''Specifications''' |
!'''Specifications''' |
||
|+ |
|+ |
||
| − | |rowspan=" |
+ | |rowspan="6"|[[File:Red_Dragon.jpg|200px|center]] |
|'''Weight:''' 79.5kg |
|'''Weight:''' 79.5kg |
||
|- |
|- |
||
| Line 59: | Line 57: | ||
|'''Notes:''' Cost £1398.70 |
|'''Notes:''' Cost £1398.70 |
||
|- |
|- |
||
| − | |colspan="2"|'''From:''' Sunderland<br/> |
+ | |colspan="2"|'''From:''' Sunderland<br/>'''Team Members:''' Tom Armstrong, Tom Armstrong Jr & Steve Armstrong |
| − | |- |
||
| − | |'''Team Members:''' Tom Armstrong, Tom Armstrong Jr & Steve Armstrong |
||
|} |
|} |
||
| Line 68: | Line 64: | ||
!'''Specifications''' |
!'''Specifications''' |
||
|+ |
|+ |
||
| + | |rowspan="6"|[[File:Stinger_with_pizza_cutter.gif|200px|center]] |
||
| − | |rowspan="8"|''image of robot'' |
||
|'''Weight:''' 73.8kg |
|'''Weight:''' 73.8kg |
||
|- |
|- |
||
| Line 81: | Line 77: | ||
|'''Notes:''' Cost £750 |
|'''Notes:''' Cost £750 |
||
|- |
|- |
||
| − | |colspan="2"|'''From:''' Lincoln<br/> |
+ | |colspan="2"|'''From:''' Lincoln<br/>'''Team Members:''' Kevin Scott, Karl Skinner & Jonathan Pillai |
| − | |- |
||
| − | |'''Team Members:''' Kevin Scott, Karl Skinner & Jonathan Pillai |
||
|} |
|} |
||
| Line 90: | Line 84: | ||
!'''Specifications''' |
!'''Specifications''' |
||
|+ |
|+ |
||
| − | |rowspan=" |
+ | |rowspan="6"|[[File:ST.JPG|200px|center]] |
|'''Weight:''' 72.1kg |
|'''Weight:''' 72.1kg |
||
|- |
|- |
||
| Line 103: | Line 97: | ||
|'''Notes:''' Aluminium + steel shell |
|'''Notes:''' Aluminium + steel shell |
||
|- |
|- |
||
| − | |colspan="2"|'''From:''' Derby<br/> |
+ | |colspan="2"|'''From:''' Derby<br/>'''Team Members:''' Andrew Jeffery, Martin Jeffery & Charles Binns |
| − | |- |
||
| − | |'''Team Members:''' Andrew Jeffery, Martin Jeffery & Charles Binns |
||
|} |
|} |
||
| Line 112: | Line 104: | ||
!'''Specifications''' |
!'''Specifications''' |
||
|+ |
|+ |
||
| − | |rowspan=" |
+ | |rowspan="6"|[[File:Weeliwako.JPG|200px|center]] |
|'''Weight:''' 78.3kg |
|'''Weight:''' 78.3kg |
||
|- |
|- |
||
| Line 125: | Line 117: | ||
|'''Notes:''' Aluminium beer barrel body |
|'''Notes:''' Aluminium beer barrel body |
||
|- |
|- |
||
| − | |colspan="2"|'''From:''' |
+ | |colspan="2"|'''From:''' Brighton<br/>'''Team Members:''' John Wyatt, Lorne Baker & Raymond Taylor |
| − | |- |
||
| − | |'''Team Members:''' John Wyatt, Lorne Baker & Raymond Taylor |
||
|} |
|} |
||
| Line 135: | Line 125: | ||
!'''Specifications''' |
!'''Specifications''' |
||
|+ |
|+ |
||
| − | |rowspan=" |
+ | |rowspan="6"|[[File:Forklift's_revenge.JPG|200px|center]] |
|'''Weight:''' 77.2kg |
|'''Weight:''' 77.2kg |
||
|- |
|- |
||
| Line 148: | Line 138: | ||
|'''Notes:''' Cost £352.67 |
|'''Notes:''' Cost £352.67 |
||
|- |
|- |
||
| − | |colspan="2"|'''From:''' Ipswich<br/> |
+ | |colspan="2"|'''From:''' Ipswich<br/>'''Team Members:''' John Benton, Bob Benton & Andrew Shorter |
| − | |- |
||
| − | |'''Team Members:''' John Benton, Bob Benton & Andrew Shorter |
||
|} |
|} |
||
| Line 157: | Line 145: | ||
!'''Specifications''' |
!'''Specifications''' |
||
|+ |
|+ |
||
| − | |rowspan=" |
+ | |rowspan="6"|[[File:Mace_2.JPG|200px|center]] |
|'''Weight:''' 78.6kg |
|'''Weight:''' 78.6kg |
||
|- |
|- |
||
| Line 170: | Line 158: | ||
|'''Notes:''' Aluminium body |
|'''Notes:''' Aluminium body |
||
|- |
|- |
||
| − | |colspan="2"|'''From:''' East Sussex<br/> |
+ | |colspan="2"|'''From:''' East Sussex<br/>'''Team Members:''' Shane Howard & Brian Fountain |
| − | |- |
||
| − | |'''Team Members:''' Shane Howard & Brian Fountain |
||
|} |
|} |
||
| Line 179: | Line 165: | ||
!'''Specifications''' |
!'''Specifications''' |
||
|+ |
|+ |
||
| − | |rowspan=" |
+ | |rowspan="6"|[[File:Raizer_blade.JPG|200px|center]] |
|'''Weight:''' 77.8kg |
|'''Weight:''' 77.8kg |
||
|- |
|- |
||
| Line 192: | Line 178: | ||
|'''Notes:''' Aluminium + steel shell |
|'''Notes:''' Aluminium + steel shell |
||
|- |
|- |
||
| − | |colspan="2"|'''From:''' Cambridge<br/> |
+ | |colspan="2"|'''From:''' Cambridge<br/>'''Team Members:''' Paul Hart, Howard Andrews & Steve Scotcher |
| − | |- |
||
| − | |'''Team Members:''' Paul Hart, Howard Andrews & Steve Scotcher |
||
|} |
|} |
||
Revision as of 19:21, 31 October 2011
Heat A of Robot Wars: The Third Wars was the first of sixteen heats which determined the Semi-Finalists of Robot Wars: The Third Wars. The episode featuring Heat A was originally broadcast on December 3, 1999 on BBC Two.
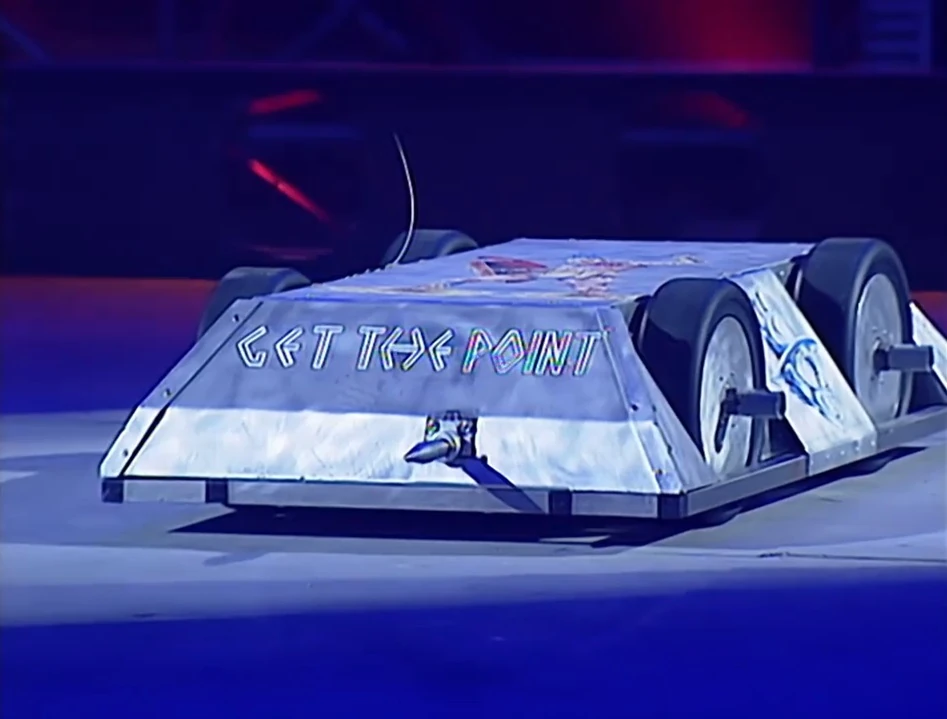
- Heat A was the début of both Weeliwako and Stinger - the first torque reaction axlebots in Robot Wars. Stinger in particular would go on to great success, despite its poor performance in its fight against Mace 2.
- This heat marked Suicidal Tendencies's only main competition loss in which it did not break down.
- Mace 2 was the winner of the heat, one of only three of Series 2's semi-finalists to make the Series 3 semi-finalists.
Competing Robots
Newcomers
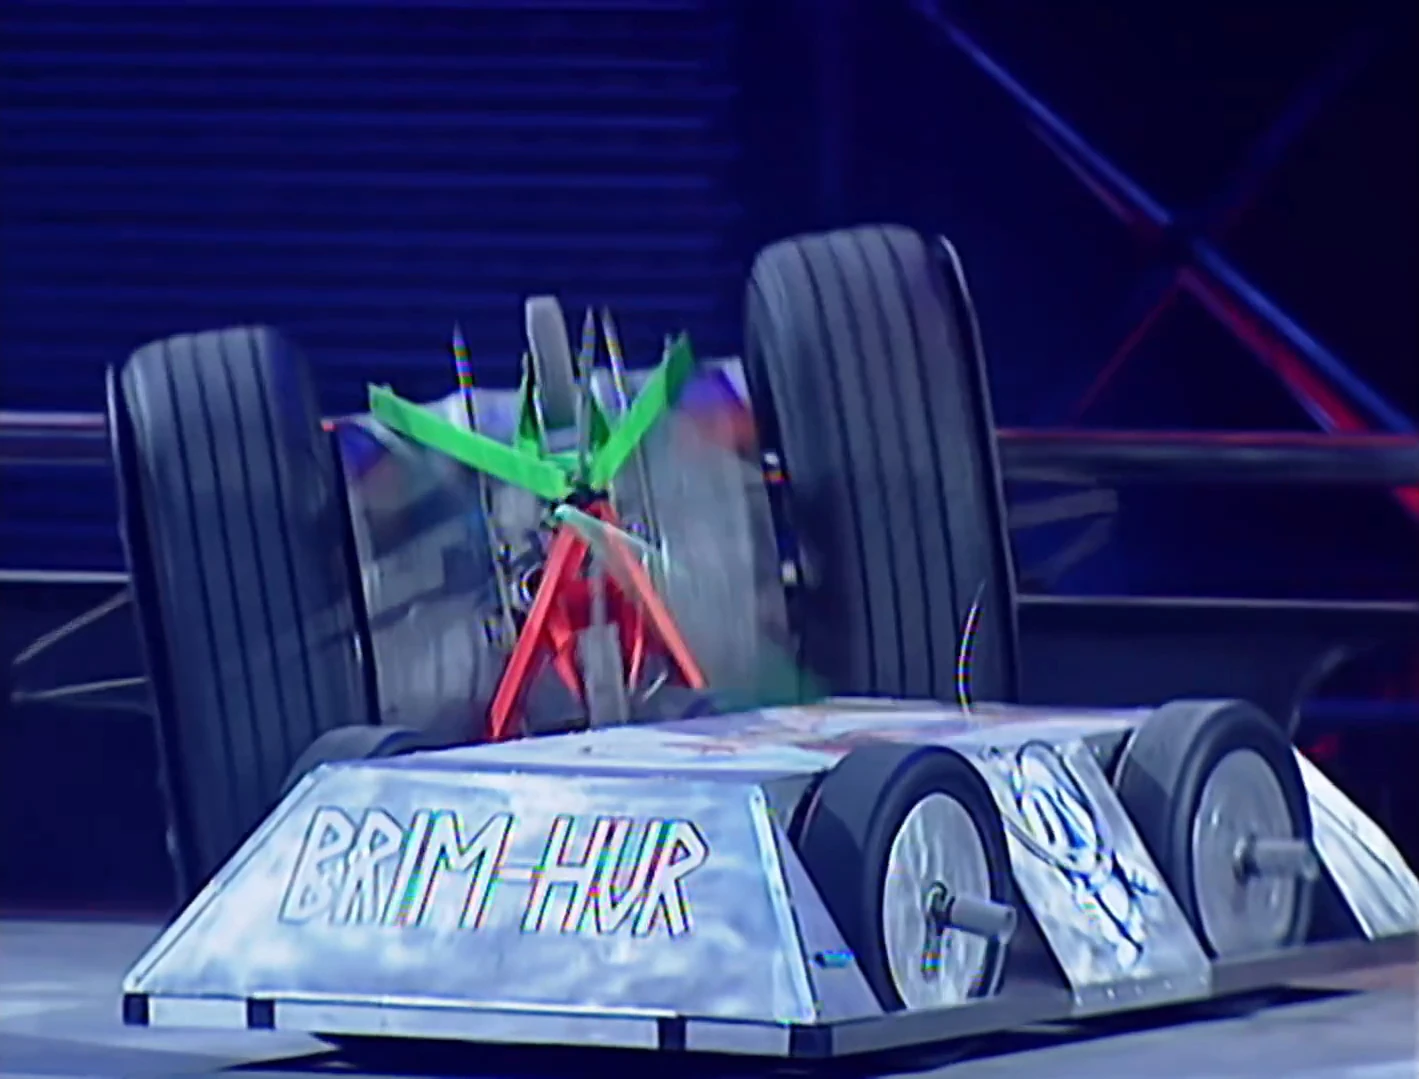
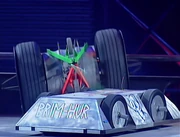
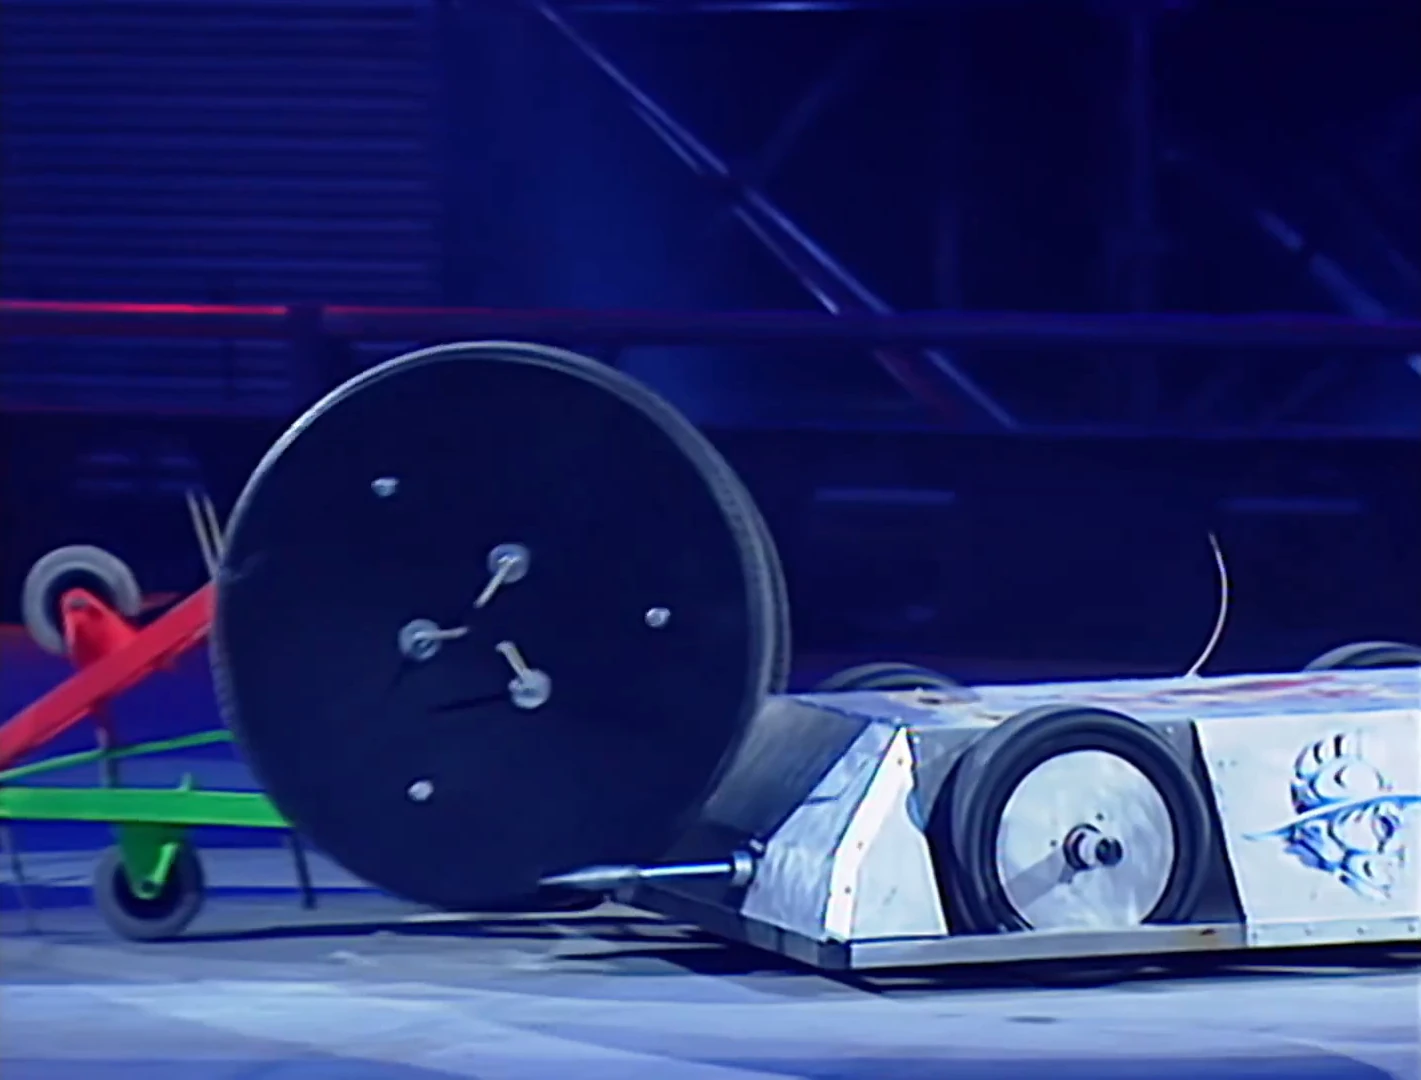
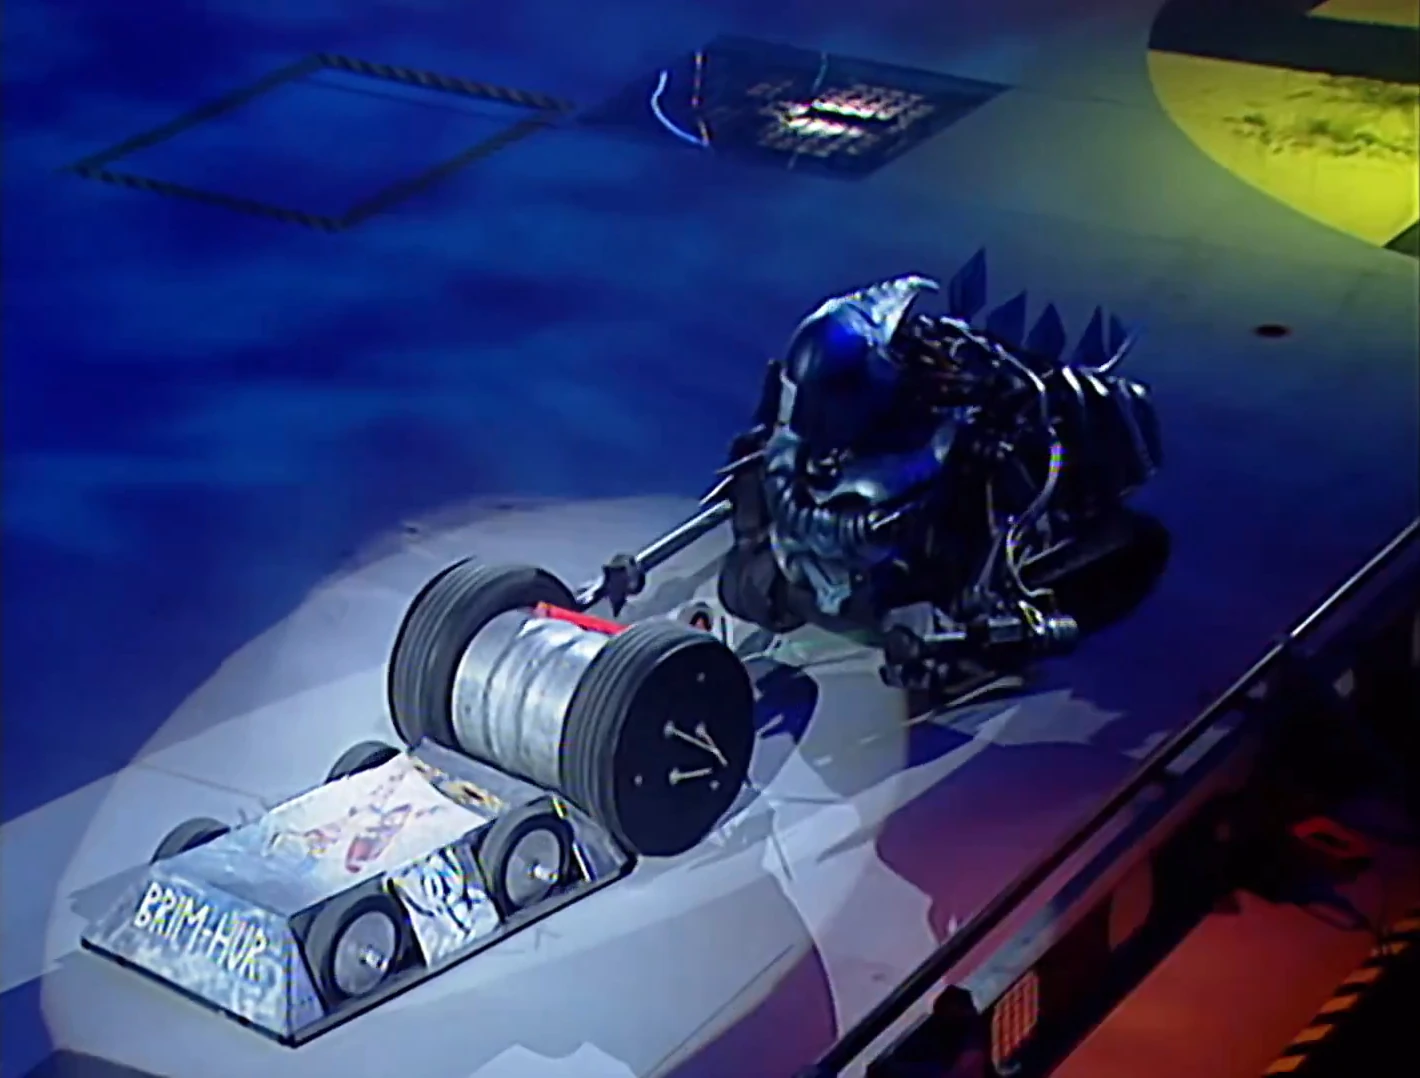
| Brimhur | Specifications |
|---|---|
 |
Weight: 77.9kg |
| Dimensions: 0.24 x 1.14 x 0.69m | |
| Clearance: 0.06m | |
| Power: 2 x Wheelchair motors | |
| Weapons: Steel spike | |
| Notes: Can operate upside-down | |
| From: Oldham Team Members: Mike Mackenzie, Paul Mainwaring & Daniel Hudson | |
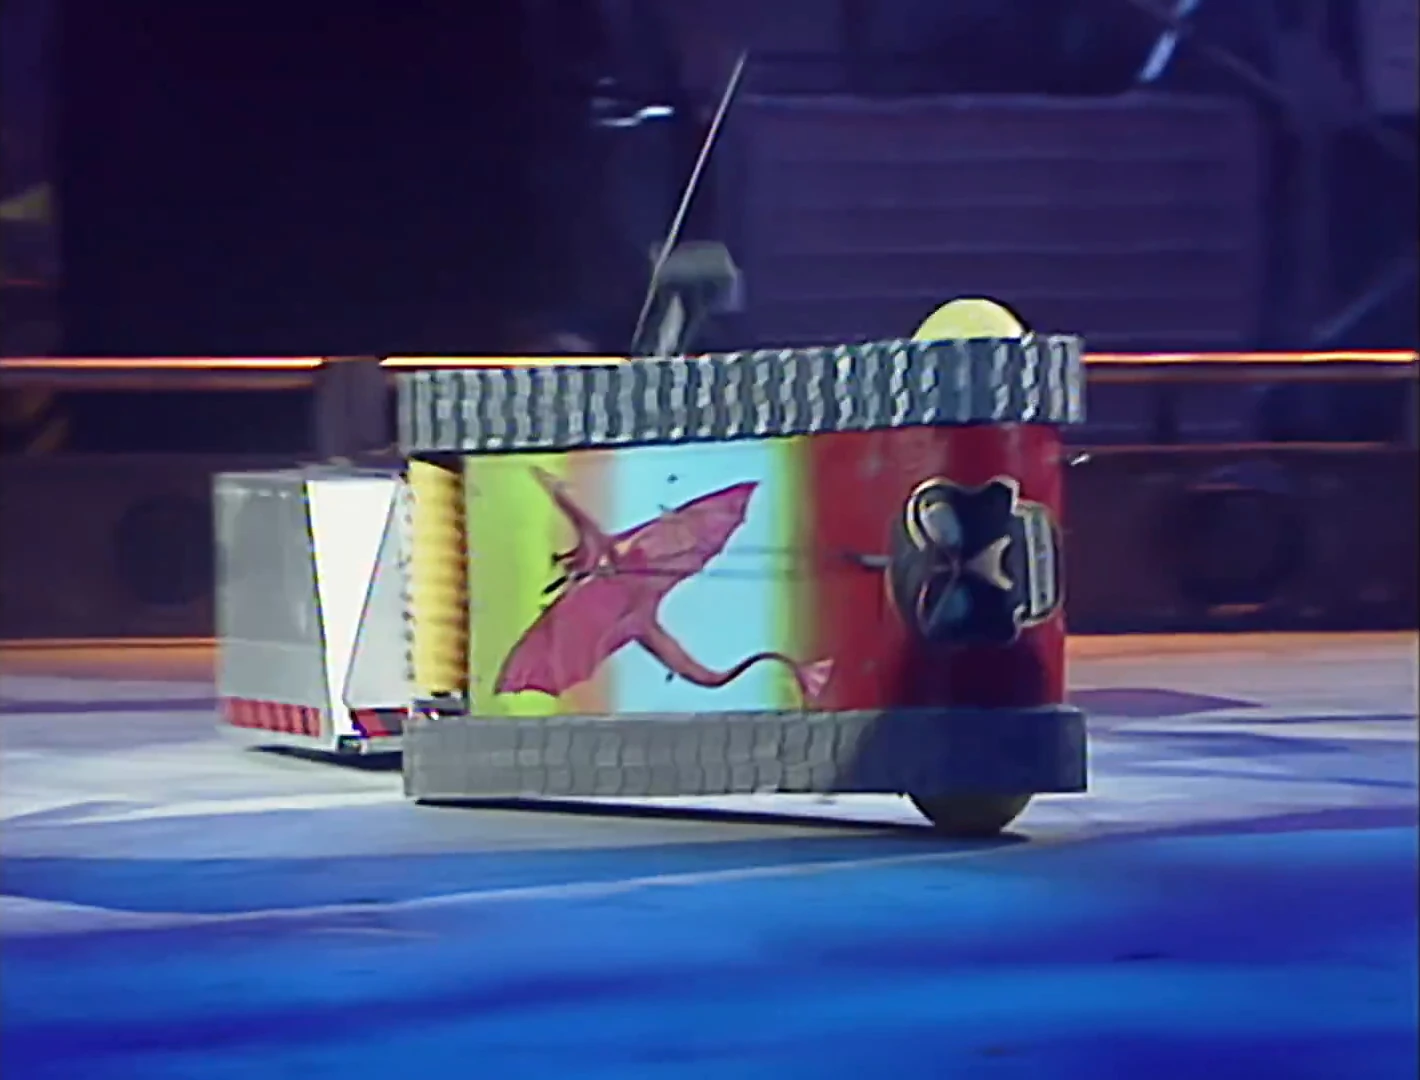
| Red Dragon | Specifications |
|---|---|
 |
Weight: 79.5kg |
| Dimensions: 0.67 x 1.29 x 0.71m | |
| Clearance: 0.03 - 0.10m | |
| Power: 2 x Wheelchair motors | |
| Weapons: Pneumatic claws & lift | |
| Notes: Cost £1398.70 | |
| From: Sunderland Team Members: Tom Armstrong, Tom Armstrong Jr & Steve Armstrong | |
| Stinger | Specifications |
|---|---|
 |
Weight: 73.8kg |
| Dimensions: 0.46 x 0.98 x 0.72m | |
| Clearance: 0.02m | |
| Power: 2 x Electric motors | |
| Weapons: 5 Kg tail wheel | |
| Notes: Cost £750 | |
| From: Lincoln Team Members: Kevin Scott, Karl Skinner & Jonathan Pillai | |
| Suicidal Tendencies | Specifications |
|---|---|
 |
Weight: 72.1kg |
| Dimensions: 0.29 x 0.99 x 0.55m | |
| Clearance: 0.04m | |
| Power: 1 x Mini starter motor | |
| Weapons: Milling cutters | |
| Notes: Aluminium + steel shell | |
| From: Derby Team Members: Andrew Jeffery, Martin Jeffery & Charles Binns | |
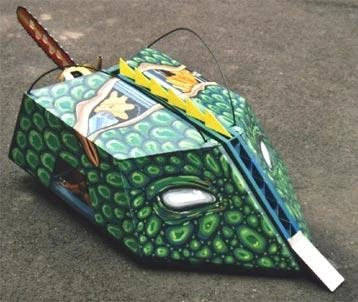
| Weeliwako | Specifications |
|---|---|
 |
Weight: 78.3kg |
| Dimensions: 1.43 x 0.57 x 1.00m | |
| Clearance: 0.03m | |
| Power: 2 x Wheelchair motors | |
| Weapons: Spikes | |
| Notes: Aluminium beer barrel body | |
| From: Brighton Team Members: John Wyatt, Lorne Baker & Raymond Taylor | |
Veterans
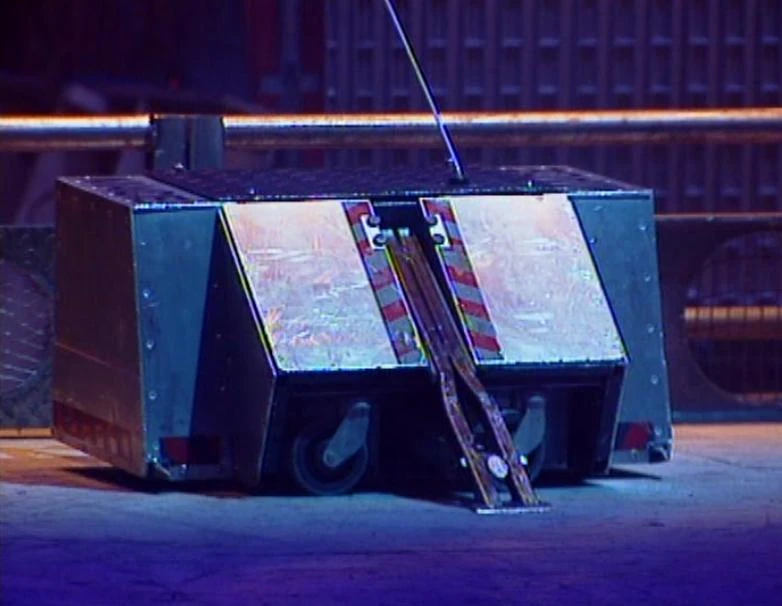
| Forklift's Revenge | Specifications |
|---|---|
 |
Weight: 77.2kg |
| Dimensions: 0.55 x 0.94 x 0.65m | |
| Clearance: 0.05m | |
| Power: 4 x Wheelchair motors | |
| Weapons: Toothed chain drive | |
| Notes: Cost £352.67 | |
| From: Ipswich Team Members: John Benton, Bob Benton & Andrew Shorter | |
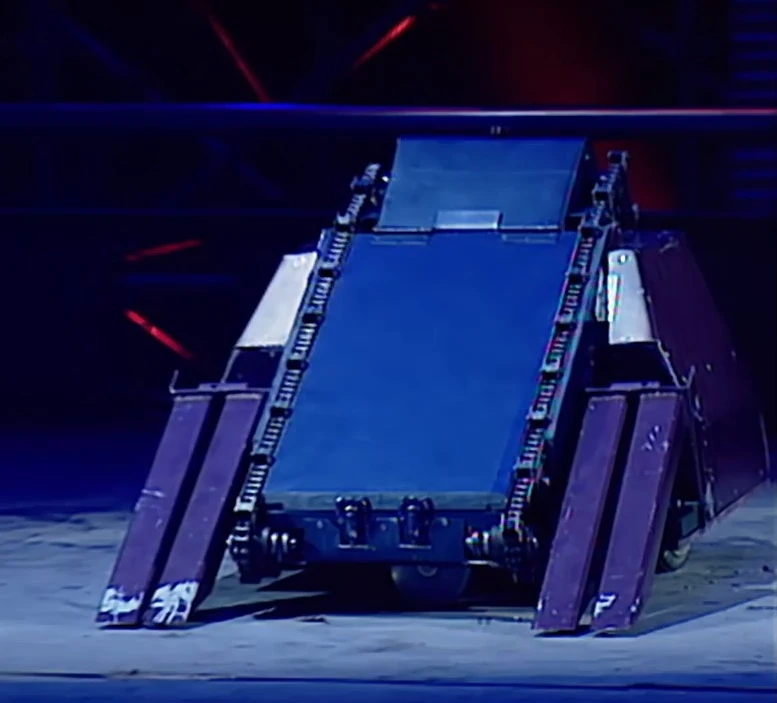
| Mace 2 | Specifications |
|---|---|
 |
Weight: 78.6kg |
| Dimensions: 0.37 x 1.14 x 0.77m | |
| Clearance: 0.03m | |
| Power: 2 x Wheelchair motors | |
| Weapons: Lift & ram at the front | |
| Notes: Aluminium body | |
| From: East Sussex Team Members: Shane Howard & Brian Fountain | |
| Raizer Blade | Specifications |
|---|---|
 |
Weight: 77.8kg |
| Dimensions: 0.59 x 1.68 x 0.76m | |
| Clearance: 0.02m | |
| Power: 2 x Electric motors | |
| Weapons: Chainsaw & hydraulic lift | |
| Notes: Aluminium + steel shell | |
| From: Cambridge Team Members: Paul Hart, Howard Andrews & Steve Scotcher | |
Round 1
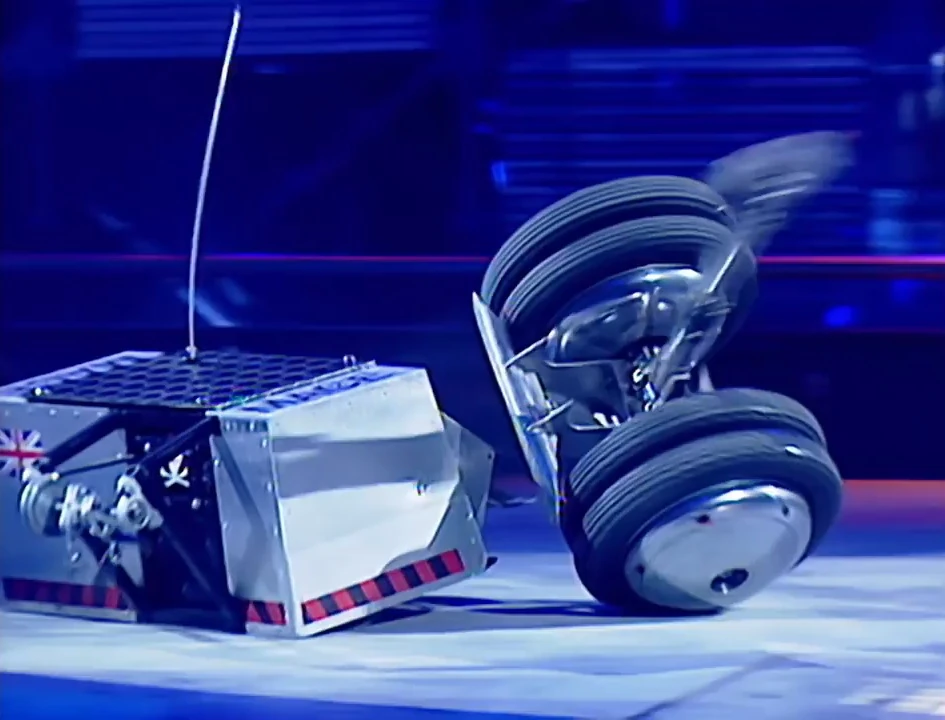
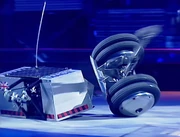
Stinger vs Mace 2
Mace 2 deflects an attack from Stinger

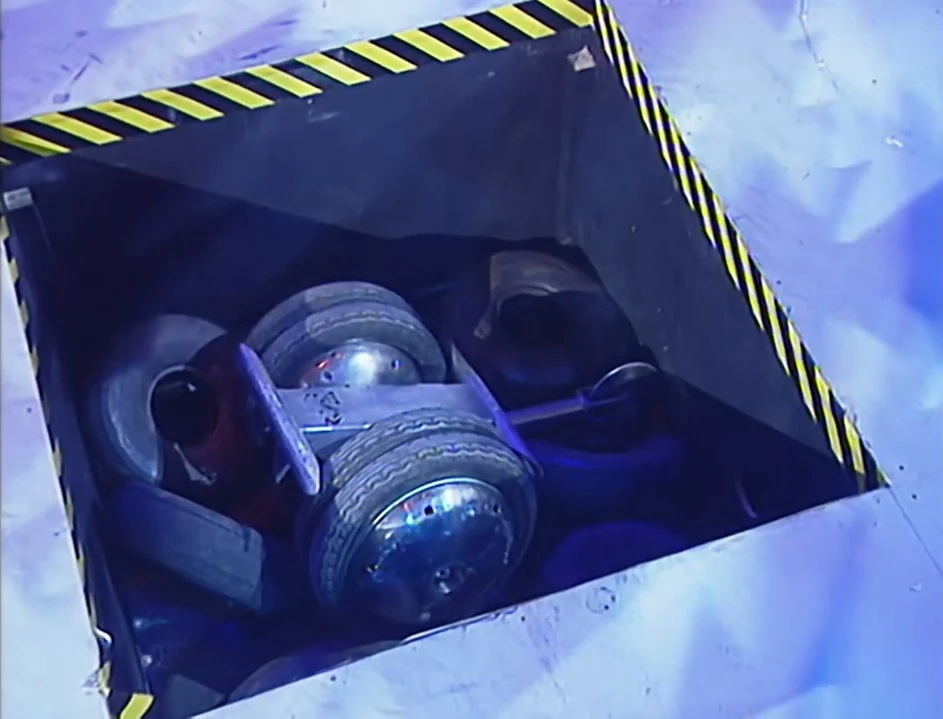
Stinger topples into the pit

Stinger in the pit
Mace 2 started much quicker and closed the distance between the robots, reaching Stinger just as it began to move. Stinger braked and swung its weapon across, but Mace 2 was too close and the attack was simply deflected onto the ground.
- "And again Stinger crashes that great grinding wheel against the floor of the arena - what on earth for? Wasted energy there!"
- — Jonathan Pearce
Stinger moved away and attempted to swing its weapon, but Mace 2 kept in close proximity, preventing Stinger from gaining torque. Stinger moved back and drove at Mace 2, its weapon deflecting off the robots side and sending Stinger flailing on one wheel and then down. Mace 2 fired its flipper several times, but the axlebot was resistant to the weapon. Mace 2 bumped Stinger twice, easily avoiding the weapon, before both robots reversed away. Mace 2 pulled out of reverse cleanly, but Stinger flailed and rolled over and over.
- "Do they really know what they're doing? Should we have tested them for booze beforehand, I wonder?"
- — Jonathan Pearce
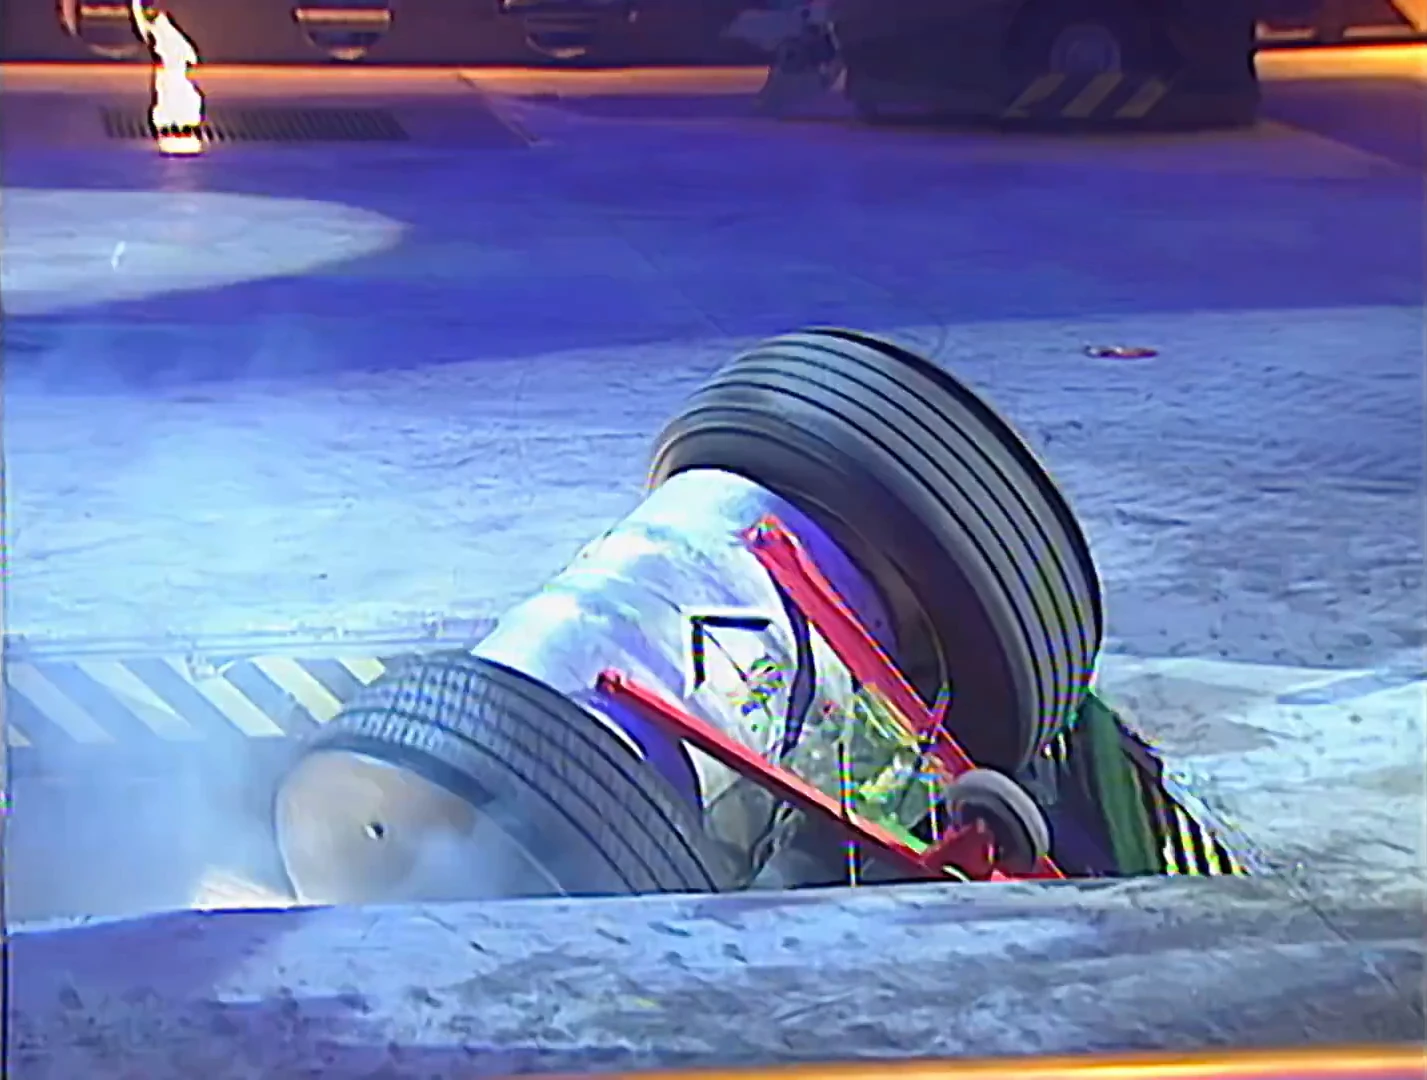
Mace 2 pressured Stinger, causing it to roll further towards the pit. Stinger turned, its weapon clashing against the side wall and sending a shower of sparks. It then drove straight into the approaching Mace 2, bouncing off and falling into the pit.
- "Well it was only a matter of time, absolute Loony Tunes from the Stinger team."
- — Jonathan Pearce
Winner: Mace 2
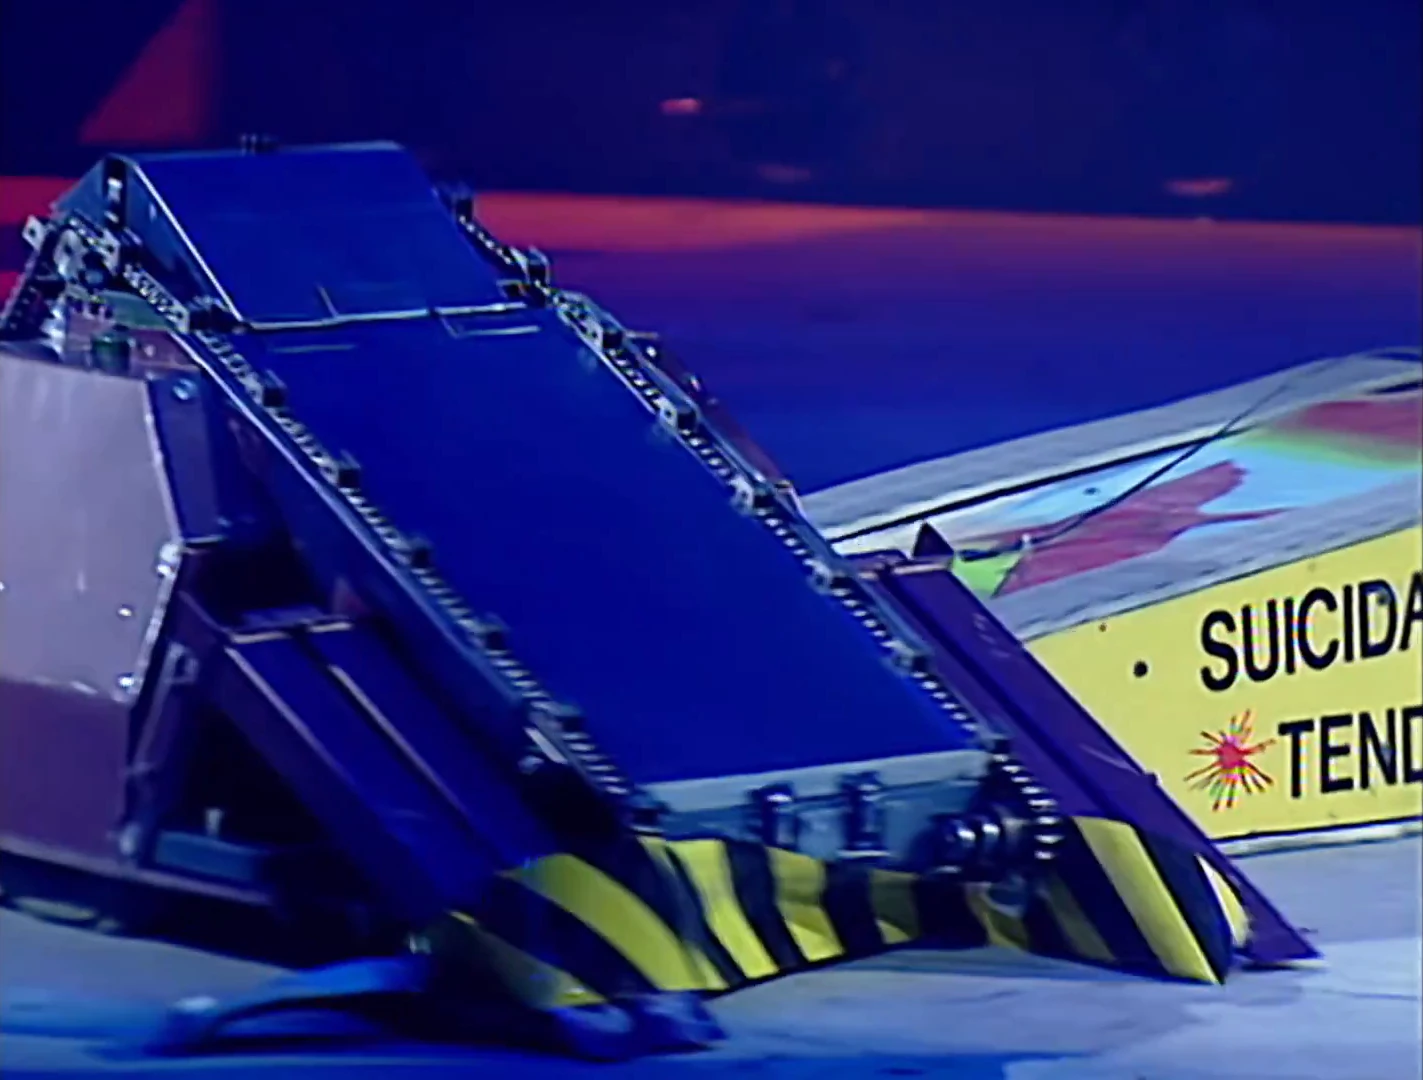
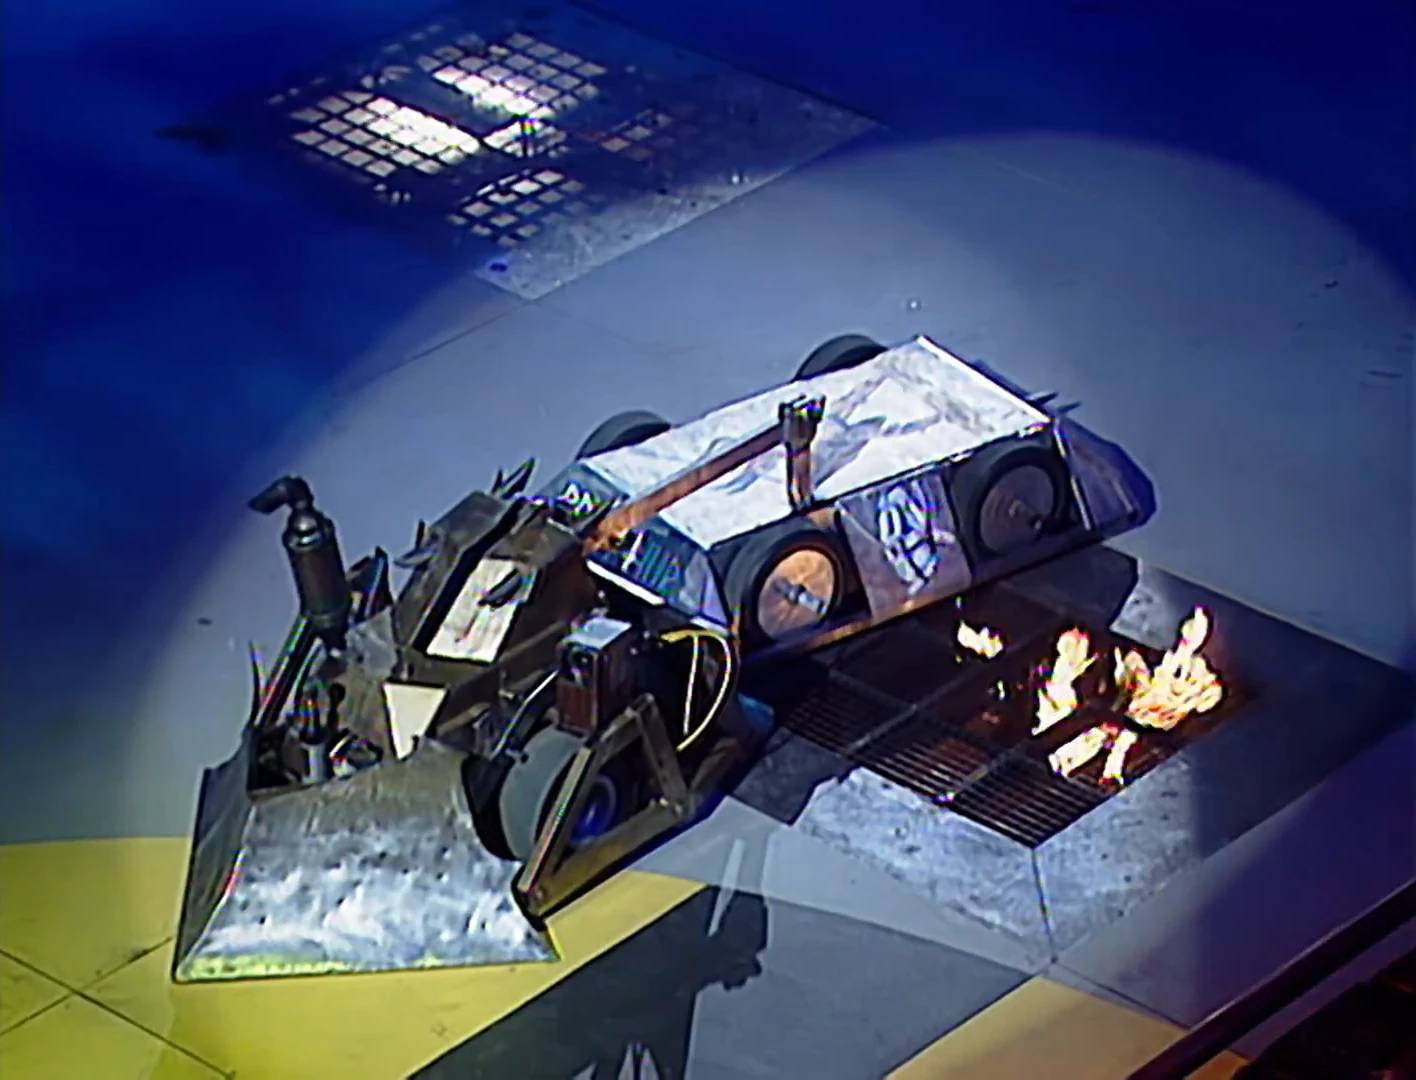
Forklift's Revenge vs Suicidal Tendencies

Suicidal Tendencies pushes Forklift's Revenge, who is clinging to the floor tape

Killalot skewers Forklift's Revenge
The two robots collided and both attempted to push the other, to no avail. Forklift's Revenge's belts started spinning, but the flat, tracked Suicidal Tendencies was resistant to being caught by such weapons. Both robots turned away, but Suicidal Tendencies had a small turning circle, and launched an attack on the still turning Forklift's Revenge, driving up the wedge and down again. Both robots spun away, but again the swifter Suicidal Tendencies was able to position itself easier, running into the rear of Forklift's Revenge and jamming the chain belt.
- "Suicidal Tendencies, makes one attack and then thinks twice about committing suicide, and turning away."
- — Jonathan Pearce
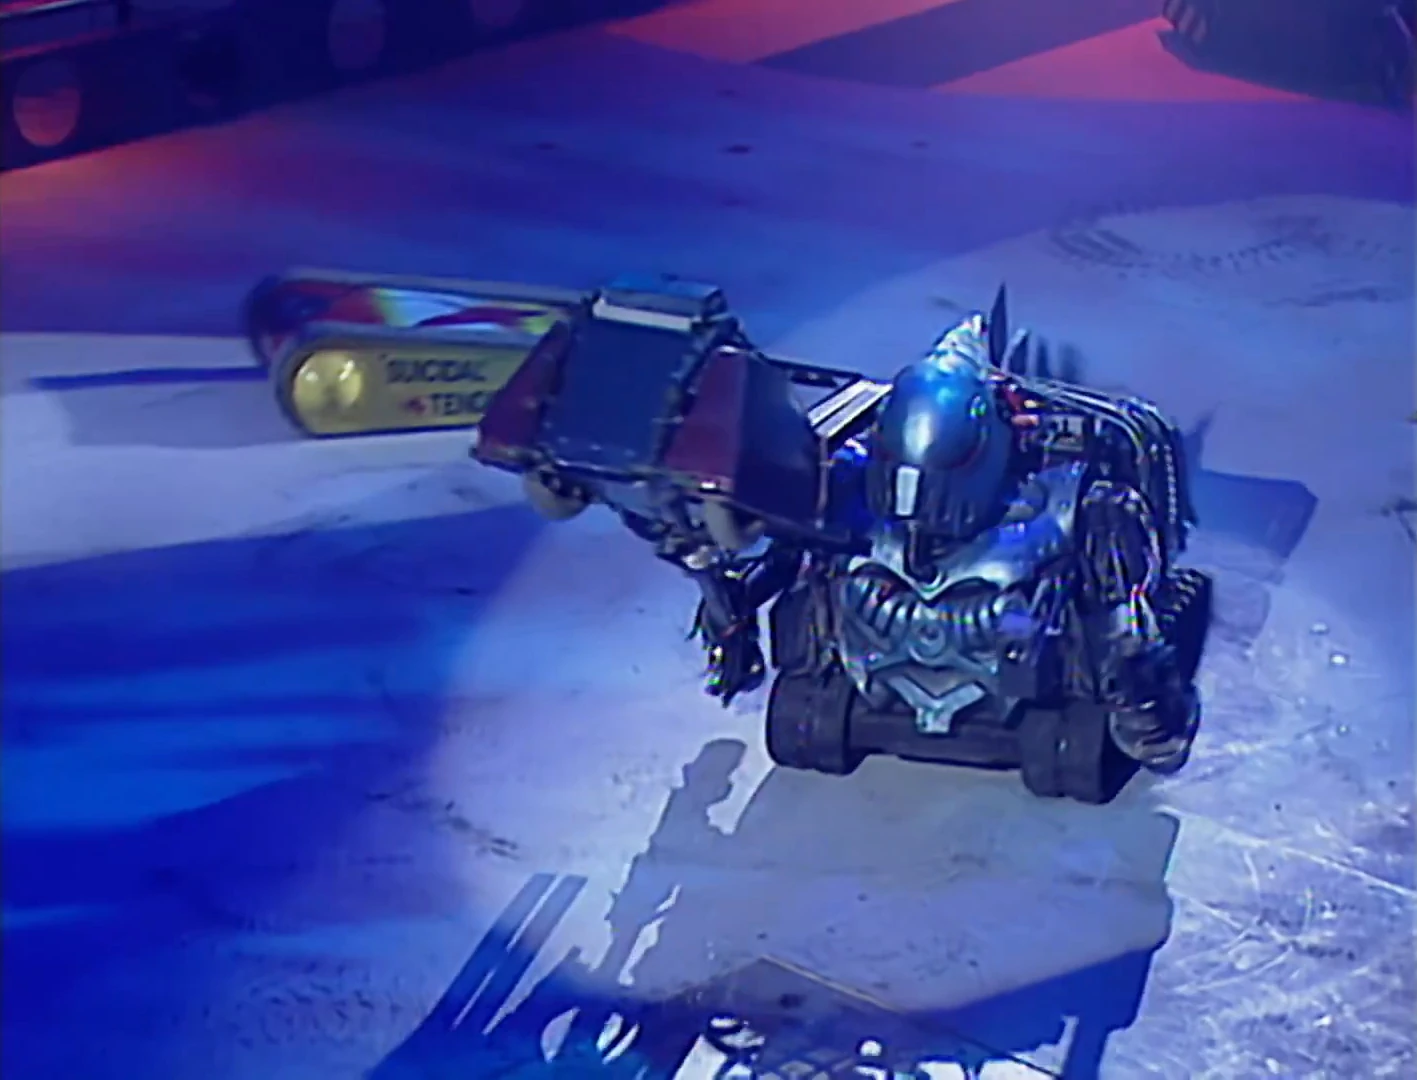
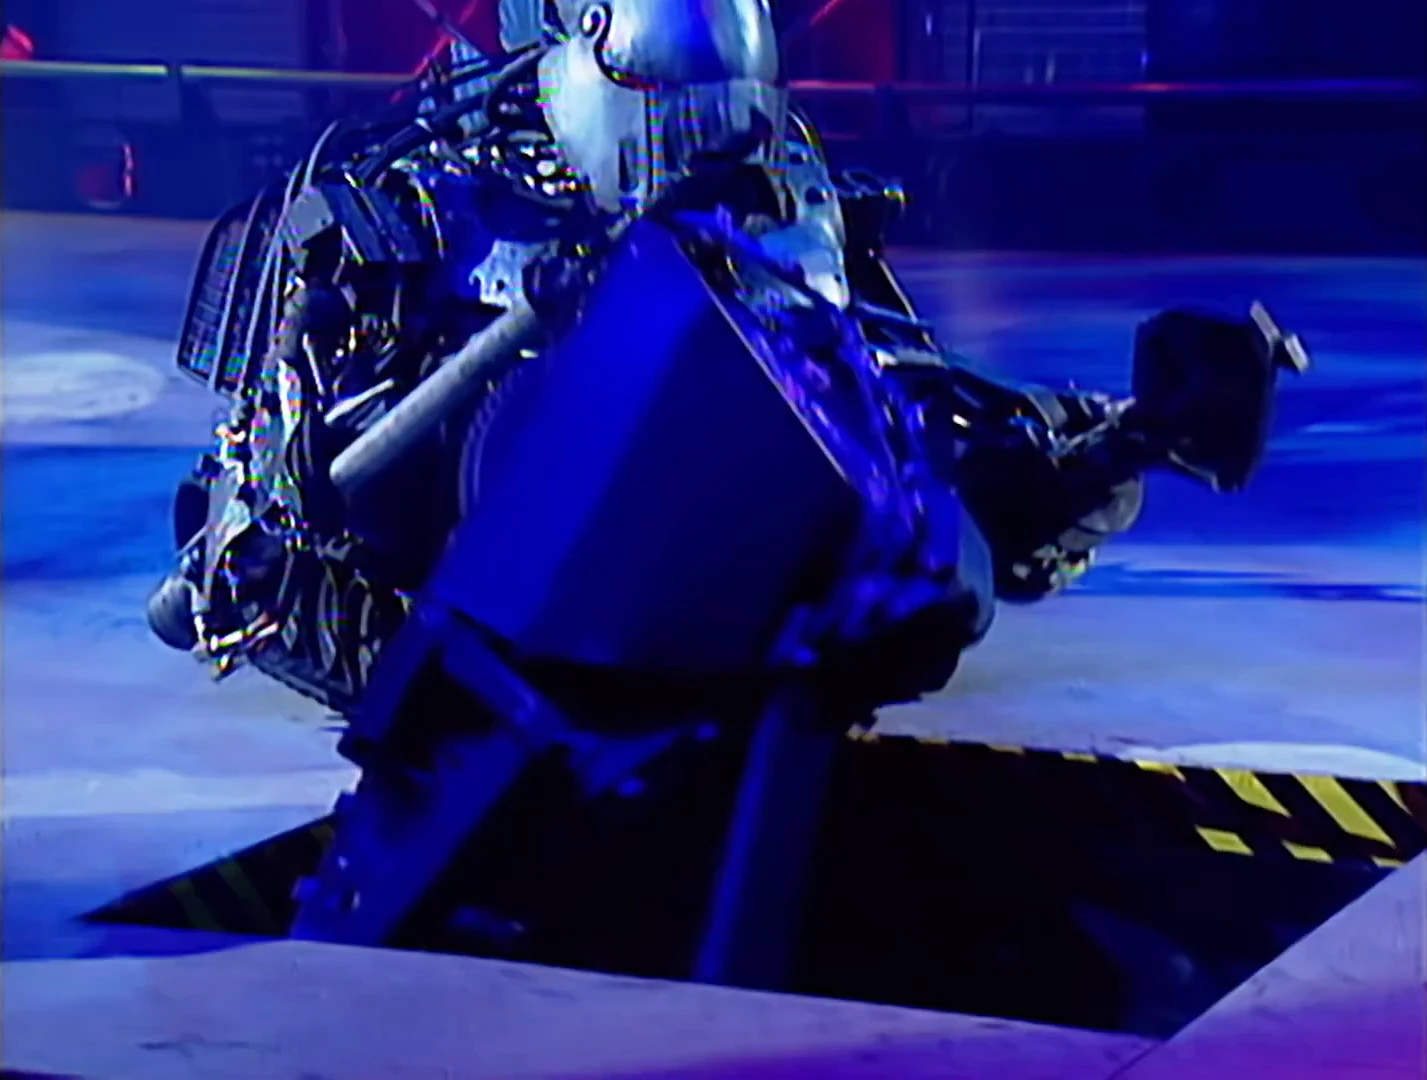
The robots pulled away, ramming together, and the wedges of Forklift's Revenge scraped one of the pieces of tape that marked the floor flipper away. Suicidal Tendencies attacked Forklift's Revenge's exposed side, pushing it up against a nearby flame pit. Forklift's Revenge escaped and moved back into the centre of the arena, but Suicidal Tendencies attacked again and pushed it into Sir Killalot. Sir Killalot dug his lance into the right chain of Forklift's Revenge, lifting it above his head. Spinning his lance, Forklift's Revenge flailed in mid-air and came to rest against Killalot's shoulder.

Killalot pits Forklift's Revenge
- "Oh, look at that! This is a mere bauble, a toy, for Killalot, that's rather gruesome."
- — Jonathan Pearce
Killalot then moved into the centre of the arena and spun around with Forklift's Revenge, before moving to the pit. Placing Forklift's Revenge in, Killalot lowered his lance and pried his lance out from the chain, leaving Forklift's Revenge to drop into the pit.
- "Well, phenomenal driving skills from Suicidal Tendencies - suddenly, he seems to want to live, and he's through to the next round."
- — Craig Charles
Winner: Suicidal Tendencies
Brimhur vs Weeliwako
- "And a slow, sluggish start."
- — Jonathan Pearce
Brimhur pushes Weeliwako into the wall

Brimhur's spear misses Weeliwako's tire
The battle began very slowly, with Brimhur edging foward and Weeliwako swaying its weapon forward and back. Brimhur bumped Weeliwako, easily getting beneath the ground clearance, whilst Weeliwako thudded its weapon on either side to no effect. Brimhur pushed into Weeliwako's wheel, but the axlebot design simply meant that Brimhur was pushing Weeliwako in a circle. Weeliwako drove around behind Brimhur, who reversed into it and began pushing it towards the side wall. Weeliwako managed to drive free and finally brought its weapon down on Brimhur, but caused very little damage, and whilst it moved back for another swing, Brimhur moved out of reach. Weeliwako swung again and clipped the passing Brimhur, again to no visible effect. Brimhur drove into Weeliwako, knocking it aside, and stabbing its spike in an attempt to hit Weeliwako's large wheel. Weeliwako swung its weapon over, but neither robot could hit the other. Brimhur pushed Weeliwako into the side wall, where it retaliated by striking twice more with its weapon.

Weeliwako heaves Brimhur backwards
- "Eight miles an hour, [Weeliwako is] not the quickest in the field. Brimhur can only touch 9 MPH, so this is hardly a Grand Prix of Robot Wars..."
- — Jonathan Pearce
Brimhur managed to make contact with Weeliwako's wheels, but with no real damage. Brimhur pushed Weeliwako into Sir Killalot's CPZ, but before the House Robot could attack, Weeliwako overpowered Brimhur and pushed it across the arena floor.

Shunt shows off its new axe
- "Oh, look at this great strength here!"
- — Jonathan Pearce
Killalot pursued the pair towards the flame pit and harassed Weeliwako, but Brimhur had broken down. Weeliwako flailed, hitting Killalot with its weapon and trying to manoeuvre away. Meanwhile, Shunt drove out of the CPZ and began to put big dents in Brimhur's top armour. Bash, Matilda and Sir Killalot joined the attack on Brimhur, and cease was called.
- "Well, Brimhur was immobilised. Towards the end it was like vultures feeding on a carcass."
- — Craig Charles
Winner: Weeliwako
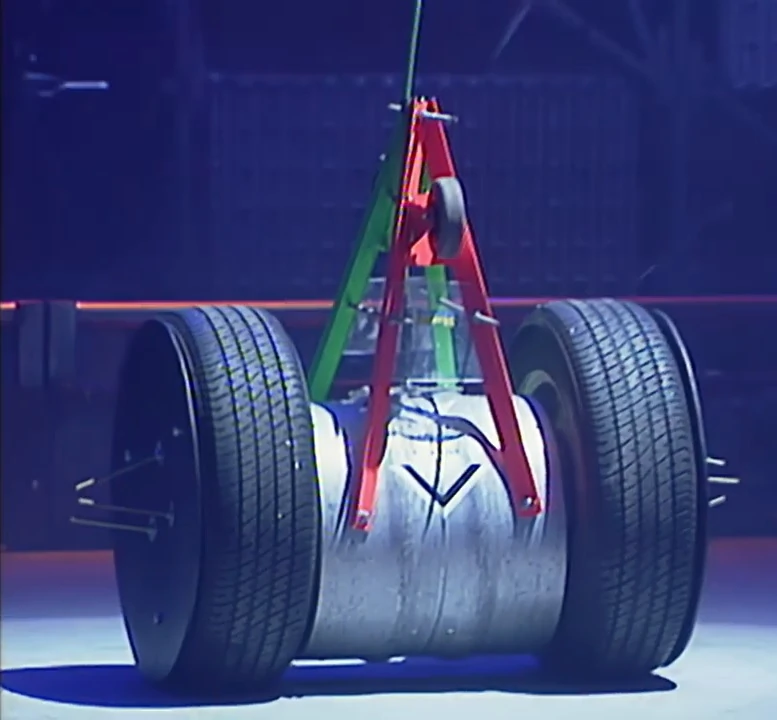
Raizer Blade vs Red Dragon


Killalot pits Red Dragon
Raizer Blade had the faster start and pushed Red Dragon into Sgt. Bash. Red Dragon got caught on the spikes but got away. Raizer Blade then got caught on the spikes itself. It escaped, but got pursued by Sgt. Bash & Sir Killalot. Then, Red Dragon just stopped dead in its tracks. Bash came in and clawed it, before Killalot lifted them into the air and dropped them in the pit.
Winner: Raizer Blade
Round 2
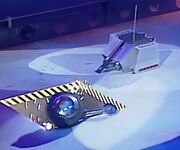
Weeliwako in the pit
Mace 2 vs Weeliwako
The two robots danced around Shunt's CPZ and Weeliwako began swinging its spikes, trying to hit Mace 2. Mace 2 pushed Weeliwako around a bit and then into Sgt. Bash and the flames. Mace 2 got stuck near the flame pit and Weeliwako began attacking it with its spikes. Mace 2 backed up and slammed into Weeliwako again before slowly pushing Weeliwako into the Pit. The house robots then came in and Killalot pulled Weeliwako out of the Pit and over the flame pit as Dead Metal celebrated.
Winner: Mace 2
Raizer Blade vs Suicidal Tendencies

Suicidal Tendencies pushes Raizer Blade
Raizer Blade had a quick start and pushed Suicidal Tendencies around. Suicidal Tendencies drove up on Raizer Blade's side, then slammed into it and shoved it a few centimetres, before, suddenly, one of Suicidal Tendencies' tracks locked up. Raizer Blade pushed them towards the pit and tried to push it in, but accidentally drove itself onto the edge. Suicidal Tendencies managed to escape, before Sir Killalot, trying to nudge Raizer Blade in, bought it back to life. It went to the judges, who gave it to Suicidal Tendencies.
Winner: Suicidal Tendencies
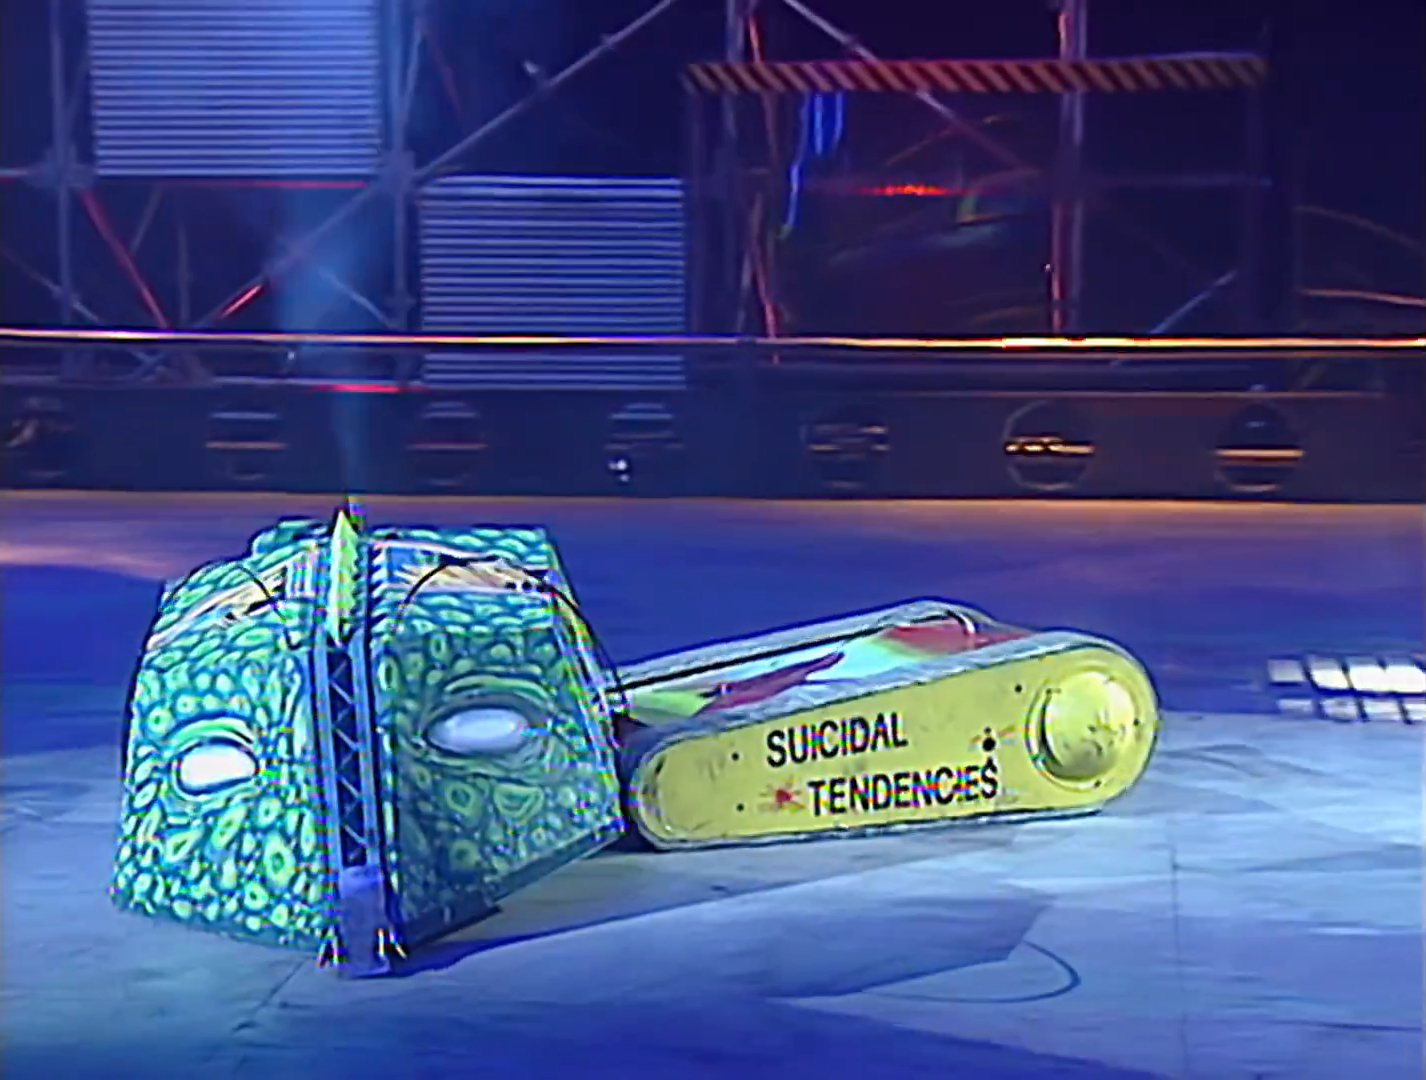
Heat Final
Mace 2 vs Suicidal Tendencies

Mace 2 vs Suicidal Tendencies
Suicidal Tendencies drove around Mace 2 and then Mace 2 flipped it over. Suicidal Tendencies tried to use its milling cutters, but they had no effect whatsoever and could only piggy back up on Mace 2. Mace 2 pushed Suicidal Tendencies into Sgt. Bash, Shunt, Matilda and Sir Killalot, but escaped every time. It then piggy-backed up on Mace 2 again and were pushed into the CPZ where Shunt buried its axe into Suicidal Tendencies. Eventually, the fight went to the judges.
Heat Winner: Mace 2
Special Event
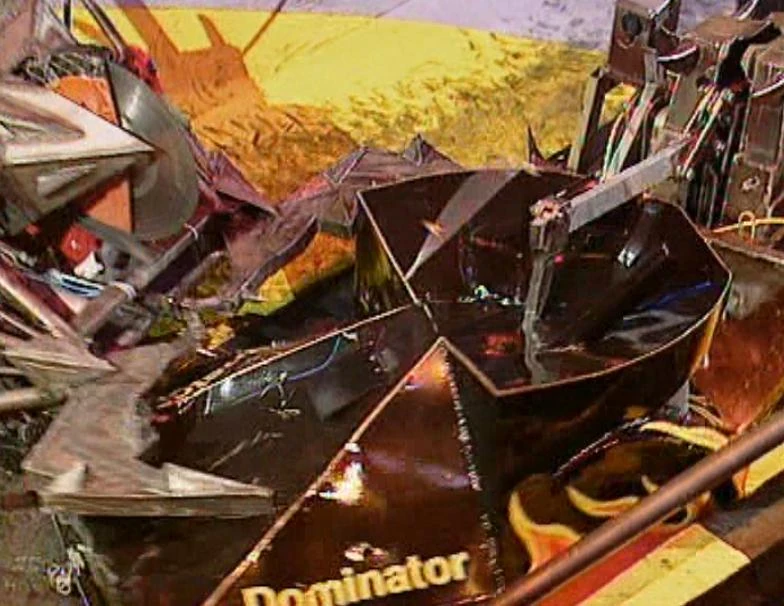
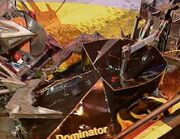
Dominator is attacked
Between Round 1 and Round 2 of each heat, a Special Event or Trial took place. For Heat A, it was the first Pinball Warrior run, featuring Dominator.
Score: 160 points
| ||||||||||||||