RobotManiac (talk | contribs) No edit summary |
|||
| Line 310: | Line 310: | ||
{{quote|We fancy a bit of boiled lobster, and we're going to take the sting out of their tail|Kane Aston}} |
{{quote|We fancy a bit of boiled lobster, and we're going to take the sting out of their tail|Kane Aston}} |
||
As the battle started, Thermidor 2 immediately backed away whilst Stinger drove towards Behemoth and attempted to use its spike on its larger opponent, but all its attempts missed as Behemoth dodged away. As it pursued, Thermidor 2 managed to get its flipper underneath Behemoth and flipped it right over, but Behemoth was able to roll back onto its wheels. |
As the battle started, Thermidor 2 immediately backed away whilst Stinger drove towards Behemoth and attempted to use its spike on its larger opponent, but all its attempts missed as Behemoth dodged away. As it pursued, Thermidor 2 managed to get its flipper underneath Behemoth and flipped it right over, but Behemoth was able to roll back onto its wheels. |
||
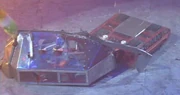
| + | [[File:Thermidorrollsbehemoth.jpg|thumb|left|Thermidor 2 catches Behemoth side on]] |
||
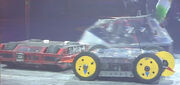
[[File:Behemoth vs Stinger Mayhem.jpg|thumb|Behemoth flips Stinger as it did in the Challenge Belt battle]] |
[[File:Behemoth vs Stinger Mayhem.jpg|thumb|Behemoth flips Stinger as it did in the Challenge Belt battle]] |
||
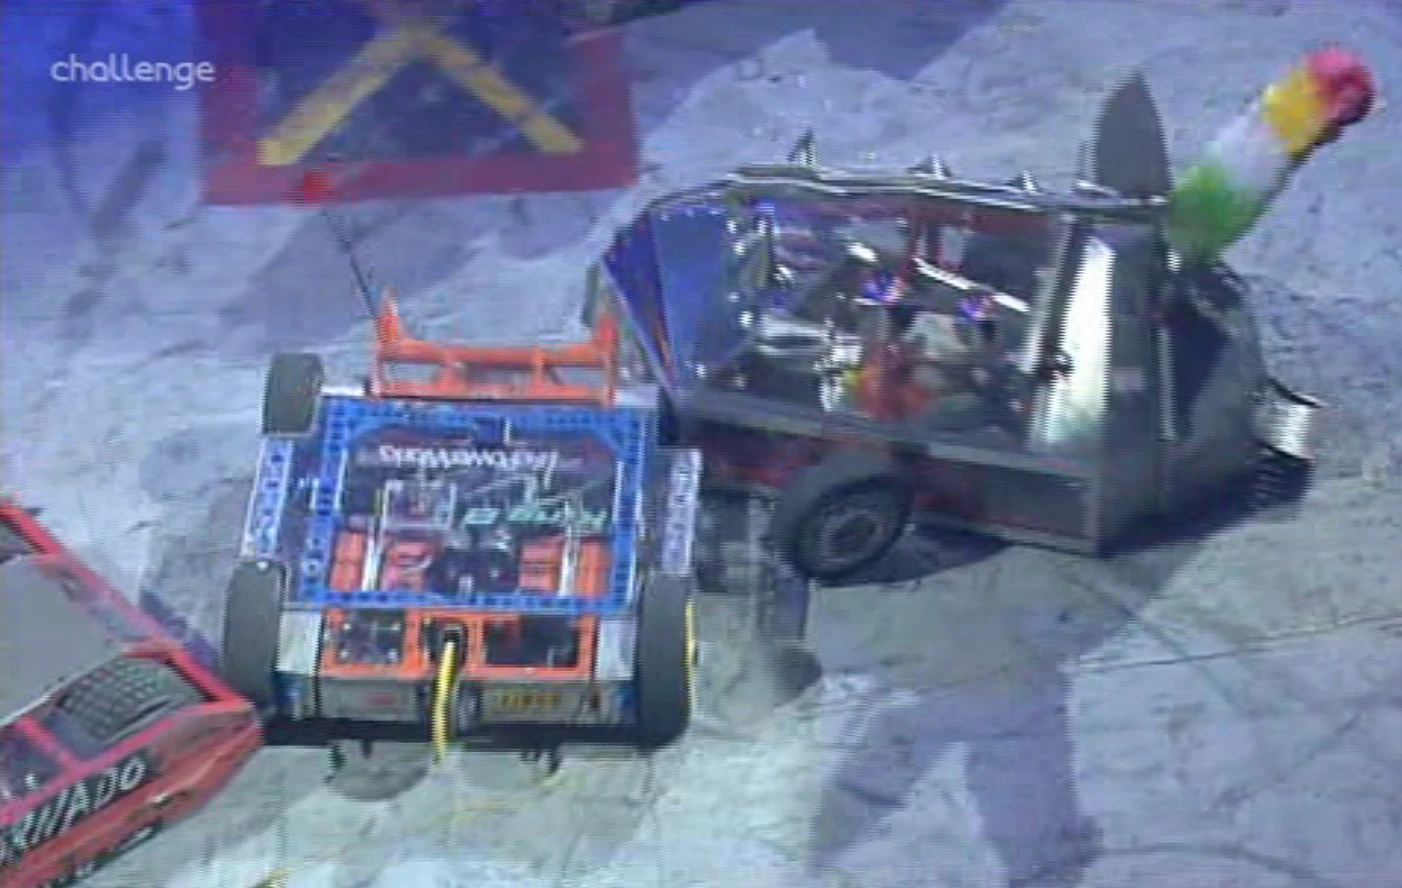
[[File:Thermidorbehemoth.JPG|thumb|left|Thermidor 2 throws Behemoth over the wall...]] |
[[File:Thermidorbehemoth.JPG|thumb|left|Thermidor 2 throws Behemoth over the wall...]] |
||
Revision as of 23:12, 26 July 2020
Mayhem battles were a series of melees which were held throughout Robot Wars Extreme: Series 1. Three robots would fight each other in each battle, where the winner would qualify for one of the two Annihilators held later on in the series.
First Half
Competing Robots
 | ||
|---|---|---|
| Aggrobot 3 | ||
| Weight | 99kg | |
| Dimensions | 0.35m x 1.60m x 1.02m | |
| Power | 12v Electric Motors | |
| Weapons | Cutting Jaws & Flipper | |
| Strengths | Multiple Weaponry | |
| Weaknesses | Reliability | |
| From: Dorking | ||
| Team Members: Peter Leach, Bob Leach & Jon Leach | ||
 | ||
|---|---|---|
| Arnold A. Terminegger | ||
| Weight | 99kg | |
| Dimensions | 0.67m x 0.71m x 1.17m | |
| Power | 2 x 24v Electric Motors | |
| Weapons | Lifter, Axe & Hammer | |
| Strengths | Good Self-Righting Mechanism | |
| Weaknesses | Durability | |
| From: High Wycombe in Buckinghamshire | ||
| Team Members: Ian Inglis, Steff Inglis & Holly Inglis | ||
 | ||
|---|---|---|
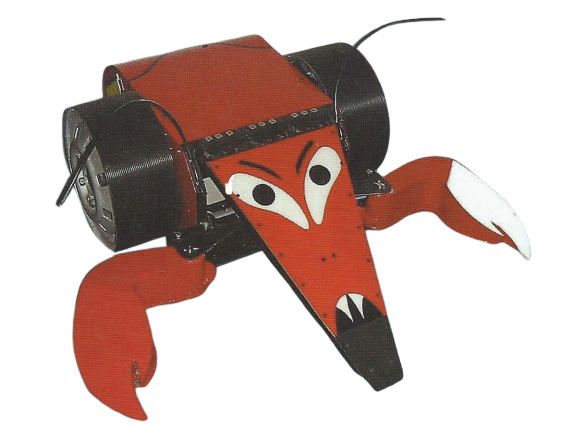
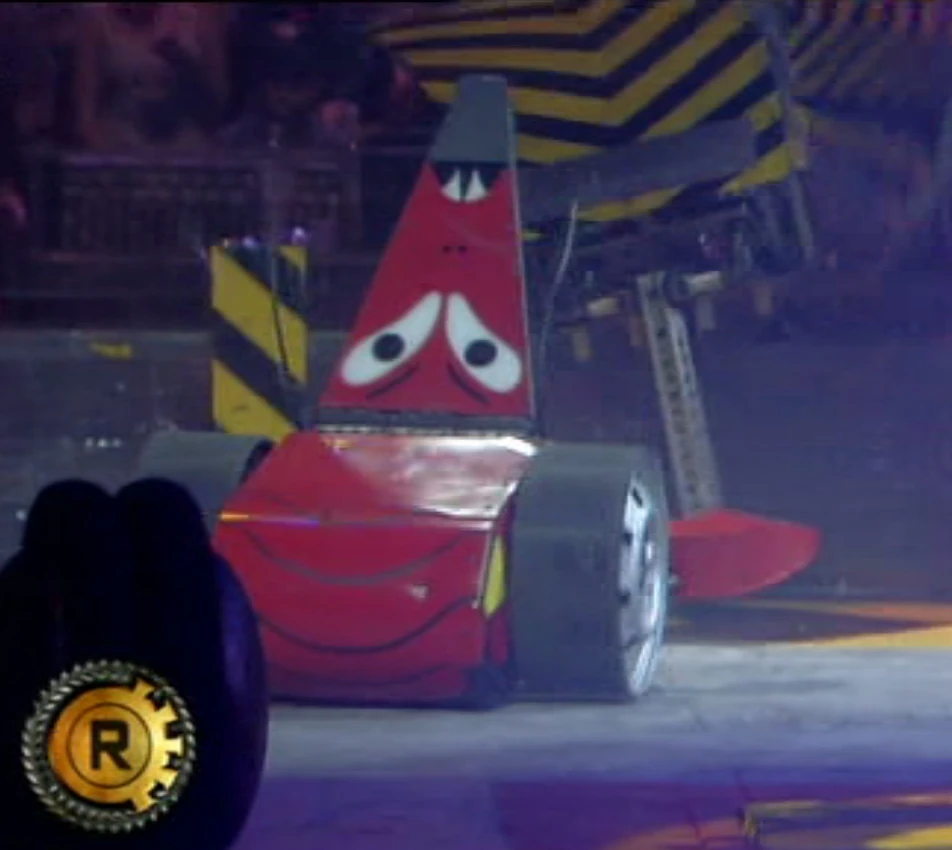
| Behemoth | ||
| Weight | 95kg | |
| Dimensions | 1.1m x 0.62m x 0.57m | |
| Power | 24v Motor | |
| Weapons | Pneumatic Scoop | |
| Strengths | Self-Righting Mechanism | |
| Weaknesses | Low Impact Weaponry | |
| From: Hemel Hempstead in Hertfordshire | ||
| Team Members: Anthony Pritchard, Michael Pritchard & Kane Aston | ||
 | ||
|---|---|---|
| Cataclysmic Variabot | ||
| Weight | 100kg | |
| Dimensions | 0.95m x 0.64m x 0.41m | |
| Power | 2 x Electric Motors | |
| Weapons | Flipper, Axe & Circular Saw | |
| Strengths | Sturdy Armour | |
| Weaknesses | Lacking in Power | |
| From: Milton-Keynes | ||
| Team Members: John Barker, Chris Brockwell & Lisa Blake | ||
 | ||
|---|---|---|
| Fluffy | ||
| Weight | 96kg | |
| Dimensions | 1.12m x 0.66m x 0.2m | |
| Power | 2 x 24v Electric Motors | |
| Weapons | Double Ended Spinning Axe | |
| Strengths | Destructive Weapon | |
| Weaknesses | Inexperience | |
| From: London | ||
| Team Members: Peter Holroyd, Peter Johnson & Richard Johnson | ||
  | ||
|---|---|---|
| Hypno-Disc | ||
| Weight | 100kg | |
| Dimensions | 0.9m x 0.55m x 0.25m | |
| Power | 24v - 36v DC Motors | |
| Weapons | Large Rotating Disc | |
| Strengths | Destructive Weapon | |
| Weaknesses | Vulnerable Wheels | |
| From: Middleton-Cheney, Banbury in Oxfordshire | ||
| Team Members: Dave Rose, Derek Rose & Ken Rose | ||
 | ||
|---|---|---|
| Killertron | ||
| Weight | 97kg | |
| Dimensions | 0.75m x 1.63m x 0.5m | |
| Power | 750w Electric Motors | |
| Weapons | Axe | |
| Strengths | Durability | |
| Weaknesses | Poor Control | |
| From: Maidstone in Kent | ||
| Team Members: Richard Broad, Abdul Degia & Christopher Broad | ||
 | ||
|---|---|---|
| Ming 3 | ||
| Weight | 100kg | |
| Dimensions | 1.33m x 0.77m x 0.8m | |
| Power | 2 x 12v Motors | |
| Weapons | Crushing Arm | |
| Strengths | Powerful Weaponry | |
| Weaknesses | Exposed Tyres | |
| From: Somerset | ||
| Team Members: Andrew Cotterell, Alexander Cotterell & Oliver Cotterell | ||
 | ||
|---|---|---|
| Panzer Wraith | ||
| Weight | 89kg | |
| Dimensions | 0.92m x 0.71m x 0.36m | |
| Power | 24v Electric Motor | |
| Weapons | High Speed Disc Cutter | |
| Strengths | Invertable | |
| Weaknesses | Exposed Tracking | |
| From: Eattington in Gloucester | ||
| Team Members: Simon Jones, Andy Jones & Hayley Jones | ||
 | ||
|---|---|---|
| Pussycat | ||
| Weight | 97kg | |
| Dimensions | 0.56m x 0.73m x 0.97m | |
| Power | 2 x Electric Motors | |
| Weapons | Spinning Blade | |
| Strengths | Always Lands On Its Feet | |
| Weaknesses | Exposed Tyres | |
| From: Gloucester | ||
| Team Members: Alan Gribble, Robert Bettington & David Gribble | ||
 | ||
|---|---|---|
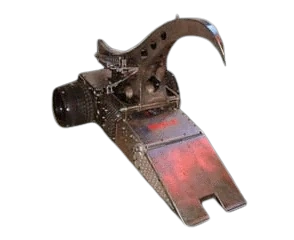
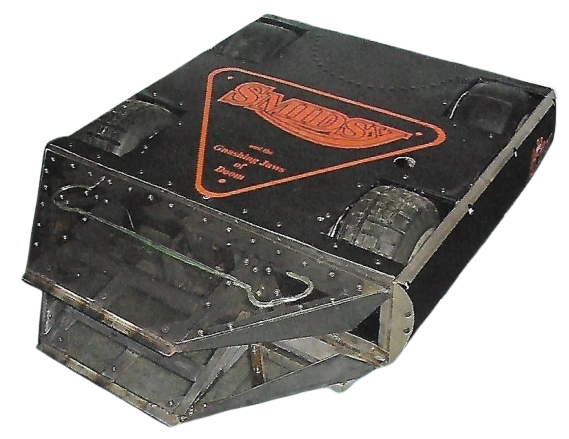
| S.M.I.D.S.Y. | ||
| Weight | 99kg | |
| Dimensions | 1.2m x 0.8m x 0.26m | |
| Power | 2 x 24v Electric Motors | |
| Weapons | Jaws, Fangs & Disc | |
| Strengths | Multiple Weaponry | |
| Weaknesses | Unreliable | |
| From: Cyberspace | ||
| Team Members: Mik Reed, Robin Bennett & Andy Pugh | ||
 | ||
|---|---|---|
| Splinter | ||
| Weight | 94kg | |
| Dimensions | 0.38m x 1.00m x 0.65m | |
| Power | 750w Electric Motor | |
| Weapons | Pneumatic Axe & Grabbing Arm | |
| Strengths | Speed & Control | |
| Weaknesses | No Offensive Weaponry | |
| From: Thorpe Marriott, Norwich | ||
| Team Members: Stuart Weightman & Craig Weightman | ||
 | ||
|---|---|---|
| Stinger | ||
| Weight | 83kg | |
| Dimensions | 0.71m x 0.61m x 0.38m | |
| Power | 2 x 24v Electric Motors | |
| Weapons | Bludgeoning Spike | |
| Strengths | Heavy Duty Weapon | |
| Weaknesses | Exposed Tyres | |
| From: Branston | ||
| Team Members: Kevin Scott, Karl Skinner & Tim Mann | ||
 | ||
|---|---|---|
| Sumpthing | ||
| Weight | 98kg | |
| Dimensions | 1.4m x 1m x 0.4m | |
| Power | 24v Motor | |
| Weapons | Crusher, Axe & Lifter | |
| Strengths | Multiple Weaponry | |
| Weaknesses | Exposed Mechanics | |
| From: Leicester | ||
| Team Members: Dig, Geoff Germainey & Paul Bacon | ||
 | ||
|---|---|---|
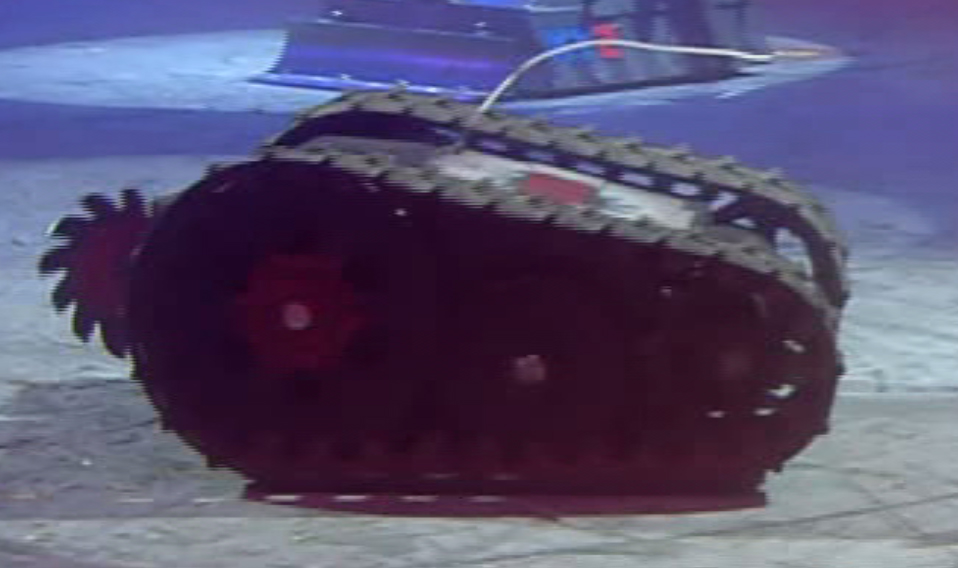
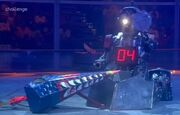
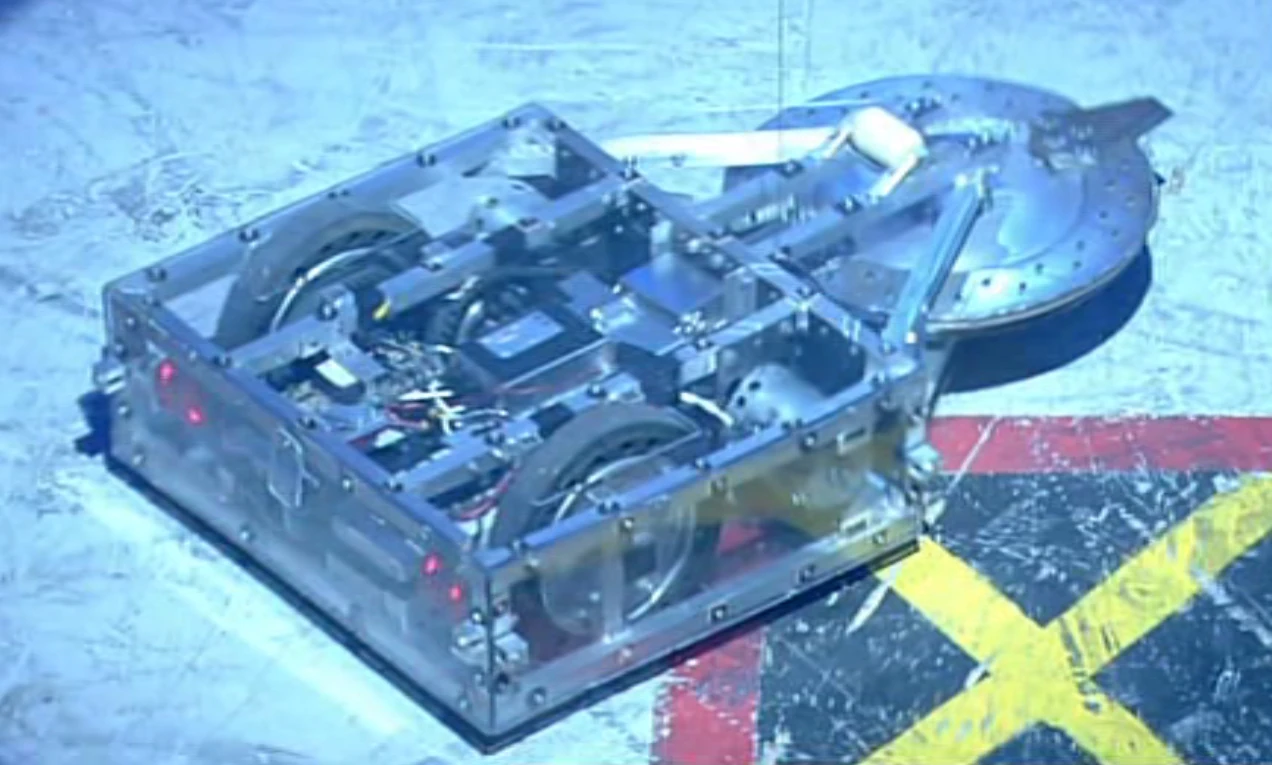
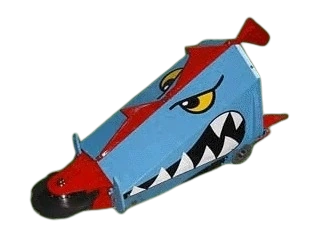
| Thermidor 2 | ||
| Weight | 95kg | |
| Dimensions | 1m x 0.8m x 0.34m | |
| Power | 2 x 750w Motors | |
| Weapons | Pneumatic Flipper & Claws | |
| Strengths | Powerful Flipper | |
| Weaknesses | Fragile Shell | |
| From: Costessey | ||
| Team Members: David Harding & Ian Harvey | ||
 | ||
|---|---|---|
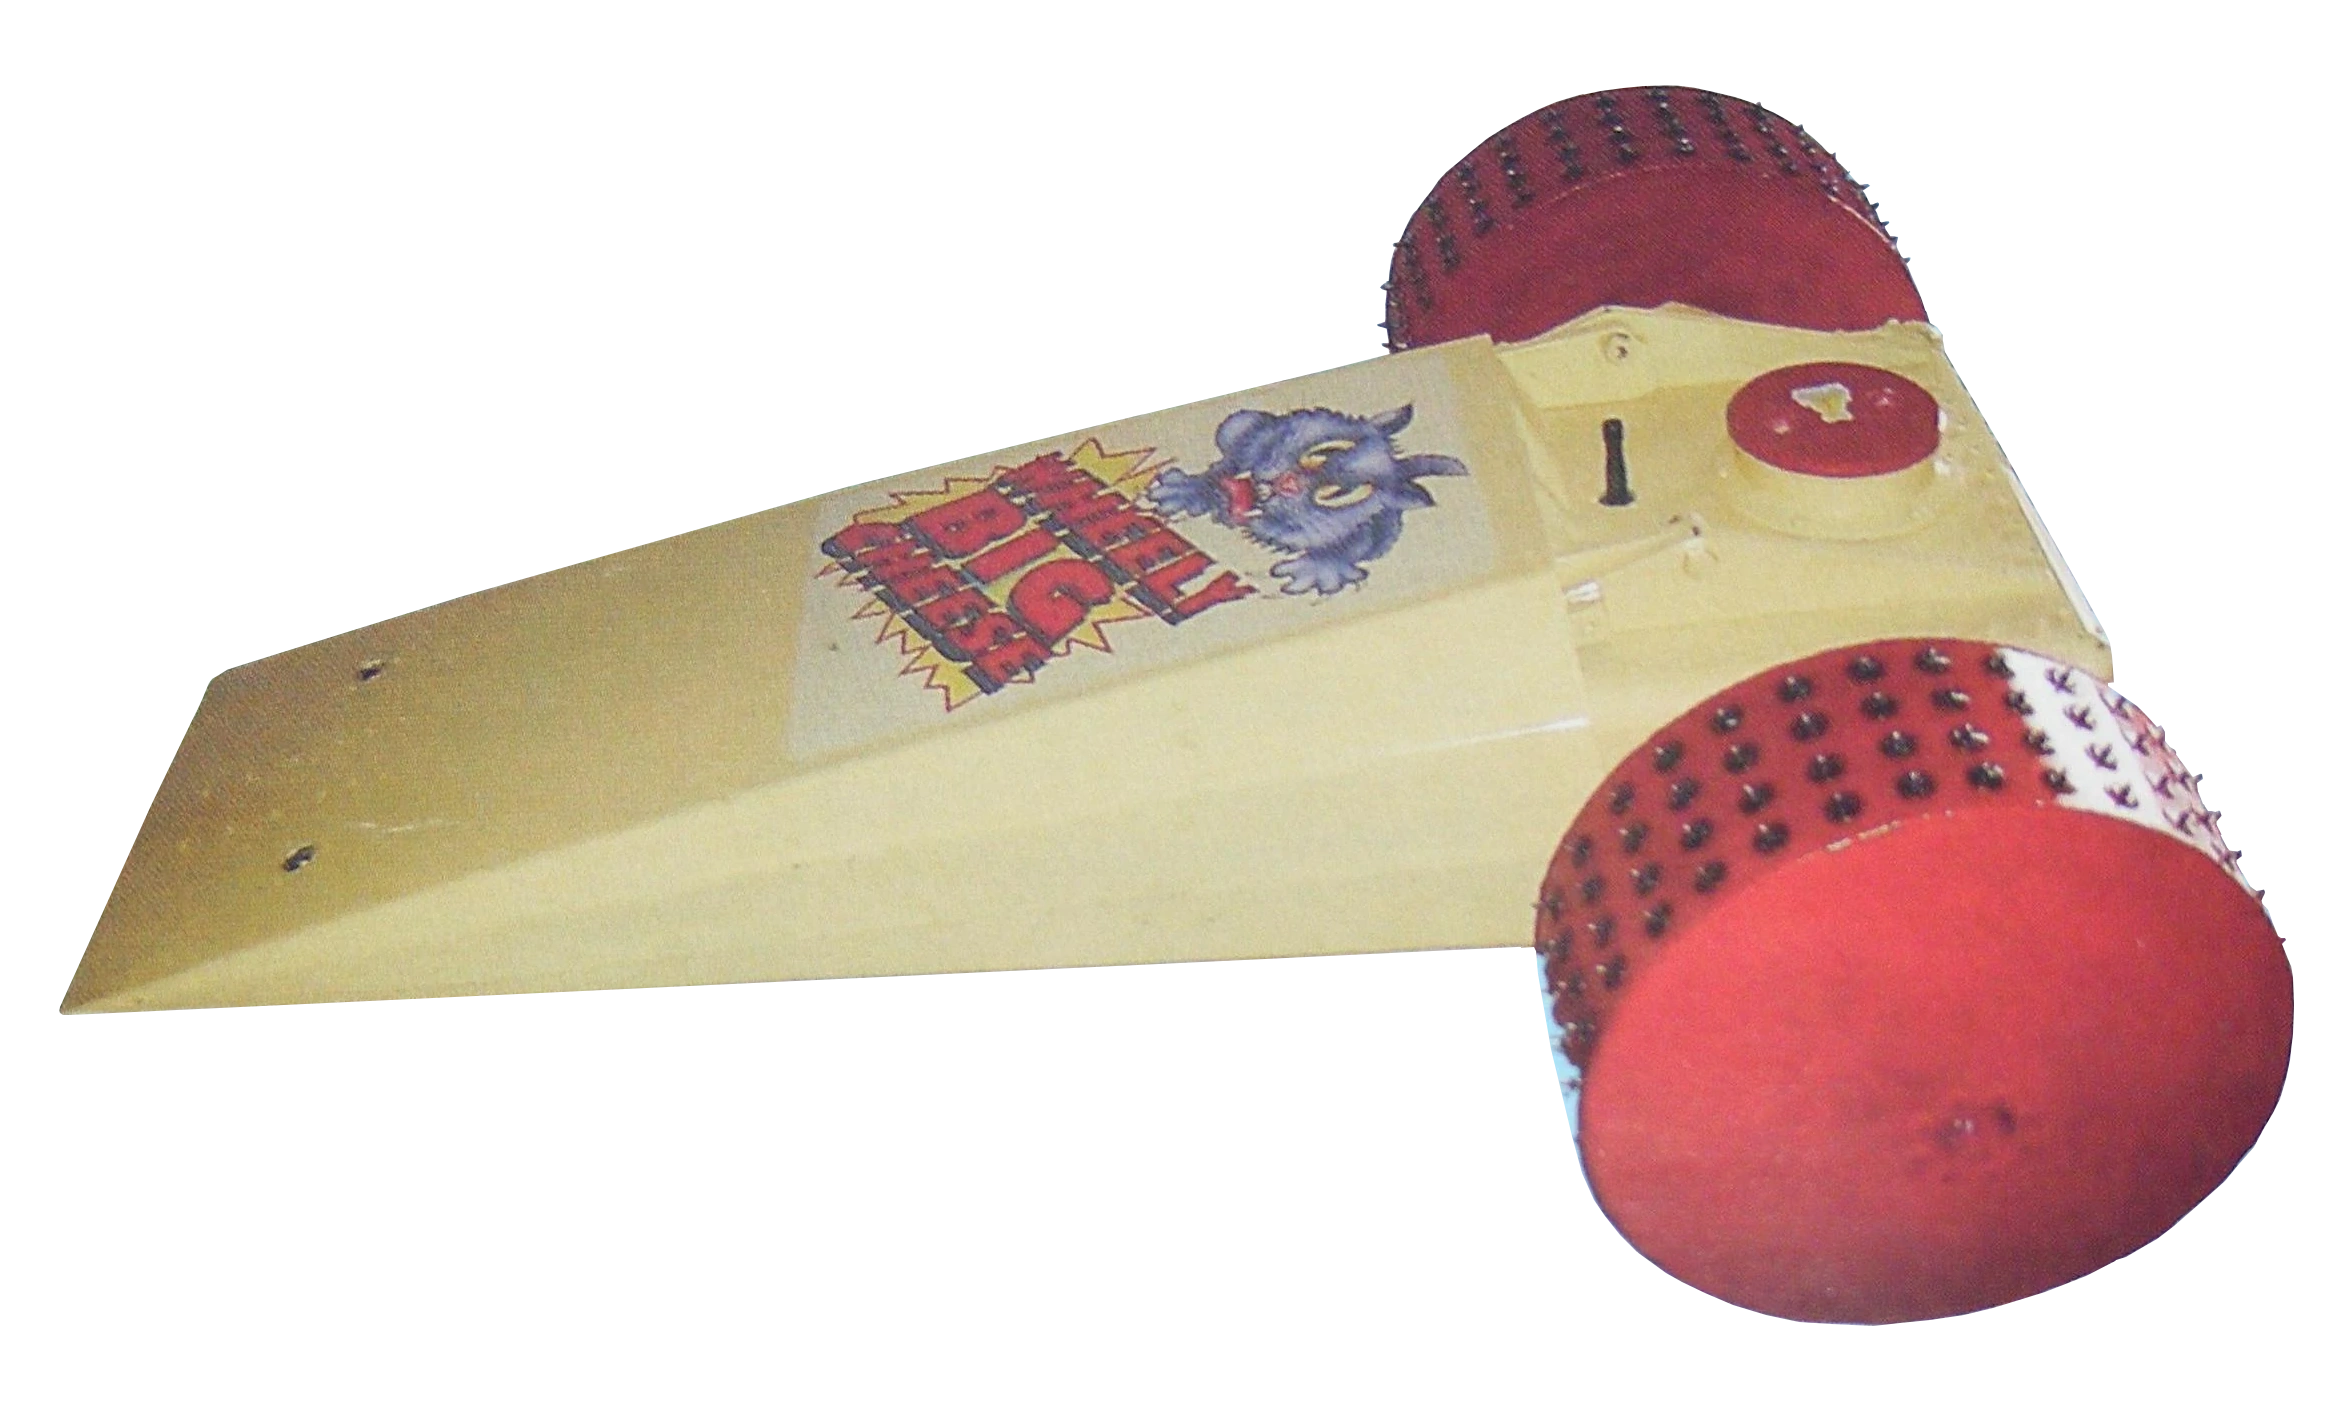
| Wheely Big Cheese | ||
| Weight | 99kg | |
| Dimensions | 1.32m x 0.95m x 0.94m | |
| Power | 2 x 24v Motors | |
| Weapons | Titanium Flipper | |
| Strengths | Self-Righting Mechanism | |
| Weaknesses | Exposed Wheels | |
| From: Langport in Somerset | ||
| Team Members: Roger Plant, Jon McGugan & Murray Wharf | ||
 | ||
|---|---|---|
| Wild Thing | ||
| Weight | 97kg | |
| Dimensions | 0.46m x 0.79m x 0.92m | |
| Power | 750w Electric Motor | |
| Weapons | 2 x Blades & Spinning Disc | |
| Strengths | Speed & Control | |
| Weaknesses | Vulnerable Tyres | |
| From: Ash in Hampshire | ||
| Team Members: Nick Adams, Isabelle Adams & Jake Adams | ||
 | ||
|---|---|---|
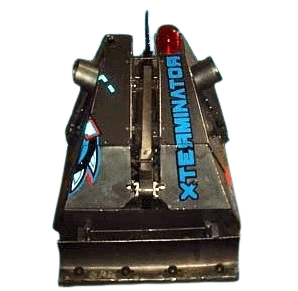
| X-Terminator | ||
| Weight | 99kg | |
| Dimensions | 0.8m x 0.6m x 0.5m | |
| Power | 24v Electric Motors | |
| Weapons | Pneumatic Axe | |
| Strengths | 37kg Axe & Base | |
| Weaknesses | Poor Manoeuvrability | |
| From: Belmont in Hereford | ||
| Team Members: Marlon Pritchard & Michael Davies (Paul Lewis & Simon Baldwin were not present) | ||
Battles
Pussycat vs Sumpthing vs S.M.I.D.S.Y.

Sumpthing impales itself on Sergeant Bash
The first Mayhem battle of the series started with S.M.I.D.S.Y. pushing Pussycat towards the flame pit. Pussycat veered away and attacked S.M.I.D.S.Y. again, but S.M.I.D.S.Y.'s jaws deflected it. Eventually, Sumpthing made an attack on the two seeded machines, but its first attack on Pussycat dislodged the drive-chain for its saw. S.M.I.D.S.Y., meanwhile, activated the pit (this was the first time the pit release button was shown, despite the pit release button being torn from the wall), but then nearly drove down it, as did Sumpthing. After this, all three robots drove to the other end of the arena, continuing to attack each other. Sumpthing seemed much more sluggish than its two opponents, who began pushing each other, and in trying to catch up managed to impale itself on Sergeant Bash.
- "Sumpthing are nothing"
- — Jonathan Pearce as Sumpthing tries to free itself.

Pussycat nudges S.M.I.D.S.Y. into the pit
Matilda eventually dislodged Sumpthing from Sergeant Bash, and attempted to attack Pussycat, who had just pushed S.M.I.D.S.Y. into the CPZ. At this point, part of the cyberspace machine's drive broke, leaving it spinning in circles for the rest of the battle. Sumpthing then rammed into Pussycat, impaling its spike into the previous runner-up's side, but it could not take advantage of this. It took a few shoves from Refbot to finally separate the two, and they both then started attacking the limping S.M.I.D.S.Y., with these attacks forcing it closer and closer to the pit until it got itself beached, whereby Pussycat hit it one last time and forced it in. Time ran out just as Pussycat got S.M.I.D.S.Y. into the pit properly, and the judges ruled in favour of it over Sumpthing.
- "They're one of the robots we've always wanted to fight, one of the best robots out there"
- — Alan Gribble on fighting Sumpthing
Winner: Pussycat
Hypno-Disc vs Ming 3 vs Wheely Big Cheese
- "He's never been truly disgraced in the warzone before, but is this the end of Hypno-Disc? Wheely Big Cheese and Ming are out to make sure it is"
- — Craig Charles

The battle of deadly weapons
This was the main event for Episode 2 of the series. The three robots had a very tentative start to the battle, with none of them making any real attempt to attack. Hypno-Disc briefly drove over Wheely Big Cheese's flipper, but the weapon did not activate. Ming 3 attempted to join in the battle, but Hypno-Disc's weapon shredded one of Ming 3's wheels, before Wheely Big Cheese thrust the crusher-robot away. Ming 3 limped away, whilst Hypno-Disc attacked Wheely Big Cheese. The first attacks were evidently making an impact, with large gashes being made in the flipper and one of the wheels. Wheely Big Cheese and Ming attempted a pincer attack on Hypno-Disc, but their mobility was now limited, and Hypno-Disc escaped, evading a flip from Wheely Big Cheese and attacking its other wheel. By now, both Wheely Big Cheese and Ming were limping badly, with large slices in the former's wheels. One last side attack from Hypno-Disc buckled Wheely Big Cheese's left wheel.
Ming 3 is left without any wheels
- "Wheely Big Cheese has been grated, lets be honest. And as for Hypno-Disc, it is putting everyone under its spell"
- — Jonathan Pearce
Hypno-Disc then went to attack Ming 3, who was unable to move properly. Hitting the same wheel it had sliced earlier, Hypno-Disc tore it clean off. It then ripped off Ming's other wheel too, immobilising it completely.
- "So, Ming 3, err....what are you going to do now, boys? Come on, back into the action Ming 3. Creep across the arena floor!"
- — Jonathan Pearce desperately wills Ming on
Refbot counted both Ming 3 and Wheely Big Cheese out and Ming 3 was flung by the floor flipper. Wheely Big Cheese, still able to move on one side, attempted to flip Ming 3, but Dead Metal grabbed it and then sliced into one of its wheels, causing fantastic sparks.

Dead Metal cuts into Wheely Big Cheese
- "This is why this is the battle of the night!"
- — Jonathan Pearce as the sparks fly
After sawing into Wheely Big Cheese's wheel a few more times, the house robots pitted it and Ming 3, with Hypno-Disc the clear winner.
Winner: Hypno-Disc
Wild Thing vs Arnold A. Terminegger vs Fluffy

Arnold pounds Fluffy with its axe
As the battle began, all three robots drove around, mostly avoiding each other with only a few small slams as attacks. After a while, Wild Thing ran into Fluffy's side, and Arnold A. Terminegger attacked briefly with its axe, but causing no damage. Wild Thing continued to push Fluffy around for a bit, before slamming it into the arena angle grinders, where it broke down completely. Arnold A. attacked it with its axe and tried to lift it, but was pushed over by Wild Thing, only to fall back on its wheels.
- "It's like a great pendulum weapon, backwards and forwards, is it really controlled aggression, though?"
- — Jonathan Pearce on Arnold's new weapon

Arnold A. Terminegger and Wild Thing are fighting together
The two robots clashed, with Arnold continuing to hit Wild Thing with its axe, and it became apparent that Wild Thing's disc was no longer working. It broke away and quickly activated the pit. Arnold A., in following, nearly drove straight in.
- "Down in the pit, pit, pit! That's where they want Fluffy or Terminegger or Wild Thing to go, they're not fussy, let's be honest"
- — Jonathan Pearce
Arnold turns Wild Thing onto its side
Wild Thing then pushed into Arnold again, nearly overturning it. Arnold retaliated with some rather ineffective axe blows, whilst Sir Killalot began toying with the immobilised Fluffy. Opting to use its forklifts instead, Arnold was able to push Wild Thing onto its side, where it couldn't right itself. It eventually fell onto its back, but only narrowly avoided being pushed onto its side again mid-righting by Arnold. As the two continued their war, Fluffy was pushed onto the arena flipper by Sir Killalot. Landing awkwardly on its front, it continued to bounce straight into the pit. Wild Thing pushed Arnold into the CPZ where it was pressurised by both Sir Killalot and Sergeant Bash, but it escaped to reach the end of the round, where the judges came to a split decision.
- Craig Charles: "You had that won, and then you helped them out"
- Ian Inglis: "We were trying not to, we were trying to get around the back so we could hit them some more"
- Craig Charles: "Well, it's gone to the judges now, they've made their decision...and it doesn't really matter, they've gone for Arnold A. Terminegger!"
- — The decision is announced
Winner: Arnold A. Terminegger
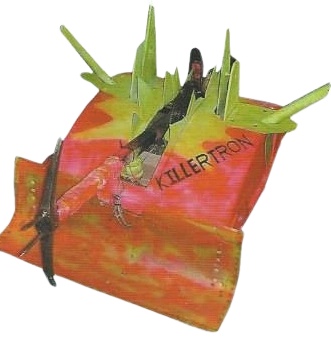
Splinter vs Killertron vs Aggrobot 3

The robots clash

Killertron axes Aggrobot 3
The three robots drove around the arena quite slowly at first, making no immediate attempts to attack each other. Killertron missed an axe blow on Splinter, who was brushed aside by Aggrobot 3 with no effect.
- "Trying to feel each other out"
- — Jonathan Pearce on the early stages
The first meaningful attack came when Aggrobot 3 accidentally reversed onto Splinter's front scoop, which allowed Splinter to grab it and hit its opponent a few times, but its axe had no effect on Aggrobot 3's tough armour. Letting go, it reversed onto Killertron's axe, who then attacked Aggrobot 3, who got wedged underneath, but neither could use their weapons effectively. Eventually, Aggrobot 3 drove underneath Splinter and began to lift it up, whilst being attacked itself by Killertron. The three broke away, and Splinter began to attack Killerton with its axe, but the former grand-finalists large body blocked the axe route. One of its grabbing arms appeared to have been pushed out of position, but this did not appear to hinder it. It continued to pursue Killertron and Aggrobot 3, hitting them with its axe, but causing no damage. Suddenly, Aggrobot 3 got underneath Splinter and lifted it up before a shove from behind by Killertron caused Splinter to be overturned.
- "It really is a great pickaxe weapon, though....it scratches"
- — Sarcasm from Jonathan Pearce
Aggrobot 3 topples Splinter
Splinter falls back onto its wheels
Killertron axed Aggrobot 3 a few more times with no effect, whilst Dead Metal came out of his CPZ and started attacking the flipped Splinter, even though it had not been counted out. However, because Aggrobot 3 appeared to be pinning Splinter down, Refbot and Dead Metal pushed Splinter away and, in doing so, re-righted it. It quickly came back on the attack, axing Killertron, and it suddenly became apparent that Aggrobot 3 had beached itself on its own lifting arm and couldn't lower itself back down.
- "None of the teeth are missing, but I think the mechanics might be! I think they've been immobilised-they have!"
- — Jonathan Pearce
Refbot counted Aggrobot 3 out just as the pit descended. Sir Killalot grabbed Aggrobot 3 in his claw and carried it over to the flame pit. With its wheels smouldering slightly, Aggrobot 3 was carried over to the floor flipper. Because it was raised from the floor when Killalot picked it up, however, Aggrobot 3's lifting arm was able to be reset, and it was able to drive away, but it was thrown by the flipper anyway. Meanwhile, Splinter and Killertron no longer seemed to be fighting each other, and Dead Metal was still attacking Splinter, despite it still being mobile. It charged at Aggrobot 3, but its damaged arm seemed to be affecting its mobility slightly, and its axe appeared to be broken too.
- "Look at it. Broken, flailing away like a birds wing that's been broken in flight"
- — Jonathan Pearce on Splinter's arm
Killertron seemed to have limited mobility as well, but this attracted the attention of Sir Killalot, who grabbed hold of it (despite it not being in a CPZ), crumpling through its plastic armour. He then started to carry Killertron towards the pit, despite Killertron's axe flailing away in an attempt to escape.

Aggrobot 3 malfunctions and is counted out


Sir Killalot unfairly pits Killertron
- "He shouldn't now dump Killertron to the floor! He shouldn't be picking it up, because Killertron was still mobile, it was still fighting....but it's in the pit!"
- — Jonathan Pearce notes that Killertron is being unfairly attacked
As Killertron was pitted, Sir Killalot chased after Aggrobot 3, as Cease was called. Despite Sir Killalot's interference against Killertron, the judges made no stand, and Splinter was declared the winner.
Winner: Splinter
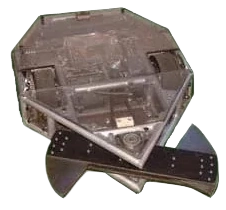
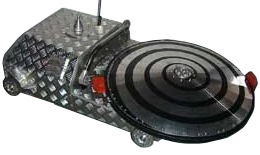
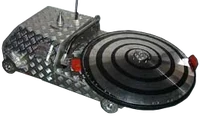
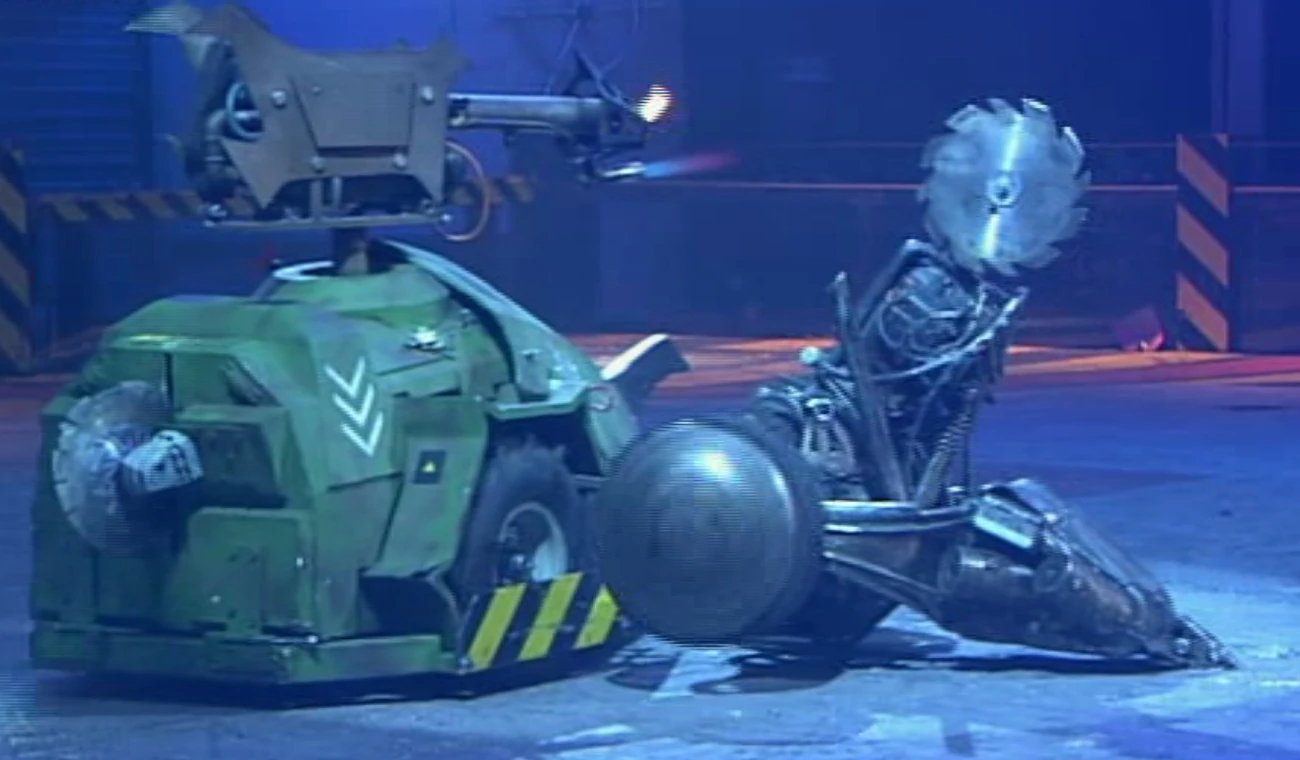
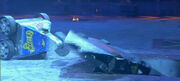
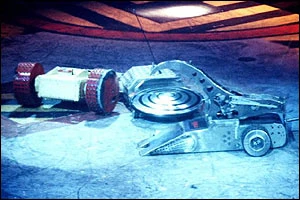
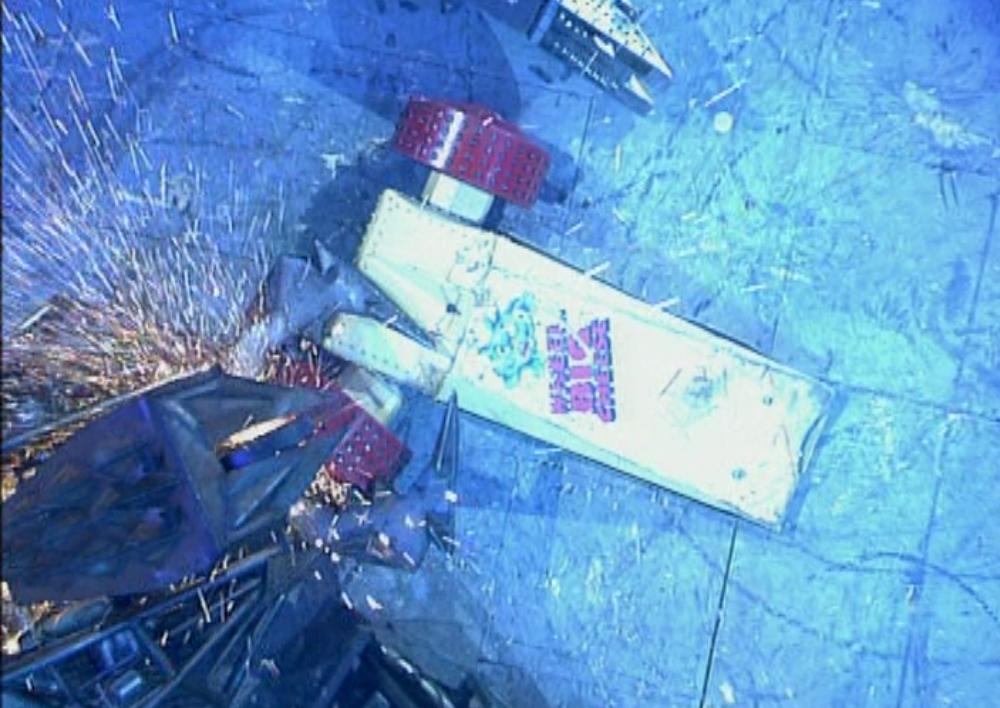
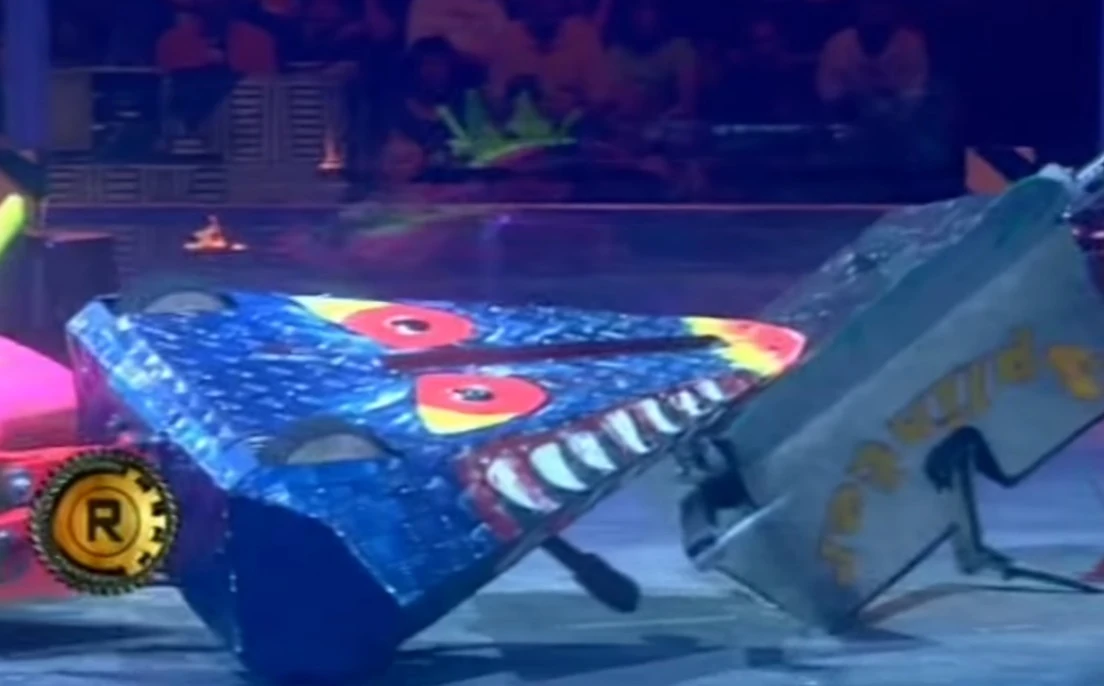
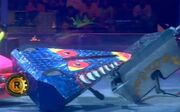
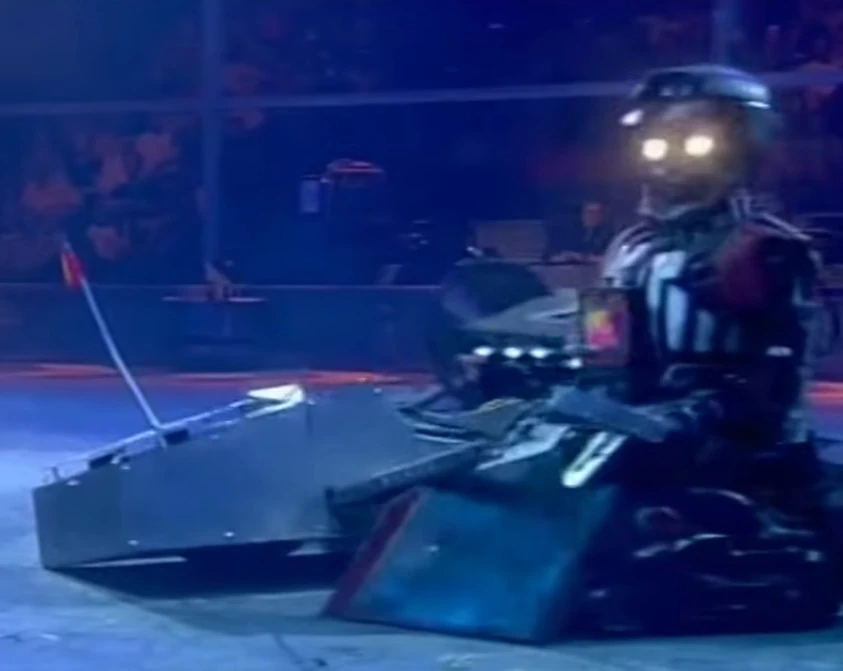
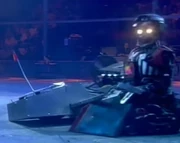
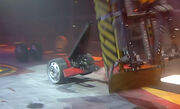
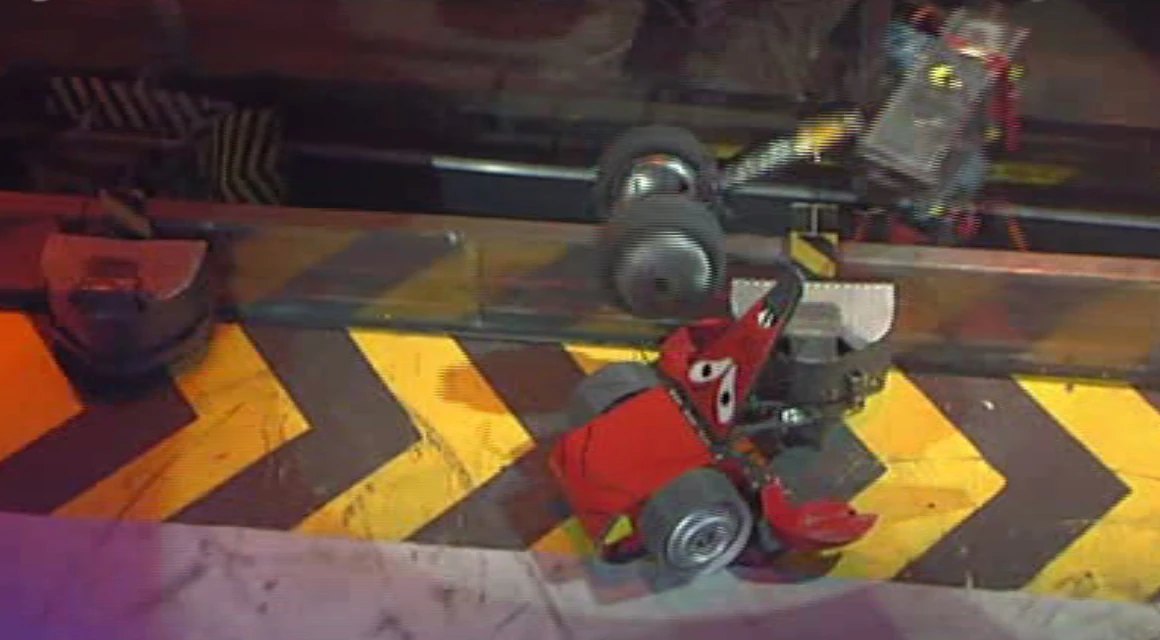
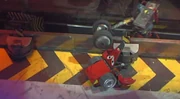
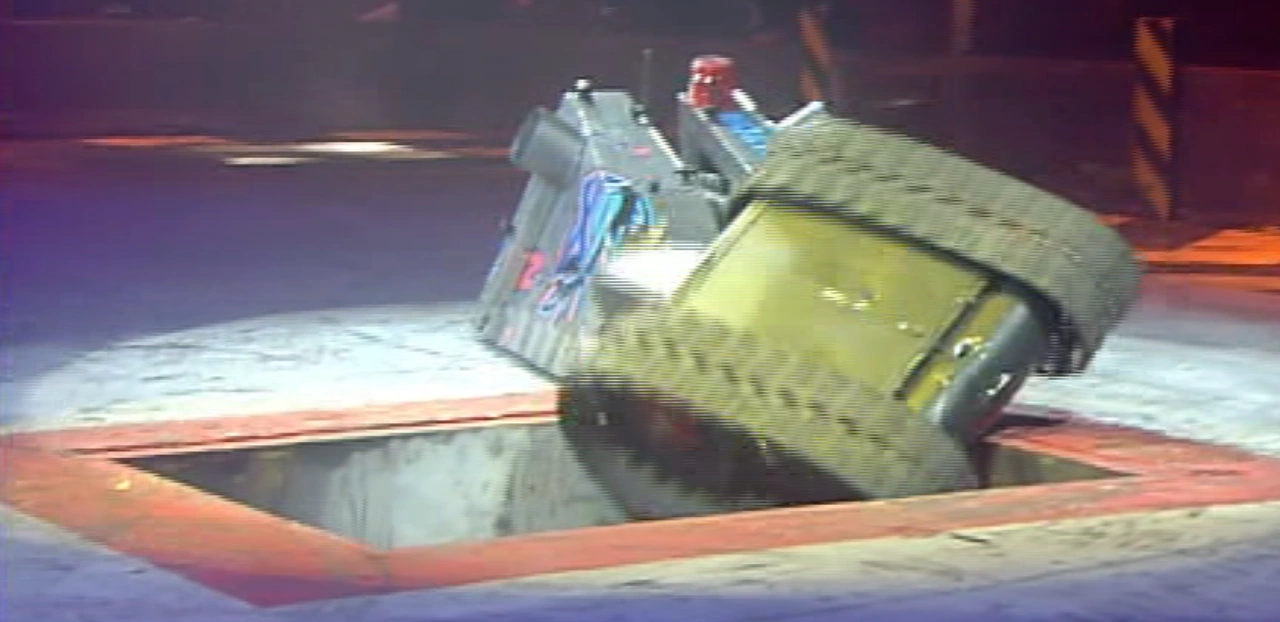
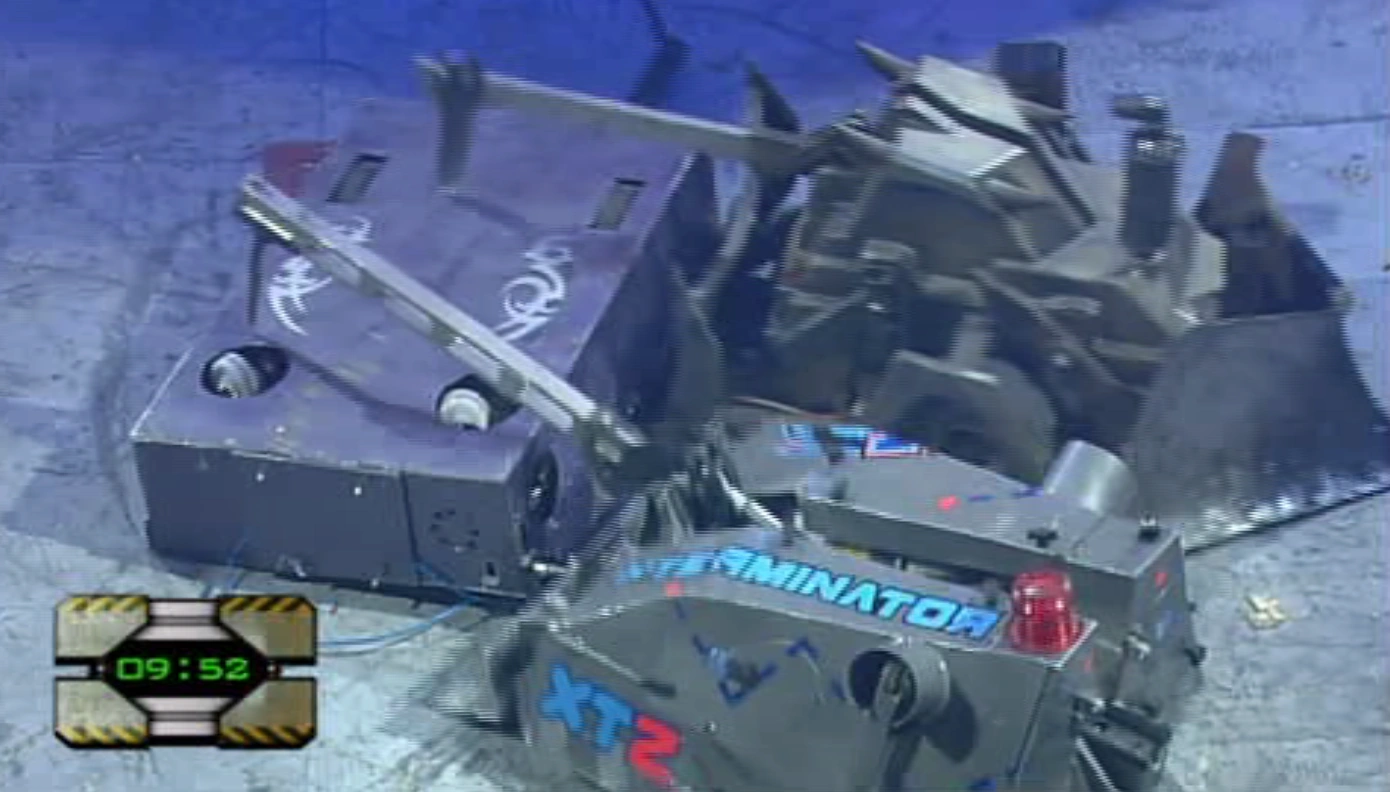
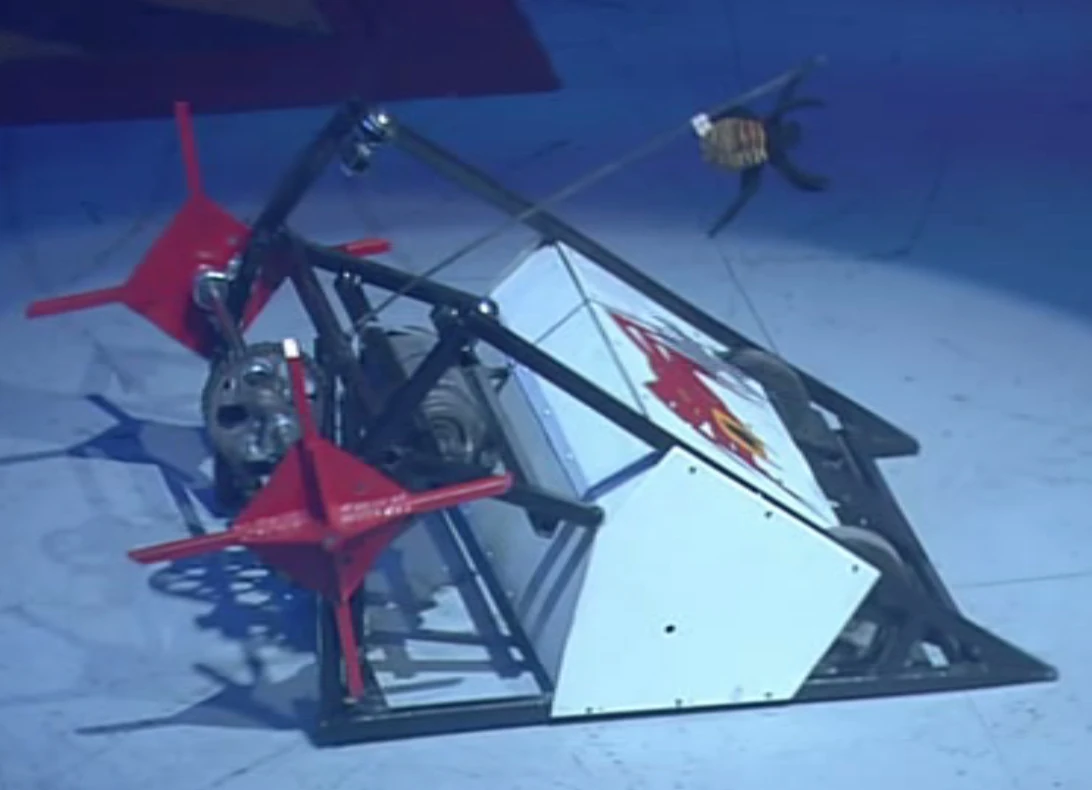
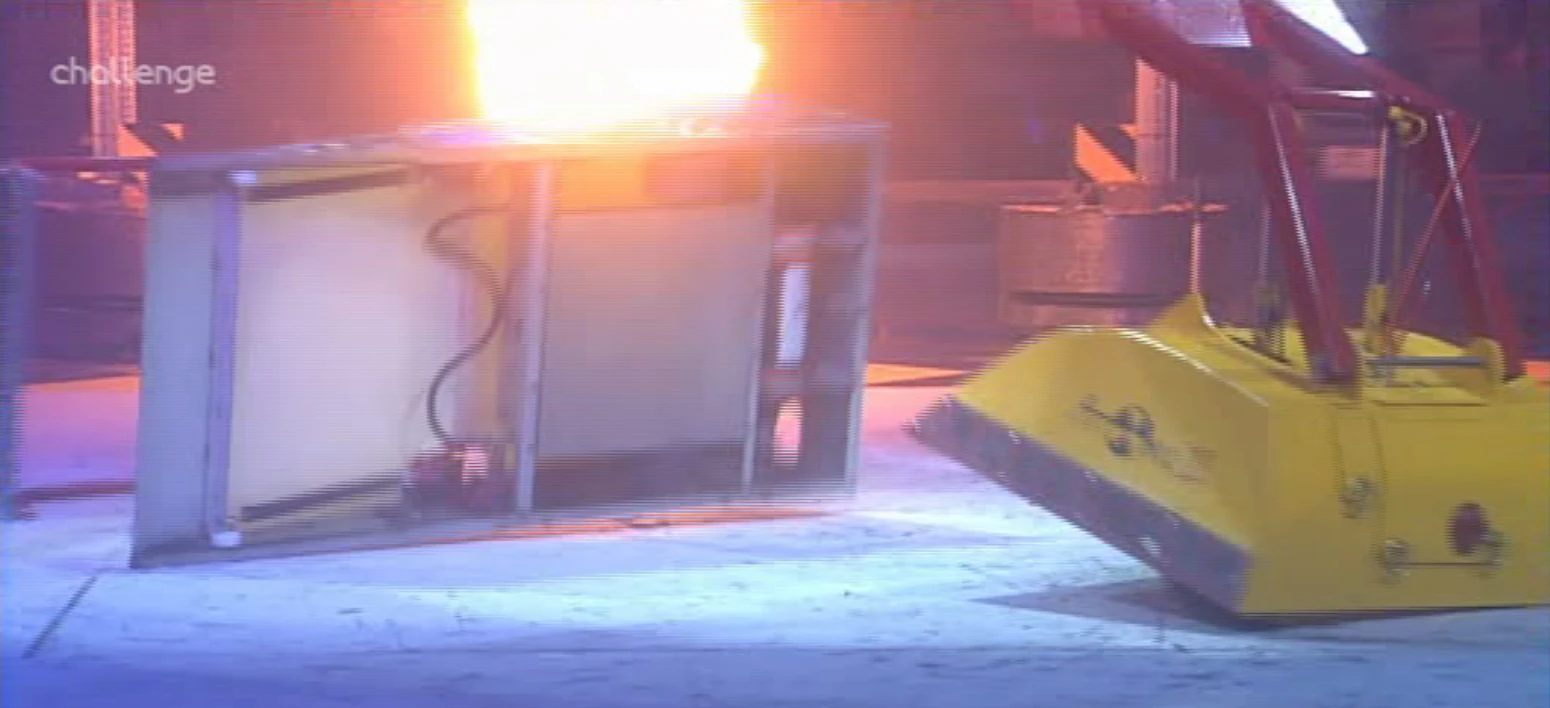
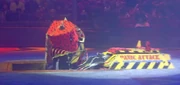
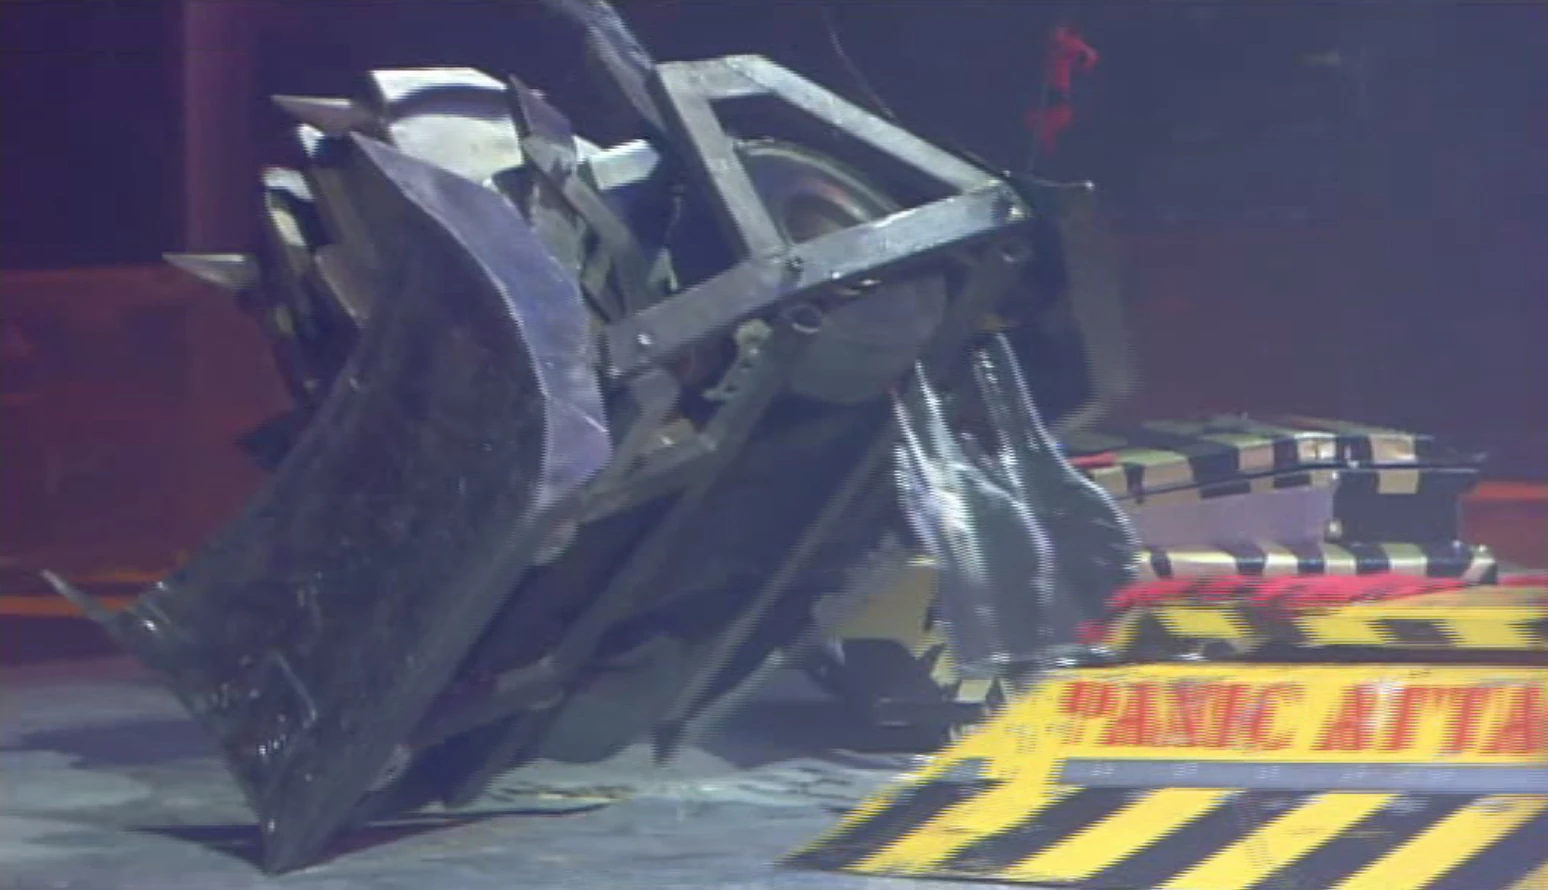
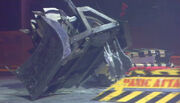
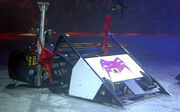
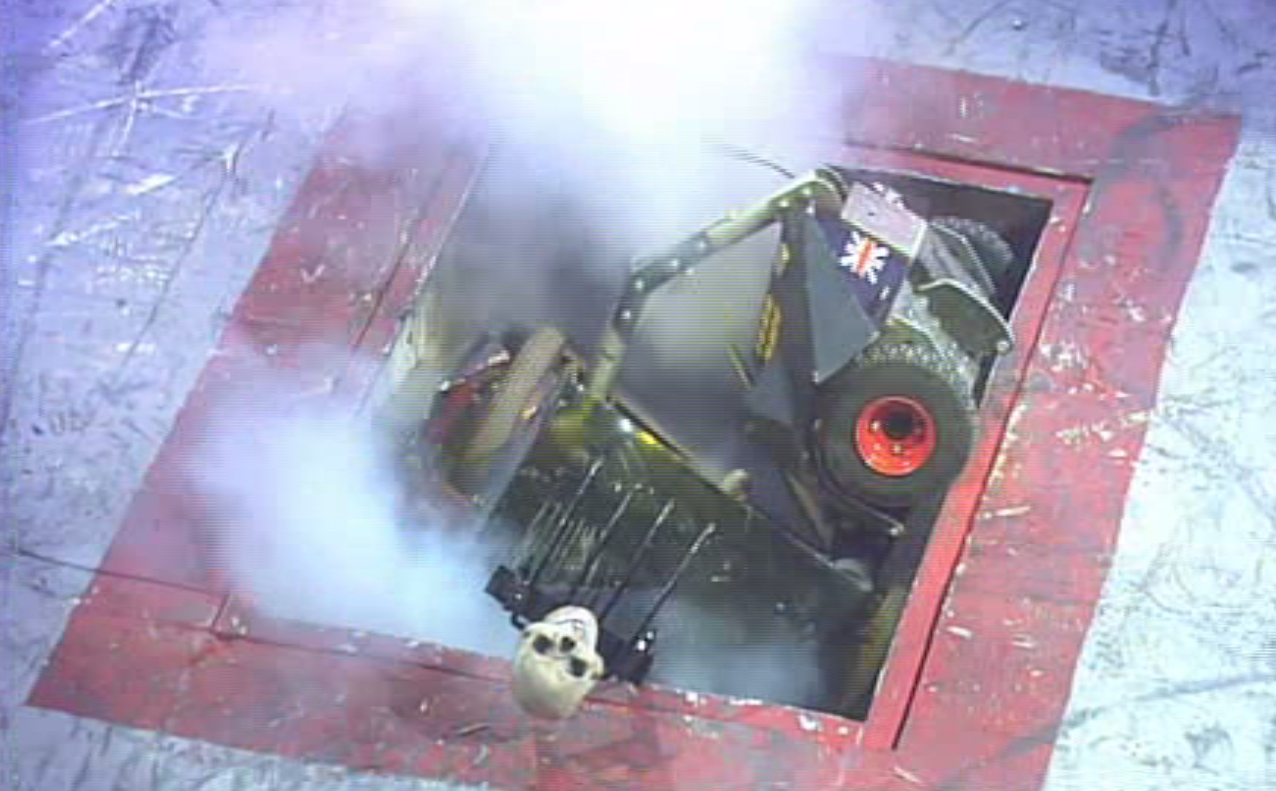
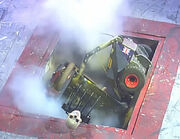
Behemoth vs Stinger vs Thermidor 2
- "We fancy a bit of boiled lobster, and we're going to take the sting out of their tail"
- — Kane Aston
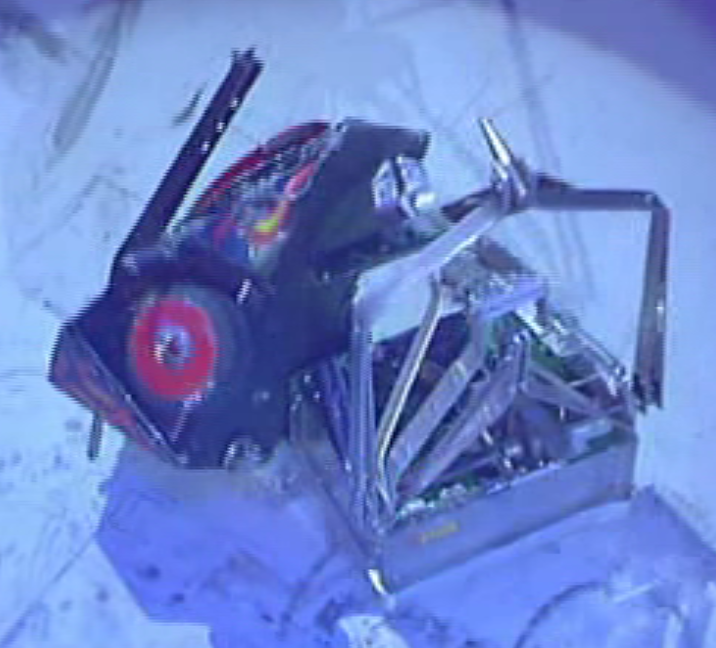
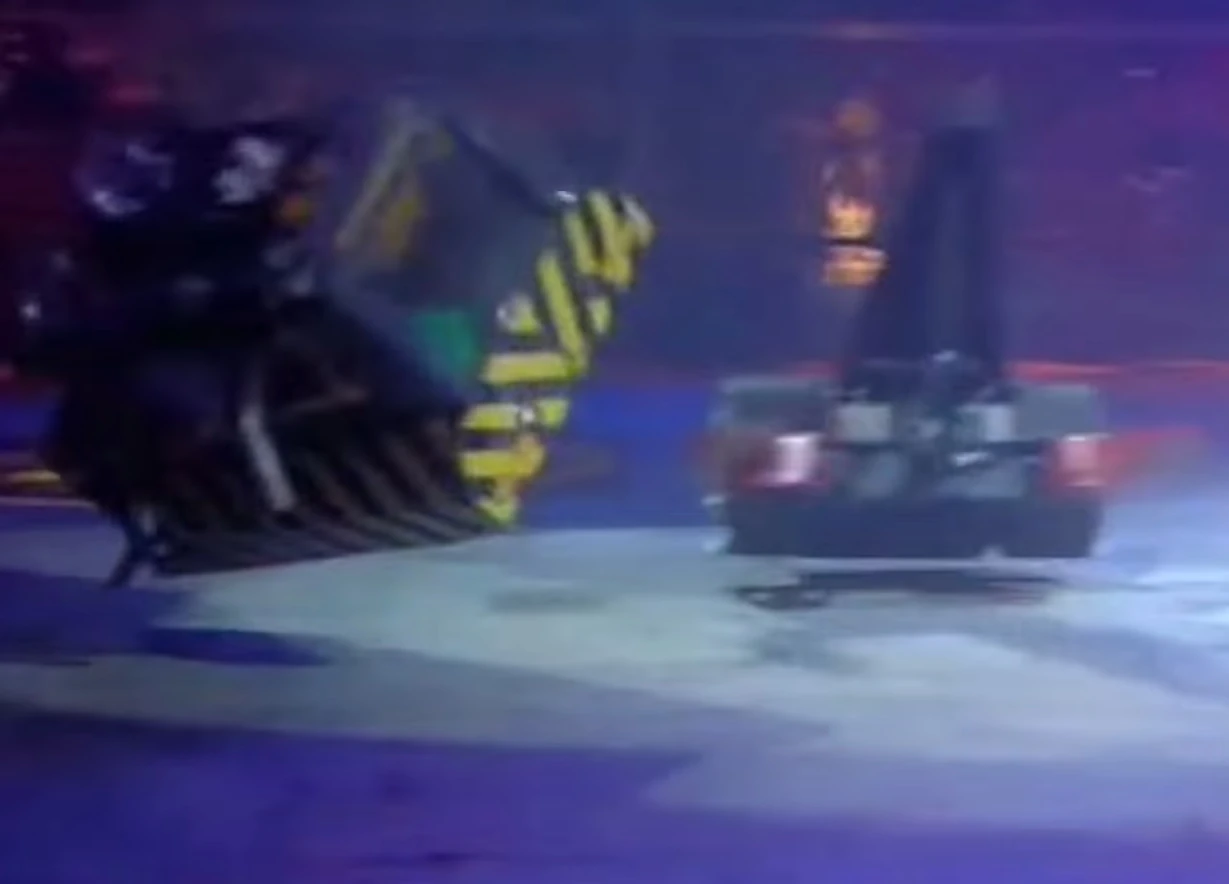
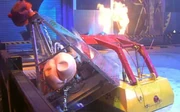
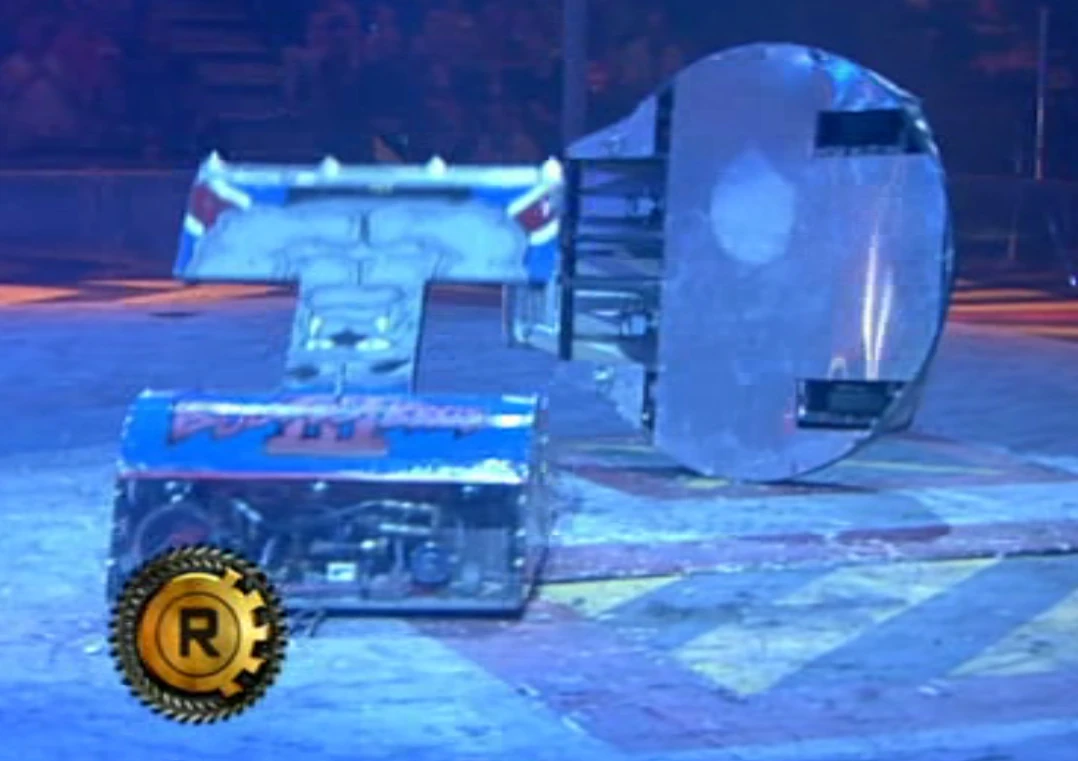
As the battle started, Thermidor 2 immediately backed away whilst Stinger drove towards Behemoth and attempted to use its spike on its larger opponent, but all its attempts missed as Behemoth dodged away. As it pursued, Thermidor 2 managed to get its flipper underneath Behemoth and flipped it right over, but Behemoth was able to roll back onto its wheels.

Thermidor 2 catches Behemoth side on

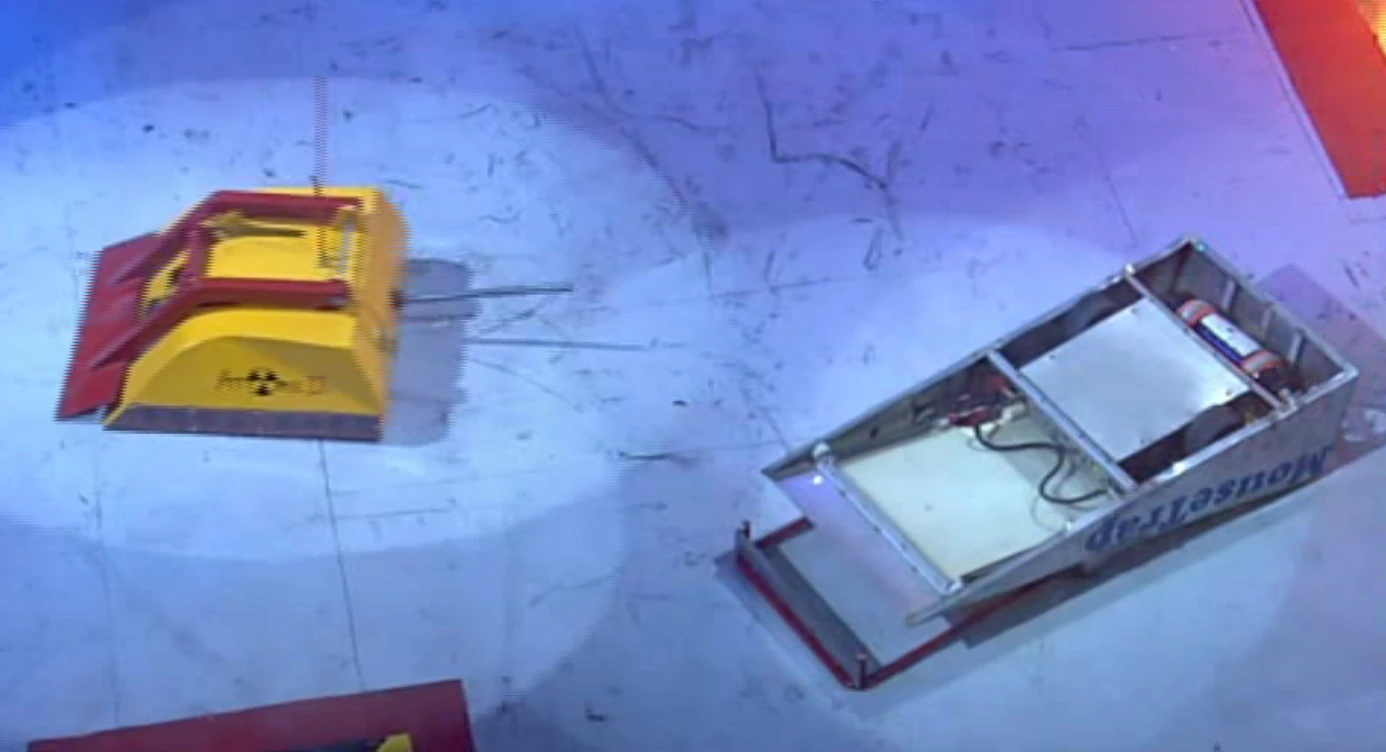
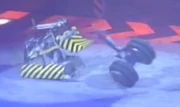
Behemoth flips Stinger as it did in the Challenge Belt battle

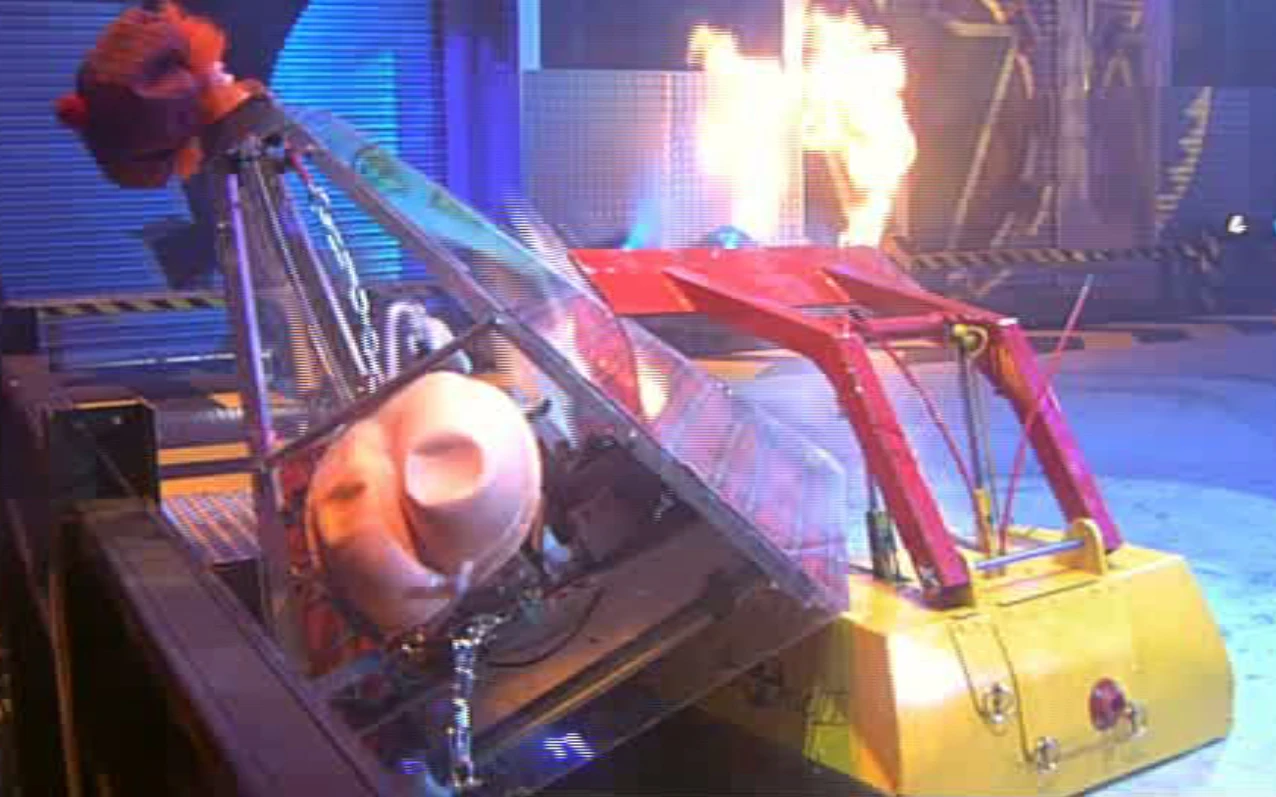
Thermidor 2 throws Behemoth over the wall...

Stinger keeps out of trouble as Behemoth is thrown out of the arena
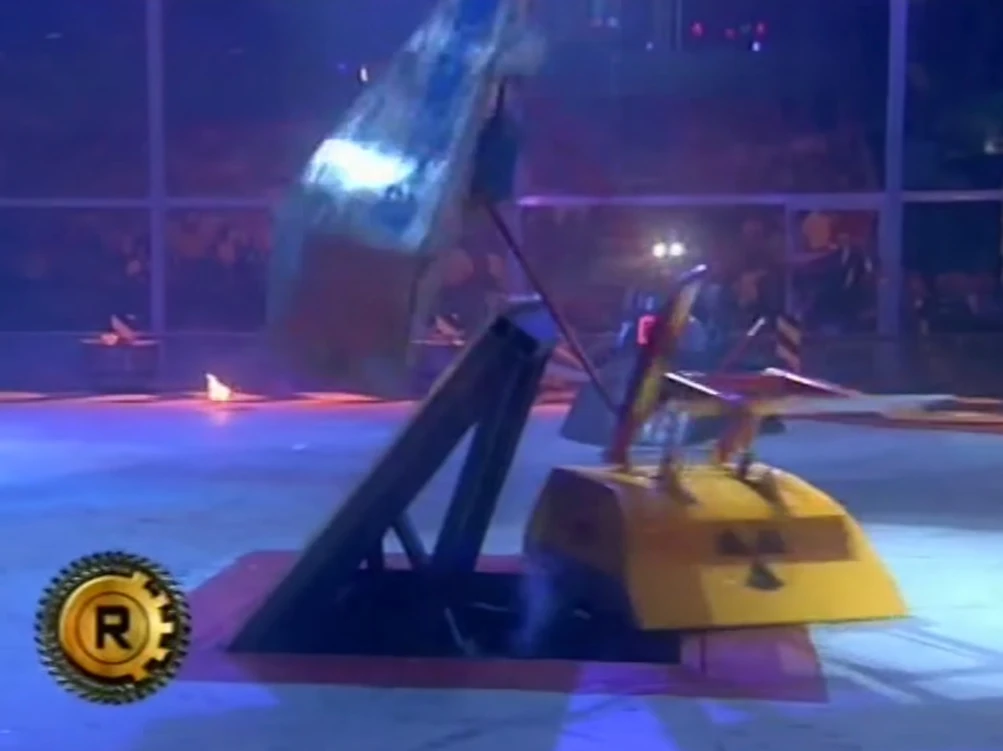
As Thermidor 2 backed away again, Behemoth and Stinger clashed once more, with Stinger engaging its infamous spin-technique. Behemoth was easily able to counter the attack, but as it drove closer to the arena wall, Thermidor 2 snuck in from behind and threw it head-over-heels out of the arena.
- "I bet even George Francis of the Chaos team is making notes about Thermidor this time around"
- — Jonathan Pearce after Thermidor 2 flips Behemoth out
The pit was activated not long after this, and Thermidor 2 tried to flip Stinger, but its body-shape proved to be much harder to deal with than Behemoth's had. Stinger hit Thermidor 2 with its spike, but this did nothing to stop its opponent. Thermidor 2 eventually managed to usher Stinger closer to the arena wall where Behemoth had been thrown out, but missed a chance to flip it.
...before flipping Stinger out as well
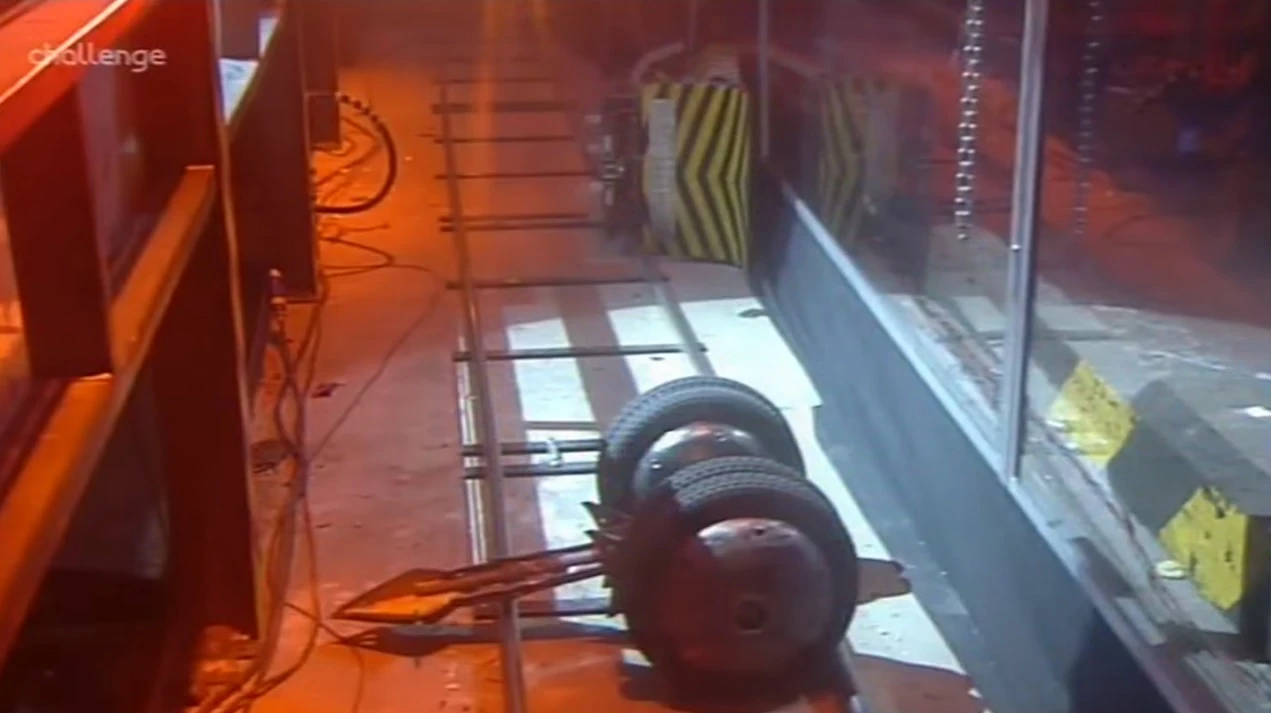

Stinger joins Behemoth outside of the arena
For a little while, the two robots simply drove around each other, quite close to the arena wall and the open pit, with Stinger looking rather sluggish. After a miss from each weapon, Thermidor 2 managed to get underneath Stinger and flip it again. This time, one wheel got caught over the arena wall and the rest quickly followed, with Stinger landing not too far away from Behemoth.
- "They've got both of them out! Thermidor - last man standing, the only one in!"
- — Jonathan Pearce
Winner: Thermidor 2
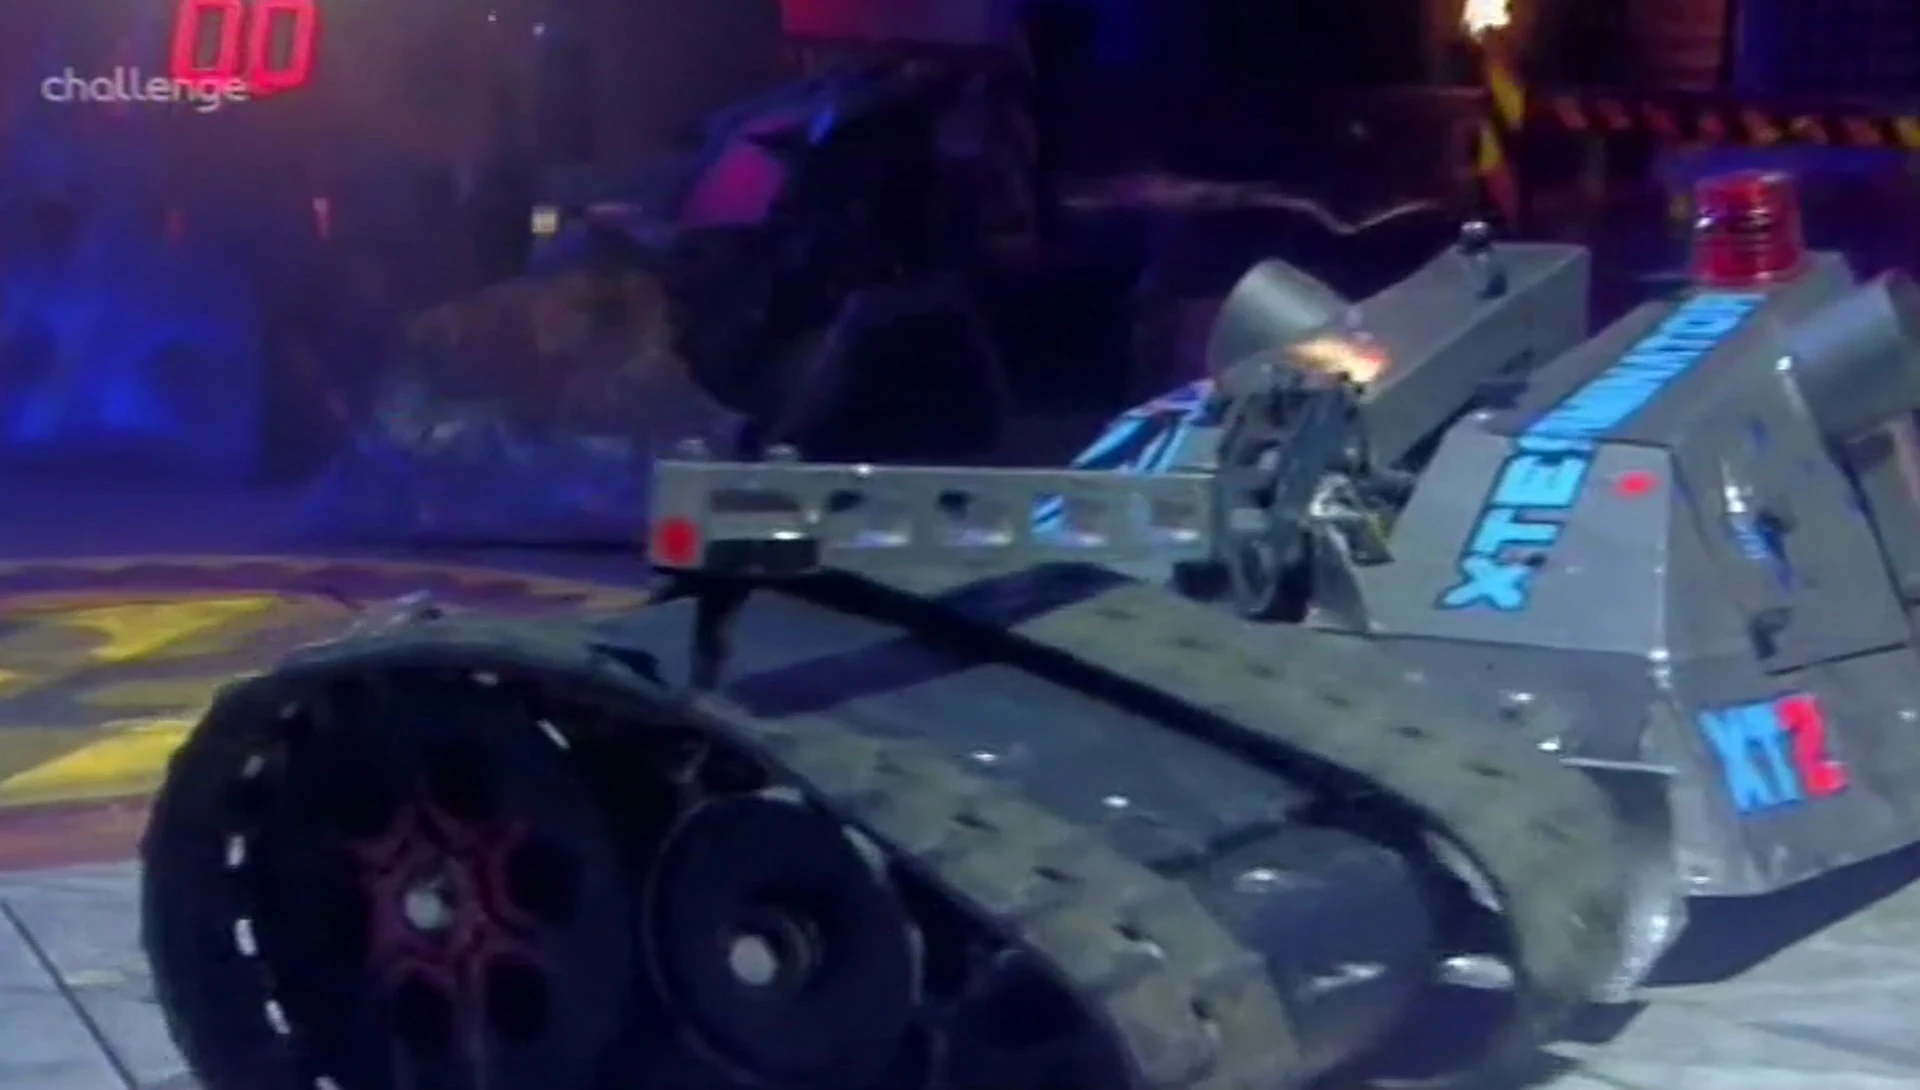
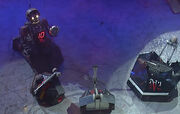
Panzer Wraith vs Cataclysmic Variabot vs X-Terminator

The three machines, in the pits, ready to fight
X-Terminator was the first off the mark as the battle began, hitting Cataclysmic Variabot when its own axe attack hit thin air. It then pushed its opponent into Shunt's CPZ, putting it under more pressure. Cataclysmic Variabot escaped with little damage, whilst Panzer Wraith attempted to use its cutting blade on it, with no success. X-Terminator then met head-on with the Variabot again, both axes swung, but only X-Terminator's hit its target. As Panzer Wraith attacked the Variabot again, X-Terminator moved away and hit Cataclysmic Variabot just as its axe was attempting to retract, where it became evident that damage was present on the left side of the Variabot. The two axe wielding machines collided head on again, only this time for X-Terminator to be pushed back, Panzer Wraith once more trying to attack Cataclysmic Variabot. It then turned towards X-Terminator, who used its axe to push away Panzer's blade. X-Terminator then got underneath Panzer and pushed it towards Shunt's CPZ, but both robots escaped before any damage could be caused. Panzer drove at X-Terminator again, who this time used its axe to overturn the former heat-finalist. During all this, Cataclysmic Variabot, whose axe was stuck outwards, had not moved since the last attack by Panzer.
X-Terminator plunges its axe into Panzer Wraith's track
- "What is the Variabot doing at this moment in time? Standing idle, or standing immobile?"
- — Jonathan Pearce
X-Terminator then hit one of Panzer's tracks, its axe going straight through and briefly stopping it from moving. Panzer only escaped once X-Terminator withdrew its axe, and it quickly retreated away, whilst Refbot counted out the Variabot. As Shunt pushed it onto the arena flipper, X-Terminator rammed into the pit release button. Panzer Wraith, meanwhile, appeared to have only minimal mobility.

X-Terminator pushing Panzer Wraith into the pit
- "How many of those tracks are working on Panzer Wraith? One or two? If only one is working, then I think X-Terminator has this battle"
- — Jonathan Pearce
X-Terminator and Shunt axe Cataclysmic Variabot.
X-Terminator put its axe clean through Panzer's track once more, before slowly pushing it into the pit, eliminating Panzer Wraith and giving X-Terminator the final annihilator place. Before the battle ended, however, the Variabot was flung by the floor flipper, causing bits of metal to fly off. Shunt and X-Terminator axed its underbelly for a bit, before attempting to pit it on top of Panzer Wraith, who seemed to now have some mobility, but to no avail.
- "It's too late now for Panzer Wraith! The track is still turning...you're too late! All over for you."
- — Jonathan Pearce, trying to hold back laughter
Winner: X-Terminator
Second Half
Competing Robots
 | ||
|---|---|---|
| Atomic 2 | ||
| Weight | 97kg | |
| Dimensions | 0.8m x 0.4m x 0.9m | |
| Power | 24v Electric Motor | |
| Weapons | Spike & Flipper | |
| Strengths | Powerful Flipper | |
| Weaknesses | Durability of Weapon | |
| From: Nr Bewdley in Worcestershire | ||
| Team Members: Stephen Bebb, Paul Francis & David Bebb | ||
 | ||
|---|---|---|
| Bulldog Breed 3 | ||
| Weight | 97kg | |
| Dimensions | 1m x 0.7m x 0.32m | |
| Power | 24v Electric Motor | |
| Weapons | Flipper & Hardened Spikes | |
| Strengths | Heavily Armoured | |
| Weaknesses | No Self-Righting Mechanism | |
| From: Cannock | ||
| Team Members: Tony Somerfield, Robert Somerfield & Karl Asplin | ||
 | ||
|---|---|---|
| Comengetorix | ||
| Weight | 93kg | |
| Dimensions | 1.23m x 0.88m x 0.31m | |
| Power | 24 Volt Electric Motors | |
| Weapons | Axe & Flipper | |
| Strengths | Self-Righting Mechanism | |
| Weaknesses | Reliability | |
| From: The Isle of Wight | ||
| Team Members: Ian Gear, Alistair Curtis-Horsfall & Tom Curtis-Horsfall | ||
 | ||
|---|---|---|
| Diotoir | ||
| Weight | 93kg | |
| Dimensions | 1.17m x 1.04m x 0.39m | |
| Power | 50cc Petrol Engine | |
| Weapons | Wedge & Scoop | |
| Strengths | Low Ground Clearance | |
| Weaknesses | Flammable | |
| From: Clondalkin, Dublin in Ireland | ||
| Team Members: Peter Redmond, Joe Gavin & Dr Zulu | ||
 | ||
|---|---|---|
| Disc-O-Inferno | ||
| Weight | 97kg | |
| Dimensions | 1.16m x 0.70m x 0.91m | |
| Power | 24v Electric Motor | |
| Weapons | Rotating Disc | |
| Strengths | Runs Both Ways Up | |
| Weaknesses | High Ground Clearance | |
| From: Cambridge | ||
| Team Members: Mark Marshall & Nick Bullock | ||
 | ||
|---|---|---|
| Fighting Torque | ||
| Weight | 93kg | |
| Dimensions | 1.75m x 0.83m x 0.42m | |
| Power | 2 x 24v Electric Motors | |
| Weapons | Spinning Disc | |
| Strengths | Robot Wars Veterans | |
| Weaknesses | No Self-righting Mechanism | |
| From: Aberdour | ||
| Team Members: Richie McBride, Alex & Ellen McBride | ||
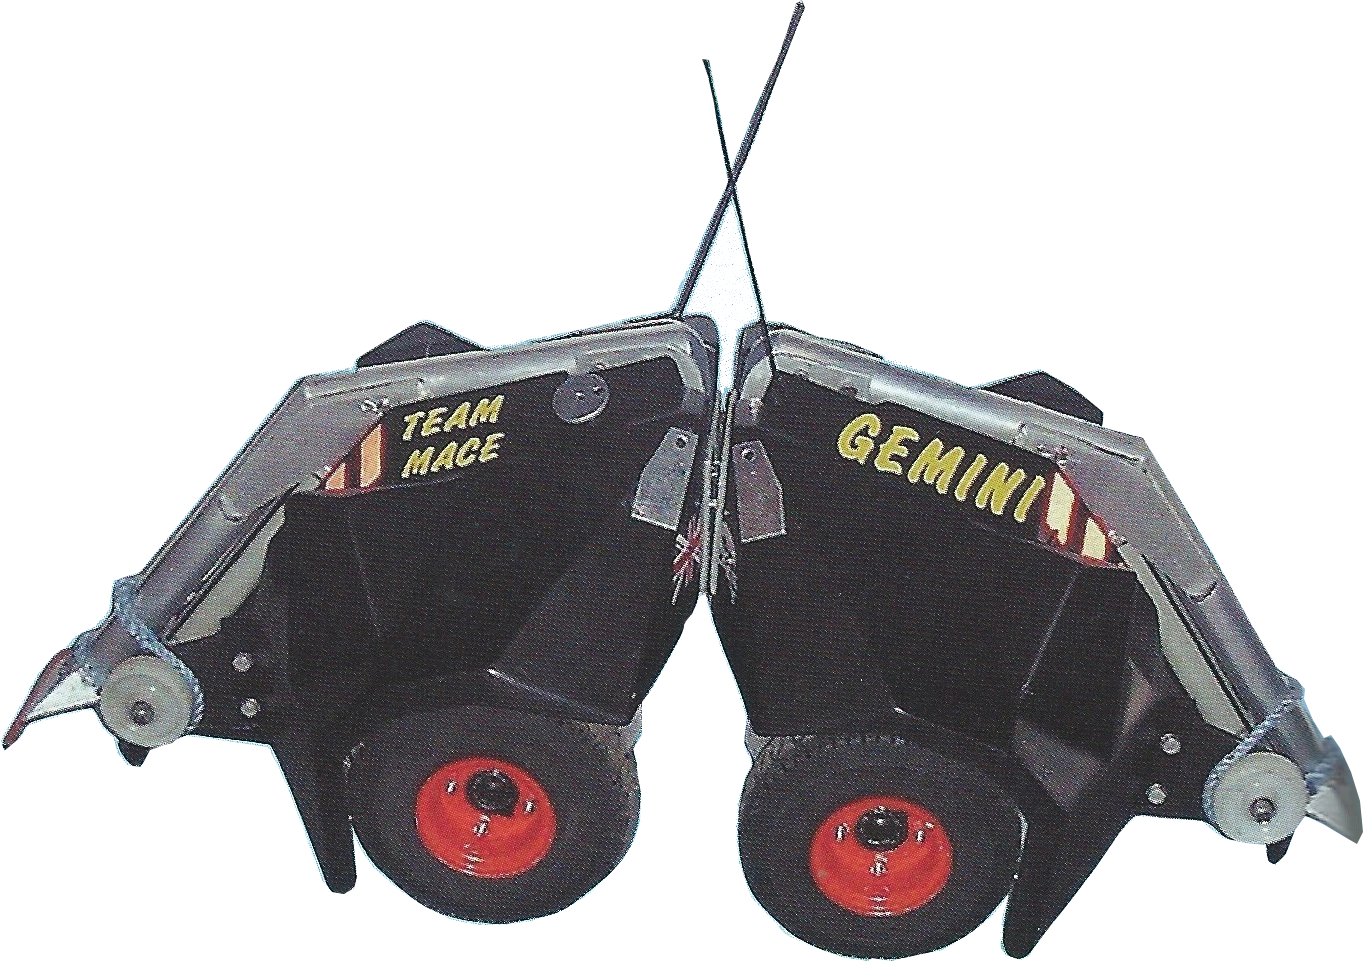 | ||
|---|---|---|
| Gemini | ||
| Weight | 94kg | |
| Dimensions | 0.68m x 0.3m x 0.38m | |
| Power | 4 x Electric Motors | |
| Weapons | High Powered Flippers | |
| Strengths | Clusterbot | |
| Weaknesses | Hard to Control | |
| From: St Leonards on Sea, East Sussex | ||
| Team Members: Shane Howard, Brian Fountain & Daryl Howard | ||
 | ||
|---|---|---|
| Judge Shred 2½ | ||
| Weight | 91kg | |
| Dimensions | 1.2m x 1m x 0.3m | |
| Power | 24v Electric Motor | |
| Weapons | Flipper & Axe | |
| Strengths | Self-Righting Body Shell | |
| Weaknesses | High Ground Clearance | |
| From: Coalville, Leicestershire | ||
| Team Members: Alan Blakeman, Paul Blakeman & Dave Cluley | ||
 | ||
|---|---|---|
| King B Powerworks | ||
| Weight | 88kg | |
| Dimensions | 1m x 0.77m x 0.25m | |
| Power | 36v DC Motor | |
| Weapons | Front Disc & Rear Flipper | |
| Strengths | Extremely Powerful | |
| Weaknesses | Exposed Tyres | |
| From: Havant | ||
| Team Members: Simon Harrison & Grant Hornsby | ||
 | ||
|---|---|---|
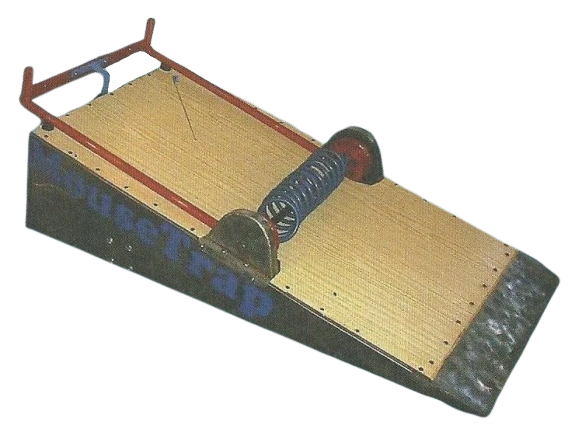
| MouseTrap | ||
| Weight | 95kg | |
| Dimensions | 1.5m x 0.7m x 0.45m | |
| Power | 24v Electric Motor | |
| Weapons | Trap Mechanism | |
| Strengths | Powerful Weapon | |
| Weaknesses | Slow & Sluggish | |
| From: Eynsham Witney, Oxford & Bristol | ||
| Team Members: Stan Launchbury & Jason Launchbury | ||
 | ||
|---|---|---|
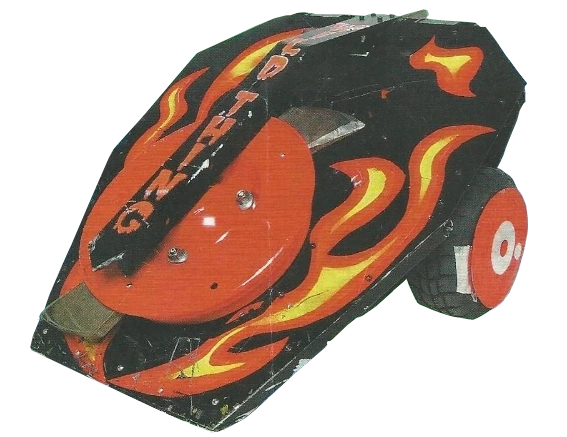
| Napalm | ||
| Weight | 84kg | |
| Dimensions | 1.94m x 0.95m x 0.7m | |
| Power | 24v Electric Motor | |
| Weapons | Spikes & Rotary Arm | |
| Strengths | Heavily Armoured | |
| Weaknesses | Poor Reliability | |
| From: New Ash Green | ||
| Team Members: David Crosby, Michelle Davey & Tegan Crosby | ||
 | ||
|---|---|---|
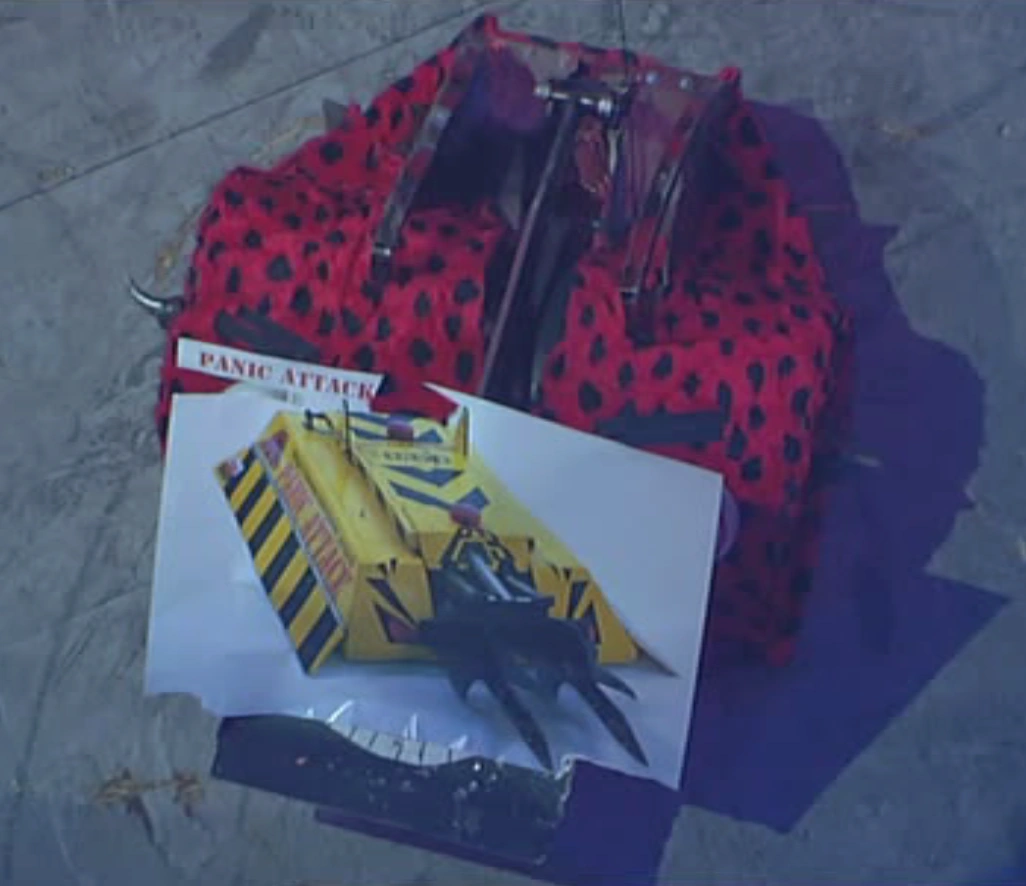
| Panic Attack | ||
| Weight | 98kg | |
| Dimensions | 1m x 0.7m x 0.16m | |
| Power | 24v Motor | |
| Weapons | Lifting Forks | |
| Strengths | Impenetrable Armour | |
| Weaknesses | Reliability of Weapon | |
| From: Thornhill in Cwmbran, Gwent | ||
| Team Members: Kim Davies, Michael Davies & Christian Bridge | ||
 | ||
|---|---|---|
| Shear Khan | ||
| Weight | 100kg | |
| Dimensions | 1.32m x 0.71m x 0.86m | |
| Power | 2 x 750w Electric Motors | |
| Weapons | Chisel & Spinning Drum | |
| Strengths | Heavily Armoured | |
| Weaknesses | Effectiveness of Weapons | |
| From: Portishead in Bristol | ||
| Team Members: Richard Radford & Chris Martin | ||
 | ||
|---|---|---|
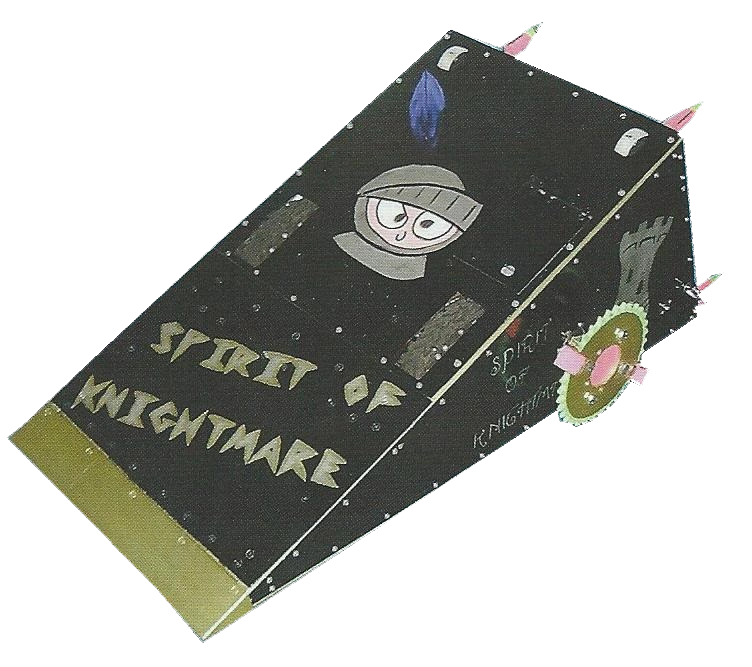
| Spirit of Knightmare | ||
| Weight | 100kg | |
| Dimensions | 1.25m x 0.70m x 0.45m | |
| Power | 2 x 24v Electric Motors | |
| Weapons | Pneumatic Lifter | |
| Strengths | Invertible | |
| Weaknesses | Slow & Sluggish | |
| From: Coalville | ||
| Team Members: Nigel Paget, Malcolm Summers & Lee Summers | ||
 | ||
|---|---|---|
| The Spider | ||
| Weight | 100kg | |
| Dimensions | 0.60m x 1.33m x 0.90m | |
| Power | 750w Electric Motor | |
| Weapons | 4 x Rotating Spikes | |
| Strengths | Invertible | |
| Weaknesses | No Armour | |
| From: Mold in Flintshire | ||
| Team Members: John Udale, Robert Udale & Carol Udale | ||
 | ||
|---|---|---|
| The Steel Avenger | ||
| Weight | 100kg | |
| Dimensions | 1.3m x 0.7m x 0.8m | |
| Power | 2 x 750w Industrial Motors | |
| Weapons | Pneumatic Axe & Rear Flipper | |
| Strengths | Powerful Axe | |
| Weaknesses | Inaccuracy of Weapon | |
| From: Holton St Mary | ||
| Team Members: John Willoughby, Jacky Willoughby & Tony Bates | ||
 | ||
|---|---|---|
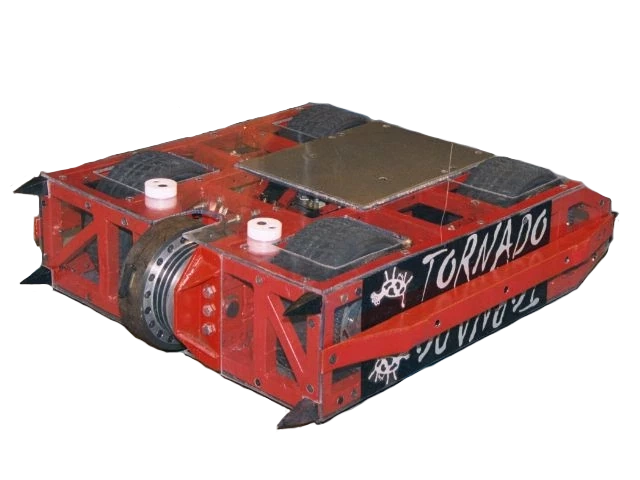
| Tornado | ||
| Weight | 97kg | |
| Dimensions | 0.85m x 0.7m x 0.25m | |
| Power | 2 x 750w Motors | |
| Weapons | 2000rpm Spinning Disc | |
| Strengths | Invertible | |
| Weaknesses | Easily Flipped | |
| From: Huntingdon | ||
| Team Members: Andrew Marchant, David Gamble & Bryan Moss | ||
 | ||
|---|---|---|
| Velocirippa | ||
| Weight | 93kg | |
| Dimensions | 1.35m x 0.49m x 0.51m | |
| Power | 12v Starter Motors | |
| Weapons | Spinning Discs | |
| Strengths | Self-Righting Mechanism | |
| Weaknesses | Unreliable | |
| From: Barton Green in Clifton | ||
| Team Members: Trevor Wright, Mat Wright & Tony Hillier | ||
Battles
Atomic 2 vs Fighting Torque vs MouseTrap
- "Looking at it, Fighting Torque is a braveheart to go up against these two, Atomic and MouseTrap"
- — Jonathan Pearce as the battle begins

Atomic 2 throws MouseTrap over

Atomic 2 uses its spike on MouseTrap
As the battle begun, Atomic 2 charged straight at MouseTrap and flipped it onto its back. MouseTrap was unable to right itself due to a problem with its weapon which had occurred before the battle began and was left powerless as Atomic 2 flipped it over all the way onto its back again. Atomic 2 then charged away and flipped Fighting Torque over, knocking various parts, including the kilt, aside. After a little while, Atomic 2 re-righted MouseTrap, before doing the same with Fighting Torque, bringing them back into the action. Moments after righting Fighting Torque, however, Atomic 2 flipped MouseTrap onto its back again. It then used its spike to push MouseTrap around the arena, whilst Fighting Torque stayed largely out of the action, almost driving onto the flame pit.
- "And Atomic could cause some real damage later on in the Extreme series"
- — Jonathan Pearce on Atomic 2
After one last lift on MouseTrap, Atomic 2 left it to be counted out by Refbot and set after Fighting Torque again. Fighting Torque's cutting arm caused no issues for Atomic 2 and the motion nearly tore the kilt off. The Scottish robot was able to fend off a flip by Atomic 2 and continued to attack it, but with no success, whilst Sir Killalot dragged the beaten MouseTrap around the arena. Atomic 2 continued pursuing Fighting Torque, using its flipper blade to deflect the arm, which also lifted up Fighting Torque. It then wedged underneath Fighting Torque, causing the head to be dislocated (much to Jonathan Pearce's delight), before backing away and flipping it once more, leaving it on its side.
- "And for Fighting Torque, not the high road, but the low road to oblivion"
- — Jonathan Pearce, having recovered
Fighting Torque's 'secret' is exposed
MouseTrap lands on top of Atomic 2
Sir Killalot, meanwhile, had placed MouseTrap onto the floor flipper. Atomic 2 suddenly rushed in to attack MouseTrap just as the floor flipper fired, which not only caused it to get caught in the flipper mechanism, but also resulted in MouseTrap landing on top of it, as it flew straight up due to being placed quite far back on the flipper. The flip also seemed to reset MouseTrap's weapon, but it couldn't knock itself back onto its wheels and was attacked by Dead Metal.

Fighting Torque is defeated
- "It's too late to spring shut. Shutting the spring door while the mice have bolted or something like that, and attacking bolts and nuts and just about everything else."
- — Jonathan Pearce as Dead Metal attacks MouseTrap
Fighting Torque, meanwhile, was finally counted out, and was also placed on the floor flipper, its kilt completely discarded. However, like MouseTrap, the flipper threw it upwards and Fighting Torque landed on its wheels. It drove away quickly, but was flipped straight back over by Atomic 2 and pushed onto the flame pit.
- "Oh, what a sad end for Fighting Torque"
- — Jonathan Pearce at the end of the battle
Winner: Atomic 2
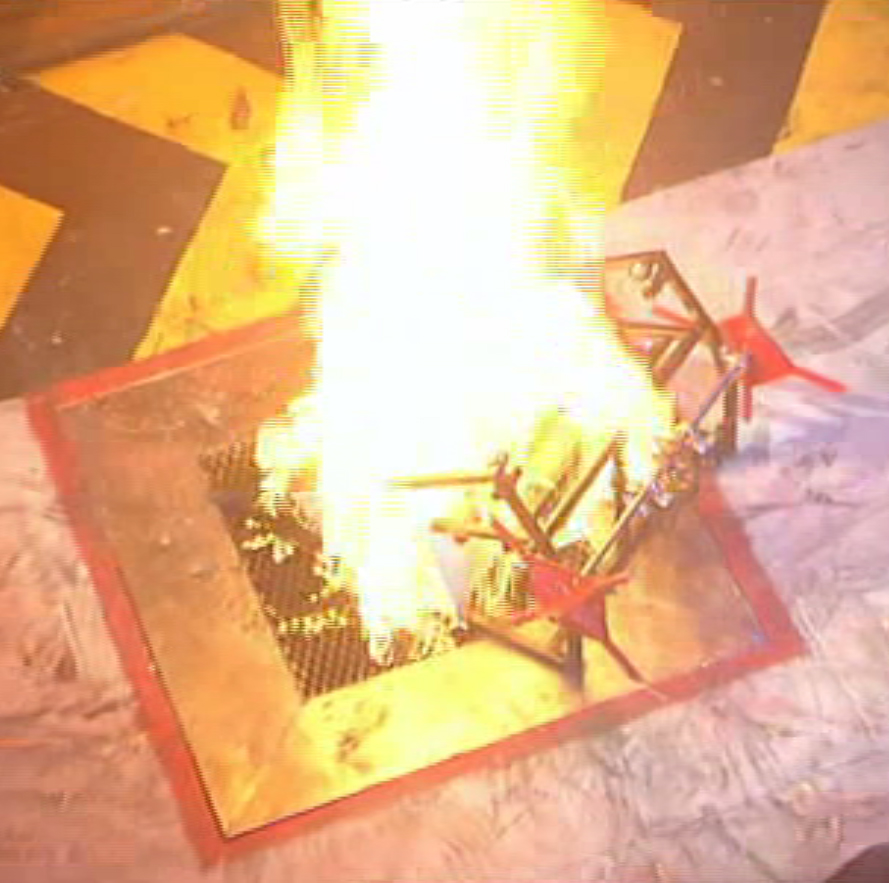
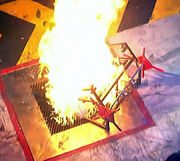
Panic Attack vs Diotoir vs Shear Khan
- "We've fought a weapon like this before and it's really destructive and this one sounds worse."
- — Kim Davis, expressing his fears over Shear Khan's weapon

Shear Khan uses its chisel on Panic Attack

Shear Khan is upended by Panic Attack
Diotoir entered the arena with a poster of Panic Attack taped to its scoop. It was Panic Attack who had the fastest start, charging straight at Shear Khan, who caused minor damage with its rock chisel. Diotoir, meanwhile, deliberately drove onto the flame pit in an attempt to burn the poster. The three robots pushed against each other, before Shear Khan reversed onto Panic Attack to use its drum. Panic Attack, however, was able to lift it up and push it onto its back.
- "Well, it's got the weaponry, but it does not have the control, nor a srimech, and they're in major trouble here!"
- — Jonathan Pearce
Panic Attack carries an immobile Diotoir

Panic Attack drops Diotoir into the pit
Panic Attack then turned its attention to Diotoir, whose poster had fallen off completely. It was unable to get underneath on the first attempt and Diotoir was able to push back, but the Welsh robot came in for another attempt and overturned its Irish foe on top of its own scoop just as Shear Khan was counted out. Just like MouseTrap in the previous Mayhem, Diotoir's weapon had malfunctioned before the battle begun, leaving it stranded as Panic Attack activated the pit. As Refbot began counting out Diotoir, Panic Attack managed to lift it onto its own back, leaving it in the perfect position to utilise its classic carry-and-pit manoeuvre. Shear Khan was then thrown by the floor flipper moments after Diotoir's pitting, landing right near Panic Attack as Cease was called.
- "Tiger, Tiger, burning bright, for you I'm afraid it's a disappointing "Good Night"!"
- — Jonathan Pearce puts his own spin on the classic poem
Panic Attack takes on Shunt

Refbot and Matilda attempt to intervene after 'cease' is called a second time
Despite the call, Shunt proceeded to push Shear Khan towards the pit. However, Panic Attack then got underneath Shunt and got its lifting forks hooked in his wheel guards. Matilda and Refbot attempted to separate them as Cease was called again, Refbot ended the battle by issuing Panic Attack a yellow card, but it had no effect on the outcome.
- "Cease called again. That means Cease, Panic Attack. I.E. - Stop, desist, finish, end! Yellow card. You're lucky to survive with just that!"
- — Jonathan Pearce
Winner: Panic Attack
The Steel Avenger vs Tornado vs King B Powerworks
- "Who wants the best, most brutal mayhem in the whole wide world ever?"
- — Craig Charles

Tornado pushes The Steel Avenger
As the battle began, The Steel Avenger drove between the similar designs of Tornado and King B Powerworks, dodging attacks by them, but failing to land an axe blow. Tornado used its drum to get underneath Steel Avenger and pushed it around, but Steel Avenger was unharmed and pursued, dodging a small ram by King B Powerworks. Steel Avenger drove at each other, before dodging around, before Tornado ran at Steel Avenger's front, resisting an axe blow and pushing underneath it once more, but failing to overturn it. King B attempted to push into Steel Avenger, but the attacks caused no issues as Steel Avenger went after Tornado again. The resulting axe blow missed, but Steel Avenger dodged to the side before Tornado could push it. Next it pushed into King B and contemplated, but decided against, an axe attack. After driving around the arena for a while, Tornado charged from the other side of the arena, drove around Steel Avenger and rammed into it again, resisting another axe blow and pushing it towards the top-left CPZ. As the two continued their battle across to near where the flame pit was, King B was struggling to keep up with its younger rivals, only managing to get the occasional small ram as they ran around the arena.
- "King B is out of the frey at the moment, not really getting involved. Tryna... Basically tryna to catch the others. It's almost like a game of tag. "Come on come on, try and catch us if you can!"
- — Jonathan Pearce on King B Powerworks

King B Powerworks rams an immobile Tornado
Eventually, Tornado managed to land a side slam on King B Powerworks, before landing an even more powerful slam on the side of The Steel Avenger. As they attacked each other, King B Powerworks finally landed an attack, pressing into the side of Tornado which appeared to stop moving. King B Powerworks then launched a stronger ram, penetrating the side of Tornado with its lifting spikes, and pushed Tornado towards the floor flipper and, as it reversed away for another push, Tornado did not move, now completely immobile as the robot's removable link had fallen out. King B Powerworks took the advantage and continued to push Tornado around, with The Steel Avenger landing minor attacks on the red robot. Eventually, the two robots broke away to fight each other, with The Steel Avenger lifting up King B Powerworks. As the two clashed with their rear weapons, Shunt placed Tornado on the floor flipper, and once Refbot counted it out, the flipper activated, throwing Tornado across the arena.

King B Powerworks loses a wheel
Meanwhile, King B had gotten underneath The Steel Avenger with its lifting forks and pulled it into the pit release button. As The Steel Avenger broke away, King B attempted to push Tornado into the pit. This proved to be a crucial mistake, as The Steel Avenger rammed hard into King B Powerworks' front-right wheel whilst it was distracted, and under the pressure, the wheel broke off.
- "And there are three wheels on that particular wagon now!"
- — Jonathan Pearce

Matilda throws The Steel Avenger over
As Matilda pushed Tornado into the pit, King B Powerworks desperately tried to use its saw, but caused no damage to The Steel Avenger. Next, The Steel Avenger managed to land a few more axe blows on King B Powerworks as time ran out, but in the last three seconds, The Steel Avenger missed a crucial charge and nearly drove into Matilda's CPZ. It began to reverse, but Matilda hit it with her flywheel anyway, throwing it upside down and tearing off its feather duster. The judges decided, however, that The Steel Avenger had not quite crossed into the CPZ and that the attack should not have happened. Judging the battle up until that point, The Steel Avenger was given a very close win.
- "Now this is, I've been informed, a really close call. But they've gone for Steel Avenger!"
- — Craig Charles
Winner: The Steel Avenger
Napalm 2 vs Gemini vs The Spider
- Julia Reed: "Spider, your opponents, have just called you weak."
- David Crosby: "Upstarts! I've just seen their fight. Call that a fight? Hah! You were in there, four seconds flat, BOOM! Out of the arena!"
- Julia Reed: "So you're not scared of them then, obviously?"
- David Crosby: "Scared? Scared of spiders? Arachnophobia? No chance!"
- — Before the battle

The Spider tips Gemini over
The Spider breaks down over the flame pit
The battle began surprisingly quickly, with The Spider ramming into Napalm, buffeting it with its rotating spikes and knocking a few bolts off. The Gemini twins, having split, each attempted to flip The Spider, but missed each attempt. As The Spider dodged one Gemini twin, the other twin rammed into Napalm and tried to flip it, but missed and got itself caught in Spider's spikes. This resulted in it getting caught on its anti-wheelie bar, rendering it stuck. As the other half of Gemini tried to get to its twin, Spider pushed Napalm into the arena wall, although its weapon seemed to have broken. Napalm's "mandibles" struck thin air as Spider backed away, only for it to drive straight over the flame pit and the moment it crossed over the hazard, it immediately broke down.
- "What on earth is The Spider doing there? The web's gonna catch fire! The Spider's gonna catch fire! Oh no!"
- — Jonathan Pearce as The Spider eliminates itself
As Refbot counted The Spider out, both Gemini twins attempted to flip Napalm. One half missed and got itself beached on its back. The other half was more successful and flipped Napalm onto its side, but the older machine was able to right itself. The Gemini twin still mobile quickly attempted to right its twin, but its flipper wasn't closed properly, and as a result it flipped itself over, beaching itself on its anti-wheelie bar too. Refbot then counted Gemini out, leaving Napalm as the only mobile robot.
- "Well, somehow Napalm has contrived an unbelievable victory without hardly doing anything! How on earth did that happen? Gemini, once again, flattering to deceive."
- — Jonathan Pearce, in surprise, as Gemini "gift-wraps" Napalm's victory

Napalm looks on at the Gemini twins are counted out
Whilst this was happening, Shunt had pushed the smouldering Spider towards the floor flipper, eventually positioning it on the hazard. The Spider was thrown across the arena, the landing finally extinguishing the flames from its body. Napalm meanwhile activated the pit and tried to push Gemini into the pit, but in doing so managed to re-right both twins. One twin managed to flip Napalm up on its side, but it was too late for it to win the battle, and Shunt pushed the twin, as well as Napalm, into the pit.
Shunt pushes Napalm and Gemini into the pit
- ""Oh I've had enough", says Shunt, "You can all go down there, skull and crossbones and just about everything.""
- — Jonathan Pearce, mostly refering to the skull on Napalm's weapon
As Cease was called, the remaining Gemini twin tried to flip Shunt, but only managed to beach itself on its back once more, immobilising itself once again.
- Craig Charles: "You're through to the annihilator, but when you think about it, aren't you just going to be cannon-fodder in that?"
- David Crosby: "I've got no objection to that at all. We're used to it."
- — After Napalm's surprise victory
Winner: Napalm
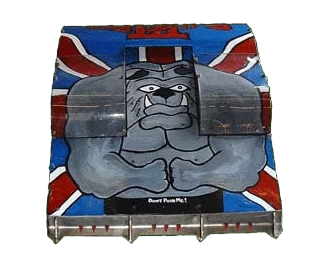
Bulldog Breed 3 vs Spirit Of Knightmare vs Judge Shred 2½

Spirit of Knightmare rams Judge Shred 2½

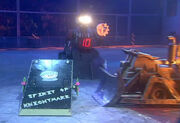
Spirit of Knightmare is counted out
Judge Shred 2½ appeared to be rather sluggish actually entering the arena. As the battle began, however, all three robots had a very cautious start, spending the first moments simply driving around each other, only giving each other an occasional nudge. The first real attack came when Spirit of Knightmare forced itself underneath Judge Shred, but its opponent fell off its narrow wedge before the flipper could be fired. It then rammed into Judge Shred with its rear spikes, but then it seemed to stop. As Judge Shred pushed Bulldog Breed 3 from the side, Spirit of Knightmare came back to life and got underneath Bulldog Breed.
- "This is a bit of a sluggish battle, so far"
- — Jonathan Pearce

Judge Shred is flipped by Bulldog Breed
Spirit of Knightmare pushed Bulldog Breed into the arena wall angle grinders, but Bulldog Breed managed to escape without any damage. Bulldog Breed then chased after Judge Shred, but neither robot's flippers fired. Spirit of Knightmare then rammed into Bulldog Breed with its rear spikes and, just like its previous attempt, it ground to a halt. This time, it didn't come back to life again, as Judge Shred and Bulldog Breed pushed against it, finally getting their flippers working, but missing. Meanwhile, Refbot counted out Spirit of Knightmare, who was severely damaged by Shunt. As this was happening, Bulldog Breed got underneath Judge Shred and finally used its flipper, rolling Judge Shred onto its back.
- "If you let the bulldog off his lead, he will create mayhem in the arena!"
- — Jonathan Pearce as Judge Shred is flipped


Spirit of Knightmare is thrown by the floor flipper
Judge Shred should have been able to right itself, but (just like in Series 4) its self-righting mechanism failed to work, and it was counted out. Meanwhile, Spirit of Knightmare was placed on the floor flipper by Dead Metal. The resulting flip threw it onto its back, revealing its comical "Who Needs A Srimech" logo and, surprisingly, it was able to run upside down, but it was too late to rejoin the fight. Meanwhile, Shunt axed Judge Shred's underbelly just as the pit was activated. During this, Judge Shred was somehow re-righted and tried to continue fighting, but Shunt pitted it anyway. Spirit of Knightmare had also been flipped the right way up, immobilising it once more.
Winner: Bulldog Breed 3
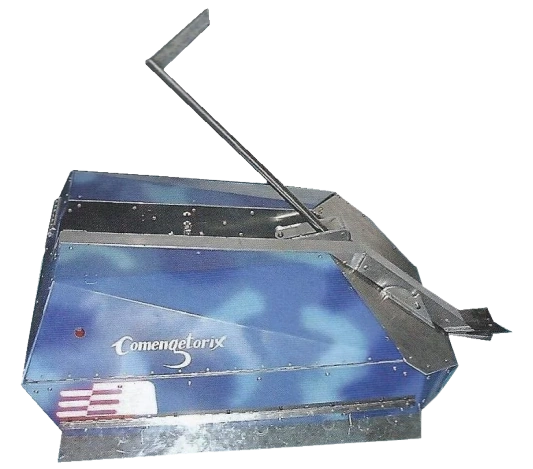
Velocirippa vs Comengetorix vs Disc-O-Inferno
Before the fight, it was revealed that the Disc-O-Inferno team did not wish to enter future series Robot Wars. It was also hinted that its opponents were to team up against it, although both teams denied this claim.
- Julia Reed: "Why don't you want to enter next year?"
- Mark Marshall: "It's lots of work, really"
- Julia Reed: "That's the point! That's what boys like to do, spent years and years building things and then have them blown up in one second!"
- Mark Marshall: "Well, this is the blow-up bit, isn't it?"
- — Discussions on Disc-O-Inferno's "suicide mission"


Comengetorix attacks Velocirippa


Comengetorix is counted out
As soon as "Activate" sounded, Comengetorix and Velocirippa struck a pincer-attack on Disc-O-Inferno, the former using its axe but causing no damage. As Disc-O-Inferno backed away, Velocirippa drove at it, and the two discs collided, but without any damage. After moving around quite sluggishly, Disc-O-Inferno launched an attack at Comengetorix, grazing its side and causing sparks to fly. Comengetorix's weapons fired at thin air, which allowed Disc-O-Inferno to push it back, whilst receiving another ram from Velocirippa. The attack had caused part of Comengetorix's front to peel away, as Velocirippa changed targets. Comengetorix tried to grab the dinosaur-based machine with its axe, but was forced to let go by Disc-O-Inferno. Velocirippa rammed Comengetorix side on a few more times. The two then spun around each other, trying to attack, but in doing so allowed Disc-O-Inferno to hit Comengetorix in the bottom-right corner. Velocirippa rammed it, but again, neither blade damaged the other. However, Comengetorix seemed to have slowed down even more, and Disc-O-Inferno landed several more hits before it lost all drive, with only its axe still working.

Disc-O-Inferno rips Velocirippa's armour away

Velocirippa is counted out, destroyed
As Refbot counted out Comengetorix, Disc-O-Inferno suddenly landed an attack on Velocirippa's left side. This time, the attack caused severe damage, dislodging an entire side panel and immobilising Velocirippa completely. A second attack on the same side tore the panel off altogether.
- "Well, they don't want to win, Disc-O-Inferno! They say they don't want to be here! Look at that!"
- — Jonathan Pearce, questioning Disc-O-Inferno's motives

Comengetorix is pitted
Velocirippa was immediately counted out, and Shunt pushed it onto the floor flipper as Sgt. Bash attempted to grab hold of Comengetorix. Due to Velocirippa's awkward shape, the flipper managed to throw Velocirippa across the arena and caused it to bounce straight into the pit release button before landing back on its wheels. Shunt, meanwhile, used his axe to drag Comengetorix onto the floor flipper, where it was flipped as well, although not as far as Velocirippa. Eventually, Disc-O-Inferno nudged it towards the open pit, where Shunt pushed it all the way in.
- "Velocirippa is extinct, and I don't know how Comengetorix had the "Gaul" to be in this competition."
- — Craig Charles after the battle
Winner: Disc-O-Inferno
Trivia
- Had Wild Thing won its Mayhem, the first Annihilator would have been comprised entirely of Series 4 semi-finalists.
- The mayhem taking place during Episode 4 of Extreme marked the final appearance of Killertron, making it the final appearance of any robot that fought in the very first episode of Robot Wars.
- According to Robot Wars Extreme: The Official Guide, Bigger Brother, Firestorm, Suicidal Tendencies, Mega Morg, 101, 3 Stegs 2 Heaven, Spawn Again, and Plunderbird 5 were considered as potential competitors, although it is unknown whether any of these robots actually applied for the competition itself. It is known that Spawn Again, at least, was never scheduled to take part[1].
References
- ↑ Private correspondence between RobotManiac and Darren Hayden-Ball in 2020
| |||||||||||||||||