No edit summary Tag: sourceedit |
LiamBryant (talk | contribs) No edit summary Tag: sourceedit |
||
| Line 10: | Line 10: | ||
==Competing Teams== |
==Competing Teams== |
||
| − | + | ;King B Powerworks & 101 |
|
| + | {{Stats |
||
| ⚫ | |||
| + | |name=[[King Buxton|King B Powerworks]] |
||
| ⚫ | |||
| + | |image=[[File:King_B_Powerworks_pic.jpg|200px|center]] |
||
| ⚫ | |||
| + | |weight=88kg |
||
| ⚫ | |||
| + | |dimensions=1m x 0.77m x 0.25m |
||
| ⚫ | |||
| + | |power=36v DC Motor |
||
| ⚫ | |||
| + | |weapons=Front Disc and Rear Flipper |
||
| ⚫ | |||
| + | |strengths=Extremely powerful |
||
| + | |weaknesses=Exposed tyres |
||
| + | |from=Havant in Hampshire |
||
| + | |team=Simon Harrison & Grant Hornsby |
||
| + | }} |
||
| + | {{Stats |
||
| + | |name=[[101]] |
||
| + | |image=[[File:Extreme_101.JPG|200px|center]] |
||
| + | |weight=97kg |
||
| + | |dimensions=1.2m x 0.75m x 0.3m |
||
| + | |power=Electric Motors |
||
| + | |weapons=Autonomous Spike |
||
| + | |strengths=Agile & Violent |
||
| + | |weaknesses=Traction control |
||
| + | |from=Kettering |
||
| + | |team=Mike Franklin, Amy Franklin & Steve Bickle |
||
| + | }} |
||
| ⚫ | |||
| + | {{Stats |
||
| + | |name=[[Diotoir]] |
||
| + | |image=[[File:Diotoir.jpg|200px|center]] |
||
| + | |weight=93kg |
||
| + | |dimensions=1.17m x 1.04m x 0.39m |
||
| + | |power=50cc Petrol Engine |
||
| + | |weapons=Wedge & Scoop |
||
| + | |strengths=Low Ground Clearance |
||
| + | |weaknesses=Flammable |
||
| + | |from=Clondalkin, Dublin in Ireland |
||
| + | |team=Peter Redmond, Joe Gavin & Dr Zulu |
||
| + | }} |
||
| + | {{Stats |
||
| + | |name=[[The Morgue|Mega Morg]] |
||
| + | |image=[[File:MegaMorg_Extreme.jpg|200px|center]] |
||
| + | |weight=99kg |
||
| + | |dimensions=1.5m x 0.9m x 0.6m |
||
| + | |power=2 x 12v Motors |
||
| + | |weapons=Pneumatic Spikes and Axes |
||
| + | |strengths=Self-Righting Capability |
||
| + | |weaknesses=Slow & Sluggish |
||
| + | |from=Penclawwd, Swansea |
||
| + | |team=Dorian Caudy, Dylan Jenkins & Mark Hooper |
||
| + | }} |
||
| ⚫ | |||
| + | {{Stats |
||
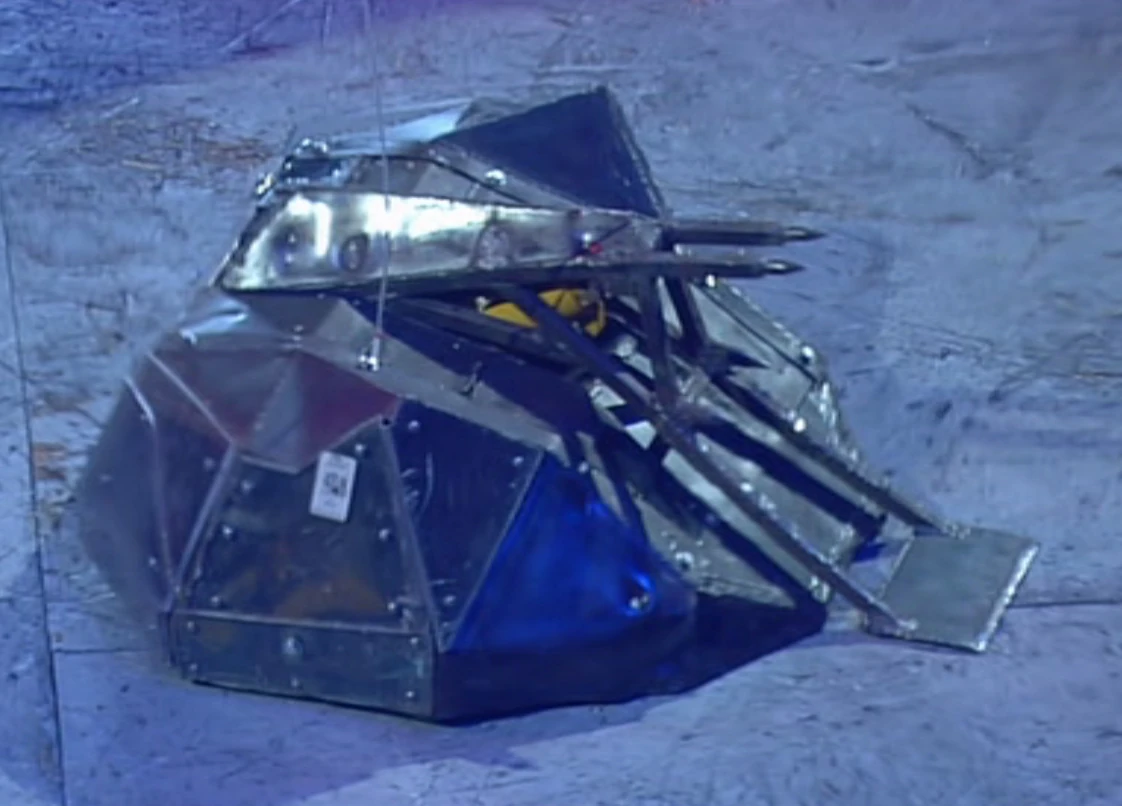
| + | |name=[[Comengetorix]] |
||
| + | |image=[[File:ComengetorixExtreme1.jpg|200px|center]] |
||
| + | |weight=93kg |
||
| + | |dimensions=1.28m x 0.88m x 0.31m |
||
| + | |power=24 Volt Electric Motors |
||
| + | |weapons=Axe and Flipper |
||
| + | |strengths=Self-Righting Mechanism |
||
| + | |weaknesses=Reliability |
||
| + | |from=The Isle of Wight |
||
| + | |team=Ian Gear, Alistair Curtis-Horsfall & Tom Curtis-Horsfall |
||
| + | }} |
||
| + | {{Stats |
||
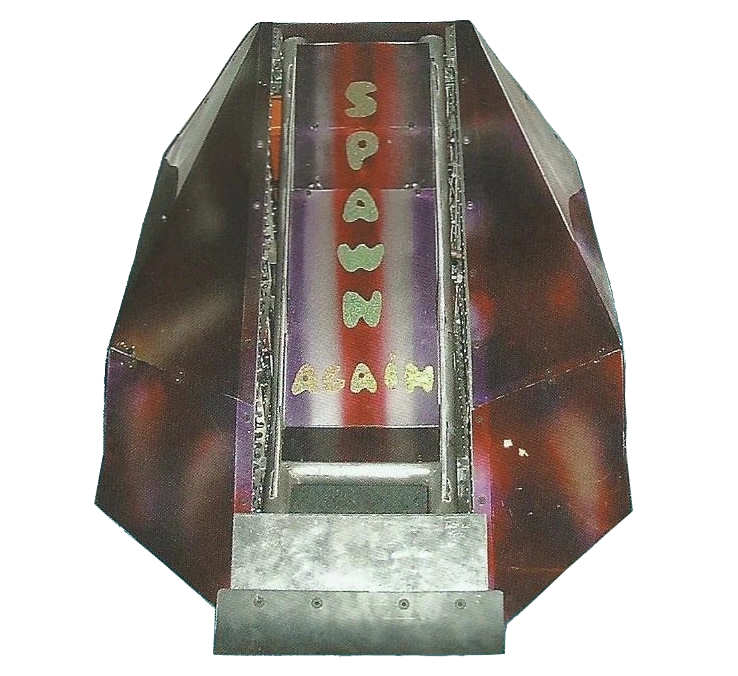
| + | |name=[[Spawn Again]] |
||
| + | |image=[[File:Spawn_Again_S5.png|200px|center]] |
||
| + | |weight=79kg |
||
| + | |dimensions=1.25m x 0.85m x 0.5m |
||
| + | |power=12v Electric Motors |
||
| + | |weapons=High Powered Flipper & Spike |
||
| + | |strengths=4 Wheel Drive |
||
| + | |weaknesses=Comparatively Light |
||
| + | |from=East Tilbury |
||
| + | |team=Darren Ball, Graham Warner & Luke Jackman |
||
| + | }} |
||
| + | ;Bigger Brother & Major Tom |
||
| + | {{Stats |
||
| ⚫ | |||
| + | |image=[[File:Bigger_brother5.JPG|200px|center]] |
||
| + | |weight=96kg |
||
| + | |dimensions=0.8m x 0.8m x 0.4 |
||
| + | |power=24v Electric Motor |
||
| + | |weapons=Pneumatic Powered Flipper |
||
| + | |strengths=Powerful Weapon |
||
| + | |weaknesses=Difficult to Control |
||
| + | |from=Brighton |
||
| + | |team=Joe Watts, Ellie Watts & Ian Watts |
||
| + | }} |
||
| + | {{Stats |
||
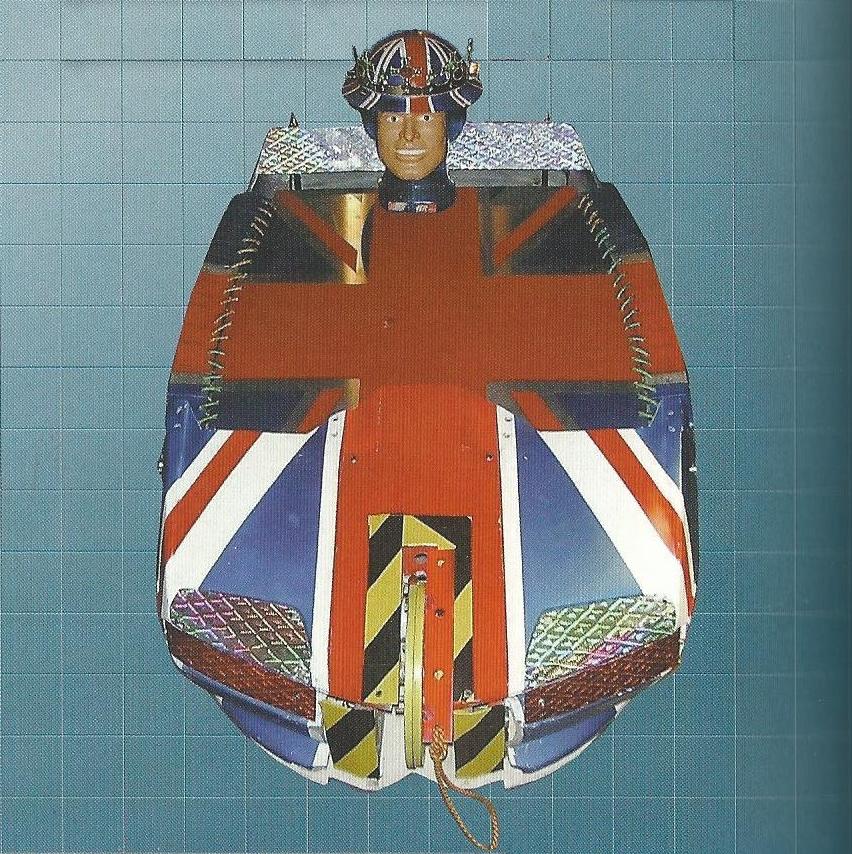
| + | |name=[[Major Tom]] |
||
| + | |image=[[File:Extreme_major_tom.JPG|200px|center]] |
||
| + | |weight=90kg |
||
| + | |dimensions=1.03m x 0.94m x 0.87m |
||
| + | |power=Golf Caddy Motors |
||
| + | |weapons=Rotating Flywheel |
||
| + | |strengths=Patriotism |
||
| + | |weaknesses=Poor Armour |
||
| + | |from=Isle of Sheppey |
||
| + | |team=Henry Ryan, Sam Ryan & Joe Brown |
||
| + | }} |
||
| ⚫ | |||
| + | {{Stats |
||
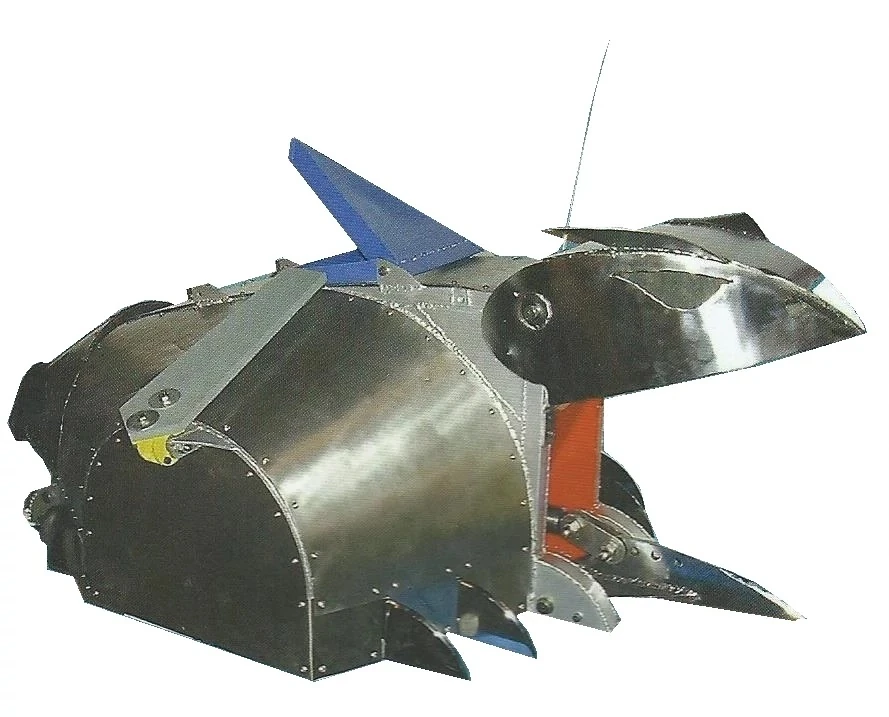
| + | |name=[[Cerberus]] |
||
| + | |image=[[File:Cerberus_Extreme_1.jpg|200px|center]] |
||
| + | |weight=99kg |
||
| + | |dimensions=1.46m x 0.92m x 0.58m |
||
| + | |power=24v Electric Motor |
||
| + | |weapons=Crushing Jaw & Ramming Blade |
||
| + | |strengths=Heavily Armoured |
||
| + | |weaknesses=No Self-Righting Mechanism |
||
| + | |from=London |
||
| + | |team=Theo Kaccoufa, Vass Vassileou & Alex Wink |
||
| + | }} |
||
| + | {{Stats |
||
| + | |name=[[Thermidor 2]] |
||
| + | |image=[[File:Thermidor_Extreme1.jpg|200px|center]] |
||
| + | |weight=95kg |
||
| + | |dimensions=1m x 0.8m x 0.34m |
||
| + | |power=2 x 750w Motors |
||
| + | |weapons=Pneumatic Flipper & Claws |
||
| + | |strengths=Powerful Flipper |
||
| + | |weaknesses=Fragile Shell |
||
| + | |from=Costessey, Norwich, Norfolk |
||
| + | |team=David Harding & Ian Harvey |
||
| + | }} |
||
| ⚫ | |||
| + | {{Stats |
||
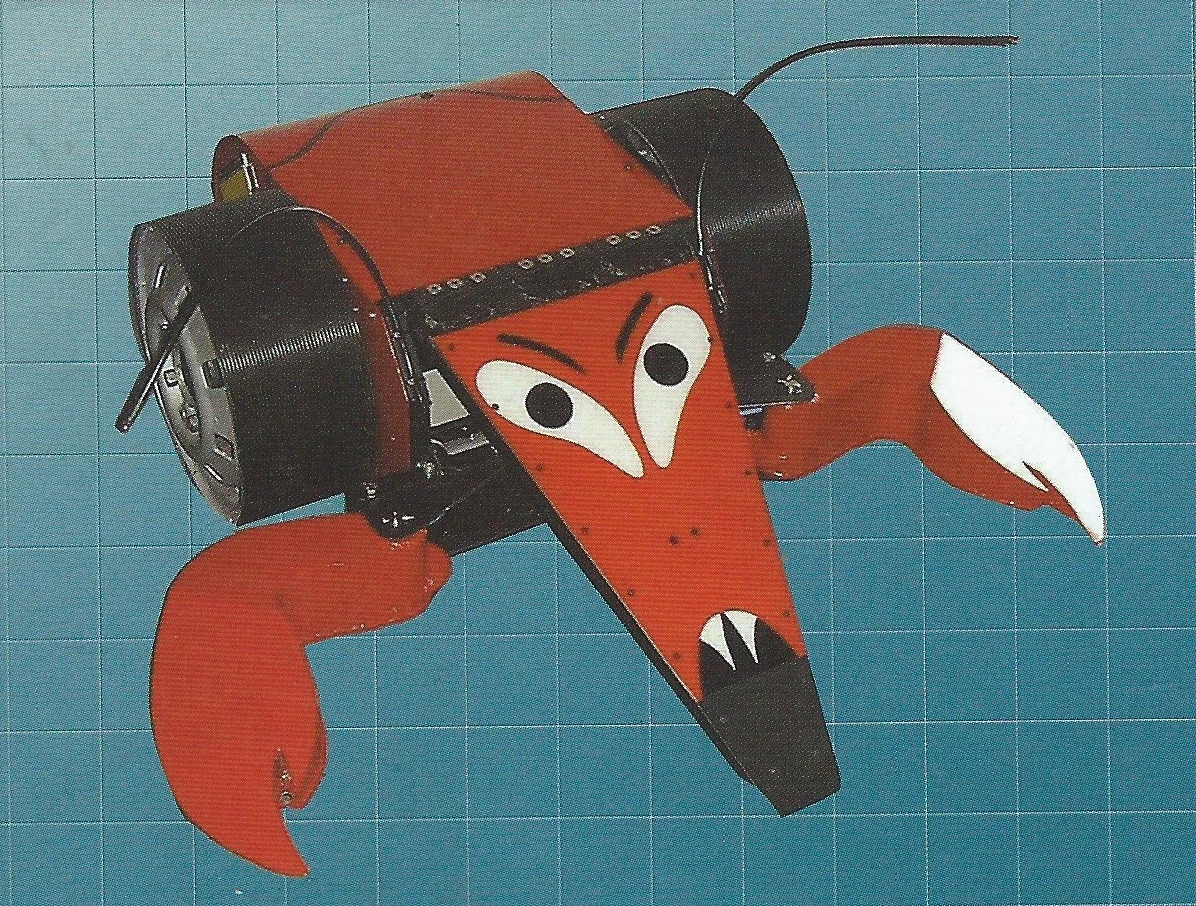
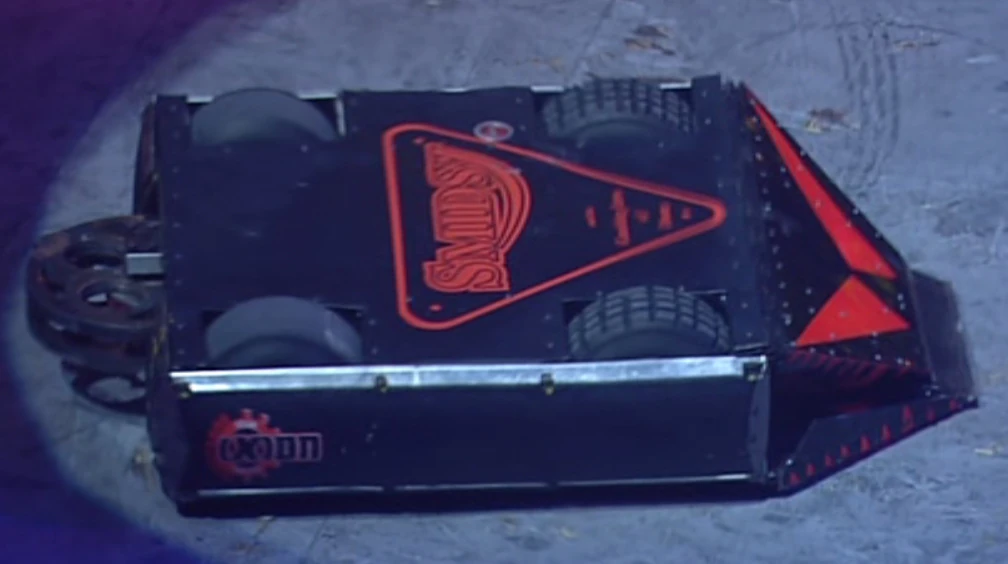
| + | |name=[[S.M.I.D.S.Y.]] |
||
| + | |image=[[File:Smidsy3.jpg|200px|center]] |
||
| + | |weight=99kg |
||
| + | |dimensions=1.2m x 0.8m x 0.26m |
||
| + | |power=2 x 24v Electric Motors |
||
| + | |weapons=Jaws, Fangs & Disc |
||
| + | |strengths=Multiple Weaponry |
||
| + | |weaknesses=Unreliable |
||
| + | |from=Cyberspace |
||
| + | |team=Mik Reed, Robin Bennett & Andy Pugh |
||
| + | }} |
||
| + | {{Stats |
||
| + | |name=[[Sumpthing]] |
||
| + | |image=[[File:Sumpthing_Extreme1.png|200px|center]] |
||
| + | |weight=98kg |
||
| + | |dimensions=1.4m x 1m x 0.4m |
||
| + | |power=24v Motor |
||
| + | |weapons=Crusher, Lifter & 2 x Saws |
||
| + | |strengths=Multiple Weaponry |
||
| + | |weaknesses=Exposed Mechanics |
||
| + | |from=Leicester |
||
| + | |team=Dig, Geoff Germainey & Paul Bacon |
||
| + | }} |
||
| ⚫ | |||
| + | {{Stats |
||
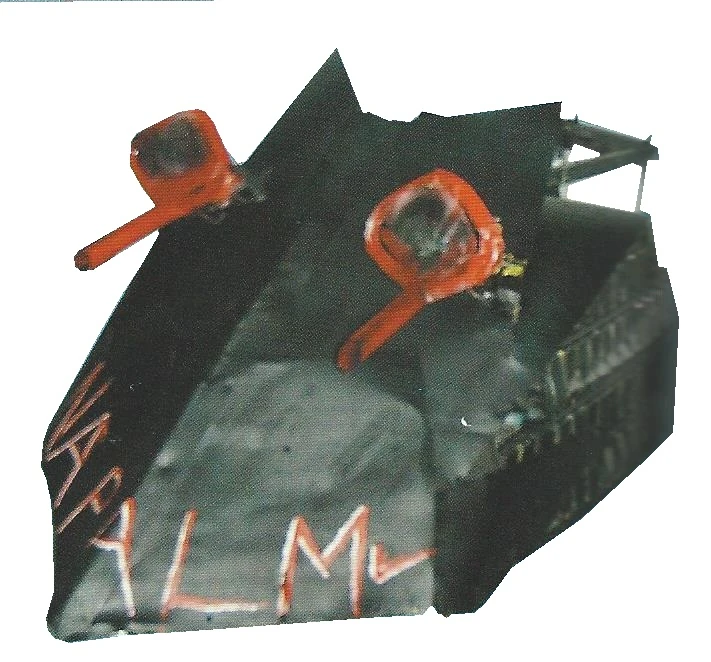
| + | |name=[[Napalm|Napalm 2]] |
||
| + | |image=[[File:Napalm_Extreme.jpg|200px|center]] |
||
| + | |weight=84kg |
||
| + | |dimensions=1.94m x 0.95m x 0.7m |
||
| + | |power=24v Electric Motor |
||
| + | |weapons=Spikes & Rotary Arm |
||
| + | |strengths=Heavily Armoured |
||
| + | |weaknesses=Poor Reliability |
||
| + | |from=New Ash Green |
||
| + | |team=David Crosby, Clare Greenaway & Victoria Allgood |
||
| + | }} |
||
| + | {{Stats |
||
| + | |name=[[Sir Chromalot]] |
||
| + | |image=[[File:Sirchromalot.gif|200px|center]] |
||
| + | |weight=100kg |
||
| + | |dimensions=1.05m x 0.64m x 1.12m |
||
| + | |power=24v Electric Motor |
||
| + | |weapons=Gas Powered Flipper |
||
| + | |strengths=In a class of its own |
||
| + | |weaknesses=No Self-Righting Mechanism |
||
| + | |from=South Ockendon in Essex |
||
| + | |team=Steve Merrill & Ray Tait |
||
| + | }} |
||
| ⚫ | |||
| + | {{Stats |
||
| + | |name=[[The Steel Avenger]] |
||
| + | |image=[[File:Steel_Avenger_Series_5.png|200px|center]] |
||
| + | |weight=100kg |
||
| + | |dimensions=1.3m x 0.7m x 0.8mm |
||
| + | |power=2 x 750w Industrial Motors |
||
| + | |weapons=Pneumatic Axe & Rear Flipper |
||
| + | |strengths=Powerful Axe |
||
| + | |weaknesses=Inaccuracy of Weapon |
||
| + | |from=Holton St Mary in Colchester, Essex |
||
| + | |team=John Willoughby, Jacky Willoughby & Tony Bates |
||
| + | }} |
||
| + | {{Stats |
||
| + | |name=[[Suicidal Tendencies]] |
||
| + | |image=[[File:SuicidalTendenciesS5.jpg|200px|center]] |
||
| + | |weight=100kg |
||
| + | |dimensions=1.24m x 0.74m x 0.70m |
||
| + | |power=24m Electric Motor |
||
| + | |weapons=Pincer & Scoop |
||
| + | |strengths=Experienced Roboteers |
||
| + | |weaknesses=Exposed Tracks |
||
| + | |from=Bresal |
||
| + | |team=Andrew Jeffrey, Ed Hoppit & Charles Binns |
||
| + | }} |
||
===Other Robots=== |
===Other Robots=== |
||
| + | {{Stats |
||
| − | *[[Plunderbird|Plunderbird 5]] (Bigger Brother's original team-mate) |
||
| − | + | |name=[[Plunderbird|Plunderbird 5]] <small>(Bigger Brother's former team-mate)</small> |
|
| + | |image=[[File:Plunderbird_5.jpg|200px|center]] |
||
| + | |weight=99kg |
||
| + | |dimensions=1.20m x 1m x 1.40m |
||
| + | |power=24v Electric Motor |
||
| + | |weapons=Slicing Jaw & Lifter |
||
| + | |strengths=Brute Force |
||
| + | |weaknesses=Lack of Control |
||
| + | |from=Alton in Hampshire |
||
| + | |team=Mike Onlsow & Bryan Killburn |
||
| + | }} |
||
| + | {{Stats |
||
| + | |name=[[Pussycat]] <small>(Diotoir's substitute partner)</small> |
||
| + | |image=[[File:Pussycat_extreme1.jpg|200px|center]] |
||
| + | |weight=97kg |
||
| + | |dimensions=0.56m x 0.73m x 0.97m |
||
| + | |power=2 x Electric Motors |
||
| + | |weapons=Spinning Blade |
||
| + | |strengths=Always lands on its feet |
||
| + | |weaknesses=Exposed Tyres |
||
| + | |from=Gloucester |
||
| + | |team=Alan Gribble, Robert Bettington & David Gribble |
||
| + | }} |
||
==Round 1== |
==Round 1== |
||
Revision as of 21:15, 18 April 2016
- "Rules? There are no rules in the Tag Team Terror!"
- — Jonathan Pearce on everyone's regard for the rules.
The Tag Team Terror of Robot Wars Extreme: Series 1 was the second Tag Team Terror, held during the first series of Robot Wars Extreme.
- Five of the pairs (excluding the robots that had to withdraw) fought against one another at some point in Robot Wars.
Format
Two teams, each with two robots, enter the arena at once. Only one member from each team is allowed to battle at any one time. If a robot wishes to let its team-mate into the action, it is to return to its CPZ. There, the robots can switch out and tag. Having said that, these rules were very frequently broken.
This tournament featured eight teams, rather than the four of last year, so the format was a simple knock-out tournament.
Competing Teams
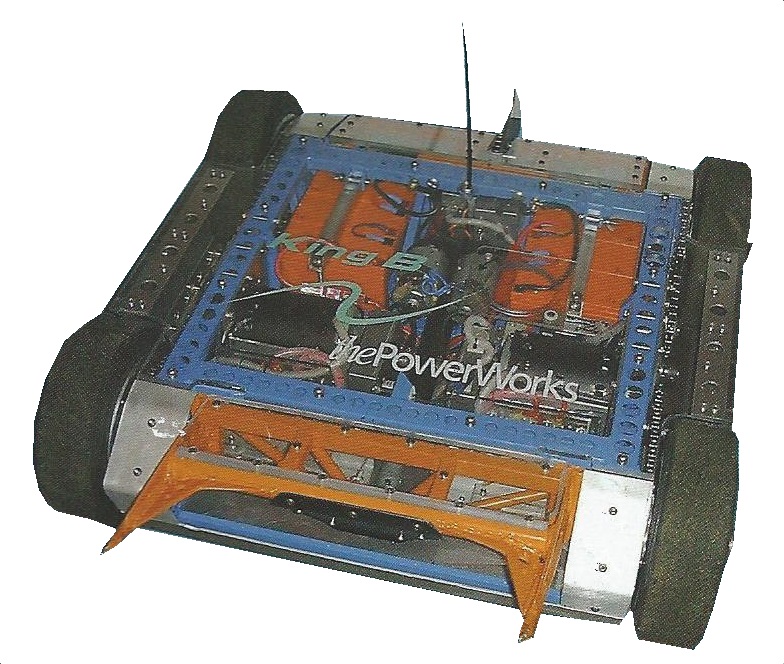
- King B Powerworks & 101
 | ||
|---|---|---|
| King B Powerworks | ||
| Weight | 88kg | |
| Dimensions | 1m x 0.77m x 0.25m | |
| Power | 36v DC Motor | |
| Weapons | Front Disc and Rear Flipper | |
| Strengths | Extremely powerful | |
| Weaknesses | Exposed tyres | |
| From: Havant in Hampshire | ||
| Team Members: Simon Harrison & Grant Hornsby | ||
 | ||
|---|---|---|
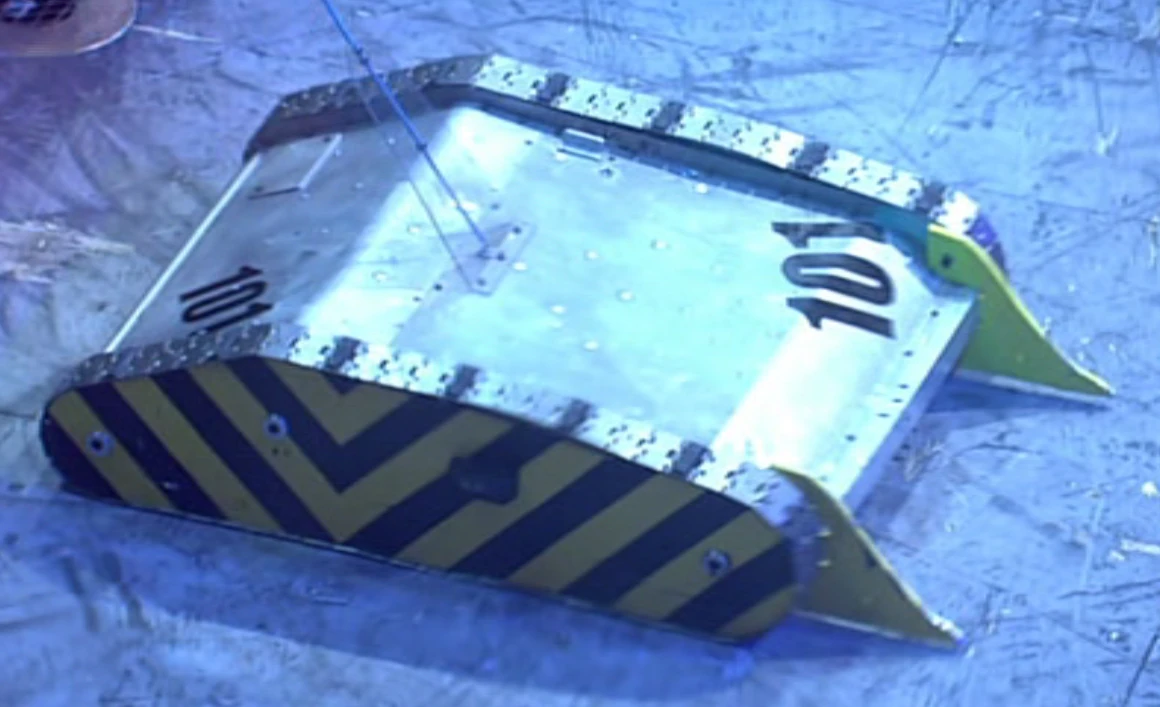
| 101 | ||
| Weight | 97kg | |
| Dimensions | 1.2m x 0.75m x 0.3m | |
| Power | Electric Motors | |
| Weapons | Autonomous Spike | |
| Strengths | Agile & Violent | |
| Weaknesses | Traction control | |
| From: Kettering | ||
| Team Members: Mike Franklin, Amy Franklin & Steve Bickle | ||
- Diotoir & Mega Morg
 | ||
|---|---|---|
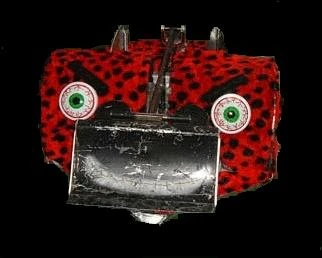
| Diotoir | ||
| Weight | 93kg | |
| Dimensions | 1.17m x 1.04m x 0.39m | |
| Power | 50cc Petrol Engine | |
| Weapons | Wedge & Scoop | |
| Strengths | Low Ground Clearance | |
| Weaknesses | Flammable | |
| From: Clondalkin, Dublin in Ireland | ||
| Team Members: Peter Redmond, Joe Gavin & Dr Zulu | ||
 | ||
|---|---|---|
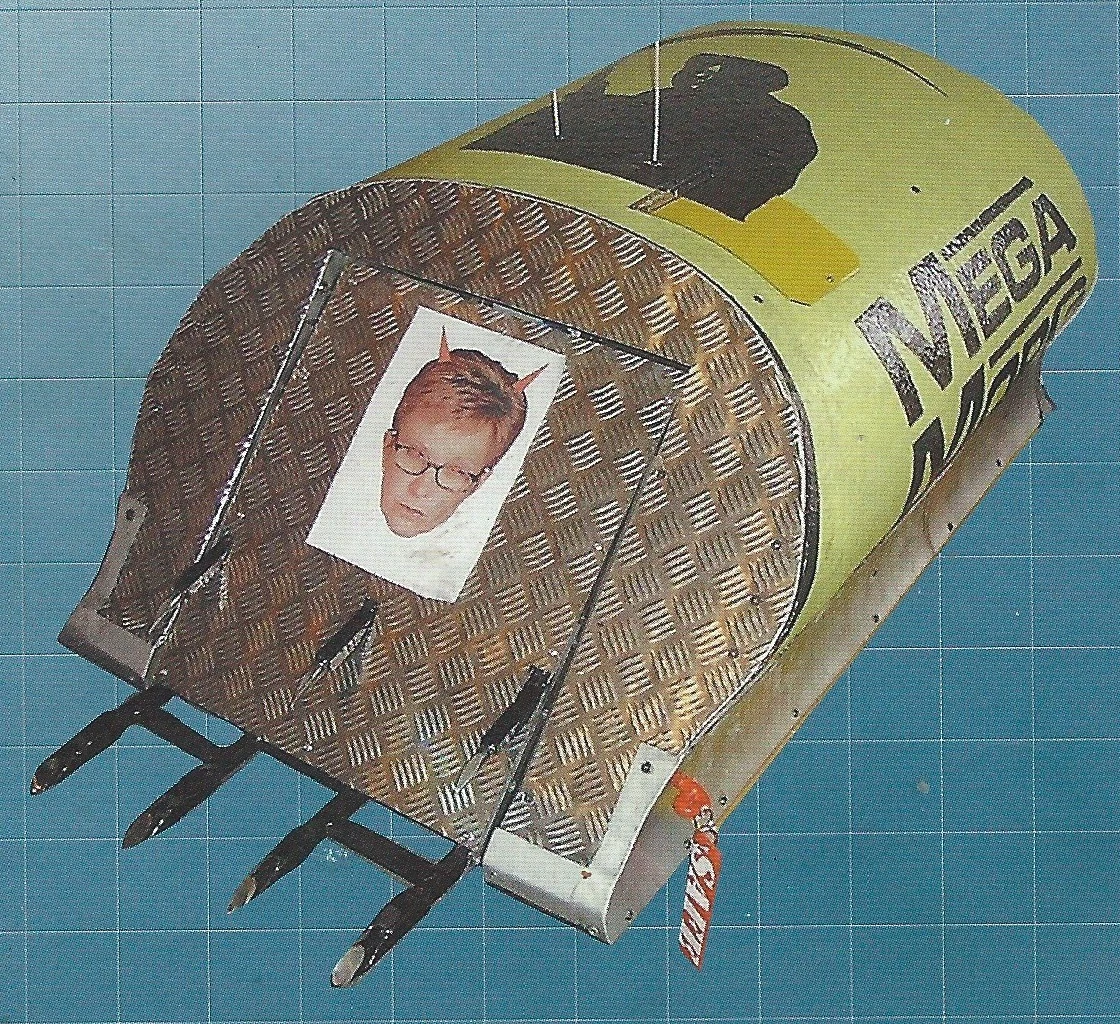
| Mega Morg | ||
| Weight | 99kg | |
| Dimensions | 1.5m x 0.9m x 0.6m | |
| Power | 2 x 12v Motors | |
| Weapons | Pneumatic Spikes and Axes | |
| Strengths | Self-Righting Capability | |
| Weaknesses | Slow & Sluggish | |
| From: Penclawwd, Swansea | ||
| Team Members: Dorian Caudy, Dylan Jenkins & Mark Hooper | ||
- Comengetorix & Spawn Again
 | ||
|---|---|---|
| Comengetorix | ||
| Weight | 93kg | |
| Dimensions | 1.28m x 0.88m x 0.31m | |
| Power | 24 Volt Electric Motors | |
| Weapons | Axe and Flipper | |
| Strengths | Self-Righting Mechanism | |
| Weaknesses | Reliability | |
| From: The Isle of Wight | ||
| Team Members: Ian Gear, Alistair Curtis-Horsfall & Tom Curtis-Horsfall | ||
 | ||
|---|---|---|
| Spawn Again | ||
| Weight | 79kg | |
| Dimensions | 1.25m x 0.85m x 0.5m | |
| Power | 12v Electric Motors | |
| Weapons | High Powered Flipper & Spike | |
| Strengths | 4 Wheel Drive | |
| Weaknesses | Comparatively Light | |
| From: East Tilbury | ||
| Team Members: Darren Ball, Graham Warner & Luke Jackman | ||
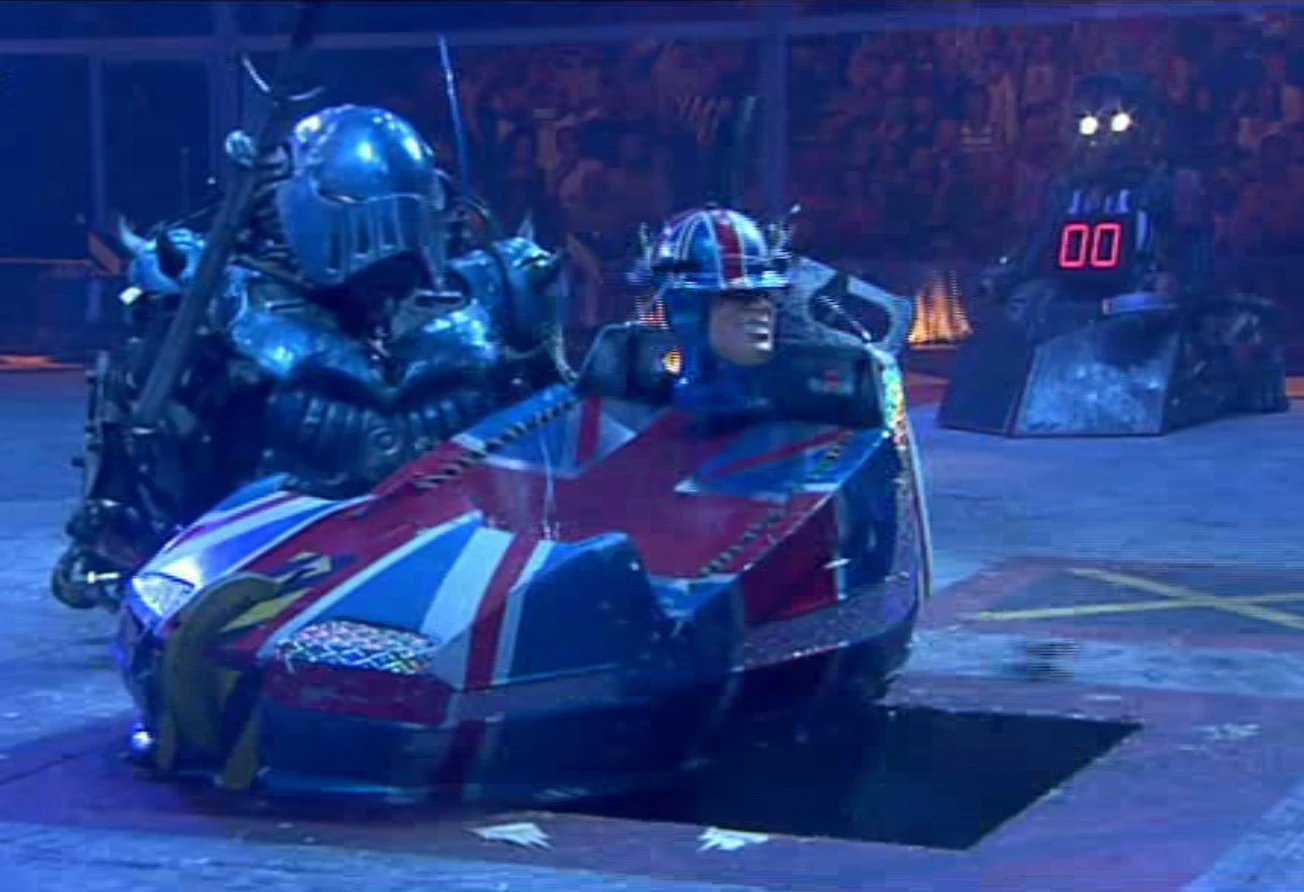
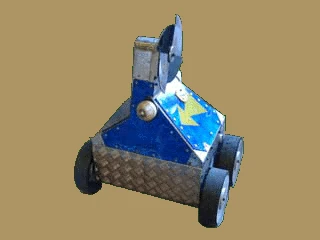
- Bigger Brother & Major Tom
 | ||
|---|---|---|
| Bigger Brother | ||
| Weight | 96kg | |
| Dimensions | 0.8m x 0.8m x 0.4 | |
| Power | 24v Electric Motor | |
| Weapons | Pneumatic Powered Flipper | |
| Strengths | Powerful Weapon | |
| Weaknesses | Difficult to Control | |
| From: Brighton | ||
| Team Members: Joe Watts, Ellie Watts & Ian Watts | ||
 | ||
|---|---|---|
| Major Tom | ||
| Weight | 90kg | |
| Dimensions | 1.03m x 0.94m x 0.87m | |
| Power | Golf Caddy Motors | |
| Weapons | Rotating Flywheel | |
| Strengths | Patriotism | |
| Weaknesses | Poor Armour | |
| From: Isle of Sheppey | ||
| Team Members: Henry Ryan, Sam Ryan & Joe Brown | ||
- Cerberus & Thermidor 2
 | ||
|---|---|---|
| Cerberus | ||
| Weight | 99kg | |
| Dimensions | 1.46m x 0.92m x 0.58m | |
| Power | 24v Electric Motor | |
| Weapons | Crushing Jaw & Ramming Blade | |
| Strengths | Heavily Armoured | |
| Weaknesses | No Self-Righting Mechanism | |
| From: London | ||
| Team Members: Theo Kaccoufa, Vass Vassileou & Alex Wink | ||
 | ||
|---|---|---|
| Thermidor 2 | ||
| Weight | 95kg | |
| Dimensions | 1m x 0.8m x 0.34m | |
| Power | 2 x 750w Motors | |
| Weapons | Pneumatic Flipper & Claws | |
| Strengths | Powerful Flipper | |
| Weaknesses | Fragile Shell | |
| From: Costessey, Norwich, Norfolk | ||
| Team Members: David Harding & Ian Harvey | ||
- S.M.I.D.S.Y. & Sumpthing
 | ||
|---|---|---|
| S.M.I.D.S.Y. | ||
| Weight | 99kg | |
| Dimensions | 1.2m x 0.8m x 0.26m | |
| Power | 2 x 24v Electric Motors | |
| Weapons | Jaws, Fangs & Disc | |
| Strengths | Multiple Weaponry | |
| Weaknesses | Unreliable | |
| From: Cyberspace | ||
| Team Members: Mik Reed, Robin Bennett & Andy Pugh | ||
 | ||
|---|---|---|
| Sumpthing | ||
| Weight | 98kg | |
| Dimensions | 1.4m x 1m x 0.4m | |
| Power | 24v Motor | |
| Weapons | Crusher, Lifter & 2 x Saws | |
| Strengths | Multiple Weaponry | |
| Weaknesses | Exposed Mechanics | |
| From: Leicester | ||
| Team Members: Dig, Geoff Germainey & Paul Bacon | ||
- Napalm 2 & Sir Chromalot
 | ||
|---|---|---|
| Napalm 2 | ||
| Weight | 84kg | |
| Dimensions | 1.94m x 0.95m x 0.7m | |
| Power | 24v Electric Motor | |
| Weapons | Spikes & Rotary Arm | |
| Strengths | Heavily Armoured | |
| Weaknesses | Poor Reliability | |
| From: New Ash Green | ||
| Team Members: David Crosby, Clare Greenaway & Victoria Allgood | ||
 | ||
|---|---|---|
| Sir Chromalot | ||
| Weight | 100kg | |
| Dimensions | 1.05m x 0.64m x 1.12m | |
| Power | 24v Electric Motor | |
| Weapons | Gas Powered Flipper | |
| Strengths | In a class of its own | |
| Weaknesses | No Self-Righting Mechanism | |
| From: South Ockendon in Essex | ||
| Team Members: Steve Merrill & Ray Tait | ||
- The Steel Avenger & Suicidal Tendencies
 | ||
|---|---|---|
| The Steel Avenger | ||
| Weight | 100kg | |
| Dimensions | 1.3m x 0.7m x 0.8mm | |
| Power | 2 x 750w Industrial Motors | |
| Weapons | Pneumatic Axe & Rear Flipper | |
| Strengths | Powerful Axe | |
| Weaknesses | Inaccuracy of Weapon | |
| From: Holton St Mary in Colchester, Essex | ||
| Team Members: John Willoughby, Jacky Willoughby & Tony Bates | ||
 | ||
|---|---|---|
| Suicidal Tendencies | ||
| Weight | 100kg | |
| Dimensions | 1.24m x 0.74m x 0.70m | |
| Power | 24m Electric Motor | |
| Weapons | Pincer & Scoop | |
| Strengths | Experienced Roboteers | |
| Weaknesses | Exposed Tracks | |
| From: Bresal | ||
| Team Members: Andrew Jeffrey, Ed Hoppit & Charles Binns | ||
Other Robots
 | ||
|---|---|---|
| Plunderbird 5 (Bigger Brother's former team-mate) | ||
| Weight | 99kg | |
| Dimensions | 1.20m x 1m x 1.40m | |
| Power | 24v Electric Motor | |
| Weapons | Slicing Jaw & Lifter | |
| Strengths | Brute Force | |
| Weaknesses | Lack of Control | |
| From: Alton in Hampshire | ||
| Team Members: Mike Onlsow & Bryan Killburn | ||
 | ||
|---|---|---|
| Pussycat (Diotoir's substitute partner) | ||
| Weight | 97kg | |
| Dimensions | 0.56m x 0.73m x 0.97m | |
| Power | 2 x Electric Motors | |
| Weapons | Spinning Blade | |
| Strengths | Always lands on its feet | |
| Weaknesses | Exposed Tyres | |
| From: Gloucester | ||
| Team Members: Alan Gribble, Robert Bettington & David Gribble | ||
Round 1
Note: Robots that started in the arena are listed first
101 & King B Powerworks vs Mega Morg & Diotoir
- "They're only champions because we weren't in it last year"
- — Dr Zulu trash-talks King B Powerworks and 101
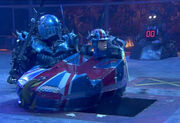
The defending champion was faster of the tracks, but neither machine made a meaningful attack, as they drove around the arena. Eventually, they made a frontal attack on each other. 101's spike fired at Mega Morg, but the two seemed largely matched in power. Moments later, both robots tagged their partners, and King B Powerworks and Diotoir entered the arena. Diotoir rammed into the side of King B Powerworks, but made no attempt to flip it, and King B quickly drove away. It then rammed Diotoir hard side-on, knocking off the inflatable sheep mascot from Mega Morg.

King B Powerworks is trapped by Diotoir
King B then got underneath Diotoir's raised scoop and pushed it towards the arena wall. It was close enough to the CPZ to allow Mega Morg to attack, but it avoided being flipped.
- "Be prepared for mayhem here, absolute confusion. I'm sure that it'll all just break down into an utter rumble"
- — Jonathan Pearce foreshadows the inevitable
Diotoir and King B attacked each other again, this time with King B using its rear saw, causing a few scratches on Diotoir's scoop. Diotoir missed a flip, and King B then attacked the inflatable sheep with its saw. Diotoir then pushed it back towards Mega Morg's CPZ, but Sergeant Bash suddenly came out of his CPZ and attacked Diotoir with his flamethrower, slowly igniting the fur. Mega Morg tried to defend its partner, but the two Celtic robots seemed to be having difficulty actually tagging each other.
- "Why is Diotoir taking the punishment here, and why is Mega Morg not coming out?"
- — Jonathan Pearce
Eventually, Mega Morg was able to come out of its CPZ and rammed into 101. Barely seconds later, all four robots joined in the battle, with King B pushing Mega Morg into the arena wall and 101 doing the same with the now burning Diotoir. The two changed their targets and 101 managed to push Mega Morg, but Diotoir managed to pin King B against the top arena wall. King B was able to get away, but then started spinning around on the spot. 101 pursued Mega Morg towards the far arena wall, which allowed Diotoir to get underneath it and flip it over. As soon as 101 landed on its back, however, it became apparent that only one of its tracks was working.
- "And all of a sudden, the reigning champions are in trouble!"
- — Jonathan Pearce
King B Powerworks, meanwhile, had driven into the CPZ and was still spinning wildly on the spot, apparently having lost all control. Diotoir pushed it around, and amidst the spinning, King B's forklifts tore off one of Diotoir's eyes. Time ran out and the judges made the decision.
Winners: Diotoir & Mega Morg
Comengetorix & Spawn Again vs Bigger Brother & Major Tom
Before the Battle
Bigger Brother had originally been paired up with Plunderbird 5, like in the last tournament, and were largely considered favourites, having come third in the last tournament. However, upon activation, Plunderbird got stuck in forward drive and damaged the arena entry door. The battle had to be postponed for a whole day whilst the door was fixed, but Plunderbird had also taken damage and was unable to participate. Major Tom took part in Plunderbird's place.
- Ian Watts: "What happened with the door, then?"
- Mike Onslow: "I told you I wanted to go in first, mate"
- Bryan Kilburn: "Well, perhaps you should have let them open it first, eh?"
- — Excuses from the pits
The Tag Team Fight
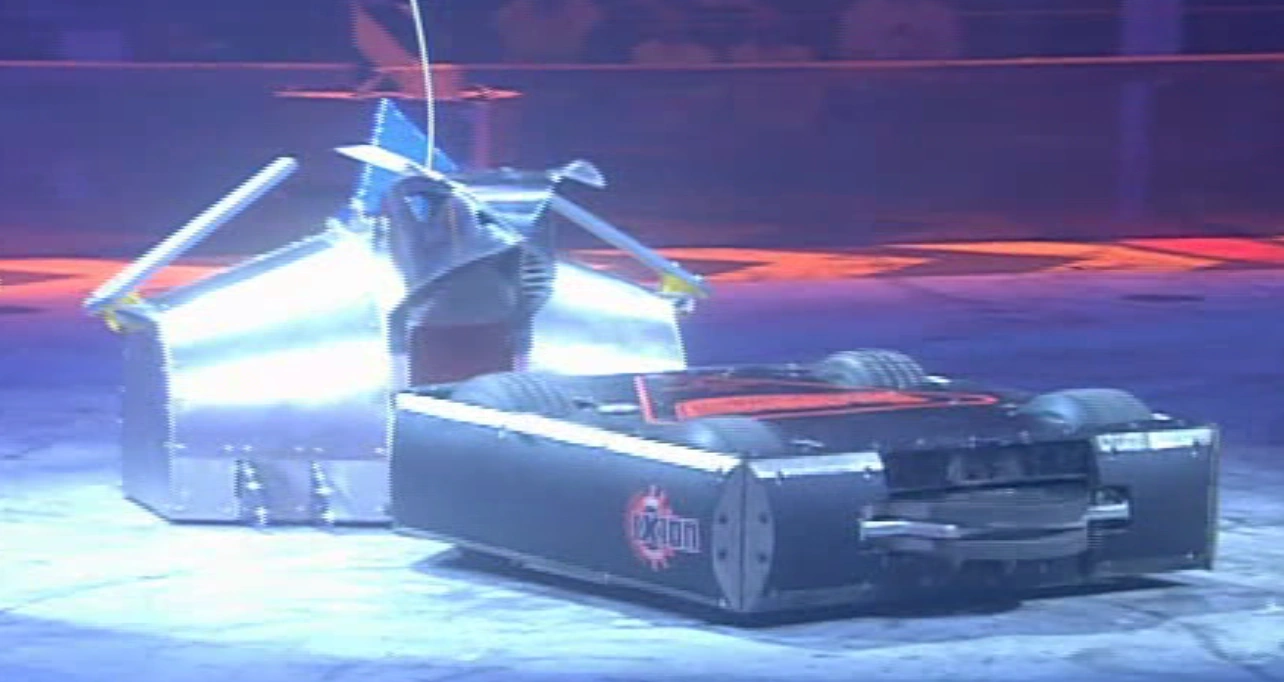
Major Tom is pitted
Comengetorix struck the first blow, hitting Bigger Brother with its axe, but causing no damage. Bigger Brother missed several flip attempts, venting what appeared to be gas whilst doing so. It then managed to get underneath the sluggish Comengetorix, but failed to flip it.
- "And Comengetorix are neither coming or going"
- — Jonathan Pearce
Bigger Brother pushed Comengetorix into Spawn Again's CPZ, but the two robots did not tag. Comengetorix then managed to get underneath Bigger Brother and pushed it to the opposite end of the arena. At that moment, Major Tom and Spawn Again left their CPZs. They immediately began their own clash and Spawn Again came out on top, flipping Major Tom over. Bigger Brother quickly rushed over to re-right Major Tom, but Comengetorix was on the other side of the fallen robot, axing it in an attempt to block Bigger Brother's rescue attempt and tearing a hole in Major Tom's chassis. However, it was outmanoeuvred by Bigger Brother, who finally righted Major Tom. Bigger Brother then pursued both Comengetorix and Spawn Again, pushing them into their CPZ. Spawn Again's flipper had not closed since flipping Major Tom, so it could do no more than ram Bigger Brother as it tried to flip Comengetorix, but its own flipper did not appear to be working.
- "But for me, Bigger Brother is the most impressive robot in this Tag Team Terror"
- — Jonathan Pearce comments as the robots clash
Whilst this was happening, Major Tom had come to a halt next to the left-hand arena wall and it was evident that it was immobilised. Refbot counted it out whilst Comengetorix caused more damage with its axe. As the house robots attempted to grab hold of Major Tom's remains, Bigger Brother continued to push Comengetorix around the arena, whilst Spawn Again, flipper still locked open, had broken down itself by the opposite arena wall to Major Tom. Dead Metal placed Major Tom on the arena flipper, which threw Major Tom, causing more pieces to break off.
- "And the Italian dodgem car failed to dodge, umm, err....just about anything there really"
- — Jonathan Pearce
Bigger Brother was still pushing Comengetorix, but both robots did not appear to be moving freely. The House Robots continued to attack Major Tom and, eventually, Sir Killalot attempted to drop Major Tom in the pit, but it was too big to fit in.
- "Lose some weight!"
- — Jonathan Pearce as Major Tom fails to fit in
The fight was stopped at this point: it was revealed afterwards that there was a radio interference which was preventing the robots from moving properly.
After the Bout
Because Major Tom was the first to be immobilised, the win was somewhat controversially given to Comengetorix & Spawn Again. However, after this, Ian Gear of the Comengetorix team made a rude remark about the team.
- Craig Charles: "No respect for the Union Jack at all"
- Ian Gear: "Well, did they deserve to wear it?"
- — Badmouthing the opposition
Team Big Brother quickly demanded a grudge match, which Team Vercingetorix accepted. The Vengeance battle would take place nine episodes later.
Winners: Comengetorix & Spawn Again
Cerberus & Thermidor 2 vs S.M.I.D.S.Y. & Sumpthing
- Julia Reed: "Your opponent's are calling you a bunch of greasy, grimy, dirty no-hopers."
- Mr Dig: "Well, apart from the "no-hopers", I think they're absolutely right about the dirt"
- — Before the battle

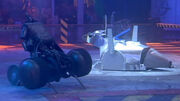
Cerberus and S.M.I.D.S.Y. lock horns
Cerberus and S.M.I.D.S.Y. began by ramming each other head-on, but neither were able to effectively push each other. Cerberus ran into S.M.I.D.S.Y.'s side and the two machines spun around each other. Cerberus' blade-like jaw caused a small scratch on S.M.I.D.S.Y.'s side, before it used its tail to club the Cyberspace machine away. After another glancing blow between the two, S.M.I.D.S.Y. backed into Cerberus, its disc causing a large scar on its tail. It then ran across the arena towards Sumpthing's CPZ, only to collide head-on with Sumpthing's saws, causing sparks to fly. S.M.I.D.S.Y. turned away and rammed head-first into Cerberus again. It tried to push its opponent, but the Cyprian machine spun away and S.M.I.D.S.Y. simply kept driving forward until it ran straight into the arena wall, near Sergeant Bash's CPZ.
- "That's a long, long run, that's too long, that's suspiciously long!"
- — Jonathan Pearce noting S.M.I.D.S.Y.'s actions

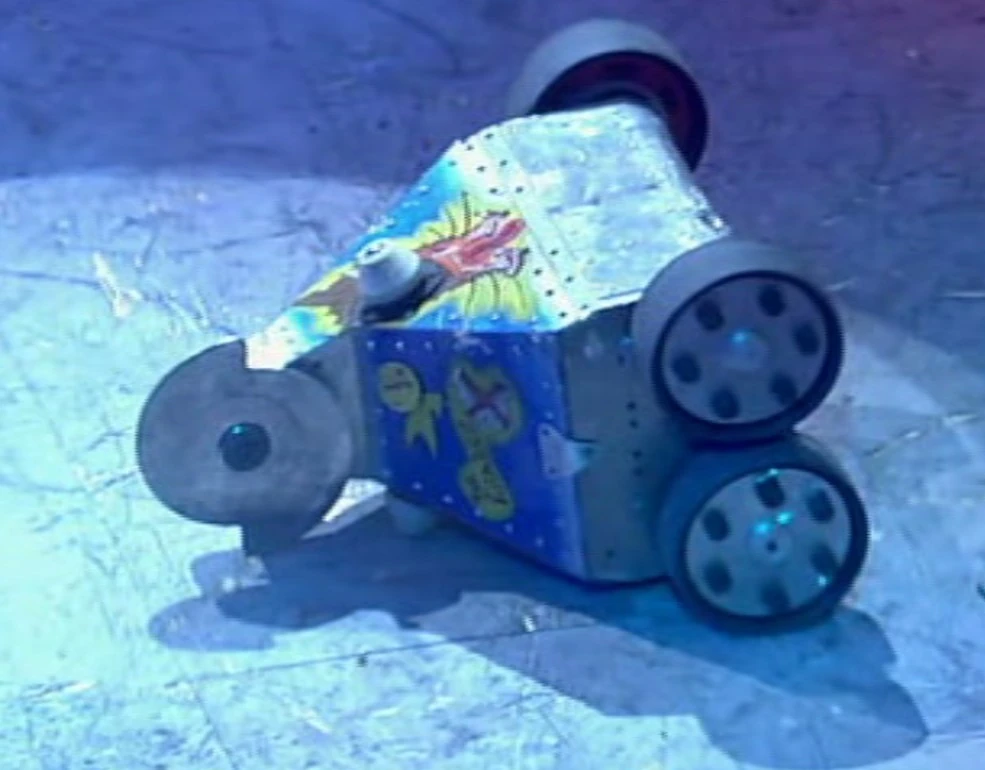
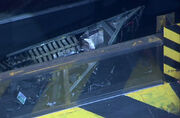
Sumpthing beaches itself on its own spikes
With S.M.I.D.S.Y.'s wheels still turning, it was evident that it had broken down in forward drive. Sumpthing immediately came out of its CPZ, but failed to utilise its saw blades on Cerberus. It missed a second attack, whereby Thermidor 2 (which was still wearing its Team Lobster baseball cap normally seen in the pits) came out to assist its team-mate. This ultimately paid off as Sumpthing became caught between Cerberus' jaws and Thermidor's flipper. Thermidor quickly flipped Sumpthing up onto its front, whereby it became stuck; its front spikes preventing its wheels from reaching the ground. Unable to move, and with its team-mate being assaulted by the house robots, Refbot counted out both machines.
- "They're out of it. Sumpthing gone, S.M.I.D.S.Y. gone"
- — Jonathan Pearce as the "Grease Monkeys" are eliminated
Thermidor drove towards S.M.I.D.S.Y., which had now stopped completely, and flipped it over. Cerberus and Sergeant Bash rammed it, before Shunt used his axe to make two large puncture marks in S.M.I.D.S.Y.'s top. He then proceeded to overturn S.M.I.D.S.Y. and attacked its underbelly, which held up better to the punishment. In the end, Shunt pushed S.M.I.D.S.Y. into the pit.
- "Most other robots have a self-righting devices. We merely have flip resistant ointment"
- — Mr Dig after the battle
Winners: Cerberus & Thermidor 2
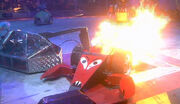
Napalm 2 & Sir Chromalot vs The Steel Avenger & Suicidal Tendencies

Napalm is dropped out of the arena
- "We're going to do damage to Steel Lego and Suicidal Meccano"
- — Steve Merrill before the fight
Steel Avenger rammed straight into Napalm, but missed its first axe blow. The second axe blow, however, knocked one of Napalm's "headlights" out of place. Napalm attempted to use its "mandibles", but Steel Avenger dodged them and rammed into the front of Napalm. Next, it ran into the back of Napalm and pushed it into the arena side wall, Napalm's weapon causing no trouble and even bending slightly.
- "I think Napalm will need to be tagged because it looks flimsy doesn't it?!"
- — Jonathan Pearce
Suicidal Tendencies quickly came out of its CPZ and rammed into the side of Napalm, crushing into its side with ease. It then launched another attack on the front, crumpling it even more, before tearing an entire side panel off.
- "It looks like they made it in about five minutes!"
- — Jonathan Pearce on Napalm
By now, Napalm was only moving on one side and Shunt also launched an attack. Suicidal Tendencies pulled Napalm onto its side, but it fell back down, but with no proper mobility, it was unable to escape. To make matters worse, Sir Chromalot was sitting at the far end of the arena, seemingly with no power, which only allowed for Steel Avenger and eventually Sir Killalot, to attack. Killalot eventually plucked Napalm up from behind and carried it to the other end of the arena before dropping it out, causing more parts to crumple.
- "Sir Chromalot never had a chance, because of its Tag Team Terror team-mate"
- — Jonathan Pearce
Meanwhile, Steel Avenger pursued Sir Chromalot, who still had little to no power and was struggling to move, and attempted to use its flipper. After being nudged by Suicidal Tendencies, Sir Chromalot lifted up Steel Avenger, whereby it got stuck between the flipper and body. Suicidal Tendencies rammed Steel Avenger free, but the two became briefly stuck together. However, Sir Chromalot's lack of mobility was becoming more evident, as Sir Killalot pressed the pit release button and, eventually, pushed it in.
- "We have had worst fights than this! This is good!"
- — David Crosby afterwards
Winners: The Steel Avenger & Suicidal Tendencies
Semi-Finals
Note: Robots that started in the arena are listed first
Cerberus & Thermidor 2 vs Suicidal Tendencies & The Steel Avenger
Cerberus' jaw had been damaged in the previous battle, so the team removed it beforehand. As the fight began, it clashed with Suicidal Tendencies rather tentatively for a while. Suicidal Tendencies' crusher did not appear to be working, so it tried lifting Cerberus with its scoop, but missed. Eventually, Thermidor 2 came out of its CPZ, rammed into Cerberus as if to tag it, then charged into the CPZ of the opposing team to attack The Steel Avenger, who quickly darted out. Missing a flip, Thermidor 2 was quickly pinned into the CPZ by Suicidal Tendencies and Steel Avenger. Cerberus then rammed into Thermidor 2's wheel, pushing it back, seemingly attacking its own team-mate.
- "The old Claw and Paw, Claw and Roar, Claw and Jaw, whatever you like to call it"
- — Jonathan Pearce

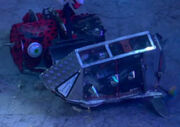
The Steel Avenger attacks the lifeless Thermidor 2
Despite several attempts, including Thermidor 2 trying to flip Suicidal Tendencies away, and Steel Avenger attacking Cerberus, none of the four robots were able to land any meaningful attacks on their opponents. Driving around for a while, Cerberus and Suicidal Tendencies eventually pushed each other in a tug-of-war of sorts. Steel Avenger then pushed Thermidor 2 onto the flame pit and finally managed to land an axe blow. Cerberus tried to use what was left of its jaw to push Steel Avenger away, before slamming into Thermidor 2 again in a bid to get it off the flame pit.
- "Well, I don't know what's happened to that team, because they've been at each other all the way through this, tooth and nail!"
- — Jonathan Pearce, questioning the Thermidor 2/Cerberus team
Unfortunately for Cerberus, the aid came too late, as Thermidor 2 had already broken down. The Steel Avenger axed it a few times whilst Refbot counted it out. Suicidal Tendencies pushed Cerberus away whilst Steel Avenger activated the pit. After using its rear flipper to lift up Cerberus, it attempted to push the dog-based robot into the pit, but Cerberus veered away, nearly causing Steel Avenger to drive in itself. After all three drove away, Steel Avenger landed an axe blow on Cerberus. Meanwhile, Sergeant Bash and Sir Killalot were taking turns in cutting holes in Thermidor 2's fragile shell, before the latter performed his trademark spinning attack, flinging Thermidor 2 across the arena, upside-down. Sir Killalot then pierced Thermidor 2's wheel and placed it on the floor flipper. Thermidor 2 was thrown and landed quite heavily on top of Steel Avenger. Suicidal Tendencies pushed Thermidor 2 away just as Cease was called, with Cerberus still mobile. Despite this, Thermidor 2's immobilisation proved crucial in the judges decision.
- "...and yes, we're having seafood tonight, because they've gone for Suicidal Tendencies and Steel Avenger!"
- — Craig Charles announces the decision
Winners: The Steel Avenger & Suicidal Tendencies
Pussycat & Diotoir vs Spawn Again & Comengetorix
Before the Battle
Diotoir and Mega Morg had been confident following their victory over King B and 101. However, disaster struck when it was discovered that Mega Morg had blown its speed controller, not only in the previous battle, but in both of its Vengeance battles. As the team had only bought three speed controllers, it was forced to withdraw, meaning a substitute partner had to be found for Diotoir.
- "Who is that replacement for Mega Morg.....It's Pussycat!"
- — Jonathan Pearce announcing the substitute
The Tag Team Fight
Pussycat started surprisingly by luring Spawn Again towards the flame pit. It then rammed into Spawn Again twice, once flipping itself upwards, but its blade did not appear to be working. Spawn Again tried to flip Pussycat, but missed as Pussycat drove away. The twice-semi-finalist seemed to be rather sluggish around the flame pit as Pussycat drove back onto the attack, however this time Spawn Again pushed back at Pussycat, flipping it into Matilda's CPZ. The house robot flipped Pussycat over with her tusks, but this did not affect the invertible Pussycat, who then drove away and activated the pit release, breaking off the tyre in the process. By this stage, Spawn Again had tagged Comengetorix, who seemed to be standing still in the middle of the arena. Pussycat nudged it once before driving back to its CPZ to allow Diotoir out. It began to push Comengetorix towards the arena side wall, only for Spawn Again to suddenly rush out of its CPZ. It managed to get underneath Diotoir, but Pussycat had also left its corner and rammed into it just as it fired its flipper. Diotoir was not flipped all the way over and fell back onto its wheels as Refbot pushed the sluggish Comengetorix away. As Diotoir focused on Comengetorix, Spawn Again and Pussycat drove around each other before the former pushed the latter into Comengetorix. However, its lifting arm missed and Pussycat was able to escape, as Diotoir lifted Comengetorix off the ground slightly. It then pushed Comengetorix towards the pit, only to be intercepted by Spawn Again, as Pussycat was stuck on its side.
- ""Comen-Help!" Comengetorix says to Spawn Again, he needs a little bit of assistance"
- — Jonathan Pearce, making another pun on Comengetorix's name
However, Spawn Again seemed to seize up after this attack, which allowed Diotoir and Pussycat, whose blade was still not working properly, to perform a pincer-attack on Comengetorix. Spawn Again came back to life, but soon stopped again after being rammed by Pussycat. Diotoir once again lifted up Comengetorix, but could not flip it. This time, however, Spawn Again did not restart, and Refbot counted it out.

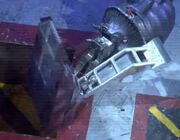
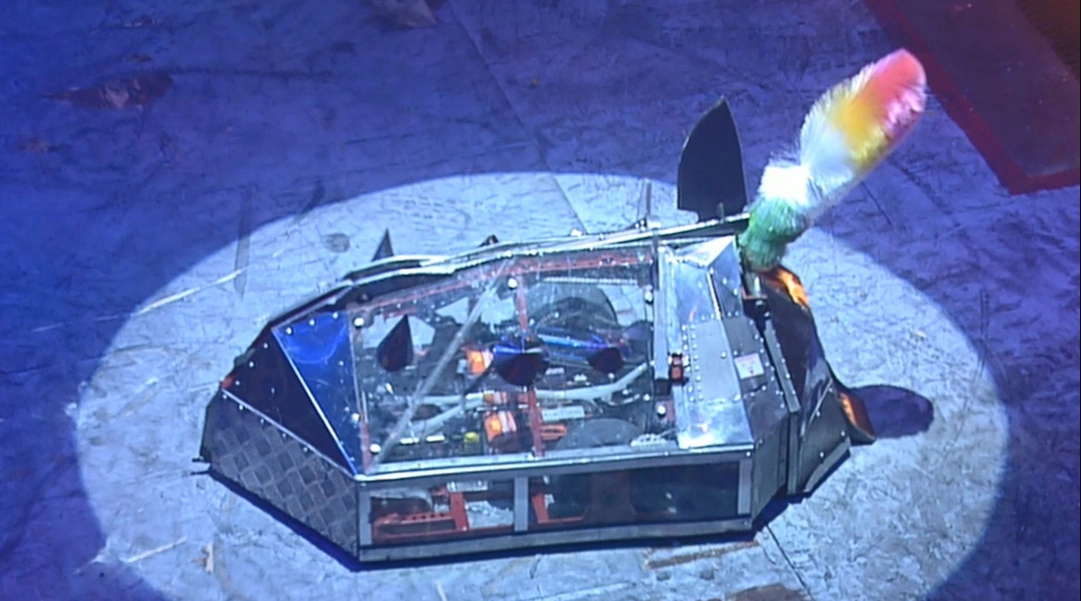
Matilda pits Spawn Again
As Comengetorix tried to push Pussycat away, Shunt axed a hole in Spawn Again's flipper. He then pushed it onto the floor flipper, which threw it across the arena. Matilda and Shunt then proceeded to push Spawn Again into the pit. This meant that Comengetorix, who was looking even more sluggish, was forced to endure attacks from both Pussycat and Diotoir, the latter of whom had caught fire.
- "And somehow, Diotoir....somehow? It always happens! Why am I baffled? It's on fire. Diotoir's always on fire."
- — Jonathan Pearce as Diotoir catches fire (again)
As the last ten second counted down, Comengetorix gained some speed and drove across the arena, straight towards the pit. It was unable to actually fit in due to Spawn Again's remains being already there, and it managed to escape. It seemed to stop once again, and just as "Cease" was called, Diotoir flipped it over once more. Comengetorix managed to self-right, landing straight on top of its fallen team-mate. Diotoir and Pussycat were given the resulting victory.
Winners: Diotoir & Pussycat
Final
Note: Robots that started in the arena are listed first
Pussycat & Diotoir vs Suicidal Tendencies & The Steel Avenger
- "You can guarantee a good fair judgement from us. We don't take bribes"
- — Judge Noel Sharkey addresses the teams before the fight. He is then humourously seen accepting a jam tart from Teams Nemesis/Cold Fusion, claiming he never liked the other team.
Pussycat entered the arena covered in bandages, whilst Diotoir entered with its entire left side devoid of fur (including its eye). It also had a Ninja Sheep attached to its scoop, to honour its former partner Mega Morg.
As the battle started, Pussycat dodged to the side of Suicidal Tendencies. After a brief pause, Pussycat charged front on at its opponent, slightly to the side so as to dodge the crushing claw. However, as Suicidal Tendencies turned, Pussycat fell onto its side and got stuck there. Eventually, Suicidal Tendencies managed to grab it just behind one of its wheels. A few moments later, Suicidal Tendencies grabbed Pussycat again, just behind the blade, but seemed unable to pierce through its armour. Pussycat retaliated by pushing Suicidal Tendencies back towards the arena wall and eventually wriggled free. It eventually charged at Suicidal Tendencies again, but crashed onto its side and bounced straight over the flame pit. Again, it took some time to free itself, but Suicidal Tendencies did not capitalise.
After a brief moment, Pussycat and Suicidal Tendencies clashed head-on again, Pussycat using its blade on Suicidal Tendencies' claw. The two-time heat-finalist forced Pussycat into the arena wall and used its claw to pierce through the base of Pussycat. Diotoir then came out of its CPZ and rammed Suicidal Tendencies, which resulted in The Steel Avenger leaving its corner too.
- "They're all out there in the arena! All is fair in love and Tag Team Terror war!"
- — Jonathan Pearce as the rules go out the window again
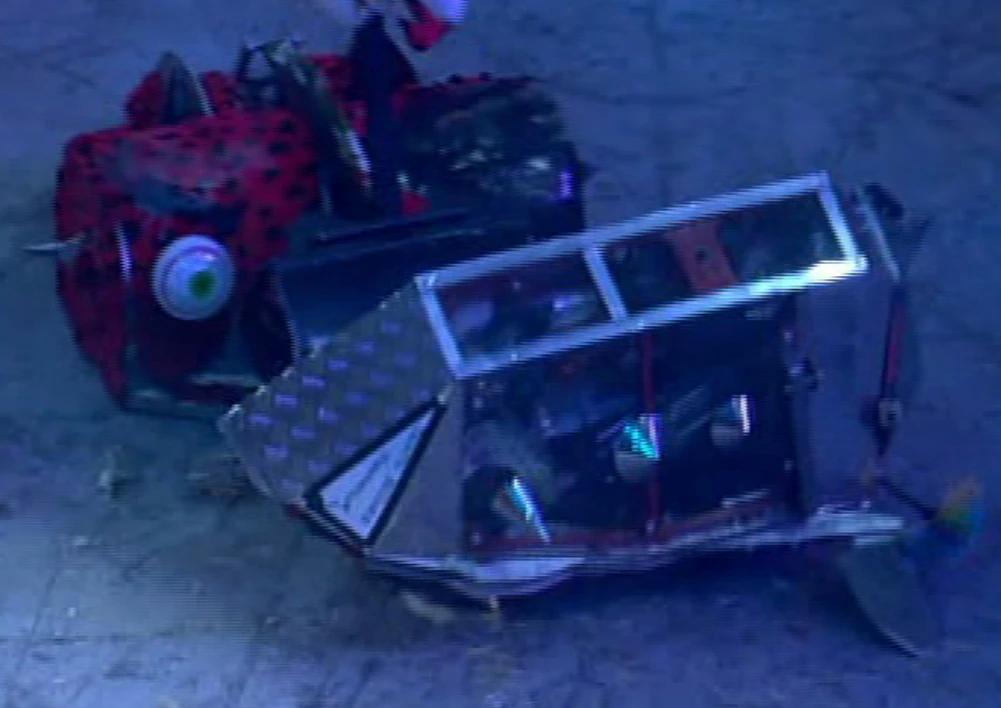
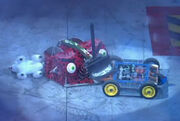
Diotoir overturns The Steel Avenger
As Suicidal Tendencies dragged Pussycat away, Diotoir got underneath The Steel Avenger and flipped it over. Steel Avenger was unable to right the first time, and subsequent attempts were hampered when Diotoir blocked its escape route with its scoop. Several more attempts, including a few using its axe, proved futile until it finally managed to right itself, just after Suicidal Tendencies, still clutching Pussycat, passed by. Surprisingly, Steel Avenger and Suicidal Tendencies collided with each other, before breaking away, which resulted in Diotoir flipping Steel Avenger again. Pussycat, who had broken free from Suicidal Tendencies, used its blade on Steel Avenger whilst Diotoir again blocked the plough-shaped robot's attempts at self-righting.
- "Pussycat and Diotoir, a concerted pincer attack there!"
- — Jonathan Pearce
Suicidal Tendencies attempted to grab hold of Pussycat in an attempt to split the two apart. Pussycat dodged away, leaving Diotoir to continue to block Steel Avenger's self-righting. By now, Steel Avenger was not showing any signs of righting itself, and Pussycat began attacking its underbelly. Suicidal Tendencies quickly came to its teammates aid, using its scoop to re-right Steel Avenger. Diotoir continued to pursue Steel Avenger as Pussycat hit the pit release, breaking it off in the process. Suicidal Tendencies clamped hold of Pussycat once more. The two began pushing at each other and were surprisingly equal, until Steel Avenger suddenly rammed into Pussycat. Steel Avenger then tried to launch an attack on Diotoir, but missed. In the last ten seconds, Suicidal Tendencies tried to chase after Pussycat, briefly getting on Diotoir's scoop, but escaping before it fired. In the last second, Steel Avenger and Suicidal Tendencies attempted to push Diotoir.
- "Interesting how it worked out. Suicidal Tendencies locked with Pussycat almost all the way through, and Diotoir locked with The Steel Avenger. Diotoir won that battle I think, but the crucial element here is did Suicidal Tendencies get the better throughout over Pussycat?"
- — Jonathan Pearce, analyzing the battle
After judging what was essentially two one-on-one battles, the judges eventually gave the win to Diotoir and Pussycat.
Tag Team Champions:Diotoir & Pussycat

Diotoir, Tag Team Terror Champion

Pussycat, Tag Team Terror Champion
- "We've found the biggest, the baddest, the best Tag Team, ever on Robot Wars Extreme"
- — Craig Charles' sign-off
| |||||||||||||||||