| (38 intermediate revisions by 14 users not shown) | |||
| Line 1: | Line 1: | ||
| + | {{TV Arena |
||
| ⚫ | |||
| + | |title1=The Drop Zone |
||
| + | |image1=[[File:DropZone.jpg|thumb]] |
||
| + | |caption1=Robochicken (bottom-centre) is placed under the Drop Zone |
||
| + | |filming_location(s)= |
||
| + | |uk_series=6-7, Extreme 2 |
||
| + | |us_series=Season 2, Nickelodeon |
||
| + | |dutch_series=2 |
||
| + | |german_series=1 |
||
| + | }} |
||
| ⚫ | '''The Drop Zone''' was an arena hazard introduced in the UK and international series of ''[[Robot Wars]]'' filmed around 2002. Immobilised robots would be placed on a black square with a yellow cross and red border placed roughly in the centre of the arena, close to the Pit, where heavy objects including ovens, washing machines, ocean buoys and assortments of balls would be dropped on them. |
||
| + | ==History== |
||
| − | It was first seen in Extreme Warriors Season 2, and it was first used in the UK in Series 6. In the UK series, the first victim of the Drop Zone was Robochicken in Round 1 of Series 6, Heat B, although the first ever victim was Unibite 2.0 in Extreme Warriors Season 2, Heat C Final. The last was Hard in the first round of the Third World Championship in Series 7. |
||
| + | The Drop Zone was first used in the [[Extreme Warriors: Season 2|second season]] of ''[[Robot Wars: Extreme Warriors]]'', with the first robot to have an object dropped onto it being [[Unibite|Unibite 2.0]] in the [[Extreme Warriors: Season 2/Heat C|Heat C]] Final. It was used in all UK and international series filmed thereafter; the first usage of the Drop Zone in the UK Series came in [[Robot Wars: The Sixth Wars|Series 6]], where it dropped a washing machine on [[Robochicken]] in the first round of [[Robot Wars: The Sixth Wars/Heat B|Heat B]]. A thunderclap sound effect was used in the Drop Zone's appearances in US Season 2, ''[[Nickelodeon Robot Wars]]'' and [[Robot Wars: The Seventh Wars|UK Series 7]], which played whenever an object was dropped. The Drop Zone square was initially seen in [[Robot Wars: The Fifth Wars|UK Series 5]] and the [[Robot Wars Extreme: Series 1|first series]] of ''[[Robot Wars Extreme]]'', but did not serve any clear purpose at the time. |
||
| + | The last competitor to have an object dropped onto it was [[Hard]] in the first round of [[The Third World Championship|the Third World Championship]], filmed and broadcast at the very end of Series 7. When ''Robot Wars'' returned in 2016, the Drop Zone did not feature as part of the [[Robot Wars Arena/Series 8-10|new arena]], and has effectively been retired as an arena hazard. |
||
| − | The Drop Zone was originally intended to have a button which house robots or competitors could press to activate it, but this idea was not implemented. In Series 7, the sound of a thunderclap would be played as an object was dropped. Strangely, the red square with a yellow cross was first seen in Extreme 1 and Series 5, not serving any clear purpose at the time. |
||
| + | The objects used for the Drop Zone varied in between series; for ''Nickelodeon Robot Wars'', less serious objects such as scrap metal and sports equipment were used in an effort to maintain the series' appeal to younger audiences. Meanwhile, at one point during the [[German Robot Wars/Grand Final|Grand Final]] of ''[[German Robot Wars]]'', previously-defeated competitor [[Golem]] was used as an item after it withdrew prior to the Losers Melee for fifth place. |
||
| ⚫ | |||
| + | |||
| ⚫ | |||
| + | The Drop Zone was originally intended to have a button which competitors and House Robots could press to activate it, in a similar way to how the Pit and Disc of Doom were activated. However, this idea was not implemented.{{cit}} |
||
| + | ==Instances== |
||
| ⚫ | |||
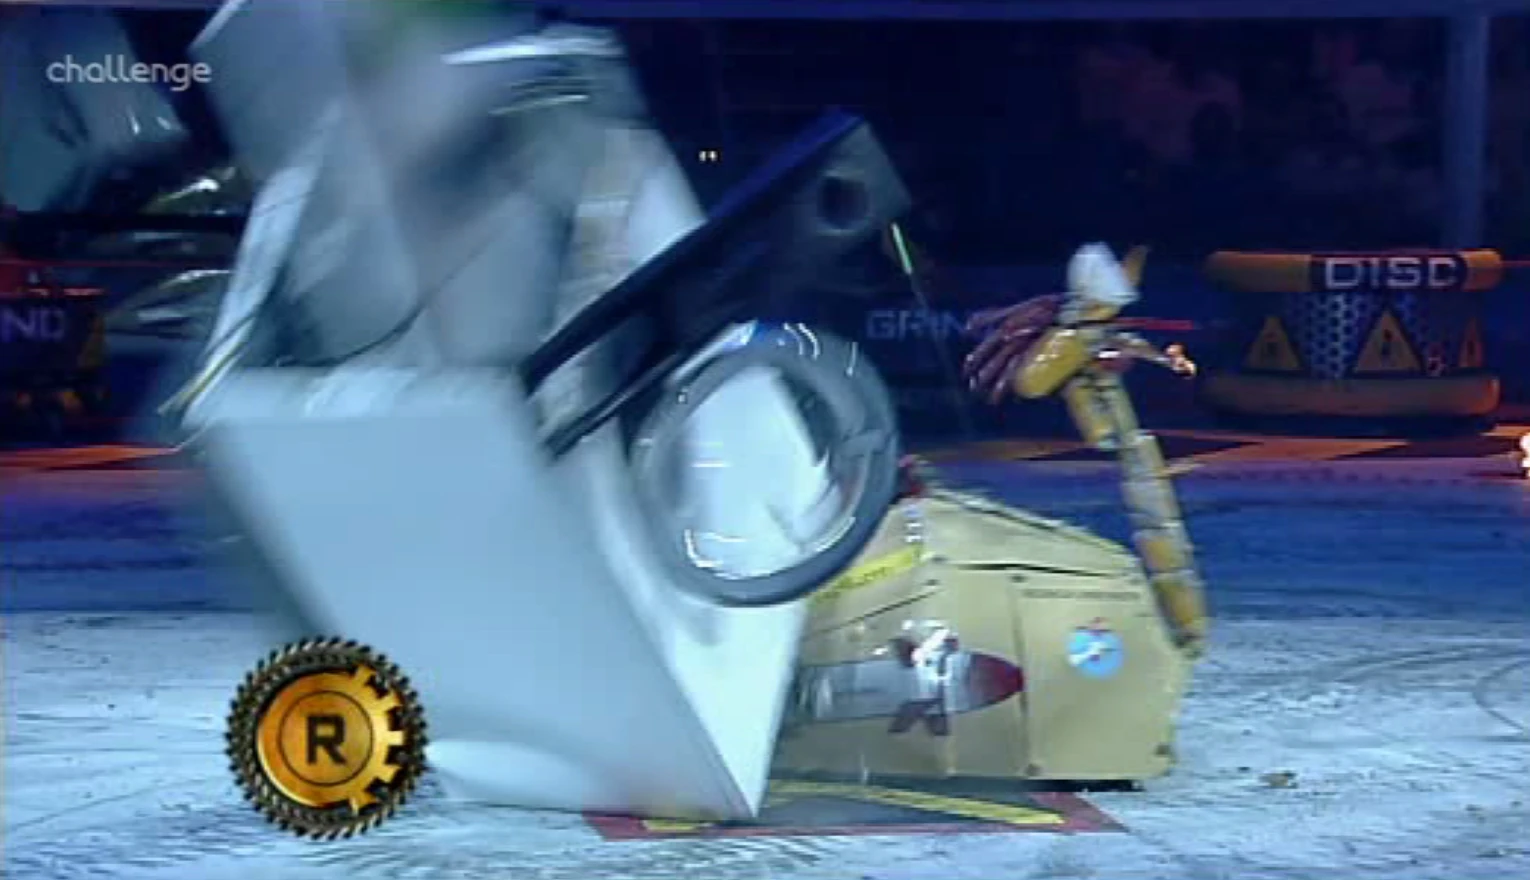
===Series 6=== |
===Series 6=== |
||
| − | [[File: |
+ | [[File:Demolition Man Dropzone.jpg|thumb|180px|Demolition Man gets a rubbish bin dropped on it]] |
| + | [[File:Panic Attack Washing Machine.jpg|thumb|180px|Panic Attack is hit with a washing machine, the only former UK champion ever to be put on the Drop Zone]] |
||
| + | [[File:Dropzonecooker.jpg|thumb|180px|Granny's Revenge 2 is flattened by an oven]] |
||
| + | [[File:Major_Tom_drop_zone_balls.JPG|thumb|180px|A shower of balls lands on Major Tom]] |
||
{|class="wikitable" |
{|class="wikitable" |
||
! Battle |
! Battle |
||
! Robot |
! Robot |
||
! Object Dropped |
! Object Dropped |
||
| + | ! Notes |
||
|- |
|- |
||
|[[Robot Wars: The Sixth Wars/Heat B|Heat B, Round 1]] |
|[[Robot Wars: The Sixth Wars/Heat B|Heat B, Round 1]] |
||
|[[Robochicken]] |
|[[Robochicken]] |
||
|Washing machine |
|Washing machine |
||
| + | |First instance of the hazard being used in the UK Series. |
||
|- |
|- |
||
|[[Robot Wars: The Sixth Wars/Heat F|Heat F, Round 1]] |
|[[Robot Wars: The Sixth Wars/Heat F|Heat F, Round 1]] |
||
|[[Demolition Man]] |
|[[Demolition Man]] |
||
|Rubbish bin |
|Rubbish bin |
||
| + | | |
||
|- |
|- |
||
|[[Robot Wars: The Sixth Wars/Heat I|Heat I, Heat Final]] |
|[[Robot Wars: The Sixth Wars/Heat I|Heat I, Heat Final]] |
||
|[[Panic Attack]] |
|[[Panic Attack]] |
||
|Washing machine |
|Washing machine |
||
| + | |The only former UK Champion to have an item dropped on it. |
||
|- |
|- |
||
|[[Robot Wars: The Sixth Wars/Heat K|Heat K, Round 1]] |
|[[Robot Wars: The Sixth Wars/Heat K|Heat K, Round 1]] |
||
|[[Granny's Revenge|Granny's Revenge 2]] |
|[[Granny's Revenge|Granny's Revenge 2]] |
||
|Oven |
|Oven |
||
| + | | |
||
|- |
|- |
||
|[[Robot Wars: The Sixth Wars/Heat L|Heat L, Round 1]] |
|[[Robot Wars: The Sixth Wars/Heat L|Heat L, Round 1]] |
||
|[[Major Tom]] |
|[[Major Tom]] |
||
|Assortment of balls |
|Assortment of balls |
||
| + | | |
||
|} |
|} |
||
===Extreme 2=== |
===Extreme 2=== |
||
| − | [[File: |
+ | [[File:Niterider TV.jpg|thumb|180px|Niterider spikes the television sent by the Drop Zone]] |
| + | [[File:NewBloodCRound1.1.2.jpg|thumb|180px|Mad Dog, after having balls dropped on it]] |
||
{| class="wikitable" |
{| class="wikitable" |
||
! Battle |
! Battle |
||
! Robot |
! Robot |
||
! Object Dropped |
! Object Dropped |
||
| + | ! Notes |
||
|- |
|- |
||
|[[Robot Wars Extreme: Series 2/Annihilator|Annihilator Round 4]] |
|[[Robot Wars Extreme: Series 2/Annihilator|Annihilator Round 4]] |
||
|[[Major Tom]] |
|[[Major Tom]] |
||
|Oven |
|Oven |
||
| + | | |
||
|- |
|- |
||
|[[Minor Meltdown|Minor Meltdown, Round 1]] |
|[[Minor Meltdown|Minor Meltdown, Round 1]] |
||
| − | |[[Saw Point]] |
+ | |[[Saw Point (Extreme 2)|Saw Point]] |
|Assortment of car parts |
|Assortment of car parts |
||
| + | | |
||
|- |
|- |
||
|[[Robot Wars Extreme: Series 2/New Blood Championship/Heat A|New Blood Heat A, Round 1]] |
|[[Robot Wars Extreme: Series 2/New Blood Championship/Heat A|New Blood Heat A, Round 1]] |
||
|[[Niterider]] |
|[[Niterider]] |
||
|Television |
|Television |
||
| + | |Niterider's spike speared the television as it landed, which was eventually destroyed by [[Matilda]]. |
||
|- |
|- |
||
|[[Robot Wars Extreme: Series 2/New Blood Championship/Heat A|New Blood Heat A, Round 2]] |
|[[Robot Wars Extreme: Series 2/New Blood Championship/Heat A|New Blood Heat A, Round 2]] |
||
|[[Maximus]] |
|[[Maximus]] |
||
|Oven |
|Oven |
||
| + | | |
||
|- |
|- |
||
|[[Robot Wars Extreme: Series 2/New Blood Championship/Heat B|New Blood Heat B, Round 1]] |
|[[Robot Wars Extreme: Series 2/New Blood Championship/Heat B|New Blood Heat B, Round 1]] |
||
|[[RT81]] |
|[[RT81]] |
||
|Oven |
|Oven |
||
| + | | |
||
|- |
|- |
||
|[[Robot Wars Extreme: Series 2/New Blood Championship/Heat B|New Blood Heat B, Round 2]] |
|[[Robot Wars Extreme: Series 2/New Blood Championship/Heat B|New Blood Heat B, Round 2]] |
||
|[[Hell's Teeth]] |
|[[Hell's Teeth]] |
||
|Assortment of balls |
|Assortment of balls |
||
| + | | |
||
|- |
|- |
||
|[[Robot Wars Extreme: Series 2/New Blood Championship/Heat C|New Blood Heat C, Round 1]] |
|[[Robot Wars Extreme: Series 2/New Blood Championship/Heat C|New Blood Heat C, Round 1]] |
||
|[[Mad Dog]] |
|[[Mad Dog]] |
||
|Assortment of balls |
|Assortment of balls |
||
| + | |The balls missed their target. |
||
|- |
|- |
||
|[[Robot Wars Extreme: Series 2/New Blood Championship/Heat C|New Blood Heat C, Final]] |
|[[Robot Wars Extreme: Series 2/New Blood Championship/Heat C|New Blood Heat C, Final]] |
||
|[[ICU]] |
|[[ICU]] |
||
|Assortment of balls |
|Assortment of balls |
||
| + | | |
||
|- |
|- |
||
|[[Robot Wars Extreme: Series 2/New Blood Championship/Heat D|New Blood Heat D, Semi-Final]] |
|[[Robot Wars Extreme: Series 2/New Blood Championship/Heat D|New Blood Heat D, Semi-Final]] |
||
|[[Fatal Traction]] |
|[[Fatal Traction]] |
||
|Assortment of car parts |
|Assortment of car parts |
||
| + | | |
||
|} |
|} |
||
===Series 7=== |
===Series 7=== |
||
| − | [[File:Tomohawkdropzone.jpg|thumb| |
+ | [[File:Tomohawkdropzone.jpg|thumb|180px|Tomahawk, badly damaged by the ocean buoy]] |
| + | [[File:Hammerhead 2 Drop Zone.jpg|thumb|180px|Hammerhead 2 is pounded by railway track]] |
||
| + | [[File:Thermidor dropzone.jpg|thumb|180px|A washing machine lands on Thermidor 2]] |
||
| ⚫ | |||
| + | [[File:Hard_Drop_Zone.jpg|thumb|180px|Hard after having computer parts smashed onto it]] |
||
{| class="wikitable" |
{| class="wikitable" |
||
! Battle |
! Battle |
||
! Robot |
! Robot |
||
! Object Dropped |
! Object Dropped |
||
| + | ! Notes |
||
|- |
|- |
||
|[[Robot Wars: The Seventh Wars/Heat C|Heat C, Round 1]] |
|[[Robot Wars: The Seventh Wars/Heat C|Heat C, Round 1]] |
||
|[[Tomahawk]] |
|[[Tomahawk]] |
||
|Ocean buoy |
|Ocean buoy |
||
| + | | |
||
|- |
|- |
||
|[[Robot Wars: The Seventh Wars/Heat D|Heat D, Round 1]] |
|[[Robot Wars: The Seventh Wars/Heat D|Heat D, Round 1]] |
||
|[[The Alien]] |
|[[The Alien]] |
||
|Ocean buoy |
|Ocean buoy |
||
| + | | |
||
|- |
|- |
||
|[[Robot Wars: The Seventh Wars/Heat G|Heat G, Round 1]] |
|[[Robot Wars: The Seventh Wars/Heat G|Heat G, Round 1]] |
||
|[[Cygnus X-1]] |
|[[Cygnus X-1]] |
||
|Television |
|Television |
||
| + | | |
||
|- |
|- |
||
|[[Robot Wars: The Seventh Wars/Heat H|Heat H, Round 2]] |
|[[Robot Wars: The Seventh Wars/Heat H|Heat H, Round 2]] |
||
|[[Scraptosaur]] |
|[[Scraptosaur]] |
||
|Ocean buoy |
|Ocean buoy |
||
| + | | |
||
|- |
|- |
||
|[[Robot Wars: The Seventh Wars/Heat H|Heat H, Round 2]] |
|[[Robot Wars: The Seventh Wars/Heat H|Heat H, Round 2]] |
||
|[[Revolution|Revolution 3]] |
|[[Revolution|Revolution 3]] |
||
|Television |
|Television |
||
| + | | |
||
|- |
|- |
||
|[[Robot Wars: The Seventh Wars/Heat J|Heat J, Round 1]] |
|[[Robot Wars: The Seventh Wars/Heat J|Heat J, Round 1]] |
||
| − | |[[Cobra]] & [[Pinser]] |
+ | |[[Cobra (UK)|Cobra]] & [[Pinser]] |
|Television |
|Television |
||
| + | | |
||
|- |
|- |
||
|[[Robot Wars: The Seventh Wars/Heat K|Heat K, Round 2]] |
|[[Robot Wars: The Seventh Wars/Heat K|Heat K, Round 2]] |
||
|[[Hard]] |
|[[Hard]] |
||
|Oven |
|Oven |
||
| + | | |
||
|- |
|- |
||
|[[Robot Wars: The Seventh Wars/Heat M|Heat M, Round 1]] |
|[[Robot Wars: The Seventh Wars/Heat M|Heat M, Round 1]] |
||
|[[B.O.D.]] |
|[[B.O.D.]] |
||
|Bowling balls |
|Bowling balls |
||
| + | | |
||
|- |
|- |
||
|[[Robot Wars: The Seventh Wars/Heat M|Heat M, Round 2]] |
|[[Robot Wars: The Seventh Wars/Heat M|Heat M, Round 2]] |
||
| − | |[[Mega Morg]] |
+ | |[[The Morgue|Mega Morg]] |
|Washing machine |
|Washing machine |
||
| + | | |
||
|- |
|- |
||
|[[Robot Wars: The Seventh Wars/Heat N|Heat N, Round 2]] |
|[[Robot Wars: The Seventh Wars/Heat N|Heat N, Round 2]] |
||
| − | |[[ |
+ | |[[R.O.C.S.]] |
|Washing machine |
|Washing machine |
||
| + | | |
||
|- |
|- |
||
|[[Robot Wars: The Seventh Wars/Heat O|Heat O, Round 2]] |
|[[Robot Wars: The Seventh Wars/Heat O|Heat O, Round 2]] |
||
|[[Hammerhead (Dutch)|Hammerhead 2]] |
|[[Hammerhead (Dutch)|Hammerhead 2]] |
||
| − | | |
+ | |Railway track |
| + | | |
||
|- |
|- |
||
|[[Robot Wars: The Seventh Wars/Heat O|Heat O, Heat Final]] |
|[[Robot Wars: The Seventh Wars/Heat O|Heat O, Heat Final]] |
||
| − | |[[Iron |
+ | |[[Iron-Awe|Iron-Awe 2.1]] |
|Oven |
|Oven |
||
| + | | |
||
|- |
|- |
||
|[[Robot Wars: The Seventh Wars/Semi-Final 2|Semi-Final 2, Round 1]] |
|[[Robot Wars: The Seventh Wars/Semi-Final 2|Semi-Final 2, Round 1]] |
||
|[[Thermidor 2]] |
|[[Thermidor 2]] |
||
| − | |Washing |
+ | |Washing machine |
| − | | |
+ | | |
| ⚫ | |||
| ⚫ | |||
| ⚫ | |||
|- |
|- |
||
|[[Robot Wars: The Seventh Wars/Featherweight Championship|Featherweight Championship, Round 1]] |
|[[Robot Wars: The Seventh Wars/Featherweight Championship|Featherweight Championship, Round 1]] |
||
|[[Mammoth (Featherweight)|Mammoth]] |
|[[Mammoth (Featherweight)|Mammoth]] |
||
|Oven |
|Oven |
||
| + | |Only non-heavyweight competitor to have an item dropped on it. |
||
| + | |- |
||
| + | |[[Robot Wars: The Seventh Wars/All-Stars|All-Stars, Round 1]] |
||
| + | |None |
||
| + | |Washing machine |
||
| + | |The washing machine was dropped in an attempt to stop the competitors' attacks on the [[House Robots]]. However, it did not hit any of the competitors. |
||
| + | |- |
||
| ⚫ | |||
| ⚫ | |||
| ⚫ | |||
| ⚫ | |||
|} |
|} |
||
===Dutch Series 2=== |
===Dutch Series 2=== |
||
| + | [[File:TAN Drop Zone.jpg|thumb|Two barrels fall onto Tough as Nails]] |
||
{| class="wikitable" |
{| class="wikitable" |
||
! Battle |
! Battle |
||
! Robot |
! Robot |
||
! Object Dropped |
! Object Dropped |
||
| + | ! Notes |
||
|- |
|- |
||
|[[Dutch Robot Wars: Series 2/Heat A|Heat A, Round 1]] |
|[[Dutch Robot Wars: Series 2/Heat A|Heat A, Round 1]] |
||
|[[Project Two: Hex'em]] |
|[[Project Two: Hex'em]] |
||
|Oven |
|Oven |
||
| + | | |
||
|- |
|- |
||
|[[Dutch Robot Wars: Series 2/Heat A|Heat B, Round 1]] |
|[[Dutch Robot Wars: Series 2/Heat A|Heat B, Round 1]] |
||
|[[The Black Beast]] |
|[[The Black Beast]] |
||
|Oven |
|Oven |
||
| + | | |
||
| + | |- |
||
| + | |[[Dutch Robot Wars: Series 2/Heat C|Heat C Round 1]] |
||
| + | |[[Slamtilt]] |
||
| + | |Bowling balls |
||
| + | | |
||
|- |
|- |
||
|[[Dutch Robot Wars: Series 2/Heat C|Heat C, Round 2]] |
|[[Dutch Robot Wars: Series 2/Heat C|Heat C, Round 2]] |
||
|[[Flepser]] |
|[[Flepser]] |
||
| − | | |
+ | |Assortment of wheels |
| + | | |
||
|- |
|- |
||
|[[Dutch Robot Wars: Series 2/Heat D|Heat D, Round 1]] |
|[[Dutch Robot Wars: Series 2/Heat D|Heat D, Round 1]] |
||
|[[Tough as Nails]] |
|[[Tough as Nails]] |
||
|Two Barrels |
|Two Barrels |
||
| + | |Tough as Nails regained mobility, and pushed one of the barrels around the arena, eventually being pitted alongside it. |
||
|- |
|- |
||
|[[Dutch Robot Wars: Series 2/Heat E|Heat E, Round 1]] |
|[[Dutch Robot Wars: Series 2/Heat E|Heat E, Round 1]] |
||
|[[Vortex Inducer]] |
|[[Vortex Inducer]] |
||
|Oven |
|Oven |
||
| + | | |
||
|- |
|- |
||
|[[Dutch Robot Wars: Series 2/Grand Final|Grand Final, Round 1]] |
|[[Dutch Robot Wars: Series 2/Grand Final|Grand Final, Round 1]] |
||
|[[Lizzard]] |
|[[Lizzard]] |
||
|Two Barrels |
|Two Barrels |
||
| + | | |
||
|} |
|} |
||
===Extreme Warriors Series 2=== |
===Extreme Warriors Series 2=== |
||
| − | [[File: |
+ | [[File:Unibitedrop.jpg|thumb|Unibite 2.0 becomes the Drop Zone's first ever victim]] |
| + | [[File:Nightstalkerdrop_rwews2.jpg|thumb|180px|A washing machine falls on a beaten Night Stalker]] |
||
{| class="wikitable" |
{| class="wikitable" |
||
! Battle |
! Battle |
||
! Robot |
! Robot |
||
! Object Dropped |
! Object Dropped |
||
| + | ! |
||
|- |
|- |
||
|[[Extreme Warriors: Season 2/Heat C|Heat C, Heat Final]] |
|[[Extreme Warriors: Season 2/Heat C|Heat C, Heat Final]] |
||
|[[Unibite|Unibite 2.0]] |
|[[Unibite|Unibite 2.0]] |
||
|Washing machine |
|Washing machine |
||
| + | |First-ever use of the Drop Zone in any series. |
||
|- |
|- |
||
|[[Extreme Warriors: Season 2/Robot Rebellion|Robot Rebellion, Round 1]] |
|[[Extreme Warriors: Season 2/Robot Rebellion|Robot Rebellion, Round 1]] |
||
|[[Night Stalker]] |
|[[Night Stalker]] |
||
|Washing machine |
|Washing machine |
||
| + | | |
||
|- |
|- |
||
|[[Extreme Warriors: Season 2/Robot Rebellion|Robot Rebellion, Final]] |
|[[Extreme Warriors: Season 2/Robot Rebellion|Robot Rebellion, Final]] |
||
|[[Snookums]] |
|[[Snookums]] |
||
| + | |Organ |
||
| − | |Piano |
||
| + | | |
||
|} |
|} |
||
===Nickelodeon Robot Wars=== |
===Nickelodeon Robot Wars=== |
||
| − | [[File:Jokerdropzone.jpg|thumb| |
+ | [[File:Jokerdropzone.jpg|thumb|180px|Joker has scrap metal dropped on it]] |
{| class="wikitable" |
{| class="wikitable" |
||
! Battle |
! Battle |
||
! Robot |
! Robot |
||
! Object Dropped |
! Object Dropped |
||
| + | ! Notes |
||
|- |
|- |
||
|[[Nickelodeon Robot Wars/US Championship|US Championship Bonus Battle]] |
|[[Nickelodeon Robot Wars/US Championship|US Championship Bonus Battle]] |
||
|[[Phantasm]] |
|[[Phantasm]] |
||
|Sports equipment |
|Sports equipment |
||
| + | | |
||
|- |
|- |
||
|[[Nickelodeon Robot Wars/Mayhem|Mayhem]] |
|[[Nickelodeon Robot Wars/Mayhem|Mayhem]] |
||
|[[Diskotek]] & [[Rigby]] |
|[[Diskotek]] & [[Rigby]] |
||
|Assortment of balls |
|Assortment of balls |
||
| + | | |
||
|- |
|- |
||
|[[Nickelodeon Robot Wars/Vengeance|Vengeance]] |
|[[Nickelodeon Robot Wars/Vengeance|Vengeance]] |
||
|[[Joker]] |
|[[Joker]] |
||
|Scrap metal |
|Scrap metal |
||
| + | | |
||
|- |
|- |
||
|[[Nickelodeon Robot Wars/House Robot Rebellion|House Robot Rebellion]] |
|[[Nickelodeon Robot Wars/House Robot Rebellion|House Robot Rebellion]] |
||
|[[Humdrum]] |
|[[Humdrum]] |
||
|Scrap metal |
|Scrap metal |
||
| + | | |
||
|} |
|} |
||
===German Robot Wars=== |
===German Robot Wars=== |
||
| − | [[File:GolemDropzone.jpg|thumb| |
+ | [[File:GolemDropzone.jpg|thumb|180px|Golem as a Drop Zone item]] |
{| class="wikitable" |
{| class="wikitable" |
||
! Battle |
! Battle |
||
! Robot |
! Robot |
||
! Object Dropped |
! Object Dropped |
||
| + | ! Notes |
||
| + | |- |
||
| + | |[[German Robot Wars/Heat A|Heat A, Heat Final]] |
||
| + | |[[Junkyard Queen]] |
||
| + | |Spare parts |
||
| + | | |
||
|- |
|- |
||
|[[German Robot Wars/Heat A|Heat A, Heat Final]] |
|[[German Robot Wars/Heat A|Heat A, Heat Final]] |
||
|[[Golem]] |
|[[Golem]] |
||
|Assortment of balls |
|Assortment of balls |
||
| + | | |
||
|- |
|- |
||
|[[German Robot Wars/Grand Final|Grand Final, Losers Melee]] |
|[[German Robot Wars/Grand Final|Grand Final, Losers Melee]] |
||
|[[Junkyard Queen]] |
|[[Junkyard Queen]] |
||
|[[Golem]] |
|[[Golem]] |
||
| + | |Golem withdrew from the Losers Melee as it could not be repaired in time to fight; the Golem Crew allowed it to be used as an item. Golem largely missed its target. |
||
|} |
|} |
||
| + | ==Appearances in Merchandise== |
||
| ⚫ | |||
| + | <gallery type="slideshow"> |
||
| ⚫ | |||
| + | DropZonewithBox.jpg|The Drop Zone as a separate accessory for the Minibot Arena set |
||
| − | * The Drop Zone appeared in merchandise before its first UK TV appearance, as an accessory for the [[Minibot Arena]], and in the both [[Robot Wars: Extreme Destruction (PC/Xbox)|Extreme]] [[Robot Wars: Extreme Destruction (GBA)|Destruction]] games. |
||
| + | Minibot Arena.jpg|The Minibot Arena set with the Drop Zone attachment |
||
| − | * In the PC/Xbox version of Extreme Destruction, items are dropped on mobile robots who stay on the cross for a certain length of time, and multiple items can be dropped in one fight. |
||
| + | </gallery> |
||
| − | * The Featherweight [[Mammoth (Featherweight)|Mammoth]] was the only non-heavyweight to have a Drop Zone item dropped on it. |
||
| + | Throughout its appearances in the show's original run, the Drop Zone was immortalised in various pieces of [[Robot Wars Merchandise|''Robot Wars'' merchandise]]. An accessory for the [[Minibots]] [[Minibot Arena|Arena]] playset based on the hazard was released, consisting of a frustrum-shaped assembly and an assortment of miniature items - including cones, tyres, balls and a washing machine. The Drop Zone assembly could be clipped onto the outer edges of the Arena playset, and the available items attached to the top, allowing the items to be 'dropped' in a similar manner to the real-life hazard. The Drop Zone accessory was available as a stand-alone set (complete with all of the aforementioned items) and as a bundle with the Arena playset (with the balls only). |
||
| − | * Panic Attack was the only former champion ever to be hit with a Drop Zone item. |
||
| + | <gallery type="slideshow"> |
||
| ⚫ | |||
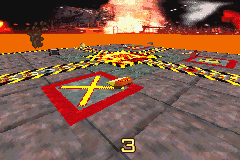
| + | Melting_Pot.PNG|The Drop Zone square in 'Melting Pot', an arena in ''Robot Wars: Extreme Destruction'' (GBA) |
||
| ⚫ | |||
| + | Tornado_vs_Tractor_ED.jpg|The Drop Zone square (behind Tractor) in ''Robot Wars: Extreme Destruction'' (PC/Xbox) |
||
| − | * In Round 1 of [[Robot Wars: The Seventh Wars/All-Stars|the third All Stars tournament]], a washing machine was dropped in an attempt to stop the competitors' attacks on the house robots, although it ultimately missed. |
||
| + | </gallery> |
||
| ⚫ | |||
| + | The Drop Zone is also seen in all versions of ''[[Robot Wars: Extreme Destruction]]'', primarily as an active hazard in arenas based on the real-life [[Robot Wars Arena/Series 5-7|Series 5-7 Arena]]: |
||
| ⚫ | |||
| + | *[[Robot Wars Arena/Extreme Destruction (GBA)]] (arena referred to in-game as the '''Studio''') |
||
| − | * Golem was used as a Drop Zone item for the German Robot Wars Grand Final, as the team could not fix it, so allowed this. |
||
| + | *[[Robot Wars Arena/Robot Wars: Extreme Destruction (PC/Xbox)]] (arena referred to in-game as the '''Robot Wars TV Studio''') |
||
| + | In the [[Robot Wars: Extreme Destruction (GBA)|Game Boy Advance version]], it operates exclusively in 'Tournament' mode, and as in real-life drops objects onto defeated robots once they have been placed onto the square by a [[House Robots|House Robot]]. The Drop Zone square also appears in the other fictional arenas available in the game, although the hazard itself remains inactive. In the [[Robot Wars: Extreme Destruction (PC/Xbox)|PC and Xbox versions]], items are dropped on mobile robots if they drive over and stay on the cross for a certain length of time. Additionally, multiple items can be dropped in one fight, including a washing machine, a safe, an anvil, a barrel which can explode if attacked, and a grand piano. |
||
| + | |||
| ⚫ | |||
| ⚫ | |||
| ⚫ | |||
| + | *The Drop Zone was used in every episode of the Extreme Series 2 New Blood Championship except the Grand Final. |
||
| ⚫ | |||
| ⚫ | |||
| + | |||
| + | {{Robot Wars}} |
||
[[Category:Robot Wars Arena]] |
[[Category:Robot Wars Arena]] |
||
Revision as of 19:37, 24 March 2019
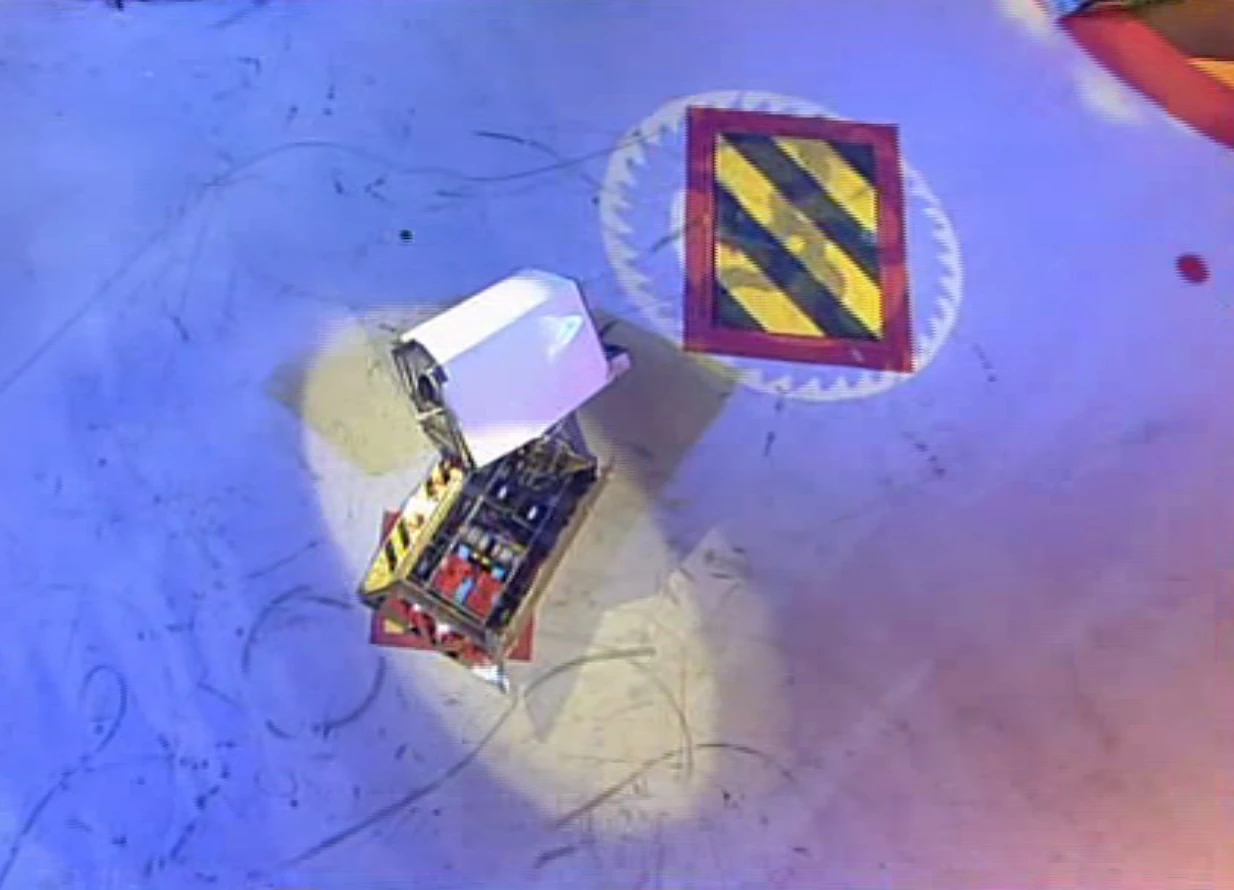
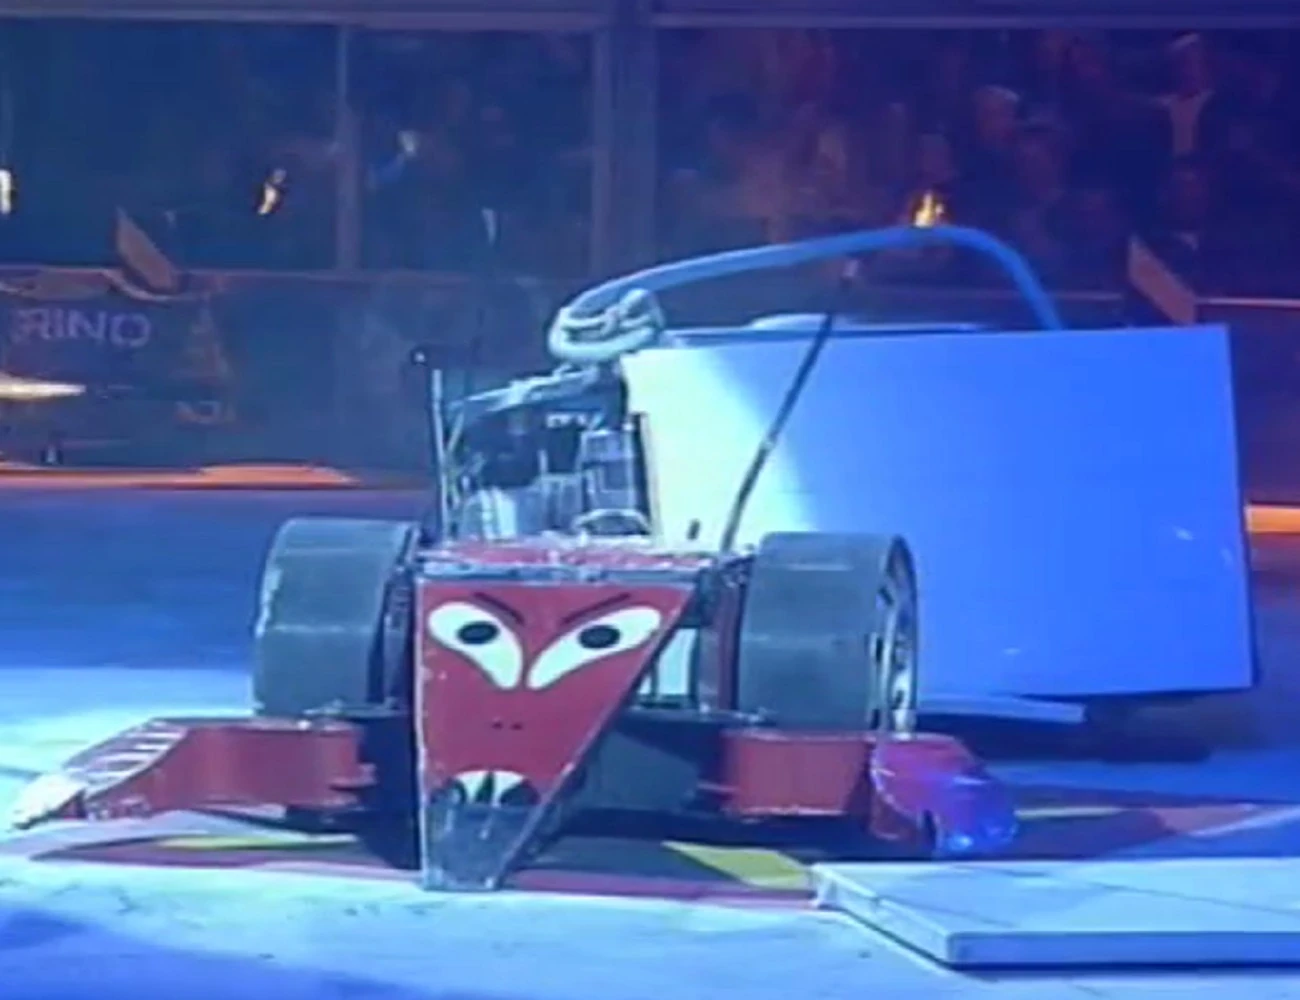
The Drop Zone was an arena hazard introduced in the UK and international series of Robot Wars filmed around 2002. Immobilised robots would be placed on a black square with a yellow cross and red border placed roughly in the centre of the arena, close to the Pit, where heavy objects including ovens, washing machines, ocean buoys and assortments of balls would be dropped on them.
History
The Drop Zone was first used in the second season of Robot Wars: Extreme Warriors, with the first robot to have an object dropped onto it being Unibite 2.0 in the Heat C Final. It was used in all UK and international series filmed thereafter; the first usage of the Drop Zone in the UK Series came in Series 6, where it dropped a washing machine on Robochicken in the first round of Heat B. A thunderclap sound effect was used in the Drop Zone's appearances in US Season 2, Nickelodeon Robot Wars and UK Series 7, which played whenever an object was dropped. The Drop Zone square was initially seen in UK Series 5 and the first series of Robot Wars Extreme, but did not serve any clear purpose at the time.
The last competitor to have an object dropped onto it was Hard in the first round of the Third World Championship, filmed and broadcast at the very end of Series 7. When Robot Wars returned in 2016, the Drop Zone did not feature as part of the new arena, and has effectively been retired as an arena hazard.
The objects used for the Drop Zone varied in between series; for Nickelodeon Robot Wars, less serious objects such as scrap metal and sports equipment were used in an effort to maintain the series' appeal to younger audiences. Meanwhile, at one point during the Grand Final of German Robot Wars, previously-defeated competitor Golem was used as an item after it withdrew prior to the Losers Melee for fifth place.
The Drop Zone was originally intended to have a button which competitors and House Robots could press to activate it, in a similar way to how the Pit and Disc of Doom were activated. However, this idea was not implemented.Citation?
Instances
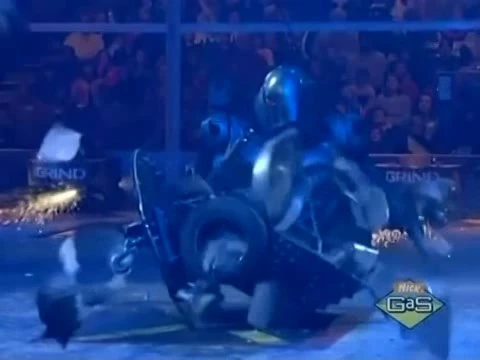
Robochicken hit with a washing machine
Series 6
Demolition Man gets a rubbish bin dropped on it
Panic Attack is hit with a washing machine, the only former UK champion ever to be put on the Drop Zone

Granny's Revenge 2 is flattened by an oven

A shower of balls lands on Major Tom
| Battle | Robot | Object Dropped | Notes |
|---|---|---|---|
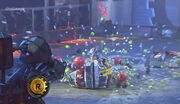
| Heat B, Round 1 | Robochicken | Washing machine | First instance of the hazard being used in the UK Series. |
| Heat F, Round 1 | Demolition Man | Rubbish bin | |
| Heat I, Heat Final | Panic Attack | Washing machine | The only former UK Champion to have an item dropped on it. |
| Heat K, Round 1 | Granny's Revenge 2 | Oven | |
| Heat L, Round 1 | Major Tom | Assortment of balls |
Extreme 2

Niterider spikes the television sent by the Drop Zone


Mad Dog, after having balls dropped on it
| Battle | Robot | Object Dropped | Notes |
|---|---|---|---|
| Annihilator Round 4 | Major Tom | Oven | |
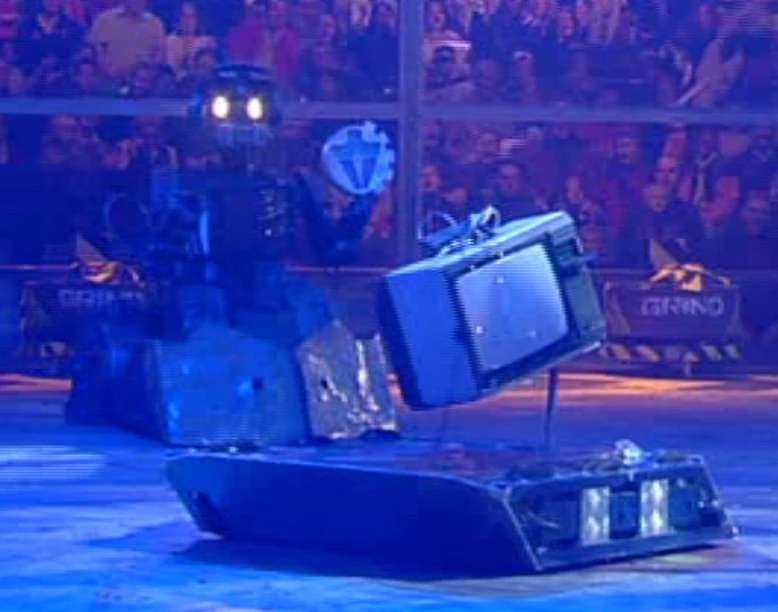
| Minor Meltdown, Round 1 | Saw Point | Assortment of car parts | |
| New Blood Heat A, Round 1 | Niterider | Television | Niterider's spike speared the television as it landed, which was eventually destroyed by Matilda. |
| New Blood Heat A, Round 2 | Maximus | Oven | |
| New Blood Heat B, Round 1 | RT81 | Oven | |
| New Blood Heat B, Round 2 | Hell's Teeth | Assortment of balls | |
| New Blood Heat C, Round 1 | Mad Dog | Assortment of balls | The balls missed their target. |
| New Blood Heat C, Final | ICU | Assortment of balls | |
| New Blood Heat D, Semi-Final | Fatal Traction | Assortment of car parts |
Series 7

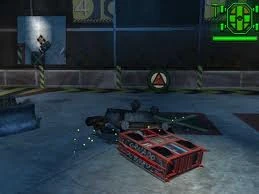
Tomahawk, badly damaged by the ocean buoy

Hammerhead 2 is pounded by railway track

A washing machine lands on Thermidor 2

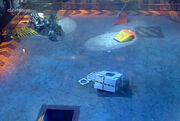
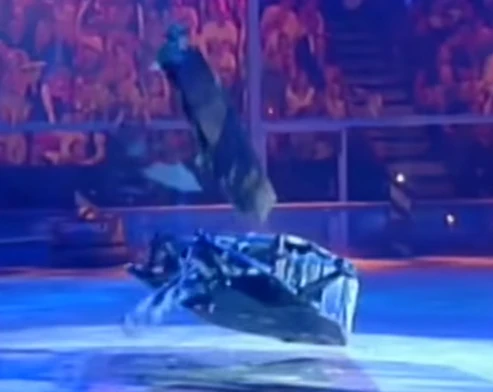
The Drop Zone misses its targets in the All-Stars

Hard after having computer parts smashed onto it
| Battle | Robot | Object Dropped | Notes |
|---|---|---|---|
| Heat C, Round 1 | Tomahawk | Ocean buoy | |
| Heat D, Round 1 | The Alien | Ocean buoy | |
| Heat G, Round 1 | Cygnus X-1 | Television | |
| Heat H, Round 2 | Scraptosaur | Ocean buoy | |
| Heat H, Round 2 | Revolution 3 | Television | |
| Heat J, Round 1 | Cobra & Pinser | Television | |
| Heat K, Round 2 | Hard | Oven | |
| Heat M, Round 1 | B.O.D. | Bowling balls | |
| Heat M, Round 2 | Mega Morg | Washing machine | |
| Heat N, Round 2 | R.O.C.S. | Washing machine | |
| Heat O, Round 2 | Hammerhead 2 | Railway track | |
| Heat O, Heat Final | Iron-Awe 2.1 | Oven | |
| Semi-Final 2, Round 1 | Thermidor 2 | Washing machine | |
| Featherweight Championship, Round 1 | Mammoth | Oven | Only non-heavyweight competitor to have an item dropped on it. |
| All-Stars, Round 1 | None | Washing machine | The washing machine was dropped in an attempt to stop the competitors' attacks on the House Robots. However, it did not hit any of the competitors. |
| Third World Championship, Battle 1 | Hard | Computer parts | Final time the Drop Zone was used. |
Dutch Series 2


Two barrels fall onto Tough as Nails
| Battle | Robot | Object Dropped | Notes |
|---|---|---|---|
| Heat A, Round 1 | Project Two: Hex'em | Oven | |
| Heat B, Round 1 | The Black Beast | Oven | |
| Heat C Round 1 | Slamtilt | Bowling balls | |
| Heat C, Round 2 | Flepser | Assortment of wheels | |
| Heat D, Round 1 | Tough as Nails | Two Barrels | Tough as Nails regained mobility, and pushed one of the barrels around the arena, eventually being pitted alongside it. |
| Heat E, Round 1 | Vortex Inducer | Oven | |
| Grand Final, Round 1 | Lizzard | Two Barrels |
Extreme Warriors Series 2


Unibite 2.0 becomes the Drop Zone's first ever victim

A washing machine falls on a beaten Night Stalker
| Battle | Robot | Object Dropped | |
|---|---|---|---|
| Heat C, Heat Final | Unibite 2.0 | Washing machine | First-ever use of the Drop Zone in any series. |
| Robot Rebellion, Round 1 | Night Stalker | Washing machine | |
| Robot Rebellion, Final | Snookums | Organ |
Nickelodeon Robot Wars

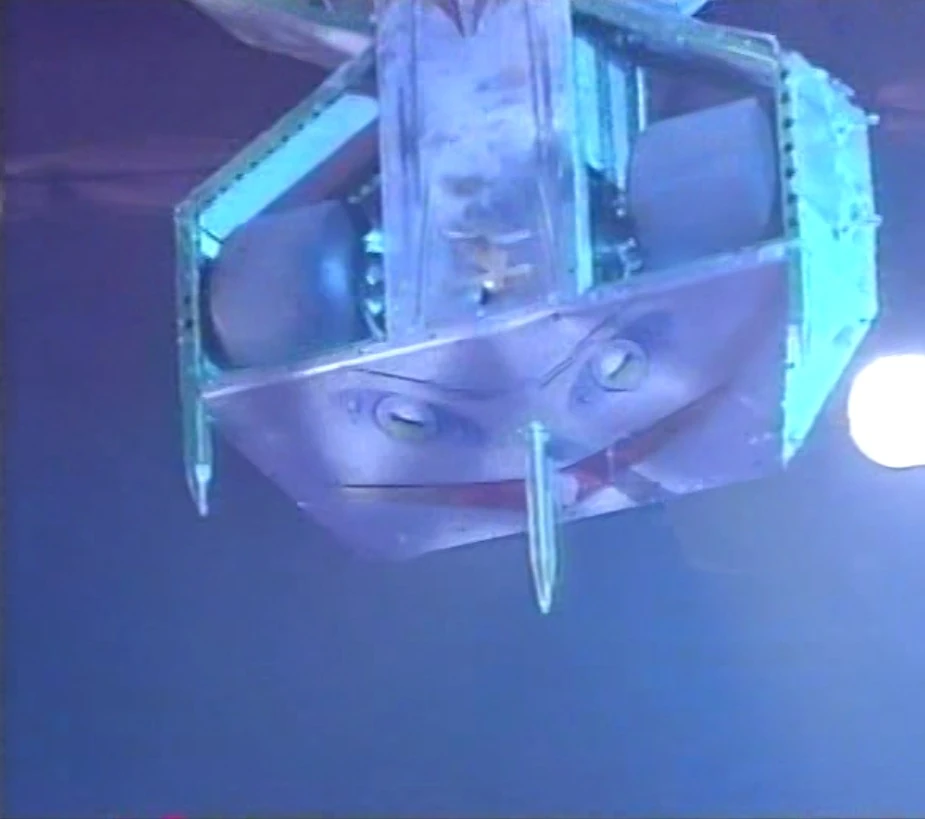
Joker has scrap metal dropped on it
| Battle | Robot | Object Dropped | Notes |
|---|---|---|---|
| US Championship Bonus Battle | Phantasm | Sports equipment | |
| Mayhem | Diskotek & Rigby | Assortment of balls | |
| Vengeance | Joker | Scrap metal | |
| House Robot Rebellion | Humdrum | Scrap metal |
German Robot Wars
Golem as a Drop Zone item
| Battle | Robot | Object Dropped | Notes |
|---|---|---|---|
| Heat A, Heat Final | Junkyard Queen | Spare parts | |
| Heat A, Heat Final | Golem | Assortment of balls | |
| Grand Final, Losers Melee | Junkyard Queen | Golem | Golem withdrew from the Losers Melee as it could not be repaired in time to fight; the Golem Crew allowed it to be used as an item. Golem largely missed its target. |
Appearances in Merchandise


Throughout its appearances in the show's original run, the Drop Zone was immortalised in various pieces of Robot Wars merchandise. An accessory for the Minibots Arena playset based on the hazard was released, consisting of a frustrum-shaped assembly and an assortment of miniature items - including cones, tyres, balls and a washing machine. The Drop Zone assembly could be clipped onto the outer edges of the Arena playset, and the available items attached to the top, allowing the items to be 'dropped' in a similar manner to the real-life hazard. The Drop Zone accessory was available as a stand-alone set (complete with all of the aforementioned items) and as a bundle with the Arena playset (with the balls only).
The Drop Zone is also seen in all versions of Robot Wars: Extreme Destruction, primarily as an active hazard in arenas based on the real-life Series 5-7 Arena:
- Robot Wars Arena/Extreme Destruction (GBA) (arena referred to in-game as the Studio)
- Robot Wars Arena/Robot Wars: Extreme Destruction (PC/Xbox) (arena referred to in-game as the Robot Wars TV Studio)
In the Game Boy Advance version, it operates exclusively in 'Tournament' mode, and as in real-life drops objects onto defeated robots once they have been placed onto the square by a House Robot. The Drop Zone square also appears in the other fictional arenas available in the game, although the hazard itself remains inactive. In the PC and Xbox versions, items are dropped on mobile robots if they drive over and stay on the cross for a certain length of time. Additionally, multiple items can be dropped in one fight, including a washing machine, a safe, an anvil, a barrel which can explode if attacked, and a grand piano.
Trivia
- Major Tom, Hard and Junkyard Queen were the only robots to be hit twice with a Drop Zone item.
- In Series 7, Zorro managed to escape the Drop Zone by driving away, having been dropped on the cross after being counted out.
- The Drop Zone was used in every episode of the Extreme Series 2 New Blood Championship except the Grand Final.
- The Drop Zone was used in every episode of Dutch Series 2.
- The barrels dropped in Dutch Series 2 were the same used in the Pinball Trial of Series 2.
| ||||||||||||||||||||||||||