Llamaman201 (talk | contribs) |
|||
| (16 intermediate revisions by 7 users not shown) | |||
| Line 1: | Line 1: | ||
| + | {{for|the toy of the same name|The Gauntlet Challenger Box}} |
||
| ⚫ | |||
| + | {{Battle Event |
||
| − | [[File:Gauntlet.jpg|thumb|One of the Series 2 Gauntlet combinations]] |
||
| + | |Battle_event=The Gauntlet |
||
| ⚫ | '''The Gauntlet''' was the first discipline featured in |
||
| + | |image=<gallery> |
||
| + | Gauntlet.jpg|Series 2 |
||
| + | Series_1_gauntlet.jpg|Series 1 |
||
| + | </gallery> |
||
| + | |caption= |
||
| + | |robots=6 per episode |
||
| + | |format=Assault course |
||
| + | |Recurrences=20 |
||
| + | |series=1-2 |
||
| + | }} |
||
| ⚫ | |||
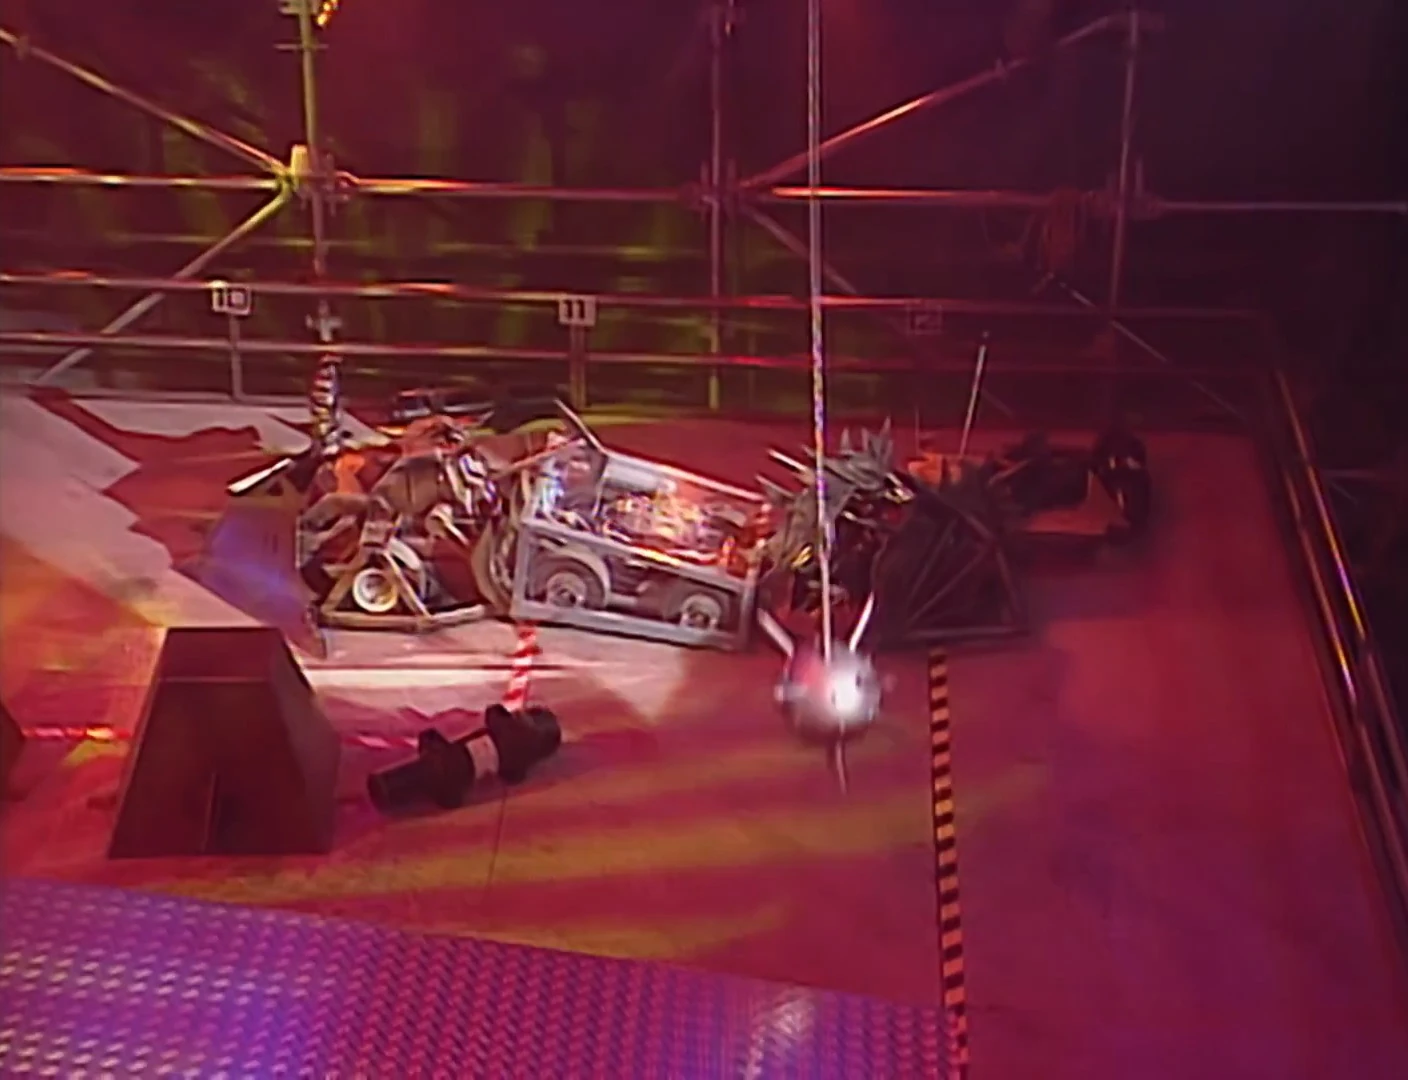
| ⚫ | '''The Gauntlet''' was the first discipline featured in the first two series of ''[[Robot Wars]]''. Taking place in the heats and the Series 2 Semi-Finals, six robots per episode would attempt to complete an assault course featuring numerous obstacles and [[House Robots]], or to get as far into the course as possible within the time limit. The robot that travelled the least distance was eliminated. In the event that all six robots completed the Gauntlet, the robot that finished in the slowest time would be eliminated, although this never happened. |
||
| + | The Gauntlet was intended to serve as a test of control and manoeuvrability for competitors, two factors which would become essential for succeeding in the later Arena stages. In Series 1, the Gauntlet course would remain largely the same throughout the series; in Series 2, however, the obstacles featured on the course would vary between episodes. |
||
| − | In Series 2, obstacles in the Gauntlet would vary per heat; however in Series 1, the course remained largely the same throughout the series. The Gauntlet provided some upsets during its run, most notably when the third seed [[Bodyhammer]] became trapped on the ramrig and was placed last, during Series 2. |
||
| + | Throughout its run, The Gauntlet would offer several surprising moments during its run, most notably the elimination of the third seed [[Bodyhammer]] in Heat D of Series 2, and the Race-Off between [[Mace]] and [[Panic Attack]] in the first Semi-Final of the same series. |
||
| − | The Gauntlet provided challenges that the straight-out combat battles of the later series provided- most important of which was the need for good control and manouvrability over a potent weapon. The first two disciplines of the earlier series required a reliable, powerful and manvourable machine over a destructive weapon, and consequently, on the whole, robots were far less destructive than later counterparts. |
||
| − | + | Both the Gauntlet and Trial stages were retired after Series 2, with the show's format changing to an entirely combat-focused knockout tournament for Series 3 onwards. However, an assault course still formed part of the Series 3 [[Qualifiers|auditions]], where it was used to showcase potential competitors' control and mobility prior to their selection for the main series. The basic idea of an assault course was also later used in one of the events from the spin-off show, ''Techno Games''. |
|
<small>'''''Note: The route referred to as the left relates to the route on the left as seen on TV, NOT from the perspective of the robot.'''''</small> |
<small>'''''Note: The route referred to as the left relates to the route on the left as seen on TV, NOT from the perspective of the robot.'''''</small> |
||
| Line 14: | Line 26: | ||
{{quote|Roboteers- be prepared to amuse and impress us. But be prepared also, to be humiliated!|Jeremy Clarkson}} |
{{quote|Roboteers- be prepared to amuse and impress us. But be prepared also, to be humiliated!|Jeremy Clarkson}} |
||
[[File:NemesisS1Gauntlet.jpg|thumb|left|Nemesis completes the Gauntlet]] |
[[File:NemesisS1Gauntlet.jpg|thumb|left|Nemesis completes the Gauntlet]] |
||
| − | Each robot would start on a |
+ | Each robot would start its run on a rotating turntable, and upon driving off it would have a choice of three routes to take. The end zone was patrolled by one of the [[House Robots]], which had the freedom to block competitors from completing the course. A small spiked mace also swung back and forth across all three routes, although it merely served as an atmosphere feature. |
| + | |||
| + | Of the 36 competitors to run the Gauntlet during Series 1, 16 successfully completed the course, almost half of the Series 1 entries. |
||
===Left Route=== |
===Left Route=== |
||
| − | [[File:Bodyhammer gauntlet.JPG|thumb|Bodyhammer attempts the maze]] |
+ | [[File:Bodyhammer gauntlet.JPG|thumb|left|Bodyhammer attempts the maze]][[File:KillertronS1Gauntlet.jpg|thumb|Killertron is blocked by the springs after changing to the left-hand route]] |
| − | The left route |
+ | The left-hand route began with a steel maze, a smaller version of that found in the [[Labyrinth]] trial. Robots were required to perform sharp turns as they negotiated through the maze, and avoid a grille at the end. Beyond the maze, the route offered a wide variety of obstacles, including corkscrew lances, two more grilles, large weights disguised as 'landmines', and springs attached to the floor, all designed to block and divert the robot's path. |
| − | {{quote|You won't beat springs with a pickaxe boys!|Jonathan Pearce |
+ | {{quote|You won't beat springs with a pickaxe, boys!|[[Jonathan Pearce]] as [[Killertron]] is blocked by the springs}} |
| + | Once negotiated, robots had to drive past a [[House Robots|House Robot]] and over a set of floor spikes, before reaching the end zone. The left-hand route was particularly suited to robots with low turning circles and high top speeds, which made it a popular choice for lighter weight category robots (especially featherweights). However, its wide variety of obstacles, and the possibility of House Robots blocking the maze (as shown by [[Scrapper|Scrapper's]] run in Heat B), made it relatively less popular with larger competitors. |
||
===Centre Route=== |
===Centre Route=== |
||
| − | [[File:Vector of armageddon stuck.JPG|thumb|Vector of Armageddon beached on the second ramp]] |
+ | [[File:Vector of armageddon stuck.JPG|thumb|left|Vector of Armageddon beached on the second ramp]] |
| + | [[File:Gauntlet_s1_drills.png|thumb|The drills protruding from the centre left island]] |
||
| − | The middle route tasked a robot with climbing over a seesaw ramp, negotiating the corkscrew lances and make its way over a second, static, ramp that billowed smoke from the middle. Robots could move from this route into the left-hand route, and vice versa, as the two routes merge towards the end. Robots with a low ground clearance struggled with this route, such as when [[Vector of Armageddon]] became stuck on the second ramp, placing it last in Heat D. |
||
| + | The middle route began with a seesaw ramp, before robots were required to negotiate past the corkscrew lances and drive over a second, static ramp that billowed smoke from the centre. At this point, the route merged with the left and right-hand routes, allowing robots to cross over to either of the other routes from the second ramp onwards. While offering robots the lowest chance of being intercepted by the House Robots, it was still possible for a House Robot from the right-hand route to cross over into the centre route and impede a competitor's progress from time to time. Additionally the route proved especially problematic for robots with low ground clearances, such as [[Vector of Armageddon]], which was unable to clear the second ramp during its run in Heat D. |
||
===Right Route=== |
===Right Route=== |
||
[[File:Robot the bruce dead metal shunt.JPG|thumb|left|Robot the Bruce rams the House Robots]] |
[[File:Robot the bruce dead metal shunt.JPG|thumb|left|Robot the Bruce rams the House Robots]] |
||
| − | The |
+ | The right-hand route lacked any major obstacles, but was patrolled by two or three [[House Robots]], making it arguably the most difficult route to negotiate. Smaller obstacles such as spiked pyramids and skittles were also scattered along this route, as well as a grille which was located near the beginning of the route. The grille was particularly effective in stranding robots that drove over or were pushed onto them, such as [[Barry]] and [[Torque of the Devil]], and played a crucial part in the former's elimination from Heat A. |
| − | |||
| − | |||
==Series 2== |
==Series 2== |
||
{{quote|It's fine when you watch someone else do it, but when you've got to do it, you just think "I want to go home".|Chris Weeks of Tantrum}} |
{{quote|It's fine when you watch someone else do it, but when you've got to do it, you just think "I want to go home".|Chris Weeks of Tantrum}} |
||
| ⚫ | In a change from the previous series, each robot would start in a three-sided pen instead of the turntable. Some robots, such as [[Spin Doctor (Series 2)|Spin Doctor]], were too large to fit inside the pen, so they started just outside it instead. As before, robots had a choice of three routes to negotiate, each with different hazards and obstacles to clear, which varied between each episode the Gauntlet was featured in. |
||
| ⚫ | |||
| ⚫ | In a change from the previous series, each robot would start in three-sided pen instead of the turntable |
||
| − | |||
| ⚫ | |||
===Left Route=== |
===Left Route=== |
||
| − | {{quote|If they've got the guts, or maybe stupidity, to take on Sir Killalot, they'll take the route on my left| |
+ | {{quote|If they've got the guts, or maybe stupidity, to take on Sir Killalot, they'll take the route on my left.|Philippa Forrester}} |
| − | [[File: |
+ | [[File:Obliviongauntlet.jpg|thumb|right|Oblivion becomes stranded on the edge of the pit while attempting the left-hand route]] |
| − | The left route |
+ | The left-hand route was similar in nature to the right-hand route from the previous series, lacking any major obstacles aside from one or two pits and one or more of the House Robots (usually [[Sir Killalot]]) occupying the route. This marked the first usage of the [[Robot Wars Arena#Pit of Oblivion|Pit of Oblivion]], a hazard which would later become a staple of ''Robot Wars''. |
| + | [[File:Roadblocks2gauntlet.png|thumb|left|Roadblock is pinned in by the Sentinel]] |
||
| + | From [[Robot Wars: The Second Wars/Heat G|Heat G]] onwards, with the exception of [[Robot Wars: The Second Wars/Heat J|Heat J]], [[The Sentinel]] occupied this route with the help of another House Robot, usually [[Dead Metal]]. The introduction of The Sentinel and the reason for The Sentinel's appearance this late on was because the producers became frustrated with roboteers using the left route, finding it boring<ref>https://youtu.be/UXFIM1syNRA?t=356</ref>. The Sentinel was intended to block competitors, pin them against the wall or steer them into one of the pits, making the route considerably more hazardous in later episodes. In the Semi-Finals, The Sentinel received additional modifications which allowed its arm to perform extra movements, including the ability to swing a full 360 degrees. This enabled The Sentinel to occupy both the left-hand and centre routes at this stage. |
||
===Centre Route=== |
===Centre Route=== |
||
| − | [[File:Killalot piece de resistance.JPG|thumb| |
+ | [[File:Killalot piece de resistance.JPG|thumb|right|Sir Killalot lifts [[Piece de Resistance]] over the bricks]] |
| + | The centre route was the most popular route in Series 2 and with perhaps the most changes across the whole series. Obstacles varied regularly between episodes, which included a wall of breezeblocks or barrels, sets of floor spikes, a Ramrig, a see-saw or static ramp, a large sphere and at least one House Robot. Competitors were required to knock down the wall of breezeblocks/barrels or negotiate the ramrig before driving over the see-saw, as well as resist the House Robots' attacks and negotiate past them on their way to the end zone. |
||
| − | The centre route was perhaps the most adaptable of all, featuring a whole host of different obstacles. The first obstacle a robot would face alternated between a Breezeblock wall and spikes, with a wall of barrels and another ramrig making one appearance each. The spikes proved the far easier to clear than the breezeblocks, which stopped many robots dead in their tracks. The next obstacle in the path of a robot was either a static ramp or a see-saw, as well as either a house robot or the Sphere, on occasion both. During the semi-finals, this route featured both ramps positioned side by side, the static ramp was guarded by the Sentinel, who now had a 360 degree radius for attack, as well as a pit, and additional protection from the House Robots. This was the most popular route during this series. |
||
| + | [[File:RaceOffS2GauntletSF.jpg|thumb|left|[[Mace]] is lifted by The Sentinel in the Semi-Final 1 'Race-Off']] |
||
| + | For the Semi-Finals, the centre route underwent many significant changes, with both a see-saw and a static ramp being positioned on either side of a pit located in the centre. The static ramp was guarded by The Sentinel, which had the capacity to block and steer competitors into the pit from the raised platform. As before, the House Robots would usually attempt to impede competitors as they negotiated over the see-saw, often attacking or pitting them in the process. A wall of breezeblocks was re-added to the route for Semi-Final 2, joined by a large sphere which could be pushed into the pit. |
||
===Right Route=== |
===Right Route=== |
||
| − | [[File:PanicAttackS2GauntletSF.jpg|thumb|Panic Attack |
+ | [[File:PanicAttackS2GauntletSF.jpg|thumb|left|Panic Attack gets wedged on the Ramrig. Note the sphere (right) that was added for Semi-Final 1]] |
| + | [[File:Tendercaressgauntlet.jpg|thumb|The right-hand route with the swinging mace added]] |
||
| − | The route on the right was dominated by the Ramrig which would ram a robot into the angle grinders positioned opposite, as happened to [[Panic Attack]] during the [[Robot Wars: The Second Wars/Semi-Final 1|first semi-final]]. If the robot managed to get past this, they would then have to beat a House Robot, as well as avoid the flame pit and tank traps. During later episodes a large spiked pendulum blocked the path after the Ramrig. This route remained unchanged for the semi-finals, except that the large sphere blocked the ramrig during the first semi-final, but was not there during the second semi-final. |
||
| + | The right-hand route was dominated by the Ramrig, which would push robots that attempted to drive through it into the angle grinders positioned on the opposite side. Robots with particularly poor control or low ground clearances had a higher tendency of getting stuck on the Ramrig, such as [[Bodyhammer]] in Heat D and [[Panic Attack]] in the [[Robot Wars: The Second Wars/Semi-Final 1|first Semi-Final]]. If the robot managed to clear the Ramrig, they would then have to drive past a House Robot, as well as avoid the [[Robot Wars Arena#Flame Pit|Flame Pit]] and spiked pyramids on their way to the end zone. In later episodes, the path immediately after the Ramrig was also blocked by a large spiked pendulum, while a sphere was also added for Semi-Final 1 only. Other than these alterations, the right-hand route remained largely unchanged throughout the series. |
||
| + | |||
| + | ==Appearances in Merchandise== |
||
| + | *[[The Gauntlet Challenger Box]] |
||
==Trivia== |
==Trivia== |
||
| − | * |
+ | *Out of a total of 120 Gauntlet runs, 41 were completed, almost exactly a third of all runs and amounting to two per episode. |
| ⚫ | |||
| − | *The worst performing robot in the Gauntlet was [[Caliban]], who cleared just 0.2m during [[Robot Wars: The Second Wars/Heat A|the first heat of the second series]], and the best performing robot was [[Demolisher]], who completed the Gauntlet in just nine seconds during [[Robot Wars: The First Wars/Heat D|Heat D of the First Wars]], although interviews later in the episode seem to imply it took longer than shown on TV. |
||
| + | *During the 20 episodes that the Gauntlet took place in, only two saw none of the competing robots successfully completing it. |
||
| ⚫ | |||
| + | *The Gauntlet appears as one of the 'Trials' challenges in the game ''[[Robot Wars: Metal Mayhem]]'', despite that game being based on Series 3. |
||
| − | *During the 20 programmes that the Gauntlet was run, only twice did no robot complete it, and never did more than half the field complete it |
||
{{Robot Wars}} |
{{Robot Wars}} |
||
Revision as of 06:55, 11 June 2020
- "In the olden days, a gauntlet was a type of glove. Right, roboteers, I challenge you to be more interesting than that."
- — Jeremy Clarkson prior to The Blob's Gauntlet run
The Gauntlet was the first discipline featured in the first two series of Robot Wars. Taking place in the heats and the Series 2 Semi-Finals, six robots per episode would attempt to complete an assault course featuring numerous obstacles and House Robots, or to get as far into the course as possible within the time limit. The robot that travelled the least distance was eliminated. In the event that all six robots completed the Gauntlet, the robot that finished in the slowest time would be eliminated, although this never happened.
The Gauntlet was intended to serve as a test of control and manoeuvrability for competitors, two factors which would become essential for succeeding in the later Arena stages. In Series 1, the Gauntlet course would remain largely the same throughout the series; in Series 2, however, the obstacles featured on the course would vary between episodes.
Throughout its run, The Gauntlet would offer several surprising moments during its run, most notably the elimination of the third seed Bodyhammer in Heat D of Series 2, and the Race-Off between Mace and Panic Attack in the first Semi-Final of the same series.
Both the Gauntlet and Trial stages were retired after Series 2, with the show's format changing to an entirely combat-focused knockout tournament for Series 3 onwards. However, an assault course still formed part of the Series 3 auditions, where it was used to showcase potential competitors' control and mobility prior to their selection for the main series. The basic idea of an assault course was also later used in one of the events from the spin-off show, Techno Games.
Note: The route referred to as the left relates to the route on the left as seen on TV, NOT from the perspective of the robot.
Series 1
- "Roboteers- be prepared to amuse and impress us. But be prepared also, to be humiliated!"
- — Jeremy Clarkson
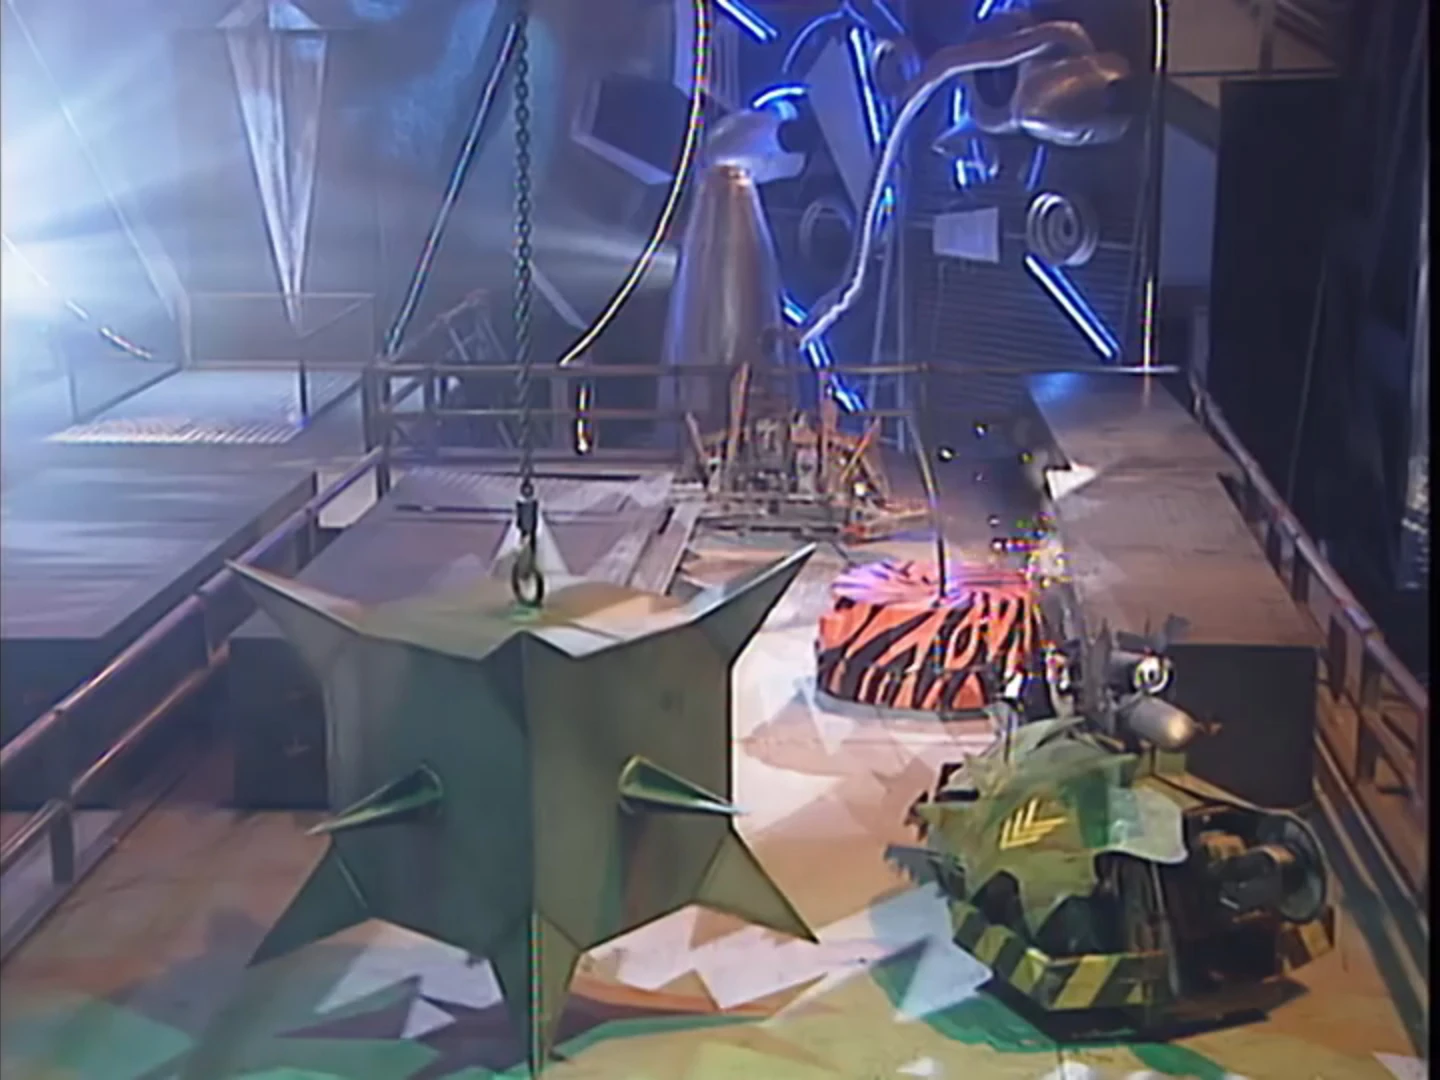
Nemesis completes the Gauntlet
Each robot would start its run on a rotating turntable, and upon driving off it would have a choice of three routes to take. The end zone was patrolled by one of the House Robots, which had the freedom to block competitors from completing the course. A small spiked mace also swung back and forth across all three routes, although it merely served as an atmosphere feature.
Of the 36 competitors to run the Gauntlet during Series 1, 16 successfully completed the course, almost half of the Series 1 entries.
Left Route

Bodyhammer attempts the maze

Killertron is blocked by the springs after changing to the left-hand route
The left-hand route began with a steel maze, a smaller version of that found in the Labyrinth trial. Robots were required to perform sharp turns as they negotiated through the maze, and avoid a grille at the end. Beyond the maze, the route offered a wide variety of obstacles, including corkscrew lances, two more grilles, large weights disguised as 'landmines', and springs attached to the floor, all designed to block and divert the robot's path.
- "You won't beat springs with a pickaxe, boys!"
- — Jonathan Pearce as Killertron is blocked by the springs
Once negotiated, robots had to drive past a House Robot and over a set of floor spikes, before reaching the end zone. The left-hand route was particularly suited to robots with low turning circles and high top speeds, which made it a popular choice for lighter weight category robots (especially featherweights). However, its wide variety of obstacles, and the possibility of House Robots blocking the maze (as shown by Scrapper's run in Heat B), made it relatively less popular with larger competitors.
Centre Route

Vector of Armageddon beached on the second ramp


The drills protruding from the centre left island
The middle route began with a seesaw ramp, before robots were required to negotiate past the corkscrew lances and drive over a second, static ramp that billowed smoke from the centre. At this point, the route merged with the left and right-hand routes, allowing robots to cross over to either of the other routes from the second ramp onwards. While offering robots the lowest chance of being intercepted by the House Robots, it was still possible for a House Robot from the right-hand route to cross over into the centre route and impede a competitor's progress from time to time. Additionally the route proved especially problematic for robots with low ground clearances, such as Vector of Armageddon, which was unable to clear the second ramp during its run in Heat D.
Right Route

Robot the Bruce rams the House Robots
The right-hand route lacked any major obstacles, but was patrolled by two or three House Robots, making it arguably the most difficult route to negotiate. Smaller obstacles such as spiked pyramids and skittles were also scattered along this route, as well as a grille which was located near the beginning of the route. The grille was particularly effective in stranding robots that drove over or were pushed onto them, such as Barry and Torque of the Devil, and played a crucial part in the former's elimination from Heat A.
Series 2
- "It's fine when you watch someone else do it, but when you've got to do it, you just think "I want to go home"."
- — Chris Weeks of Tantrum
In a change from the previous series, each robot would start in a three-sided pen instead of the turntable. Some robots, such as Spin Doctor, were too large to fit inside the pen, so they started just outside it instead. As before, robots had a choice of three routes to negotiate, each with different hazards and obstacles to clear, which varied between each episode the Gauntlet was featured in.
In the heats, 21 out of 72 robots completed the Gauntlet course. During the Semi-Finals, four out of the twelve Semi-Finalists completed the course.
Left Route
- "If they've got the guts, or maybe stupidity, to take on Sir Killalot, they'll take the route on my left."
- — Philippa Forrester

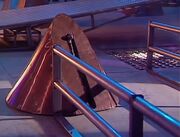
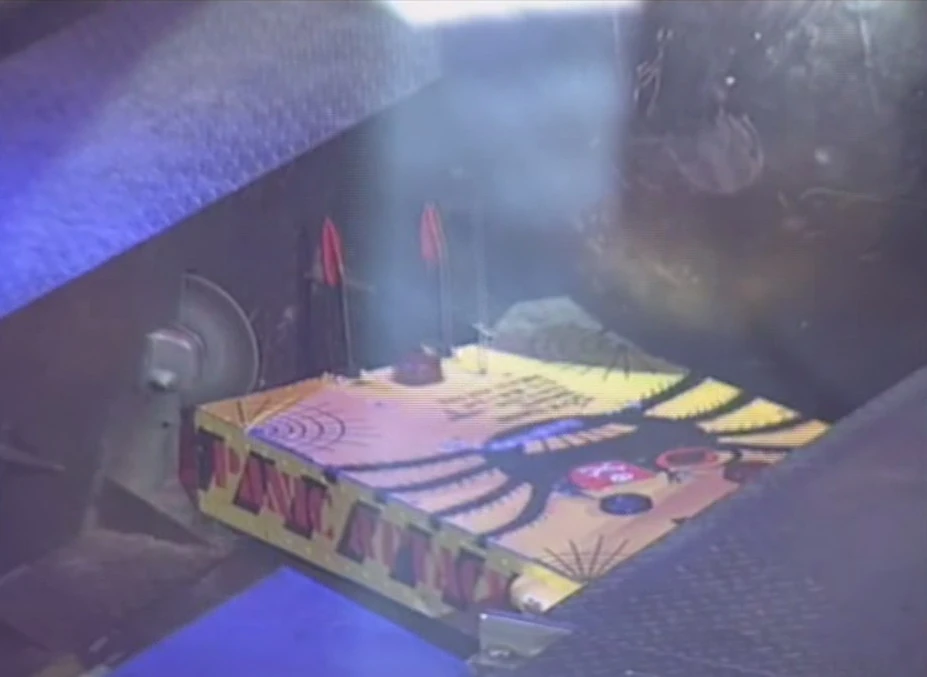
Oblivion becomes stranded on the edge of the pit while attempting the left-hand route
The left-hand route was similar in nature to the right-hand route from the previous series, lacking any major obstacles aside from one or two pits and one or more of the House Robots (usually Sir Killalot) occupying the route. This marked the first usage of the Pit of Oblivion, a hazard which would later become a staple of Robot Wars.
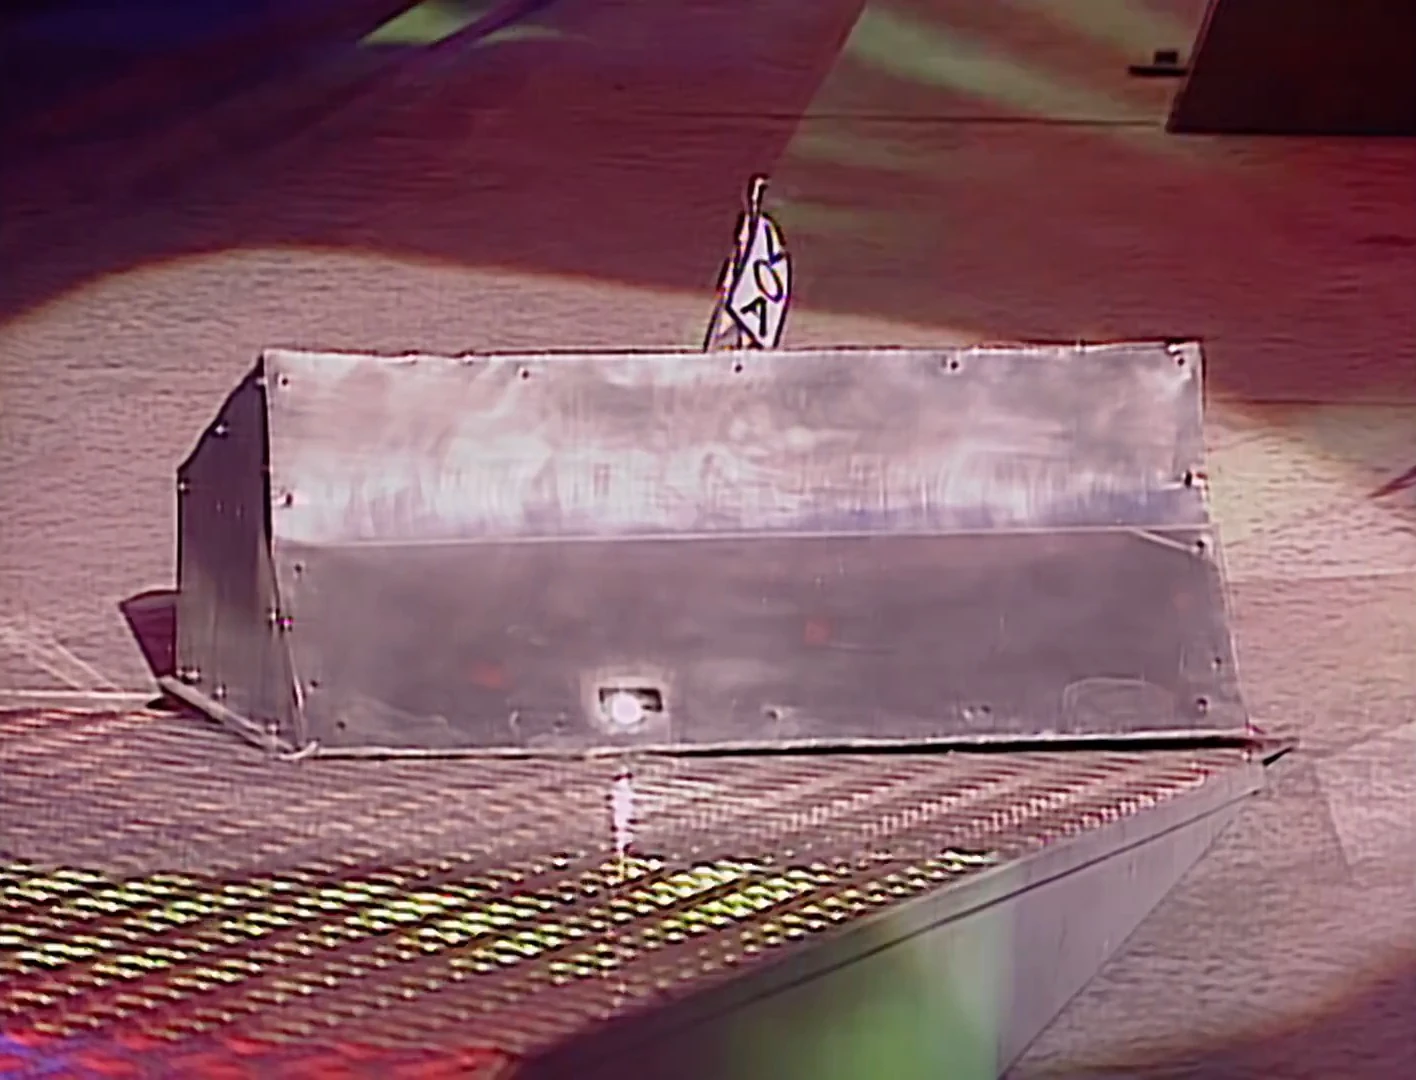
Roadblock is pinned in by the Sentinel
From Heat G onwards, with the exception of Heat J, The Sentinel occupied this route with the help of another House Robot, usually Dead Metal. The introduction of The Sentinel and the reason for The Sentinel's appearance this late on was because the producers became frustrated with roboteers using the left route, finding it boring[1]. The Sentinel was intended to block competitors, pin them against the wall or steer them into one of the pits, making the route considerably more hazardous in later episodes. In the Semi-Finals, The Sentinel received additional modifications which allowed its arm to perform extra movements, including the ability to swing a full 360 degrees. This enabled The Sentinel to occupy both the left-hand and centre routes at this stage.
Centre Route

Sir Killalot lifts Piece de Resistance over the bricks
The centre route was the most popular route in Series 2 and with perhaps the most changes across the whole series. Obstacles varied regularly between episodes, which included a wall of breezeblocks or barrels, sets of floor spikes, a Ramrig, a see-saw or static ramp, a large sphere and at least one House Robot. Competitors were required to knock down the wall of breezeblocks/barrels or negotiate the ramrig before driving over the see-saw, as well as resist the House Robots' attacks and negotiate past them on their way to the end zone.

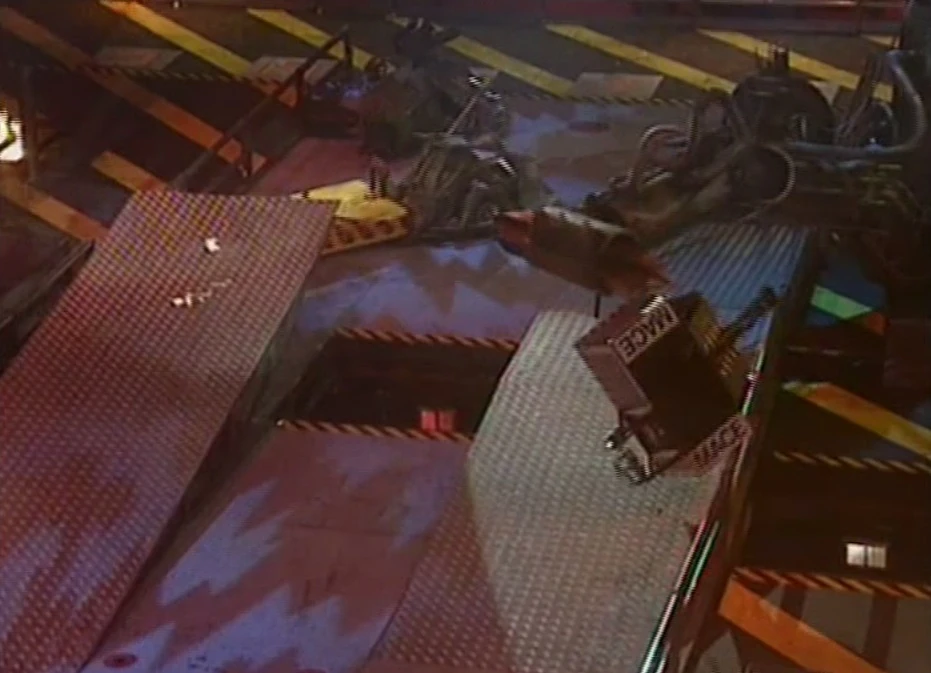
Mace is lifted by The Sentinel in the Semi-Final 1 'Race-Off'
For the Semi-Finals, the centre route underwent many significant changes, with both a see-saw and a static ramp being positioned on either side of a pit located in the centre. The static ramp was guarded by The Sentinel, which had the capacity to block and steer competitors into the pit from the raised platform. As before, the House Robots would usually attempt to impede competitors as they negotiated over the see-saw, often attacking or pitting them in the process. A wall of breezeblocks was re-added to the route for Semi-Final 2, joined by a large sphere which could be pushed into the pit.
Right Route

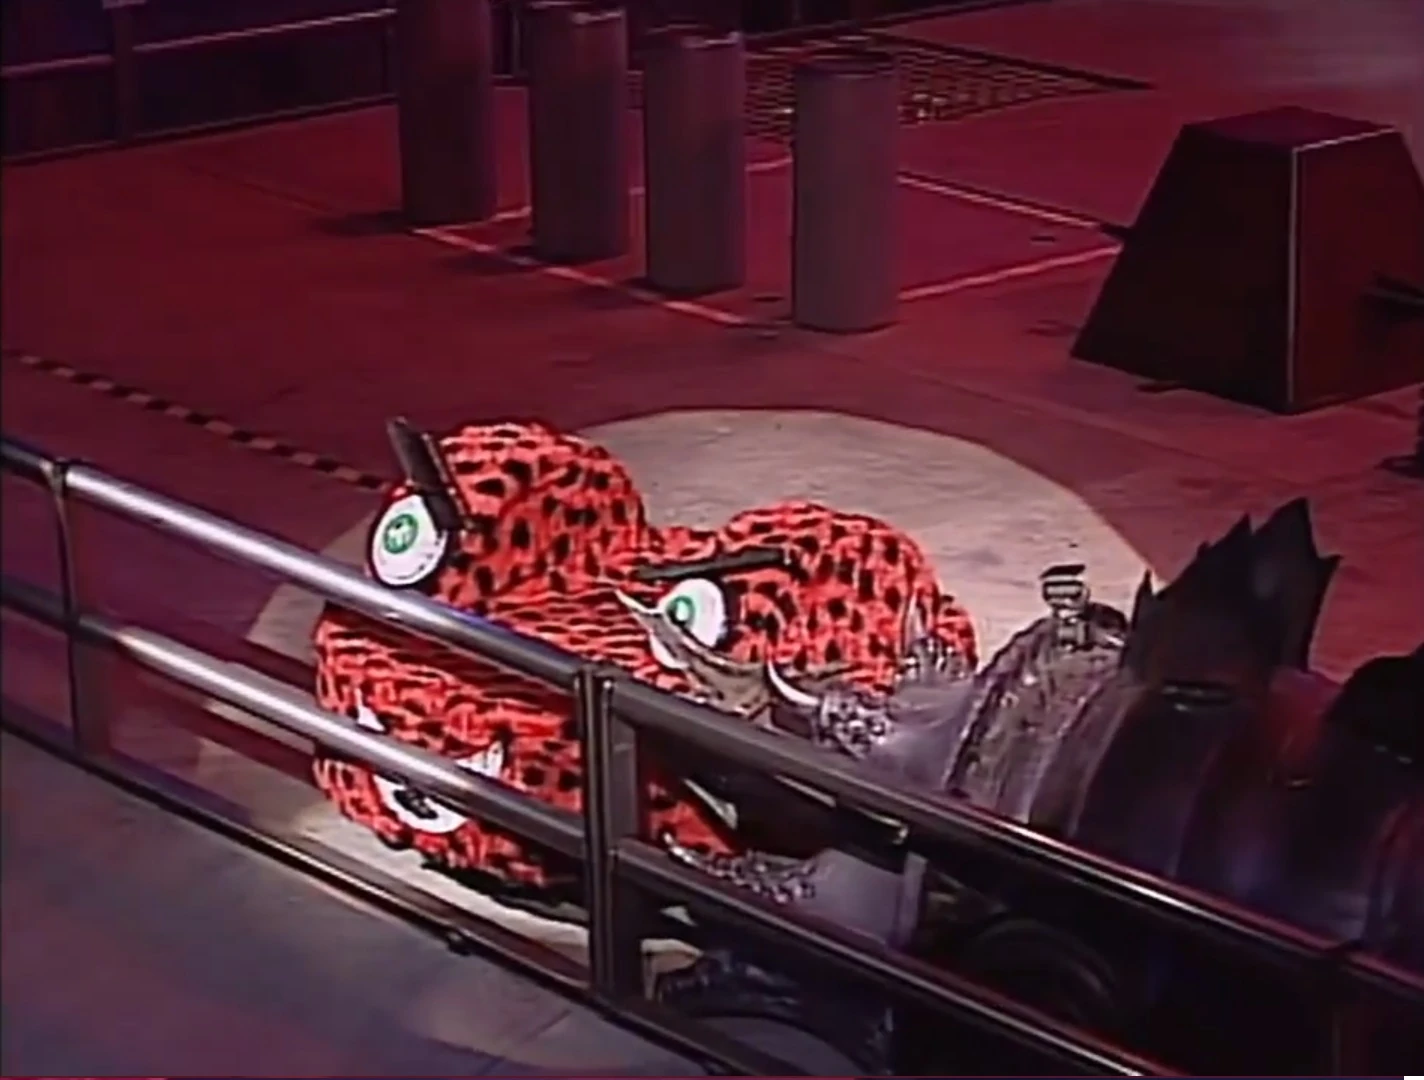
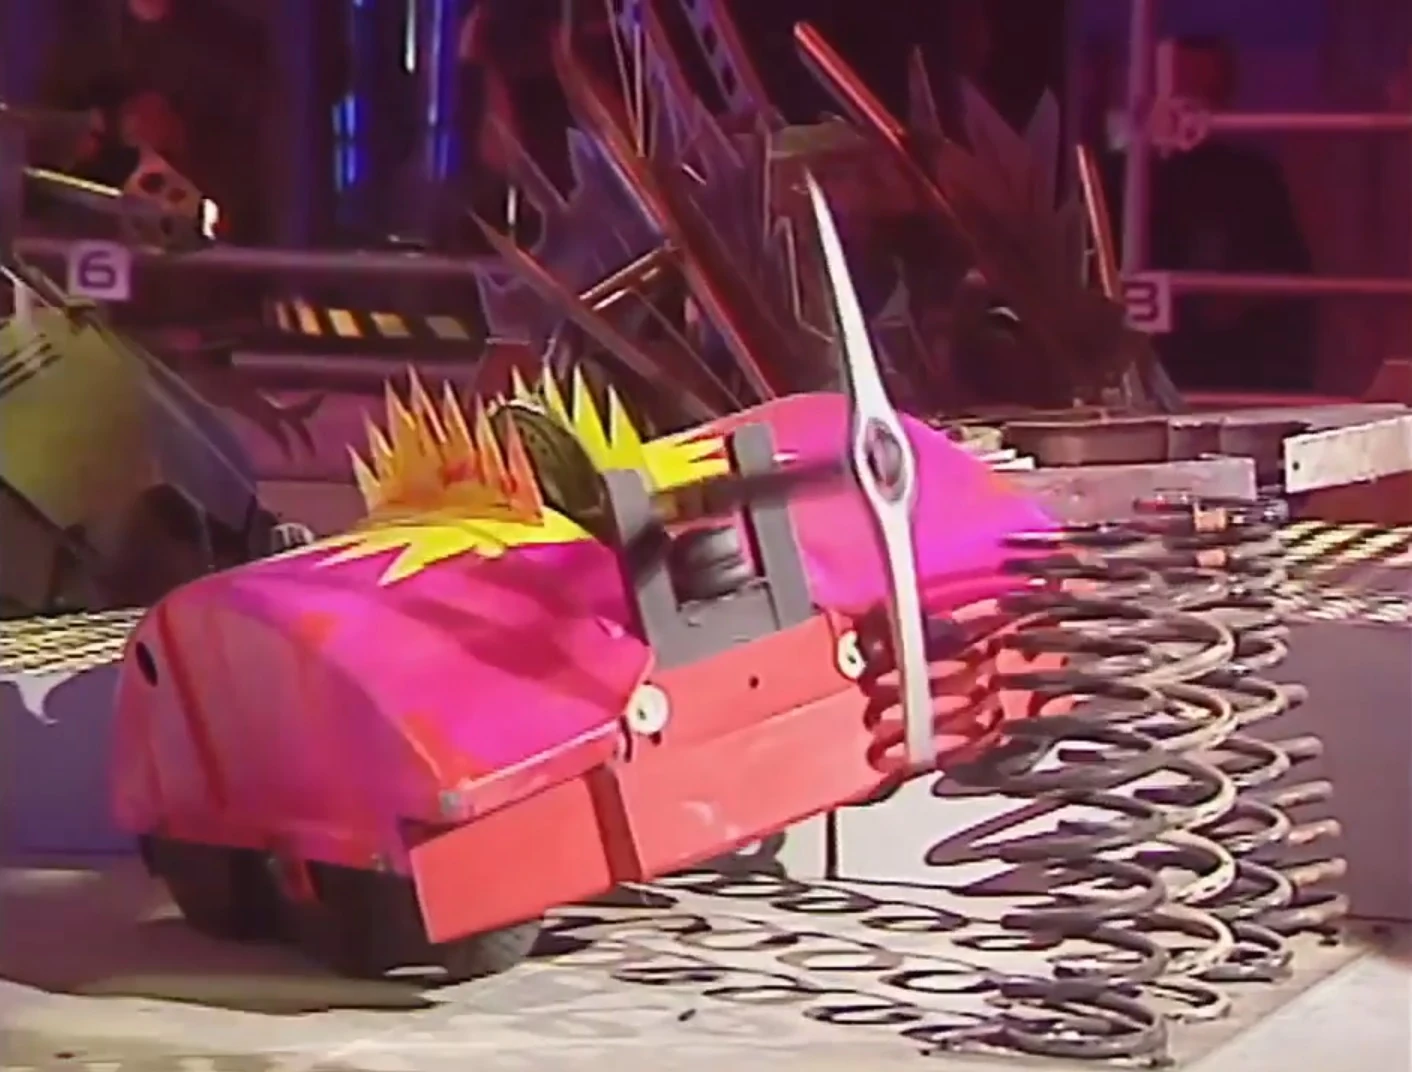
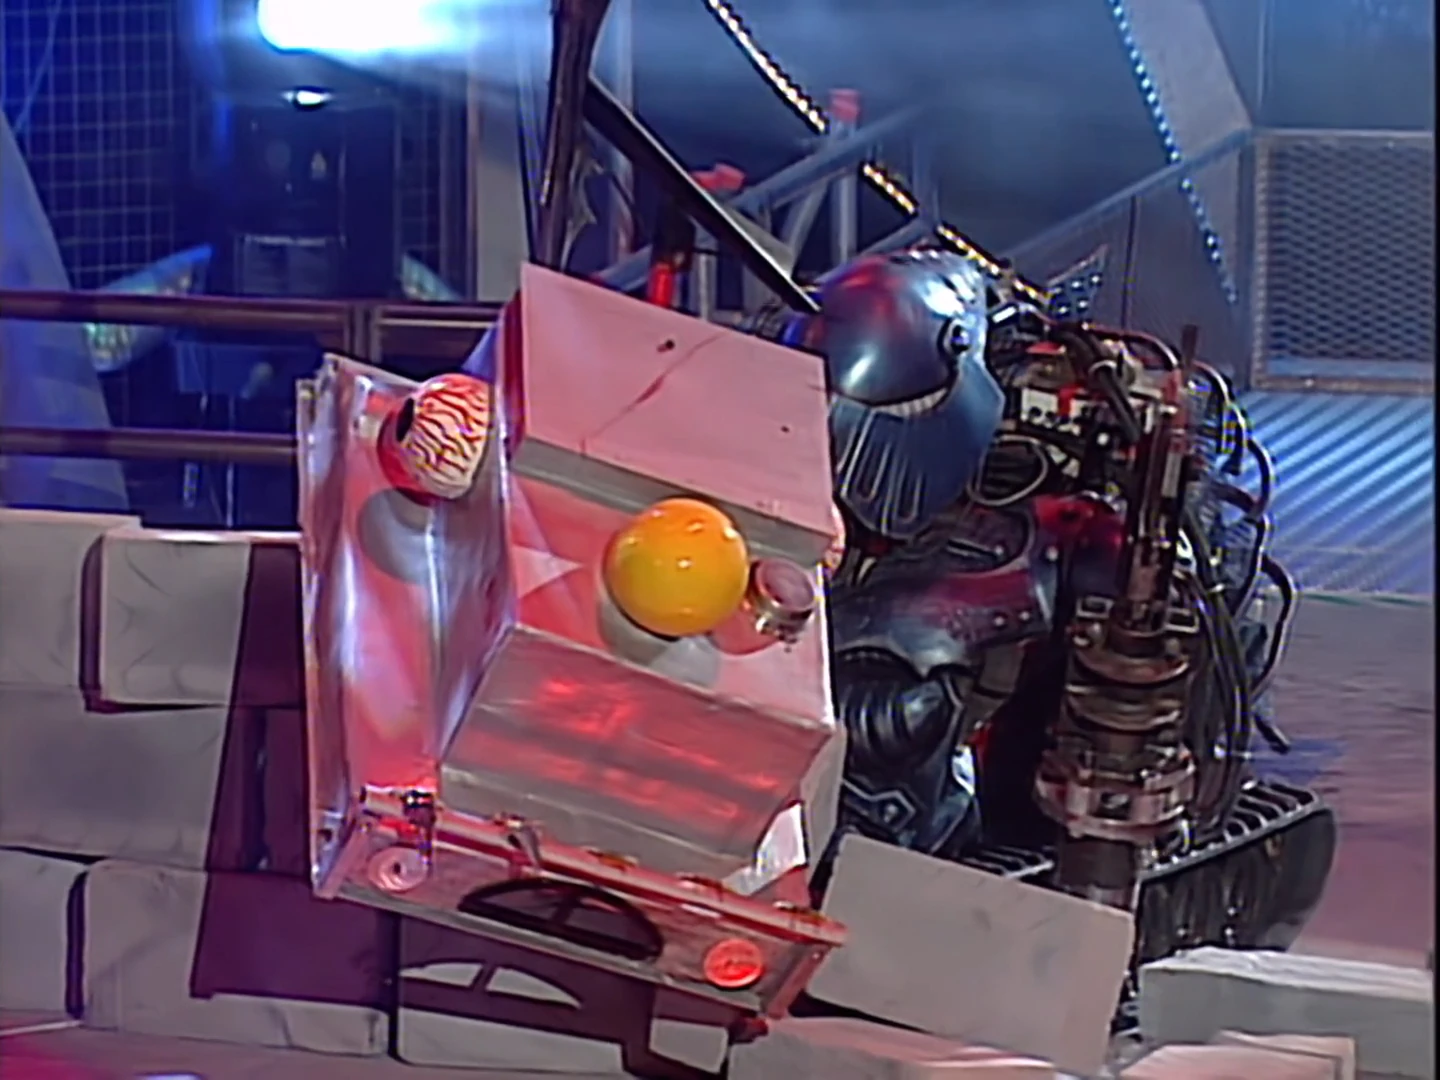
Panic Attack gets wedged on the Ramrig. Note the sphere (right) that was added for Semi-Final 1

The right-hand route with the swinging mace added
The right-hand route was dominated by the Ramrig, which would push robots that attempted to drive through it into the angle grinders positioned on the opposite side. Robots with particularly poor control or low ground clearances had a higher tendency of getting stuck on the Ramrig, such as Bodyhammer in Heat D and Panic Attack in the first Semi-Final. If the robot managed to clear the Ramrig, they would then have to drive past a House Robot, as well as avoid the Flame Pit and spiked pyramids on their way to the end zone. In later episodes, the path immediately after the Ramrig was also blocked by a large spiked pendulum, while a sphere was also added for Semi-Final 1 only. Other than these alterations, the right-hand route remained largely unchanged throughout the series.
Appearances in Merchandise
Trivia
- Out of a total of 120 Gauntlet runs, 41 were completed, almost exactly a third of all runs and amounting to two per episode.
- Four robots - Dreadnaut, Roadblock, Mortis and Nemesis - have completed the Gauntlet twice. Out of these four, only Mortis took the same route on both of its successful runs.
- During the 20 episodes that the Gauntlet took place in, only two saw none of the competing robots successfully completing it.
- The Gauntlet appears as one of the 'Trials' challenges in the game Robot Wars: Metal Mayhem, despite that game being based on Series 3.
| ||||||||||||||||||||||||||